
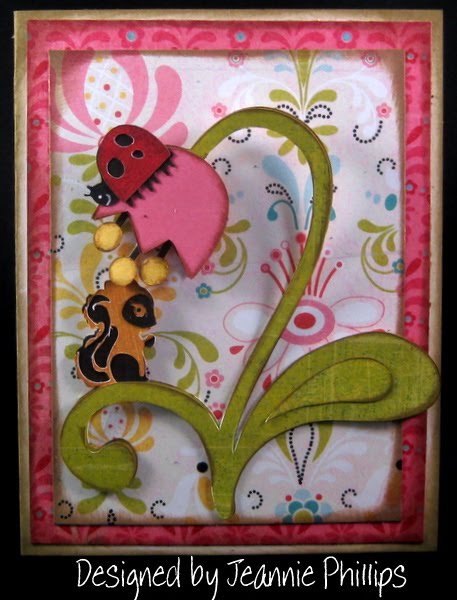
To my Favorite Chick! - Fun shape card
Happy Monday morning to you all!
I made this card for the Peachy Keen Let's Face it Friday "Sew super cute" challenge #11 and the Pink Elephant #95 challenge I got the sketch from the Monday Mojo #180 challenge, but I didn't finish in time to link up last week - Life happens!! :)
For this card I used the Create a Critter, Home Accents, and Mother's Day Bouquet cartridges.

For the shaped background card:
1. Cut the Scalloped circle from Mother's Day bouquet at 5.5 inches. I cut 3, one from light blue patterned card stock (CratePaper) and 2 from cream cardstock (Papertrey Ink).
2. Be sure to mark with a small x in pencil the top scallop on each piece so you can match them up easily! (I spent a long time trying to match and finally ended up just staggering the blue and cream)
3. Score one of the cream scalloped circles about 3/4 inch from the top. This will be the back of your shape card and where it will fold. Click here for a tutorial on the Monday Mojo Blog.
4. Match up the two cream scallops and glue above the score line so the card will open, but the fold will be on the back. Clear as mud?!?!?
5. Adhere the blue scallop on top of the cream scallop card base. (I did this because the pattern on the back of the blue was really dark and busy. Didn't want anyone to get a shock when they opened the card!
I cut large brown circle at 4.69 inches and the cream circle at 4.29 inches on my gypsy. The small green circle behind the chick was cut at 2.33 inches (I think!)

The cute little chick and egg are from Create a Critter (cut at 2.5 inches). I love Peachy Keen face stamps which I used for the cute chick's face. And of course, I had to cover it with glossy accents! Click HERE for a video tutorial (scroll down to the bottom of the post) showing how I do the Peachy Keen Face Stamps!

I pop-dotted this card with pop-its from Ranger (They are really thick!)

I tied the bow with Vanilla Bean Crinkle ribbon and the stamped sentiment is from My Pink Stamper

I inked everything with the Vintage Touch distressing ink from Papertrey Ink.

Have a wonderful day!
Labels: shape card, scallop edge, chick, easter, peachy keen, create a critter, mothers day bouquet
Welcome Baby!
Good morning my crafty friends! Today it is design team day over at the Celebrate the Occasion Challenge blog! The challenge is to make a card for a new pet or new baby. Head on over to join in the fun! A winner will be selected and entered into CTO's monthly drawing. March's prize will be the Rock Princess cricut cartridge!!


This card is from the same sketch as one I did a few days ago. Both cards even have a Chick! I thought the scalloped circle shape was so fun that I made a few cards like this.
For the grass:
First, I used a circle the same size as the white inner circle that the grass is attached to as a template.
Next, I welded the grass border from the Paper Doll Dress ups cartridge (1 inch) to a circle that had been stretched so that the bottom was the same as the circle you are using for a template, but didn't stick up past the grass blades.
** There may be an easier way. I just couldn't get the grass to weld to the bottom part of the circle and then cut out at the top. If you have an easier way, let me know!!


The card folds along the top of the back of the card:

Click HERE to see my first card from this sketch and for directions telling how to make the base card.

The chick was cut at 2.5 inches (Create a Critter cartridge). The stamp is from My Pink Stamper

I used the Peachy Keen face stamps, but had a hard time with the beak. Tip: It is much easier to use the face stamps on smooth rather than textured card stock! :-)

The Crinkle Ribbon is a color and technique that I have been experimenting with and isn't available yet. The flower I made using the Mother's Day bouquet cart and my Gypsy (love my Gypsy!!!) Click HERE to see a video showing how I made this flower.

Labels: flowers, create a critter, peachy keen, shape card, scallop edge, paper doll dress up, baby card
Turtle Birthday Card
 This is a card that I made for my niece. I love this turtle from the Pooh and Friends Cricut cartridge. Here is what I used to create this card:
- Pooh and Friends Cricut cartridge
- Pooh Font Criscut cartridge
- DCWV Nana's Kids mat stack
- Color Box pigment ink ~ Brown
- Martha Stuart pigment ink ~ spring green
Labels: pooh and friends, pooh font, turtle
A Sweet Baby Card

This is a card I made for a friend that just had a baby. I saw a similar card on the Cricut messageboard and thought it would be perfect. I used DCWV Baby Girl stack. I just love this paper. The scalloped circles are Nestablities. I cut the lamb from the Paper Doll Dress Up cartridge. I cut it three times and layered it with pop dots. The top layer is run through the Cuttle Bug using D'Vine Swirls. I cut the ticket tag from Stretch Your Imaginations, once on black out and once on shadow. The sentiment is from Stampin Up! I added a little ribbon, inked the hooves, and used a little Prisma pencils for the nose and cheeks. I think is came out very cute!

Here is a close up of the lamb.
Labels: lamb, scallop edge, baby card
Another Sweet Baby Card
I needed to make a card for a baby shower. So, I liked the other I had made a few weeks ago that I thought I would make another one only with a different Cricut cut. I wanted to use my Nestabilities, too! ( I really like them!!)For this card I used the DCWV Baby Girl Stack. My card base is 5x7. I layered the papers, cut my scalloped circles and pop-dotted them from the page. I cut the rocking horse 3 times at three inches from Paper Dolls Dress Up cartridge. Then I cut it again at 3 inches from patterned paper. I wanted him to be sturdy like chip board so I glued 2 of the yellow images together and I ran the 3rd one through my Cuttlebug using the Swiss Dots folder and glued him on top of the other two. Then I paper pieced my patterned paper. I took some Color Box brown pigment ink and inked all my edges. I then pop-dotted my rocking horse from the scallops. I added some mint green ribbon that I have had around for a very long time but never seemed to find quite the right project and Viola! the card was finished!
 Here is a picture of the inside. I have started decorating the inside of my cards lately and I really like how much it seems to add to the quality of my cards.
 I hope you enjoyed looking today. Come back anytime
 Labels: rocking horse, baby card, paper doll dress up, cuttlebug, scallop edge
Card Recreation ~ Cindy Loo
Good Morning! I am so enjoying my time off from school. It has been so nice to just have the time to play in my craft room. Last week was very crazy but this week my kids are at summer camp so it is very quiet around here.
I wanted to share a card I recreated. I first saw this card over on Jeannie's blog. I just thought it was adorable. Here is the direct link to her card: http://aplaceformycards.blogspot.com/ Isn't it cute! Well, when I saw her card I just knew that I wanted to get the Cindy Loo Cricut cartridge. Sure enough CricutMachine.com was having a sale and I snatched this cartridge right away.
Here is what I used to make the card:
Cindy Loo Cricut cartridge ~ flower from p. 51 cut at 4 inches with the layers and squirrel from p. 62 cut at 1 inch with all it's layers
Doodle Charms Cricut cartridge ~ lady bug p.92 cut at approximately 3/4 inch and all its layers.
Paper is from DCWV Baby Boy stack and Papertrey Ink
Color Box pigment ink in brown.
Thanks for stopping by. I hope to have more projects to show later.
Labels: lady bug, cindy loo, doodlecharms, flower, squirrel

All right, moving on to my card...
Ingredients:
Card base is 4 1/4 x 5 1/2
Paper is from Papertrey Ink ~ New Leaf, Spring Moss, Raspberry Fizz, and Hibiscus Burst
Patterned paper is DCWV Baby Girl Stack
Cartridges:
From My Kitchen ~ cupcake and cherry, using the blackout and layer features
Stretch Your Imaginations ~ flourish p.78, using shift in the shadow and blackout feature.
The sentiment is from Inkadinkado stamps and I used Glossy Accents for the cherries. The ribbon is just some I had in my stash and went perfectly with this card.
Labels: cupcake, from my kitchen, stretch your imaginations


Hello, Everyone! Here is a card that I made for the My Pink Stamper color challenge. The challenge is to use only Pink, Brown, Orange, and Green in a project. You can read about the challenge here -->Challenge
Recipe:
This card is 5x5 inches.
All solid cardstock is from Papertrey Ink in dark chocolate, orange zest, summer sunrise, ripe avacado, new leaf, spring moss, raspberry fizz, and hibiscus burst.
Patterned paper is from Memory Makers~ Chloe's Closet
I laid all the pieces of this card in Design Studio.
Cartridges used:
Plantin SchoolBook ~ patterned paper square cut at 4 3/4 x 4 3/4 inches
Doodlecharms ~ sun p. 96 cut at 2 inches, regular cut and shadow feature
Pooh and Friends ~ turtle p.45 cut at 2 1/2 inches using icon and shift feature. I cut the shell twice to get the 2 shades of pink. I LOVE this little turtle!
ZooBalloo ~ grass p. 129 cut at 1 1/2 inches on regular cut and cut at 1 inch on layer feature. I flipped one of these cuts so the grass was going in different directions.
Other items used:
Cuttlebug ~ Swiss Dots folder
Tim Holtz Distress Ink ~ Tea Dye, all cuts were inked in this.
Martha Stewart ~ butterfly punch
foam tape to pop the trutle's shell and the top layer of grass
Sentiment is from Studio G
Labels: plantin schoolbook, doodlecharms, pooh and friends, zooballoo, cuttlebug, turtle, hello, butterfly, grass

Good Evening, Everyone. This is my submission to the Challenge Me Monday #18 sweet treats challenge over at Fantabulous Cricut challenge blog. We are to make something with a sweet treat theme with the option to make a shape card.

This was a fun card to make because it was my first project using my Gypsy!! I'm lovin' it!!
Here are the details...
Cartridges used:
Doodlecharms ~ Ice cream cone cut using the black out feature. I cut off the cherry and dicraded it.
Gypsy Wanderings ~ Square ticket tag? This was cut at 5 1/2 inches and welded together to create a shaped card. The patterned paper is cut at 5 1/4 inches and white cardstock was cut at 5 inches for the inside.
Additional supplies:
Cuttlebug ~ Spots and Dots embossing folder and D'Vine Swirls embossing folder
Sizzix embossing folder ~ Argyle
Tim Holtz Distress ink ~ Tea Dye
Martha Stewart ink ~ Pink
Ranger Glossy Accents ~ used on the chocolate cone
Stickles ~ Crystal, used for the vanilla cone
StampinUp! ~ sentiment
Ribbon from my stash
Paper ~ Solids are from Papertrey Ink and the patterned paper is from DCWV Nana's Baby Girl stack
Labels: cuttlebug, doodlecharms, gypsy wonderings, shape card, birthday card, ice cream cone
Yummy Treat Bag!!
I wanted to share the little treat bag I made for my students to take with them when they came for our school's orientation. I was in a really big rush that day and actually had my youngest daughter adding the stitching while I was in a teacher's meeting. We got these finished 5 minutes before our school's doors were opened. The only thing I would have added if I had had time was a bow out hemp for the little horse but all in all I am happy with the way these turned out and the cookies were scrumptous!!

The recipe:
Cricut Cartridges ~
Simply Sweet , I cut the letters in shadow feature
Paperdoll Dress Up, For the first layer, I used the hide contour feature in my Gypsy to make a blackout cut for the horse and then I cut two more horse in regular cut and used them to piece the horse's face and mane the way I wanted them.
Paper is just solid card stock that I had in my stash
Clear bags
Distress Ink ~ Tea Dye
stapler
adhesive
White Gelly Roll Pen
Labels: simply sweet, paper doll dress up, stick horse, topper
Trick or Treat
I received A Child's Year Cricut cartridge yesterday and couldn't wait to put a card together with one of the cuts. I have been wanting this cartridge for a long time and finally found for an awesome price over at CricutMachine.com. The shipping was fast, too. Here's the card that I put together.
This is a 4x5.5 card folded at the top. I put this together for the challenge over at Cardz TV. Mary is asking that we make Halloween cards. If you have not checked out her blog you are missing a real treat. She comes up with the cutest ideas! Make sure to check her out.
Here's the recipe:
Cricut cartridge~ AChild's Year, the little girl p.53 and card frame p.48
Card base~ Bazzill Basic cardstock
Frame~ DCWV
Patterned Paper~ Cloud 9
Black is from my stash
Hemp
Beads~ I found a bag of these Halloween colored beads at Michaels for $1.00
Pop Dots~ I popped the frame up off the base
This was really quick and easy to put together but I think it came out cute.
Labels: halloween, witch, scallop edge, a childs year, bakers twine
A Cheery Thank You
I made this thank you with the new Smiley Cards cartridge. This was my first cut. I needed a thank you for someone special and thought this would be cute. It's so cheery, especially since it has been so gray and cloudy here for the last 2 days. Hope my recipient likes it.

I am enter this is in the Creative Scraps Challenge over at Army Wife Learns the Cricut and in Momo's Tuesday challenge. Both challenges require embossing. Of course, I had to use A Peachy Keen face on this cute little flower.
The details:
Smiley Cards Cricut cartridge ~ flower
A Child's Year Cricut cartridge ~ layer
Peach Keen Stamps ~ PK-521 Winter Faces
Cuttlebug Embossing Folders ~ Swiss Dots and D'Vine Swirl
DCWV Cardstock
Glossy Accents
Chalk for cheeks
Buttons
Ribbon
White Gelly Roll Pen
Labels: thank you, flowers, peachy keen, a childs year, smiley cards, cuttlebug
by Scrappy Moms Stamps and decided to use them on the card.
 Here are the details:

- Cricut Cartridge ~ Christmas Cheer ~ Mug cut at 3.5 inches, 1st rounded square was cut on real dial size, with the width and height unlinked in my Gypsy, at 4 x 5.25 and the second layer was cut at 3.75 x 5. Gypsy Wanderings ~ Heart cut at .75.
- Patterned Paper ~ K&Company Pepermint Twist
- Solid card stock ~ Recollections
- Sentiment ~ Scrappy Moms Stamps ~ Winter Wishes
- Ribbon ~ This actually came wrapped around my stamps so I reused it!
- Distress Ink ~ Tea Dye
- White Gel Pen
- Stickles ~ Star Dust ~ This is put on the steam.
- Ranger Glossy Accents ~ I added this to the cocoa in the mug. It wasn't quite dry when I took this picture but I knew I only had a little sunlight left
Labels: gypsy wonderings, christmas cheer, mothers day bouquet


I am submitting this card on the Cooking With Cricut blog. The challenge this week is all about LOVE. This is the first challenge for this blog. It is full of inspiration and tutorials. I'm also submitting this on the Cricut Couple blog. It's their anniversary, so they are celebrating with and Anniversary challenge.
Here are the details for my card:
Card size is 4.25 x 5.5 inches
Cricut Cartridge ~ Sweethearts ~ all my cuts are from this cartridge. I welded the stamp image in my Gypsy to create the card base. The red mat is just a 1/4 of an inch smaller. I then cut the white mat with my Fiscars papercutter 1/4 of an inch smaller. The lock and key, I believe, were cut at 2.5 inches.
Solid Cardstock ~ Recollections
Cuttlebug ~ Heart Blocks embossing folder
Ranger Perfect Medium
Clear embossing powder
Ribbon ~ Hobby Lobby
Heart brad ~ I just pulled the prongs off and adheared it with glue dots
Cat's Eye Ink ~ Black
Sewing machine ~ I used black thread and then red thread for the stitching.
Sentiment ~ Computer generated
That's it! I am pleased with the way it came out and hope that it makes my husband know how much I love him.
Labels: heart, sweethearts, cuttlebug, key


Here are the details:
Card size~ 5.5 x 5.5
Cricut Cartridges ~ Plantin Schoolbook ~ Scallop border, Pooh and Friends ~ Snowflake
Pattern Paper ~ K&Company Peppermint Twist
Glitter paper ~ JoAnn’s open stock
Peachy Keen Stamps ~ PK-490 Everyday Character Face Assortment
Sentiment ~ Scrappy Moms Stamps Winter Wishes
Stickles ~ Stardust
ribbon ~ Hobby Lobby
Cuttlebug ~ Snowflakes embossing folder
Glossy Accents
White Gel Pen
Labels: snowflake, peacky keen, plantin schoolbook, pooh and friends, cuttlebug
Gobble!
I received my Action Wobbles yesterday and couldn't wait to use them on a card. I wanted to make a Thanksgiving card for my neice and nephew and thought it would be fun to use with this turkey from Create A Critter. I love the action my turkey has now and I know the children will love it.
Here are the details:
Card size ~ 4.25 x 5.5 folded potrait style
Cricut Cartridge ~ Create A Critter ~ turkey cut at 3.25 inches and Gobble cut at .75
Peachy Keen Stamps ~ PK-754 Critter Faces Set A Medium
Patterned Paper ~ DCWV Autumn Splendor
Action Wobble
White Gelly Roll Pen
Cat's Eye Chalk Ink ~ Chestnut Roan
Gems
Labels: create a critter, peachy keen, turkey, cuttlebug
There is a Birthday Celebration Blog Hop going on over at the Peachy Keen Stamps Blog. If you haven't visited today you are missing quite a treat. So hop over there after you veiw my card. ;-)


Sorry about the lighting. No sunshine here today :(
I just received the Birthday Bash cartridge in the mail yesterday and was anxious to use it.
Here is the list of supplies:
Card size ~ 4.25 x 5.5
Kraft Cardstock
Solid Cardstock from my scraps
Birthday Bash Cricut cartridge ~ This mouse is holding a lollypop but I trimmed it off so he could hold balloons instead.
Peachy Keen Stamps ~ PK-490 Everyday Character Face Assortment I just used the smile from the stamp. PK-754 Critter Faces Set A Medium I just used the eyes from one of the stamps. I had to ink one eye so that they would be closer together.
Cullebug Embossing Folder ~ Happy Birthday
Ribbon ~ American Crafts
White Gelly Roll Pen
DMC Floss
Foam tape
Glue Dots
Thanks for stopping by!
Labels: birthday card, mouse, peachy keen, cuttlebug, balloons, birthday bash
Todays card is for the challenge over at Flaunt It Fridays. It's a fairly new challenge blog that features a certain Cricut cartridge cut. This week's challenge is to use the turtle from Create A Critter, one of my favorite cartridges!

Here's what was used to make this card:
Card size ~ 4.25 x 5.5
Kraft Cardstock for the base
Patterned Cardstock ~ DCWV Baby Boy Mat Stack
Solid Cardstock ~ Scraps form my bin
Cricut Cartridge ~ Create A Critter , turtle cut at 2.5 inches
Peachy Keen Stamps ~ PK-532 Simple Sallies 1 1/8
Sentiment ~ TPI Studios
Crinkle Ribbon ~ My Craft Spot
Cuttlebug Embossing Folders ~ D'Vine Swirls, Tony Mosaic
Decorate Edge Punch ~ Stampin Up!
White and Black Gelly Roll pens
Foam tape
Glue Dot
Labels: create a critter, peachy keen, turtle, cuttlebug
challenge:


Here is what is needed to make this 4.25 x 5.5 inch card:
Cricut Cartridge ~ Winter Frolic
Peachy Keen Stamps ~ PK-547 Cutie Pie Face Assortment
Scrappy Moms Stamps ~ Winter Wishes
Cuttlebug Embossing Folder ~ Snowflakes
Action Wobble
Ek Success Punch
Ribbon
DMC Floss
White Gelly Roll Pen
IRock Gems
Snowflake Brad
All paper is from my scrap file.
I hope you can join us at Fantabulous Cricut this week. We love seeing what you create and there is always an awesome prize to win. Happy Crafting!
Labels: winter frolic, snowflake, peachy keen
Hello Kitty Blog Hop
Hello! Welcome to the Flaunt It Friday's Hello Kitty Blog Hop. If you are here from the super talented Elsa's blog Cricutlver then you are in the right spot. If you just arrived here and would like to start from the beginning please go directly to the Flaunt It Fridays blog. For this week's challenge we were asked to flaunt the Hello Kitty with Airplane on Page 65 from the Hello Kitty Greetings Cart. I am one of the designers that does not own that cart but I was able to use other carts to create a Hello Kitty look-alike.
I made a treat bag topper. To make my Hello Kitty look-alike I used Create A Critter for the kitty and New Arrival for the airplane. I used my Gypsy to "hide" the kitty face and the windows on the airplane. I Peachy Keen Stamps PK-754 Critter Faces Medium for the kitty face. I had to kind of ink certain parts of the face stamps to get the parts that I wanted. I used heart shaped brads for my airplane windows and used to white gelly roll pens for the stitching. The Cuttlebug D'Vine Swirls was used to emboss the background paper.
Now for my second project we got to choose any cut from the Hello Kitty Greetings but again since I don't own the cartridge I chose a similar cut. I used the Cricut Search Engine and found that there are cherries on Hello Kitty Greetings so I found some cherries on several cartridges and chose the cherries from Country Life. For my second project I made a card.

This is a 4.25x5.5 inch card. The cherries were cut from the Country Life cartridge. The patterned paper came from DCWV Sweet Stack. I used a Fiscars punch and added ribbon and button with baker's twine. Used my white gelly roll pen for a bit of accent. The sentiment is from Pink By Designs Country Living stamp set.
Labels: hello kitty, cherries, bakers twine, topper, create a critter, new arrival, country life
Peachy Keen Stamps Let's Face It Challenge ~ Thank You
Hi Everyone! I would like to take a moment to welcome all my new followers! I am so honored to have you here.Today's project is for Peachy Keen Stamps Let's Face It Friday Challenge. For this challenge you must used Peachy Keen face stamps and it must be a thank you card. Here is my project:


Here is what I used to make this card:
Card size ~ 4.25 x 5.5
Cricut Cartridges ~ Nate's ABCs for the Jack-in-the-Box, Just Because Cards for the background shape
Peachy Keen Stamps ~ PK-692 Monster Mash Face Assortment ( I just wanted to use the eyes and nose from the stamps so wiped the ink from the mouth.) PK-547 Cutie Pie Face Assortment ( I used the mouth only from this stamp.)
Scrappy Moms Stamps ~ A Pinch and A Dash
Paper ~ Recollections
Sizzix Embossing folder ~ Lines and Dots
Baker's Twine
White and Black Gelly Roll Pens
Foam Tape
Labels: peachy keen, nates abcs, jack in the box, just because cards, bakers twine
Berry Special ~ Peachy Keen Sketch Challenge #43
Hello Crafty Friends! Thank you for stopping by.Today's card is for Peachy Keen's Sketch Challenge #43.


Here is what I used to create this card:
Cricut Cartridges ~ Simply Charmed for the strawberry and Birthday Bash for the scalloped circle
Cardstock ~ Recollections and DCWV Sweet Mat Stack
Sentiment ~ Pink By Design Country Living
Ribbon ~ Hobby Lobby
Punch ~ Stampin Up!
White and Black Gelly Roll Pen
Foam Tape and ATG
Labels: simply charmed, peachy keen, birthday bash, scallop edge
Fantabulous Cricut "Challenge Me Monday" ~ Sweet Shop
Good Morning, Crafty Friends!This week's Challenge Me Monday over at Fantabulous Cricut Challenge Blog is Sweet Shop! Create something yummy! Here is what I made to help inspire you:

Here's a little close up of those Peachy faces!

Here's what I used to make this card:
Cricut Cartridge ~ Birthday Bash
Cardstock ~ Recollections, DCWV Sweet Mat Stack
Sentiment ~ Inkadinkado
Martha Stewart Punch
Ribbon ~ Hobby Lobby
White Gelly Roll Pen
This is a great challenge to help you get out of the winter woes. It can be so bright and colorful. I hope decide to join us. Make sure to head on over to Fantabulous Cricut Challenge Blog to see what all the talented designers have put together for you.
Labels: peachy keen, birthday bash, ice cream sundae
Now, on to my card:

I just love this card! In fact, my husband commented on how cut it came out and he rarely pays attention to what I make.
Here's is what I used to make this card:
Cricut Cartridges ~ Twinkle Toes for the card base and its layers, 3 Birds On Parade for the bird and its layers, Simply Charmed for the red heart box, Home Decor for the branch, and Create A Critter for the hearts on the branch. I had those left over from another project.
40:31 Creations Stamps ~ Love, I used 2 stamps from this set, one for the sentiment and one for my heart.
Cardstock ~ Recollections and Martha Steward
Googly Eye
White Gelly Roll Pen
Pop Dots, Glue Dots, and ATG
Now it's your turn. Go over to Fantabulous Cricut Challenge Blog and check out what all the other designers have to inspire you. Then dust off those neglected cartridges and join us in the challenge.
Labels: heart, bird, 3 birds on parade, twinkle toes, simply charmed, home decor, create a critter
quite cute.


This card is 4.25 x 5.5
Here is what I used:
Cricut Cartridges ~ Everyday Paper Dolls, puppy, ~ Doodlecharms, mailbox and letter, ~ Plantin School Book, rectangle for the mailbox post, ~ Create A Critter, hearts. These were extras from another project.
Gypsy
40:31 Creations Stamps ~ Love set ( XOXO)
Sentiment ~ Computer generated
Cuttlebug ~ Embossing folders D'Vine Swirls and Distressed Stripes
Cardstock ~ Various scraps
Ranger Distress Ink ~ Tea Dye
Gelly Roll Pen
Foam Tape, Glue Dots, and ATG
Labels: cuttlebug, dog, peachy keen, create a critter, heart, everyday paperdolls, doodlecharms, mailbox
This is my first official design team post for 40:31 Creations! I am super excited to share my card with you.


I am so pleased with this card. This card is 4.25 x 5.5.
Here is what is I used:
Cricut Cartridge ~ My Community, puzzle pieces ~ Twinkle Toes, label
40:31 Creations ~ Love stamps
Chipboard ie. cereal boxes ~ I wanted to puzzle pieces to really look like puzzle pieces ao I cute them out 3 times, twice out of cereal boxes and once out of my patterned paper then layered them all together.
Cardstock ~ Recollections and DCWV open stock
Cuttlebug ~ Heart Blocks embossing forlder
Ribbon ~ Hobby Lobby
Paper Rose
Ranger Distress Ink ~ Aged Mahogany
Glue Dots, Foam tape, ATG
I love these stamps from 40:31 Creations. They are very high queality and stamps crisp and clean. Lauren has several sets available. Go on over to 40:31 Creations and check out all the wonderful inspiration from the design team and see all of the stamps. You will not be disappointed!
Labels: heart, puzzle, chipboard, my community, twinkle toes, cuttlebug
Happy Friday! Welcome to Luv Scrapping Together and the Flaunt It Fridays “Paper Doll” Blog Hop! We are Flaunting the Raggedy Ann and Andy cut on the Paper Doll Dress Up cartridge. If you just happened upon my blog then you will want to start from the beginning HERE. If you came from the talented Denise at Lala’s World then you are in the right place.
For my first project I decided to make a card.


Now what would a blog hop be without a little blog candy? Today I am offering you a chance to win the New Baby stamp set from 40:31 Creations.
For my first project I decided to make a card.

Here are the details:
Cricut cartridges ~ Paper Doll Dress Up ( dolls and all the layers ) and A Child’s Year ( scalloped tag ) I welded 2 tags together to make my card base using my Gypsy.
40:31 Creations ~ Love stamps
White and black gel pens
Ribbon ~ Hobby Lobby
Glue dots and ATG
For my second project I used the lollipop that is found on the same page as Andy. I decorated a small brown sack that could be filled with some kind of sweet treat.Glue dots and ATG

 |
| A close up of the lollipop! |
Here are the details:
Cricut Cartridges ~ Paper Doll Dress Up ( lollipop, cut 2 times ) and A Child’s Year ( scalloped tag )
40:31 Creations ~ New Baby stamps
Prisma Colored Pencils ~ I colored the lollipop in with different colored pencils and then blended with Odorless Mineral Spirits.
Crystal Stickles ~ cover the top of the lollipop and let it dry.
Ranger Glossy Accents ~ when the stickles were dry I covered the top to the lollipop and had to let this dry for several hours. Then I was able to assemble everything
Ribbon ~ Walmart
Foam tape, Pop Dots, ATG
Now what would a blog hop be without a little blog candy? Today I am offering you a chance to win the New Baby stamp set from 40:31 Creations.
Labels: raggedy ann, lollipop, a childs year, paper doll dress up, treat bag
The challenge is to use either Sugar and Spice Cricut Lite or B is for Boy Cricut Lite cartridge. I don't own S&S so it was B is for Boy for me! I thought I would use this cute little hedgehog.


Here are my ingredients:
Cricut Cartridges ~ Accent Essentials for the card base, B is For Boy Cricut Lite for the hedgehog, A Child's Year for the shamrock
Echo Park Paper
Kraft cardstock
Peachy keen Stamps ~ PK-754 Critter Faces Medium Set A
Scrappy Moms Stamps ~ Spring Fling
White Gelly Roll Pen
Ribbon ~ Hobby Lobby
Button
Marth Stewart Baker's Twine
I'm also adding this to The Kraft Journal Challenge #10. Use kraft cardsock with a St Patty's theme or Green! (Thanks Georgiana! :)
Labels: st. pattricks day, peachy keen, a childs year, b is for boy, accent essentials, shamrock, bakers twine
Thankzzz... Challenge Me Monday #17


Happy Wednesday, Everyone! I hope you all are keeping yourselves cool. It's really hot out there!
This for the Challenge Me Monday challenge over at Fantabulous Cricut challenge blog. The challenge this week is to use a critter on a project and use the color orange some where in the project. You also need to use your Cricut somewhere in the project. I decided to make a card. I think it came out very cute!
Recipe:
Card size ~ 5.5 x 5.5 inches
Paper from Papertrey Ink
Patterned paper from Memory Makers ~ Chloe's Closet
Cartridge used ~ Create A Critter
Scallop page 62. I welded two 5.5 inches scallop circles to make the card base in Design Studio. The paterned paper is cut at 4.75 inches to layer on top. The inside layer is the same size and the white layer is cut at 4.25 inches.
Love Bug p. 66 cut at 3.5 inches. I used the hide contour feature on the face and heart.
Sentiment is from StampinUp!
Face is from Peachy Keen Stamps
Other supplies:
Cuttlebug ~ Swiss Dots embossing folder
orange ink for edges of scallops and sentiment
black ink
ribbon from stash
gelly roll pen for stitching
glue dots and pop dots
Labels: shape card, bee, scallop edge, cuttlebug, create a critter, peachy keen
Luv Scrapping Together
http://luvscrap
http://luvscrap
You're My Sunshine!
Happy Monday!
It's time for another Challenge Me Monday over at Fatabulous Cricut Challenge Blog. This week is all about weather. Creat something to do with a season. Well since we are in the dead of winter, I decided I was going to create something sunny!


It's time for another Challenge Me Monday over at Fatabulous Cricut Challenge Blog. This week is all about weather. Creat something to do with a season. Well since we are in the dead of winter, I decided I was going to create something sunny!

The details:
Cricut Cartridge ~ Pooh and Friends, I used my Gypsy to hide one of the rings on the layer.
Peachy Keen Stamps ~ PK-547 Cutie Pie Face Assortment
40:31 Creations ~ New Baby stamps
Paper ~ Recollections, DCWV- Autumn Splendor, My Minds Eye- Where the Heart Is
Ribbon ~ Hobby Lobby
Fiscars Punch
Martha Stewart Ink
White Gelly Roll Pen
Foam tape, Pop Dots, ATG
I believe this follows the sketch challenge over at Peachy Keen Challenge Blog for Challenge #45. Here is the sketch:

I hope you will take a look at all the wonderful projects that my fellow designers have for you over at Fantabulous Cricut. Then make something of your favorite season and play along with us. There is a fantabulous prise up for grabs!
Have a wonderful Monday.
And
Happy Valentine's Day!
Labels: peachy keen, sun, pooh and friends
Luv Scrapping Together
http://luvscrap
http://luvscrap
From One Chick to Another
Happy Saturday! I hope you plan to enjoy this gorgeous weather. Today I have a really cute card that I made for Scrappy Moms Challenge, Tacky Tuesday Challenge, and Cardz TV. Scrappy Moms and Tacky Tuesday challenges involve using the Simply Charmed cartridge. Tacky Tuesdays challenge is to use these sweet chicks and use the word chick in your sentiment. Cardz TV is a spring challenge. I think this card qualifies.
Here is my card:

Here is my card:

I think this turned out so stinkin' cute!
Here is what I used to create this card:
Cricut Cartridges ~ Simply Charmed - chicks, Pooh and Friends - butterfly
Paper ~ Colorbok, DCWV Autumn Splendor, the green with flowers is from my stash
Peachy Keen Stamps ~ PK-754 Critter Faces Set A medium
Fiscars Punch
Ink ~ Memento, Color Box, and Marths Stewart
Sakura Gelly Roll Pen ~ white and black
Sentiment ~ computer generated
Now if you would like to play along you can go to Scrappy Moms HERE and you can get to the Tacky Tuesday Challenge by to to Facebook HERE. Cardz TV can be found HERE.
Labels: chick, peachy keen, simply charmed, pooh and friends, butterfly
Luv Scrapping Together
http://luvscrap
http://luvscrap
Spring Gift Bag
Hello, My Crafty Friends.
Today I have a spring gift bag that I have made for a few challenges. I am definately in the mood for spring and the weather here in NC has been beautiful.


Today I have a spring gift bag that I have made for a few challenges. I am definately in the mood for spring and the weather here in NC has been beautiful.


The details:
Cricut Cartridges ~ Plantin Schoolbook for the gift bag, I used my Gypsy and sized it to fit a 8.5 x 11 inch piece of kraft cardstock. Create A Critter for the bee, Simply Charmed for the flowers, Zooballoo for the grass, and Tags, Bags, Boxes, and More for the round tag.
Peachy Keen Stamps ~ PK-450 Wide Eyed Kids Face Assortment and PK-490 Everyday Character Face Assortment
Sentiment ~ Fiscars
Cuttlebug ~ D'Vine Swirls embossing folder
Sakura Gelly Roll Pen
Chalk for cheeks
Ribbon ~ Walmart
Thin wire for my bee
Pop dots, glue dots, and ATG
Cardstock ~ Recollections and Colorbok
Here are the challenges that I am submitting this in:
My Creative Time Throwback Thursday ~ Walk in My Garden flowers. I don't have this cartridge so I used Simply Charmed.
Peachy Keen Stamps Let's Face It Fridays ~ Spring gift, you must use PK faces on the project.
Cooking with Cricut ~ Embossing
Celebrate the Occasion ~ Anything Birthday
Scrappy Moms Stamps Tuesday Challenge ~ Create A Critter
Linda's Creativity Creative Sisters Monday Challenge ~ Embossing
Labels: gift bag, spring, peachy keen, bee, flowers, plantin schoolbook, simply charmed, create a critter, tags bags boxes, cuttlebug
Luv Scrapping Together
http://luvscrap
http://luvscrap
Sunday, February 27, 2011
Spotlight My Craft Spot ~ Post #1
Happy Sunday!
I hope you all are enjoying your weekend. As many of you may already know, I am a designer for Fantabulous Cricut Challenge Blog. Well, not only am I a designer but I also write the Spotlight Sunday feature for FCCB.
This week's Spotlight Sunday is a spotlight of one of our sponsors: My Craft Spot.
I was given the priviledge of not only spotlighting My Craft Spot but also designing with the beautiful hand-dyed Crinkle Ribbon that can be purchased there. I made 4 projects with the Crinkle Ribbon and I will be showing them to you over the next few days.
For my first project I made a card using Spring Moss Crinkle Ribbon.


I love the elegant look of this card. The crinkle ribbon is beautiful. It definately lends itself to a vintage feel.
Here are the details for this card:
Card measures 4.25 x 5.5
Cricut Cartridges ~ A Child's Year, oval and scalloped oval cut at 4.01 ~ Cindy Loo, flower cut at 2.76 and scalloped border cut at .83
My Craft Spot ~ Spring Moss Crinkle Ribbon
Ranger Distress Ink ~ Tea Dye
Cardstock ~ DCWV, K&Company Classic K McKenna Mat Pad
Pearls
Foam tape, Glue Dots, Zig Glue Pen, and ATG
Head on over to Fantabulous Cricut to see the other projects I have created along with a few of my fellow design team members and to read about My Craft Spot and the wonderfully talented Kimberly.
If you are interested in purchasing Crinkle Ribbon or Baker's Twine I want to let you know about a special promotion that Kimberly is offering.
With every $25 purchase you will receive FREE one 30 yard spool of Traditional Baker's Twine in the color of your choice. All you need to do is write: FCCB free twine offer with your color choice in the "notes to seller" section at the time of checkout. This special promotion will end March 15th so you will want to hurry! And get this...
Every order recieves FREE shipping no matter how much you spend.
Now go visit My Craft Spot -HERE to see all the scrumptous colors of Crinkle Ribbon and Baker's Twine.
Happy Crafting!
Labels: a childs year, scallop edge, cindy loo, flower
Luv Scrapping Together
http://luvscrap
http://luvscrap
Spotlighting My Craft Spot ~ Post #2
Good Morning!
It's Monday so that means is is time for a "Challenge Me Monday" challenge over at Fantabulous Cricut Challenge Blog. For this week's challenge we are asking that you make some kind of shaped card. There are so many Cricut cartridges that have shaped cards that you can use or it you have a Gypsy or Design Studio you can create your own shaped card. I decided that that I would create my own.
I am also sharing my second card that I made using hand-dyed Crinkle Ribbon from My Craft Spot. We featured My Craft Spot in our "Spotlight Sunday" post over at FCCB. You can check that out -HERE.


Also take a moment to see all the other wonderful shaped cards my fellow designers have created over at Fantabulous Cricut Challenge Blog. Take the time to join us this week. The prize is a gift certificate to My Craft Spot.
Oh! I wanted to mention that the new design team is being announced today. How exciting!
It's Monday so that means is is time for a "Challenge Me Monday" challenge over at Fantabulous Cricut Challenge Blog. For this week's challenge we are asking that you make some kind of shaped card. There are so many Cricut cartridges that have shaped cards that you can use or it you have a Gypsy or Design Studio you can create your own shaped card. I decided that that I would create my own.
I am also sharing my second card that I made using hand-dyed Crinkle Ribbon from My Craft Spot. We featured My Craft Spot in our "Spotlight Sunday" post over at FCCB. You can check that out -HERE.


I created this shaped card using my Gypsy. I used the Create A Critter Cricut cartridge for this sweet little lamb. I took 2 shadow images at 3.94 inches flipped one vertically and welded them at the head. I then cut out another shadow image so that I could layer that on top so the the fold would be hidden. All other layers were also cut at 3.94.

Here you can see a close up of that adorable face! I used Ranger Glossy Accents on the eyes and nose to give them a little shine and dimension.

I stamped my sentiment on the inside of this cute little card.
Here is what I used to create this card:
Cricut Cartridge ~ Create A Critter - lamb cut at 3.94
Peachy Keen Stamps ~ PK 757 Wide Eyed and Bushy Tailed Face Assortment
My Craft Spot ~ Hand-dyed Crinkle Ribbon in Petal Pink
Pink By Design Stamps ~ Country Living
Stampendous Fun Flock ~ Cotton Ball White
Cuttlebug Embossing Folder ~ D'Vine Swirls
Ranger Glossy Accents
Martha Stewart Baker's Twine
Sakura Gelly Roll Pens ~ Black and White
Pop dots, Glue dots, and ATG
Did you notice the gorgeous Crinkle ribbon? If you are interested in purchasing Crinkle Ribbon or Baker's Twine I want to let you know about a special promotion that Kimberly is offering.
With every $25 purchase you will receive FREE one 30 yard spool of Traditional Baker's Twine in the color of your choice. All you need to do is write: FCCB free twine offer with your color choice in the "notes to seller" section at the time of checkout. This special promotion will end March 15th so you will want to hurry! And get this...
Every order recieves FREE shipping no matter how much you spend.
Now go visit My Craft Spot -HERE to see all the scrumptous colors of Crinkle Ribbon and Baker's Twine.
Also take a moment to see all the other wonderful shaped cards my fellow designers have created over at Fantabulous Cricut Challenge Blog. Take the time to join us this week. The prize is a gift certificate to My Craft Spot.
Oh! I wanted to mention that the new design team is being announced today. How exciting!
Labels: shape card, lamb, bakers twine, create a critter
Luv Scrapping Together
http://luvscrap
http://luvscrap
Sptlighting My Craft Spot ~ Post #4
Hi Everyone!
Today is my 4th post featuring a card using hand-dyed Crinkle Ribbon from My Craft Spot. As I had shared with you Sunday, I am the Spotlight Sunday feature writer over at Fantabulous Cricut Challenge Blog where we featured My Craft Spot. If you missed it, you can find the article - HERE.
In keeping with the challenge theme this week over at FCCB, I made a shaped card other than a square or rectangle. I am also submitting this to the Wacky Wednesday Callenge over at More Than Favors.

Here is what I used to create this card:
Cricut Cartridges ~ Birthday Bash for my card base and layer, New Arrival for my elephant
My Craft Spot ~ Petal Pink Crinkle Ribbon
Pink By Design stamps ~ Baby Love
Cardstock ~ Recollection, My Mind's Eye Twinkle Twinkle Little Girl
Sakura Gelly Roll Pen ~ White
Ranger Distress Ink ~ Brushed Corduroy
Baker's Twine
Button
Googly Eyes
Foam Tape, Pop Dots, ATG
Did you notice the gorgeous Crinkle ribbon? If you are interested in purchasing Crinkle Ribbon or Baker's Twine I want to let you know about a special promotion that Kimberly is offering.
With every $25 purchase you will receive FREE one 30 yard spool of Traditional Baker's Twine in the color of your choice. All you need to do is write: FCCB free twine offer with your color choice in the "notes to seller" section at the time of checkout.
This special promotion will end March 15, 2011, so you will want to hurry! And get this...
Every order recieves FREE shipping no matter how much you spend.
Kimberly is also our sponsor for the current challenge over at FCCB. That means if you play along with us you may have a chance of winning a wonderful gift certicate from My Craft Spot. You can find the current challenge- HERE.
Now go visit My Craft Spot -HERE to see all the scrumptous colors of Crinkle Ribbon and Baker's Twine.
Thanks for stopping by today!
Happy Crafting!
Labels: shape card, scallop edge, elephant, bakers twine, birthday bash, new arrival
Luv Scrapping Together
http://luvscrap
http://luvscrap
A Treemendous Card!
Happy Monday, Everyone! I hope it's beautiful and sunny where you are! It's time for another "Challenge Me Monday" over at Fantabulous Cricut Challenge Blog and today's challenge is to use a tree or tree branch somewhere in your project. I've been using my Cindy Loo cartridge a bit more lately and I saw the perfect cut for this challenge.


Here is what was used to create this card:
Cricut Cartridge ~ Cindy Loo
Gypsy ~ I welded 2 shadow cuts for my base
Cardstock ~ Recollections and DCWV Autumn Splendor
Cuttlebug ~ Swiss Dots embossing folder
Ranger Distress Ink ~ Brushed Corduroy
Sakura Gelly Roll Pen ~ White
Ribbon ~ Hobby Lobby
Pop Dots, Glue Dots, ATG
Now this partricular cut on Cindy Loo does not have layers so I cut it out several times so that I could have green leaves and pop the frame up from the rest of the card. I also cut out a seperate bird and all its layers.
Well that's it for today. I hope you will pop on over to Fantabulous Cricut Challenge Blog to see what my fellow designers have to inspire you with today. Join in the challenge, there is always great prizes to be won!
Labels: shape card, bird, cindy loo, tree, scallop edge, cuttlebug
It's A New Day
Designed by Jeannie Phillips ~ Southside, AL
Click on any picture to enlarge.

A how to VIDEO for this card at the bottom of this post.
Gypsy file for this card available by email…just copy and paste the email address into your own personal email account winacard@gmail.com .
A friend of mine from High School contacted me on Facebook and asked me to make her a retirement card for her husband… he like to fish !!… so this is what I came up with…I am so hoping she is happy with it…as we all know those masculine cards are just so hard!!… thank you so much for looking!! I love your comments and thank you in advanced for them!!… hugs, Jeannie
CRICUT & GYPSY
Campin Out
Fishing rod and its shadow cut @ h 1.86... Set the height and the width will be right….On the Cricut I would cut this @ 1 ¾ inches.
Fish and their shadow cut @ h 1.76... Set the height and the width will be right… on the Cricut I would cut these at 1 ¾ inches.
George
Squares larger square cut @ h 2.07... Smaller square cut @ h1.89...set the heights and the widths will be right…on the Cricut I would cut the larger square at 2 ¼ inches square and the smaller square at 2 inches square on my paper trimmer.
Base Camp
It’s, a, day all cut @ h 0.68...set the height and the width will be right....on the Cricut I would cut these @ 3/4 an inch.
New and its shadow cut @ h 1.01 ..set the height and the width will be right…on the Cricut I would cut these at 1 inch.


Labels: masculine card, fishing, camp out, george and basic shapes, base camp
All the World's a Stage ~ Handmade Cards by Jeannie ~ How to Video Tuto...
Designed by Jeannie Phillips ~ Southside, Al
Click on any picture to enlarge.
There is a instructional VIDEO at the bottom of this post.
The Gypsy File is available for this card by email. Just copy and paste this email to your personal email account winacard@gmail.com.
I was in a card making mood today… but also very tired.. I have 4 new cartridges!!!… Yipee, Cindy Lou, Freshly Picked, Mini Monsters and Once Upon a Princess… when I was looking through the Cindy Lou cartridge and saw this flower I knew, right then and there, what I was making… I hope that you like this one.. Its fairly simple… if you watch the video it will make you laugh.. I made a big oops. Hugs, Jeannie
>>>>>There is now a link at the bottom of each post where you can show off your recreation of my cards… I would love it if you share your recreations with me! Thank you so, so much! <<<<<
CRICUT & GYPSY
Cindy Lou
Flower and all its layers cut @ 4.11...set the height and the widths will be right… on the Cricut I would cut these pieces at 4 inches.
Squirrel and its layers cut @ h 1.07 set the height and the widths will be right… on the Cricut I would cut these @ 1 inch.
Walk in My Garden
Lady Bug and its layers cut @ h 0.72 set the height and the widths will be right. … on the Cricut I would cut these @ ¾ an inch.
Card base is 4 ¼ x 5 ½, Frame Piece 4 x 5 ¼ , Background piece 3 ½ x 4 ¾… these cuts are on the inside and outsides of my cards… Sentiment piece 2 ¾ x 4 inside only….. I cut all of these with my paper trimmer.
If you make this card and put it on your blog or submit it for another blog please be kind enough to give me credit for my design. I do ask too that you not submit any of my designs for publication or for any contest. Thank you!


Labels: flower, lady bug, squirrel, wimg, cindy loo
Cupcake Gift bag Card Set
This first one is actually the one I made yesterday.
 Uh...and the day before. The whole Dexter Season 1 and 2 marathon made me a very slow crafter.
Supplies used:
Cricut Expressions
Cricut Celebrations cartridge
MME Everyday Tango Stack
Spare Parts Brads
Stickles
Grosgrain ribbon
Tissue paper
Cat eye Chalk Ink
Gift bag
I will tell you that I am posting a picture of the cutest giftbag. I got lazy and only did tissue paper on two of the large cupcakes. I got to thinking that these will probably be thrown away and I don't want to put that much effort into trash.
On the cupcake for the card I just Stickles to coordinate with the brads
 I used on the larger cupcake on the gift bag. I didn't write anything in the card thinking people might want to use it for something besides a birthday and they could write their own sentiment on the inside.
I cut the paper wrong for the card, I meant for it to run vertical instead of horizotal, like on the gift bag but once again I was on the phone and screwed up *okie thinks she really needs to stop talking on the phone and crafting because she messes up a lot of chit this way*.
On this larger cupcake I just used gift wrap tissue and folded to match the
 cupcake holder on the Cricut cut. I know the tissue paper does make it look so much nicer, but it was not an easy feat and I didn't want to do it on all four. Since these will be used as prizes at my Christmas party this year and most of my guests are not paper crafters they will never know that the tissue paper looks so much better.
I will be posting gift bag card sets for the next few days.
Labels: birthday card, gift bag, cupcake, celebrations
Half Flower Gift bag Card Set
My daughter liked this set because orange is her favorite color.

Supplies Used:
Cricut Expressions
Cricut Graphically Speaking cartridge
Cricut Stamping cartridge
MME Everyday Tango stack
White Signo UM-153 gel pen
Grosgrain Ribbon
Circle punches in various sizes.
I cut out the flowers with the Cricut and then cut them in half with my guillotine cutter and then the same method with the centers of the flowers.
I like the sentiments on the Stamping cart because they are simple
 and have shadows. I haven't made any stamps with them but have used them quite a bit on projects. I believe I cut this sentiment at 1.5 inches. I thought about Cuttlebugging the sentiment but once again I got lazy and just wanted to get this done and move on to something else. Do you guys ever feel that way about a project you are working on? I feel that way all the time!
You can see a bit better where I used a stylus to run a line down the middle
 of the flower petals and then curved up a bit for a little dimension. I used Stampin Up markers for the faux stitching on the flower and then a white gel pen for the dots. Since the flower on the bag is larger I punched 3 circles for the flower center.
Hmm after seeing the pictures on here I do like the colors but how could I go wrong matching papers when they are from a paper stack! Oh the paper I am using on these sets are paper and not cardstock. I don't like using the thin paper on layouts or cards much but I think it is great stuff for projects like this since it is cheaper and I am not putting mega dollars into something that will be used once and tossed aside.
Labels: birthday card, gift bag, flower, graphically speaking, stamping
Ready, Set, Blow Gift bag Card Set
 put on the inside of this card! But I resisted and it can be used for a child if needed *okie still thinks a big "ME" on the inside would be hilarious*.
Supplies Used:
Cricut Expressions
Cricut Sweet Treats cartridge
Stickles
Cuttlebug D'Vine Swirls folder
Heat set studs
Signo UM-153 gel pen
MME Everyday Tango stack
I haven't used Sweet Treats in awhile but I have to say it is my go to
 birthday cartridge! I think I love every cut on there. Now with that said I do have Celebrations and like it but I just think the cuts on Sweet Treats are just so much cuter. I used Red, Orange Peel and Yellow Stickles to make the flame on the candles for the set. I think I got the "blow" too dark but ya live and learn and I am too lazy to go back and change it now. Besides that would be a waste of paper and I don't like to waste paper!
The shadow for the cupcake was actually quite a big bigger and I sized
 it down using Design Studio because I didn't want a shadow that thick. So if you think the shadow is off a little that would be the reason. For the icing on the cupcake I used Coredinations cardstock and after Cuttlebugging it I sanded it a little and then added Diamond Stickles. You can also see the little heat set studs a little better in this picture *okie wonders where she might find herself a nice heated stud and then suddenly remembers she forgot to put on her tinfoil had and knows her readers just heard her thought* uhhh...yeah a heated stud, like a wood block would be nice right now since my feet are cold *okie glances from side to side wondering if anyone is buying that and makes a mental note not to blog without her tinfoil hat anymore*.
 Labels: gift bag, birthday card, cupcake, candle, sweet treats, cuttlebug
Sprinkled With Fun Gift Bag Card Set
I love this ice cream cone and thought it would make a
 great gift bag and card set.
Supplies used:
Cricut Expression
Cricut Sweet Treats cartridge
Bazzil Bling cardstock
Imaginisce paper stack
Drippy Goo paper punch
Spare Parts brads
Viva Pearl Pen - Ice White
The middle strip needed something on the card so I added some dots with the Pearl pen
 and I think it gave it just the little something extra to make the card pop. The sentiment is from Sweet Treats and it does have the layers to cut for it. I thought the words should match the ice cream, even if it isn't in the same order as the scoops on the gift bag *okie wonders if she is the only person that would notice such a thing*. I will admit I meant to punch some Drippy Goo strips for the card but forgot until after I had the cards put together and didn't want to go back and do them and take the card part to add them.
The ice cream cone is such a fun looking cut and I was trying to decide what "flavors"
 to use and figured the standard chocolate, vanilla and strawberry would be good. I think using the Bazzil bling cardstock gave it a nice sheen of icy goodness *okie cracks herself up sometimes with her dorky comments*.
I think the Drippy Goo punch added a cute touch to the gift bag and I used coordinating colors of the ice cream scoops. Oh and I filled in the areas on the pink scoop with the Pearl Pen.
Labels: birthday card, gift bag, ice cream cone, sweet treats
3 Flower Happy Birthday Gift Bag Card Set
 I don't know if it is the colors or the flowers, but either way I really love this one!
Supplies used:
Cricut Expressions
Cricut Sweet Treats cartridge
Cuttlebug Swiss Dots
DCWV Spring Stack circa 2008
Various carstock
Stampin Up markers
Signo UM-153 gel pen
Grosgrain ribbon
The sentiment is from Sweet Treats as are the flowers. I layered the sentiment
 using the same colors as that were used in the large daisy looking flower.
I can't remember what size I cut all the images because I used Design Studio and I rarely pay attention to the sizes. I am wondering how easy the new Cricut Craftroom software will be to use and can't wait to find out! I am sure there will be some things I don't like about it but as long as I can see the screen I should be in good shape *okie cusses under her breath about the Gypsy*.
I like how the large flower goes off the front of the gift bag. I keep wanting to
 do more of this method because I think it looks cool but I usually forget while I am designing and then don't want to go back and redo a design...YES IT IS BECAUSE I AM LAZY! *okie rolls her eyes and hates her readers making her be honest*. I used the Swiss Dots folder on the large flower center to give it a little dimension. A stylus was used on the petals and you might remember this method from a post a few days ago on the Half Flower set that I did.
I made the leaves on the stems by looping grosgrain ribbon and then attaching to the back of the "stem" with some ATG tape.
Labels: birthday card, gift bag, flowers, sweet treats, cuttlebug
Blast from the Past - 4 Star Movie Card
This was a fun card to make and my sister put them in her son's stockings and they just loved them! They even said they were going to keep the cards because "Aunt Shirley made it".
Jeannie Phillips was the creator of the card and I stole the idea from her. Jeannie is fabulously talented but sadly she isn't making cards anymore. For some odd reason she got hooked on the Knifty Knitter and is now knitting to her hearts content. She even recently got a spinning wheel! If you would like to see some of Jeannie's great work you can go to A PLACE FOR MY CARDS and see what she has been up to lately.
************************************
Originally posted August 29, 2008
I so totally swiped this idea from Jeannie Phillips on the Cricut messageboard! She is one talented lady, let me tell you! If you have a minute go over and check out her work on her blog at A Place For My Cards or you can also check her out at Win a Handcrafted Card and see if you can't win one of her fabulous creations!
When I saw Jeannie's card I fell in love with it and knew I wanted to make some. My sister gives her (grown) sons movie gift cards in their Christmas stockings each year and I thought this card would be great for her to put the gift cards in. I sent Jeannie a message and asked if she minded if I posted a .cut file to the 4 STAR MOVIE CARD on my blog. Being the gracious person she is, she said she didn't mind at all!
I used Plantin for most of the cuts, however I did use Locker Talk for the ticket. If you want to use the file you can just delete the images of the ticket. The file is set to cut 4 at a time. I also just used my trimmer to cut the silver for the back of the film strip. I used a background stamp for the popcorn bucket and then colored in between some of the lines with a Stampin Up marker. I used cat eye ink to do the shading on the bucket, ticket and popcorn. The mats are all labeled for you. There are some extra circles that will cut to help you fill in the popcorn bucket, but you might have to punch or cut a few extra also.
I pop dotted the popcorn and ticket for some added dimension *okie so loves dimension on cards...and layouts...and is glad we live in a 3 dimensional world*. I didn't glue the bucket all the way down so I could slide some "popcorn" in the bucket. I added some stickles to the popcorn just because I thought it might look good and I LOVE STICKLES! Anyone else out there love Stickles? Can I get a HELL YEAH! *okie cracks up laughing at herself knowing that people are rolling their eyes and thinking 'that dang okie ain't got no kinda sense'*. I did use the white Signo pen to do the doodling around the edge of the card.
The saying is generic so it can be used for various occasions. Also the sentiment is completely in one piece so if you want to r esize it you can. Just don't forget to resize the stars that go on top also. I used Doodlebug sugar glitter on the stars and then dotted with black diamond Stickles. I also doodled with the white Signo pen on the letters.
The inside envie will hold a gift card. N o that is not a movie gift card, it is my Staples Teacher Rewards card! I had to make sure it was the right size and that is the card I pulled out of my purse to use as an example. But it does fit rather nicely with the stars on there now doesn't it. I used some Aileens Tack It Over and Over on the flap of the envie so it will stay close but yet be able to reopen.
**********
Jeannie Phillips was the creator of the card and I stole the idea from her. Jeannie is fabulously talented but sadly she isn't making cards anymore. For some odd reason she got hooked on the Knifty Knitter and is now knitting to her hearts content. She even recently got a spinning wheel! If you would like to see some of Jeannie's great work you can go to A PLACE FOR MY CARDS and see what she has been up to lately.
************************************
Originally posted August 29, 2008
I so totally swiped this idea from Jeannie Phillips on the Cricut messageboard! She is one talented lady, let me tell you! If you have a minute go over and check out her work on her blog at A Place For My Cards or you can also check her out at Win a Handcrafted Card and see if you can't win one of her fabulous creations!
When I saw Jeannie's card I fell in love with it and knew I wanted to make some. My sister gives her (grown) sons movie gift cards in their Christmas stockings each year and I thought this card would be great for her to put the gift cards in. I sent Jeannie a message and asked if she minded if I posted a .cut file to the 4 STAR MOVIE CARD on my blog. Being the gracious person she is, she said she didn't mind at all!
I used Plantin for most of the cuts, however I did use Locker Talk for the ticket. If you want to use the file you can just delete the
 images of the ticket. The file is set to cut 4 at a time. I also just used my trimmer to cut the silver for the back of the film strip. I used a background stamp for the popcorn bucket and then colored in between some of the lines with a Stampin Up marker. I used cat eye ink to do the shading on the bucket, ticket and popcorn. The mats are all labeled for you. There are some extra circles that will cut to help you fill in the popcorn bucket, but you might have to punch or cut a few extra also.
I pop dotted the popcorn and ticket for some
 added dimension *okie so loves dimension on cards...and layouts...and is glad we live in a 3 dimensional world*. I didn't glue the bucket all the way down so I could slide some "popcorn" in the bucket. I added some stickles to the popcorn just because I thought it might look good and I LOVE STICKLES! Anyone else out there love Stickles? Can I get a HELL YEAH! *okie cracks up laughing at herself knowing that people are rolling their eyes and thinking 'that dang okie ain't got no kinda sense'*. I did use the white Signo pen to do the doodling around the edge of the card.
The saying is generic so it can be used for various occasions. Also the sentiment is completely in one piece so if you want to r
 esize it you can. Just don't forget to resize the stars that go on top also. I used Doodlebug sugar glitter on the stars and then dotted with black diamond Stickles. I also doodled with the white Signo pen on the letters.
The inside envie will hold a gift card. N
 o that is not a movie gift card, it is my Staples Teacher Rewards card! I had to make sure it was the right size and that is the card I pulled out of my purse to use as an example. But it does fit rather nicely with the stars on there now doesn't it. I used some Aileens Tack It Over and Over on the flap of the envie so it will stay close but yet be able to reopen.
**********
Labels: gift card holder, movie, plantin schoolbook, stars, locker talk
I wanted to try my POCKET CARD as a regular card without all the ghosts and spiders so.....this is what I came up with. The paper is from a K & Company stack and the staying on the front was a punch out from the stack. I do have to admit I like this card. I know I know there are more things I could have done like sewing or embossing, etc........BUT I AM LAZY!! ARE YOU HAPPY NOW? I ADMITTED IT!! However....I did use some flourish stamps to jazz it up a little. The flourish is from an Autumn Leaves set.
Here is how the card looks open. As you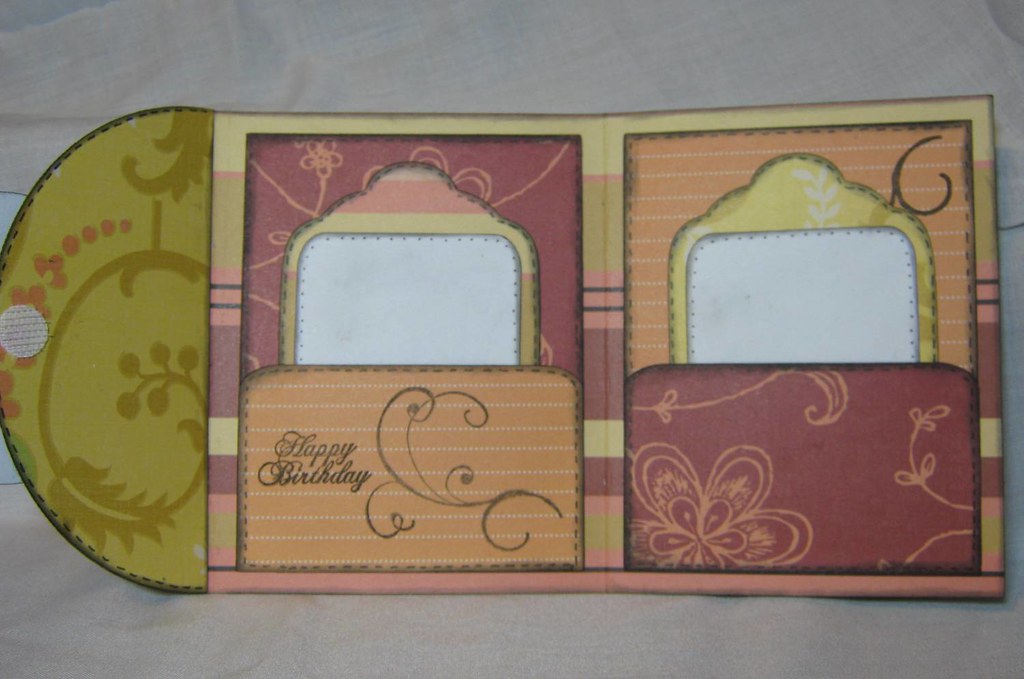 can see I stamped on the inside too! The Happy Birthday is from an Inkadinkadoo Birthday Circle Stamp. Oh yeah and I doodled. I think I doodle just so I can say the word....it just kinda cracks me up!! *okie must have sniffed too much zig pen today because she is just down right talkin crazy now*. You can see the velcro dot on the left hand side of the photo, that is what I use to keep these little handy dandy card closed.
As you see the mats are blank. AND! there is a reason for this! *who k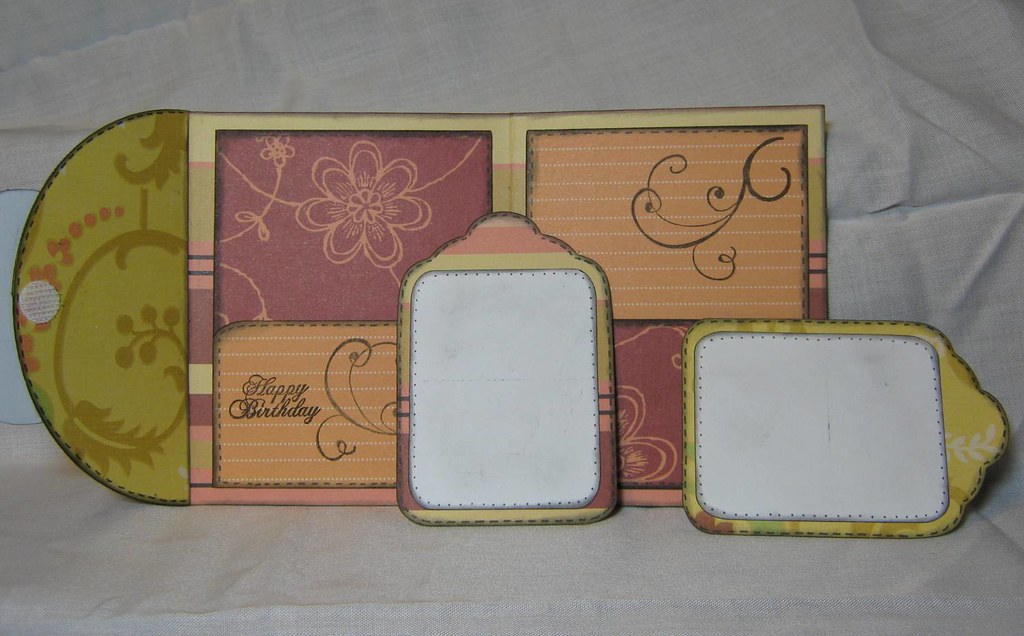 new okie had foresight, okie sure didn't* I plan on using this one for when I give a gift card. I can use the herma dotto repositionable runner to adhere a gift card to one of the mats and then I can use the other mat for writing my own personal birthday message.
K & Company stack and the staying on the front was a punch out from the stack. I do have to admit I like this card. I know I know there are more things I could have done like sewing or embossing, etc........BUT I AM LAZY!! ARE YOU HAPPY NOW? I ADMITTED IT!! However....I did use some flourish stamps to jazz it up a little. The flourish is from an Autumn Leaves set.Here is how the card looks open. As you
can see I stamped on the inside too! The Happy Birthday is from an Inkadinkadoo Birthday Circle Stamp. Oh yeah and I doodled. I think I doodle just so I can say the word....it just kinda cracks me up!! *okie must have sniffed too much zig pen today because she is just down right talkin crazy now*. You can see the velcro dot on the left hand side of the photo, that is what I use to keep these little handy dandy card closed.As you see the mats are blank. AND! there is a reason for this! *who k
new okie had foresight, okie sure didn't* I plan on using this one for when I give a gift card. I can use the herma dotto repositionable runner to adhere a gift card to one of the mats and then I can use the other mat for writing my own personal birthday message.Labels: pocket card, tag, birthday card
Small Bits of Paper
http://smallbit
http://smallbit

Labels: owls, george and basic shapes, create a critter, cuttlebug, glossy accents, flowers, paisley
imagine what you could do
http://iwycd.bl
http://iwycd.bl
This card is dedicated to my friend, since it is her birthday today. Hope you have a great one!

It's a gate-fold card and the tag hanging from the gift is free swinging and says "Happy Birthday".
Here is the inside:

Finished card: 5" x 5"
Materials:
Cardstock: Green, White, and Three Different Patterned Papers (Background, Shadow Present, Base Present)
Cricut Cartridge Simply Charmed, Present1, page 67 (Base, Layer 2, Layer 3, Shadow)
Cricut Design Studio (Just to lay it out all on one 12 x 12 mat)
Sizzix Tag, Crescent Combo (Small Tag Only)
Cuttlebug Embossing Folder Swiss Dots
EK Success Border Punch Swiss Cheese
Green Ribbon
Gold Embroidery Floss (To hang tag off present)
Olive Green Pigment Ink
3D-Dots
Labels: birthday card, gate fold card, simply charmed, cuttlebug, present
imagine what you could do
http://iwycd.bl
http://iwycd.bl
Two Challenges in One Card
This is the first time I have done this...used one card for two challenges. Here is the card:


The first challenge is CropStop Challenge # 2 - Add Some Stickles or Glitter Glue on your project. Click here. I used it on the swirl.
The second challenge is Fantabulous Cricut Challenge # 43 Sweet Shop - Incorporate something sweet on your project. Click here. The cupcake would be something sweet..don't you think? lol
I think I accomplished it.
Finished Card: 4 1/4" x 5 1/2"
Materials:
Cardstock: White, Green, Pink, Brown and Patterned Paper
Cricut Cartridge Sweet Treats Cupcake 1 page 24 (Base, Shift Layers and Base Shadow), Cupcake 4 page 27 (Shift Base, Base Layers)
Cricut Design Studio
Cuttlebug Embossing Folder D'Vine Swirls
Ranger Stickles Lime Green
Computer Printed Sentiment on Front and Inside
Labels: sweet treats, cuttlebug, cupcake, birthday card
imagine what you could do
http://iwycd.bl
http://iwycd.bl
Lollipop Cards
Well, as you can see, I drifted down from the ceiling, (lol), and I am writing my second post for today.
After seeing Robin's " Lolli Pop Shape Cards", (Robin's Creative Cottage), I made these:

I used lollipop sticks, plastic candy wrappers (rather than cellophane) and I think mine are smaller than Robin's. I hope she likes my version.
Finished Card: 2 1/2" x 5 1/4" (including stick)
Materials:
Cardstock: Various Patterned Paper and White
Cricut Cartridge Accent Essentials Accent 1 (Circle) page 32 (Base Shift), Accent 19 (Swirl) page 50 (Base)
Lollipop Sticks
Candy Wrappers
Ribbon
Crystal Clear Glitter
Computer Printed Sentiment "So Sweet"
Pigment Ink (Various colors to ink around sentiment)
I thought these were just so adorable. You could use them for birthdays, baby showers, etc. Just change the paper...imagine what you could do....
Labels: lollipop, shape card, accent essentials, circle
imagine what you could do
http://iwycd.bl
http://iwycd.bl
Make A Splash

I made this card for Fantabulous Cricut (Use embossing) and Scrappy Moms Stamps (Use Create A Critter Cartridge) Challenges.
Finished Card: 4 1/4" x 5 1/2"
Materials:
Cardstock: White, 3 Shades of Orange, Green, Tan, Clear Vellum, Clear Craft Plastic and Patterned Paper.
Cricut Cartridge Create A Critter Fish and Fishbowl page 43 (Base, Shift Base, Shift Layer 1, Base Layer 2, Shift Layer 2, Base Layer 3, Shift Layer 3); Gator/Splash drop (bird's wing) page 45 (Shift Layer 2).
Cricut Design Studio (paper placement and to stretch bird's wing to make it look like a splash drop)
Cuttlebug Embossing Folder Tiny Mosaic
Cuttlebug Embossing Folder Herringbone
Pigment Ink: White (for stones on bottom of fishbowl), 2 Shades of Blue (rubbed over the clear vellum for water and splash)
Computer Sentiment
This is how I layered the fishbowl: Clear Vellum Fishbowl, Tan Stones, Green Plants, Fish, Clear Vellum Splash, Clear Vellum Water and Clear Craft Plastic Fishbowl. (Not sure is you can see the top clear layer...looks really cool in person).
Well, the new Expression is working very well...in fact, I only had to cut the cardstock once (instead of twice) and the clear craft plastic cut with only two cuts. The last time I tried to cut the plastic with the old machine, it never cut all the way through, even after 4 cuts. So, this was pretty exciting...lol. (It's the little things..you know!)
Hope you like the card. Leave a comment/become a follower...only 14 to go for 50 followers...Would love to hear from you. Thanks....imagine what you could do....
You might also like:
Labels: fish, create a critter, cuttlebug
No comments:
Post a Comment