
Flower Pot Card
Jeri Fladmark sent me this great flower pot card for my birthday this summer.

When you pull on the top flowers, the message pops up.

Want to learn how to make this card? Host a Stampin'
When you pull on the top flowers, the message pops up.
Want to learn how to make this card? Host a Stampin'
Christmas Ideas Start Now!
Stamps: Four the Holidays* and Delightful Decorations* stamp sets Ink: Real Red and Night of Navy Classic Pads
Paper: Whisper White, Real Red, Night of Navy and More Mustard card stock
Accessories: Silver Elastic Cord*, Ornament Punch*, Big Shot, Petals-a-Plenty Textured Impressions Folder*
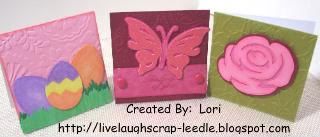
3"x3" cards are great for tucking in lunch boxes and leaving in fun places.

Stamps: Best Wishes & More stamp set
Stamps: Best Wishes & More stamp set
sent to me by Kristen Bryant.

Stamps: Pocket Silhouettes and Heard from the Heart stamp sets
Ink: Chocolate Chip Classic Pad
Paper: Creamy Caramel, More Mustard, Ruby Red, Really Rust and Chocolate Chip card stock
Accessories: Hemp Twine
Stamps: Pocket Silhouettes and Heard from the Heart stamp sets
Ink: Chocolate Chip Classic Pad
Paper: Creamy Caramel, More Mustard, Ruby Red, Really Rust and Chocolate Chip card stock
Accessories: Hemp Twine
Extra Large Fancy Flower Punch
Stamps: Warm Words stamp set
Three Quick Cards with a Half Sheet Wonder plus win a punch! - Claire Daly: Stampin Up Demonstrator
http://claireda
http://claireda
three Quick Cards with a Half Sheet Wonder plus win a punch!
Some days you just want to whip up some quick and easy cards, right? That was me last night, so I went for my never fail 'half sheet wonder', my lazy adaptation of the one sheet wonder! Basically this just means you stamp up a half sheet of A4 cardstock, and then chop that up to use on your cards. I have used the Stampin' Up! Summer Mini set For Everything which I am really loving at the moment as it's happy and summery. I used Certainly Celery, Sage Shadow, Pretty in Pink and So Saffron as my colours.

For this one it was just punching the shapes with the scallop square punch, adding a heart from I Heart Hearts and a button from the yummy Sherbert Designer Series buttons. To finish off I embossed a greeting from Cheer & Wishes (in the main catalogue) in white.

For this one I stamped the tiny flower from For Everything in Versamark as a background. I cut a semi circle using the 1 3/8" circle punch, and the greeting from Happy Thoughts using the 1 1/4" circle punch. I finished this one off with a scallop punched edge, another button from the Sherbert Designer Series Buttons and a heart from I Heart Hearts. I didn't intentionally place it so the outside of the flower frames it, but it looks kind of cute don't you think?

For this last one I stamped the greeting from For Everything, and then matted it with Certainly Celery using the Scallop Oval Punch. Finished off with two hearts and a button. Easy hey?
For this one it was just punching the shapes with the scallop square punch, adding a heart from I Heart Hearts and a button from the yummy Sherbert Designer Series buttons. To finish off I embossed a greeting from Cheer & Wishes (in the main catalogue) in white.
For this one I stamped the tiny flower from For Everything in Versamark as a background. I cut a semi circle using the 1 3/8" circle punch, and the greeting from Happy Thoughts using the 1 1/4" circle punch. I finished this one off with a scallop punched edge, another button from the Sherbert Designer Series Buttons and a heart from I Heart Hearts. I didn't intentionally place it so the outside of the flower frames it, but it looks kind of cute don't you think?
For this last one I stamped the greeting from For Everything, and then matted it with Certainly Celery using the Scallop Oval Punch. Finished off with two hearts and a button. Easy hey?
~~~~~~~~~~~~~~~~~~~~~~~~~~~~~~~~~~~~~~~~~~~~~~~~~~~~~~~~~~~~~~~~~~~~~~~~~
***Note Card Pouch***
 It's a beautiful set of cards that comes in it's own clear pouch. It features our new Sale-a-Bration stamp set Polka Dot Punches & also the patterned paper & ribbon bundle that is currently available as FREE Sale-a-Bration choices.
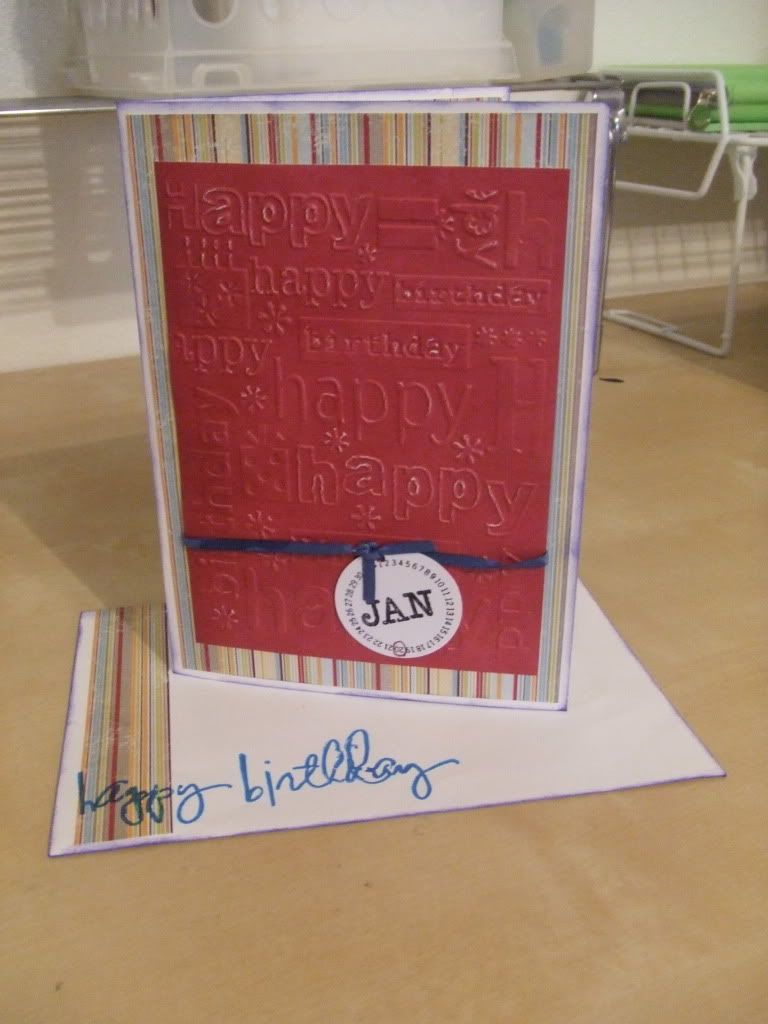
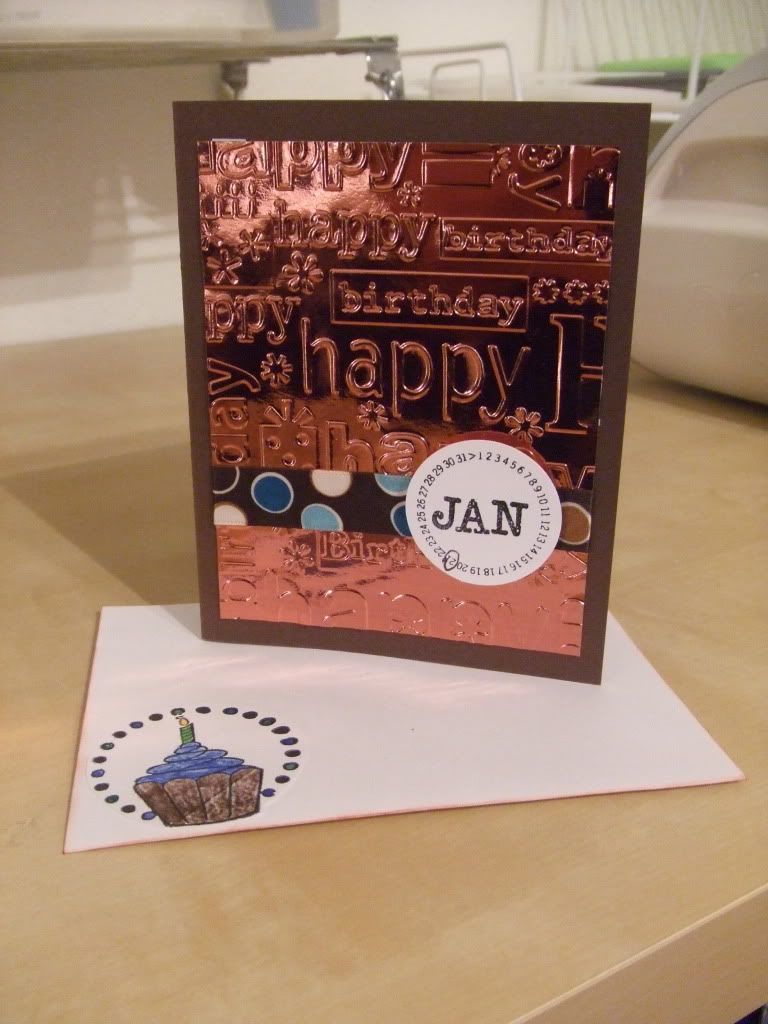
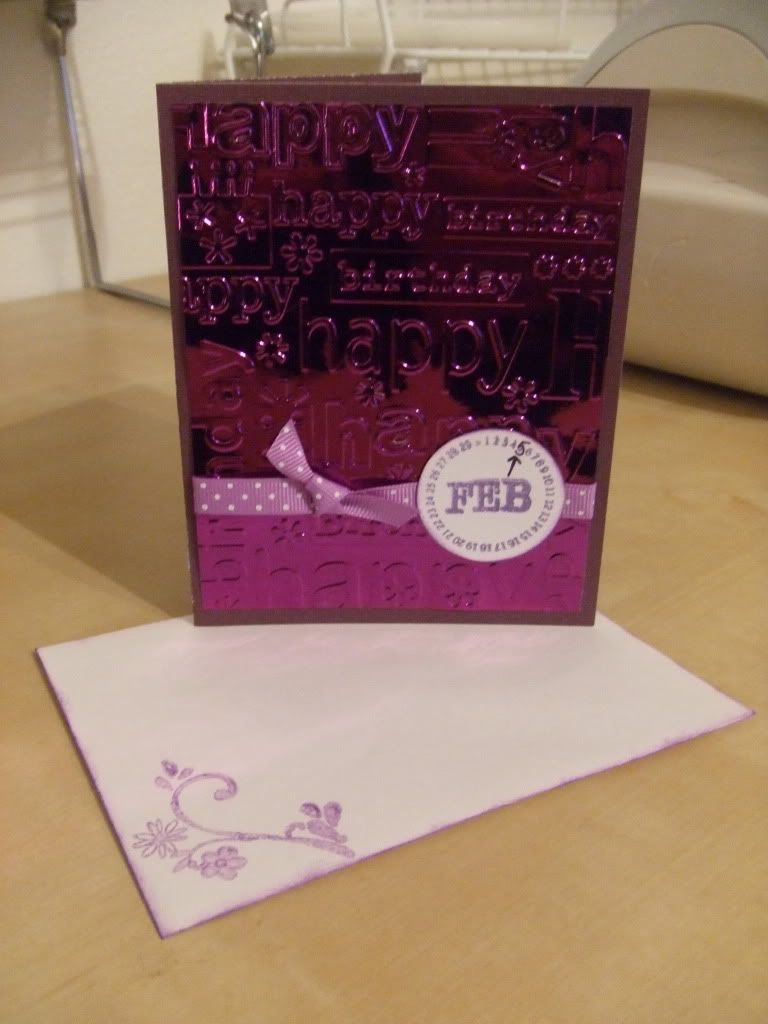
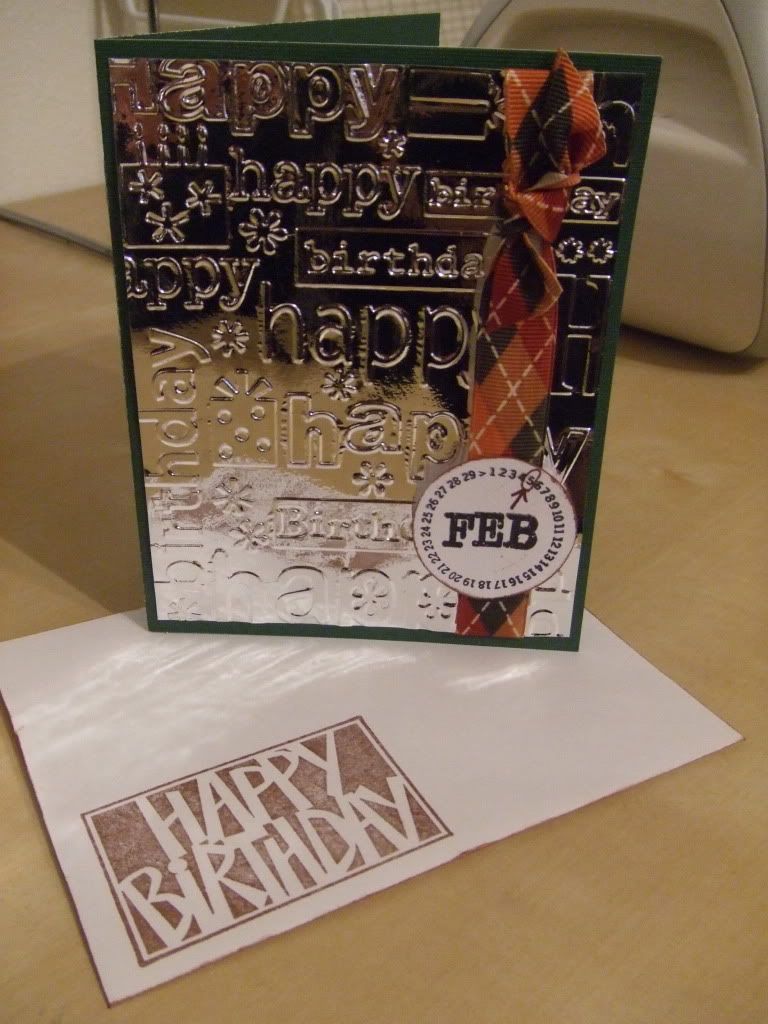
It includes 4 embossed note cards with envelopes. These are all occasion cards; a perfect way to give a gift of cards!
These are the 4 all occasion note cards that are included in the pouch.
So soft & pretty.
**Click on the picture to see them larger.
This class is available as in pdf form - an e-mailed project rhat includes step by step directions with measurements, photos & a supply list.
***Note Card Pouch***
It includes 4 embossed note cards with envelopes. These are all occasion cards; a perfect way to give a gift of cards!
These are the 4 all occasion note cards that are included in the pouch.
So soft & pretty.
**Click on the picture to see them larger.
This class is available as in pdf form - an e-mailed project rhat includes step by step directions with measurements, photos & a supply list.
It's so very easy to do. Here's the template - sorry it's a bit messy!
You'll need a piece of card stock 6 X 9" in size. Score 1" in on both long ends, turn it & score 4" in on both short ends. Cut in to the 1" score lines at both 4" score lines. Fold up & adhere the sides together.
Then cut two Scallop Square dies or cut your own 4 1/2" square shape & adhere to the front & back of the basket. I added polka dot texture to my Celery scallop squares with the Perfect Polka dot impressions folder. And then I cut a length of ribbon for a handle & adhered it with brads.
Here's a better view of the cards for those who like to case exactly.
Remember, I used SU's pre-packaged note cards with envelopes. You get 20 in a package for $5.95 & are 5" X 3 1/2" in size.

Circle - George & Basic Shapes Cricut Cart.
Scallop Circle - Mini Monograms Cricut Cart.
Smile - Wild Cards Cricut Cart.
Cuttlebug - Swiss Dots Embossing Folder
Ribbon
Peachy Keen Face Stamp
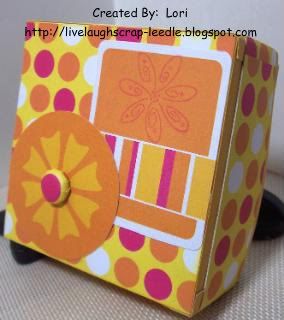
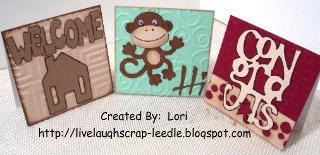
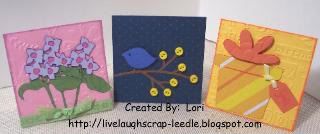
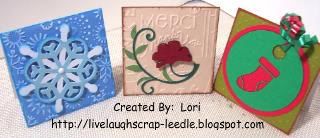
3x3 Assorted Card Set w/ Box
This is a set of 12 3x3 note cards, envelopes, and a 4x4 box that I made to have on hand for a gift or inventory.
I used my Cuttlebug on every card and several embossing folders and Cricut cartridges. I can't remember exactly which ones, but if anyone has questions - don't hesitate to ask.
All cards are blank on the inside.
 Thanks for looking. Questions & comments are always welcomed.
I used my Cuttlebug on every card and several embossing folders and Cricut cartridges. I can't remember exactly which ones, but if anyone has questions - don't hesitate to ask.
All cards are blank on the inside.
Thanks for looking. Questions & comments are always welcomed.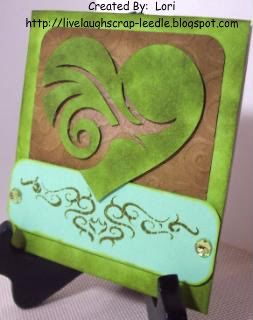
Indie Art Cricut Cart for the heart
Cuttlebug w/ Swirls Embossing Folder
Distress Inks in Pealed Paint & Vintage Photo
Stamp (?) at this time Sorry - I am horrible about remembering the names of my stamps (unless I am purposefully using a particular set).
Popped up the stamped band & the heart
Rhinestones

Cuttlebug w/ Stars Embossing Folder
Beyond Birthdays Cricut Cart. for the You Did It
Iridescent Glitter Glue on the yellow star
Popped up the You Did It
LiveLaughScrap: Baby Girl Feet
http://livelaug
http://livelaug
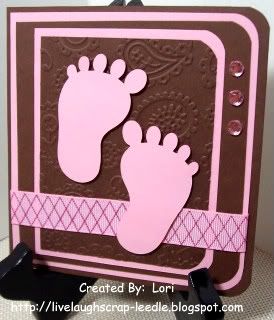
Really it is just layers, all 1/4" smaller than the previous one.
I used the Cuttlebug w/ the Paisley Embossing Folder on the top brown layer.
Added ribbon from my stash.
The baby feet are from the New Arrivals Cricut Cart.
3 pink rhinestones for accent.
Thanks for looking. Questions & comments are always welcomed.
Lori
Mother's day is next Sunday here in the UK. I made this mothers day card using the doily card cut from WC at 5" and used a gorgeous Lily-Boo digi image for the centre and finished off with a triple bow.
The challenge over at Lily-Bootoo this month is Mother's day so why not get a head start on your cards! Lily-Boos Boutique also have a DT call out at the moment you can find the details here if you fancy being on the Design Team!
Thanks so much for looking x

 Attachment (1)
_____________________________
The challenge over at Lily-Bootoo this month is Mother's day so why not get a head start on your cards! Lily-Boos Boutique also have a DT call out at the moment you can find the details here if you fancy being on the Design Team!
Thanks so much for looking x
Attachment (1) _____________________________


I decided to start by trying the gorgeous Letterpress technique that I've seen on so many cards. The finished product looks so professional that the recipient will never guess it was so easy! The only difference with this technique is that before you put the cardstock over the stencil, you apply pigment ink directly to the stencil. This is what gives the debossed portion of the image a different color. I inked my stencil with Colorbox Cloud White ink before running it through The Wizard.
 I also cut one of the butterflies from the design, spritzed it with Lime Metallic Maya Mist, and popped it up at the bottom. The patterned paper is from the October Afternoon Ducks in a Row paper pad and I used Thickers Patchwork for the sentiment. And here you can see a side-by-side comparison of the letterpress and embossed/chalked techniques. The technique on the left requires ink directly on the stencil before you send it through your machine. With the technique on the right you send it through the machine first to emboss your cardstock and then chalk the embossed portion with pigment ink.

I wanted to try something different with my second card so I sent cardstock through The Wizard to emboss it (with the Butterfly stencil) and then keeping the stencil in place, I spritzed the cardstock with Iridescent Pearl Metallic Maya Mist. I love this effect! I
 decided to pair it with the cherries from Berries and Cherries and some patterned paper that reminds me of a 70's diner from the October Afternoon Report Card collection. I also used the same Thickers Patchwork chipboard for the sentiment. I decided I wasn't quite through with this technique so I embossed another piece of cardstock and misted it with Lime Metallic Maya Mist so you can see the closeup of that too.

OK I promise...just one more card! This time I decided to emboss the cardstock (with the Pebbles Impressabilities), chalk the embossed portion with white pigment ink, and then cut a heart from that piece. You can see the cool design on the red heart behind the image panel. I stamped the Whales in Love with
 Memento Rich Cocoa ink, colored it with Copic markers, and cut it out with the Spellbinders Classic Heart die. I added Glossy Accents to the water and Crystal Stickles to the hearts. And then finished it off with some Caribbean satin ribbon and the Thickers Patchwork chipboard.
Thanks for stopping by to check out our Impressabilities Product Focus! I can guarantee you won't want to miss the rest of Impressabilities projects the Baker's Dozen has to share:
Taylored Expressions: Baby Shower Invitation
http://taylored
http://taylored
Baby Shower Invitation
 My mom is helping to plan a baby shower for a couple from church so we sat down last weekend to create a few invitations. I wanted to use a duck on the invitation, but none of the duck stamps I have were fitting the vision in my head. I tried to sketch a duck in order to create a template and my efforts can be summed up in one word.... laughable! So I asked my mom to try sketching a duck and she came out with this perfect little duck on the first try! Apparently I didn't receive that gift from her! :) So we traced her duck template onto cardstock, cut each one out, and chalked the edges with Yellow Ochre chalk ink. Then we added Orange Sparkly Fluff to the beak and a tiny Black Pearl for the eye. The patterned paper is from the October Afternoon Ducks in a Row collection and the "You're Invited" stamp is from the $1 spot at Michael's. I just love how these turned out and my mom said
 the baby shower guests loved them too! Thanks for stopping by today! Hope to see you tomorrow for TESC101! There's still time to enter your card in last week's sketch challenge for a chance to win a $25 gift certificate to the TE Store! Hope you all have a wonderful day!
P.S. Remember the Mouthwatering Monster Cookies recipe I shared a while back? I received an email encouraging me to submit the recipe for a contest at Foodista.com so I did! Now I need your help... click on the image below to vote for my Mouthwatering Monster Cookies!
Taylored Expressions: Dragonfly Card Drive - TESC101
http://taylored
http://taylored

Created by Taylor VanBruggen: Taylored Expressions
 Created by Lori Craig: Make a Difference
 Created by Monika Davis: M.A.D. Stamper
Taylored Expressions: Dragonfly Card Drive - TESC101
http://taylored
http://taylored


Healing Wings – Cards, Stamps and Paper Crafts at Splitcoaststampers.com
http://www.spli
http://www.spli
|

Simple Sympathy – Cards, Stamps and Paper Crafts at Splitcoaststampers.com
http://www.spli
http://www.spli
 |
| Simple Sympathy |
CAS40 With Sympathy – Cards, Stamps and Paper Crafts at Splitcoaststampers.com
http://www.spli
http://www.spli
|

A Cuttlebug Sympathy Card – Cards, Stamps and Paper Crafts at Splitcoaststampers.com
http://www.spli
http://www.spli
|


Bird Sympathy Card – Cards, Stamps and Paper Crafts at Splitcoaststampers.com
http://www.spli
http://www.spli
|

FS160 – Cards, Stamps and Paper Crafts at Splitcoaststampers.com
http://www.spli
http://www.spli
|

 Photo Details Photo Details |
A Letter From Heaven

 This is for my dear husband, Robby...I know that he misses his mom... this card came to me at 2:30 in the morning....I couldn't go back to sleep for thinking of it...finally got up at 4 am to make it.... I feel so much like its a message from his mom and she wouldn't let me sleep until he knew she was watching over him. ~~Jeannie
CRICUT
Doodle Charms
Mail Box cut @ 1 1/2 inch.
Dreams Come True
Clouds cut @ 1 1/4 inch.
Wedding Cart
Birds cut @ 1 inch.
(the birds are 2 birds with a heart in the middle..I took away the heart and cut the birds apart ...and flipped one of the birds.)
Jasmine
Corners cut @ 1 1/4 inch and 2 1/4 inches on real dial size w/shadow feature.
Stampin Up Ink
The letters and envelopes are hand cut.
You might also like:
My Craft Spot
http://craftspo
http://craftspo
Wishing you happiness


The little box/bag was cut from the TBBM cricut cartridge. I cut out by hand the patterned paper to put on the front of the box. The stamps were imaginesque (I think). I used colored pencils and distress ink to color in the images. I also used some jute twine and copper colored staples.
My Craft Spot
http://craftspo
http://craftspo
Chocolate covered strawberry

I used the Sweet Treats cartridge for this card (One of my favorite carts!)

Cut the card base (Page 50) at 4". This is just a plain card, but fit the strawberry exactly. The patterned cardstock is from DCWV. Cut all other layers with your paper trimmer. Round the corners with a corner rounder punch.

Cut the Strawberry top (Page 34: shift/layer) at 2 1/2" Real Dial size. Emboss with your swiss dots cuttlebug folder and ink lightly with black ink.

Cut another strawberry top from dark brown. (same size) Trim as shown in picture below. For the strawberry leafs, cut from green (p. 34 layer) at 5" Real Dial size. Then trim off excess. (You don't need the icecream part). Tape a white piece of paper on the back of the strawberry as shown.

Draw lines on the leafy part with a colored pencil (I used Crayola) and then use gamsol on a small sponge and a blender stick to blend the colored pencil a bit.

Assemble strawberry and spray with glimmer mist. Use glitter glue on the white dots.

cover brown cardstock with dimensional glaze and let dry (a long time!) When it is all dry, adhere to top of strawberry. Looks yummy!

Labels: Cards, Happy Everthing, Tutorials
Heart warming Bunny

I had this patterned paper from Wild Asparagus that I love and wanted to use for a card, so this is what I came up with. The bunny is from the Winter Woodland cartridge (p. 58) cut at 2 1/2 inches with the shadow and layers. I inked the edges of everything with Ranger Antique Linen ink. I chalked the bunny's little cheek with pink chalk and a q-tip. Hint: Rub most of the chalk off on a scratch piece of paper so the cheek will be very subtle. I also raised every layer of the bunny with pop dots. The stamp is from a Fiskars set and the grass is from the Paper Doll Dressups cartridge. I tied ribbon and tulle together to make the bow. To finish everything off and make it shiny, I sprayed glimmer mist over the entire card.


FLOWERDISCO'S SCRAP HUT
http://flowerdi
http://flowerdi
BABY GIRL CARD


The Cricut Cartridge used here is Wild Card and is on page number 76 and is cut at 6 inches. The paper is K&Co from the Cut 'N Paste. I made it for my niece's baby shower. The envelope is adorable too.
FLOWERDISCO'S SCRAP HUT
http://flowerdi
http://flowerdi
MADE FROM SCRAPS
 The cardstock is a maroon color (unknown brand), the border is MS, the tag is from Accent Essentials, the rub-on is from Heidi Grace, the bird from a Fiskars punch.
All the cardstock are bits and pieces found in my scraps.

FLOWERDISCO'S SCRAP HUT
http://flowerdi
http://flowerdi
DREAM... MINI CARDS
DREAM

The background was stamped, as well as the word Dream, the flowers and border were punched using Fiskar's paper punches, the leaves I believe was an EK punch. The center of the flower was embossed with the Swiss Dot Cuttlebug embossing folder. The cardstock is white linen from Wausau.
Thanks for stopping by!
A2
Cuttlebug:
or call 616.225.8801 and give them product numbers and descriptions so it is easy for them and you. Reference card #4093 so they can look it up on my HeartPrints gallery to insure no mistakes in your order. I am going to start posting this info each time, since I get numerous questions after each post. Might be a good idea to send a copy of the card with the email.

Attachment (1)
Cuttlebug:
- Birds & Swirls Folder
- Dots & Flowers Textured Impressions Folder
- Floral Flourishes and Vines Textured Impressions Folder
- Egg Die Set
or call 616.225.8801 and give them product numbers and descriptions so it is easy for them and you. Reference card #4093 so they can look it up on my HeartPrints gallery to insure no mistakes in your order. I am going to start posting this info each time, since I get numerous questions after each post. Might be a good idea to send a copy of the card with the email.
Attachment (1) New tri-fold card kit
No Comments » The card kit is complete! Here are the cards in the kit. Theres enough supplies for 4 cards !!
Category(s): Uncategorized
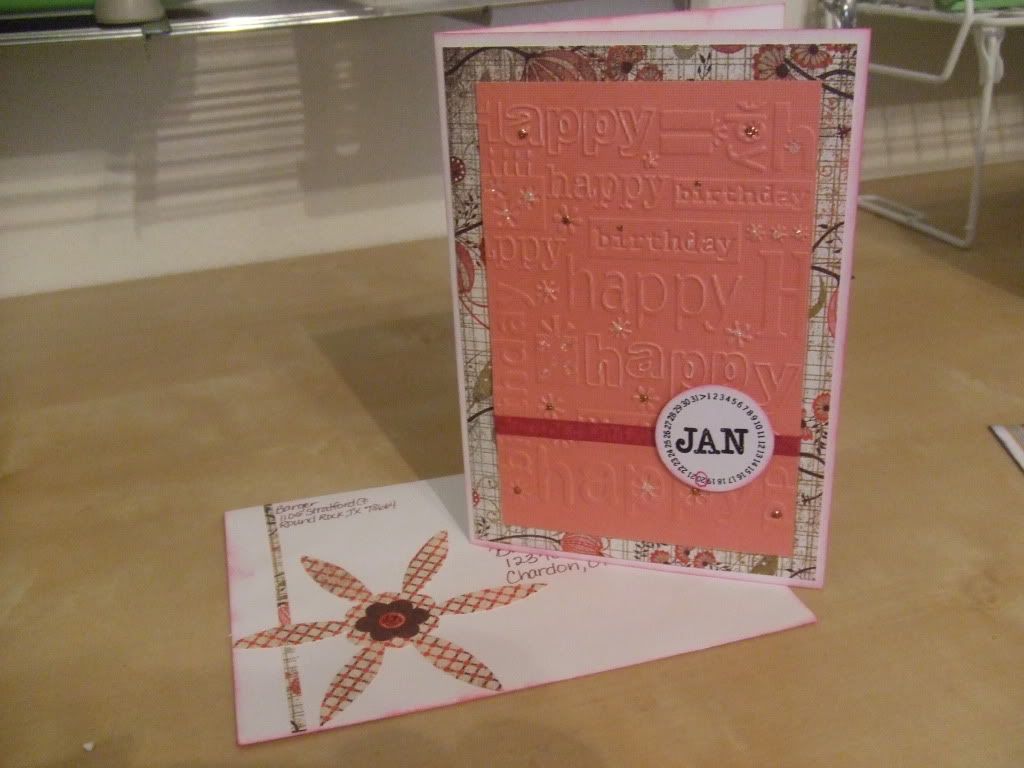
Here is a birthday card - made with the celebrations cartridge. Simple and easy - under 10 minutes!
check my blog for more cards and info!

Attachment (1)
check my blog for more cards and info!
Attachment (1) Love this cut from SYI. Card has been in my head for awhile but didn't get it made.

another one using my cuddle bug embossing folder. I use these little freebies all the time.

used the technique someone posted about embossing the whole paper after using the embossing folder. I didn't ink my folder, just inked the embossing and used clear embossing powder.

last one! this is a new (I think) embossing folder from Sizzix using the same allover embossing with clear powder. I inked the berries and vines with a little makeup sponge for eye shadow.

Attachment (1)
Attachment (1)

_____________________________
Be Blessed & Be a Blessing

This is for my BIL who is a cat lover. I welded the cat and the hat together in DS, and then cut out several layers to give it dimension. Couldn't resisit the google-eyes!!
TFL

TFL
Invite Experiment!
Author: Stacey | at:Saturday, February 20, 2010 | Category : Big Shot, Cupcakes, DCRU, Doodlecharms | 


I have been experimenting this morning with some ideas for invitations to a fancy party! As always I like to put a Stacey twist on things! I love how this has turned out and I think I will be using this design quite a bit! It is a small version of what the actula invit will be, The cupcake is cut at 5" in shadow and welded together in DS ( I flipped the one image so they would match up when folded ) Then I have cut just one more shadow layer to stick over the top. Next I have cut it in the black out feature and stuck this on with foam pads, I added a silver border peel off sticker to the bottom then added some gems! I have used white card for the icing which i have then embossed with the big shot. To top the icing I have glued the embossed swirls then added fine glitter! I could not resis the opportunity to make this even more sparkly so I added more gems!!!
I have been looking at challenge blogs today so I have decide to enter this in the Die Cuts R Us Challenge!!! wish me luck!!!
Love Birds
Author: Stacey | at:Monday, February 08, 2010 | Category : Big Shot, Bo Bunny, Doodlecharms, Embossing, Hello Kitty, Indie Arts |


It is coming upto Valentine's day so I though I would get in the mood for ramance and create some valentines cards! I must admit I have seen a few versions of the bird cut on the cricut forum and on some of the blogs I have stumbled across. I was so inspired that I decided to create my own version!!! This card ( I think ) has used the most carts during its birth, but I think the hard work is reflected!!! The card is A5 in size and it is made from brown pearl card. The background papers are by Bo Bunny and they are both the reverse of christmas papers!!! I have hidden the join with some American Crafts ribbon and punched the blue card with my Martha Stewart border punch. The bird is cut from Indie Arts at approx 3", I cut the shadow, then the blackout and then the shape, they have been shaded with brown ink then layered. The clouds are cut from the Hello Kitty Greetings cart, I have run them through the big shot using the divine swirls embossing folder them inked them up again using brown ink. The little heart that the bird is carrying is cut from Doodlecharms and embossed. To finish off the card I have used my trusted pearl gems!!! The smaller card is done almost the same but using up scraps for the background!!!
Cupcake Creations
Author: Stacey | at:Friday, January 29, 2010 | Category : Big Shot, Bo Bunny, Cricut, Cupcakes, Doodlecharms |


In keeping with my good blogger pledge I am pleased to bring you another card!!! I have been at it with the cupcakes again! I must say I have stolen a few ideas from the amazing card I had for my birthday from Julie over at huxtershouse!!! You can see that card here http://huxtershouse.blogspot.com/2009/11/cupcake-birthday-for-stacey.html
The card is A5 and it is a pearl brown cardstock The background is actually the reverse of a Bo Bunny christmas paper ( nothing goes to waste ) I have cut the cupcake using Doodlecharms and I think it is cut at about 6". I have aged the edges of the cupcake top and embossed it with the divine swirls embossing folder using my big shot!!! I have finished off the cupcake with some fab sticky gems and a bow using american crafts ribbon. The whole card is then finished with a self adhesive lace strip and more of those cute gems x x x
SewDelish
http://sewdelis
http://sewdelis
Valentine's Day Cricut Cards I have made!

I designed the heart with the flourish base on the Design Studio software for my cricut, then cut it out. I wanted it to look a little like a Cinderella carriage! Maybe I should take a photo with a horse in the front!


Valentine - Flutter – Cards, Stamps and Paper Crafts at Splitcoaststampers.com
http://www.spli
http://www.spli
|

| Photo Details | |||
| Poster: cardsbyjo
|
Paper, Scissors, Ink.: Spring Bird, Birdhouse Card and svg
http://www.pape
http://www.pape

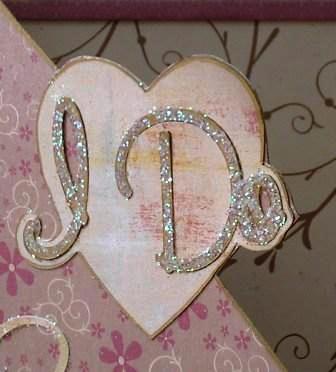
Wedding Heart Card
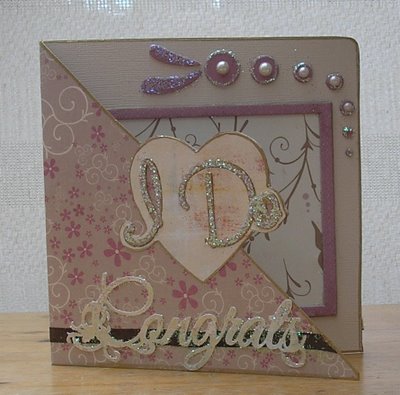 |  |
- Cut and fold a piece of Bazzill Bling String of Pearls into the desired card size.
- Cut the "I Do" heart and "Congrats" wording on a QuicKutz Silhouette. I cut them both using Basic Grey paper. Cover the "I Do" letters with gold ink or gold pen and run the pen (or ink) around the heart.
- Cover the card in Heidi Grace Cherrywood Lane Mini Floral Glitter paper so that the textured side of the Bazzill is visible (adhere the Mini Floral paper to the reverse of the Bazzill).
- Stick the heart to the middle of the card.
- Trace a line from corner to corner and cut through the line going around the heart shape.
- Adhere a length of brown organza ribbon around the bottom of the card as shown.
- Stick on the "Congrats" title. Draw around the word with a clear Sakura Gelly Roll pen then immediately sprinkle with glitter. Do the same for the "I do" letters within the heart. Blow off excess glitter then leave to dry.
- Run a gold pen (or gold ink) around all edges on the card.
- Fit a piece of Heidi Grace Mix Floral paper behind a rectangle frame from the Heidi Grace Chipboard Shapes pack. Attach to card.
- Stick on flourish dots from the Heidi Grace Chipboard Shapes pack around the frame as shown. Draw with the clear Sakura pen on each shape as shown then immediately sprinkle with glitter. Leave to dry then top with a K&Co Wedding Pearl.

Light Whimsy
http://lightwhi
http://lightwhi


Frosted Designs - Ink Challenge
Paper Play Challenges - Precious Metals
The Craft Garden ~ New Challenge
Baby Carriage from New Arrival Cartridge, cut at 5", flipped and welded in DS, Shadowed for back of card, words are also from new arrival cartridge. Ribbon,Wire, Brads, lots of INKING, distressing and layering.
Birthday Turtle
 I had been seeing so many wonderful shape cards on the Cricut Message Board that I wanted to do one too! I used the turtle cut from the Walk in My Garden cart and welded two shadow cuts in Design Studio. Her hat is from the Celebrations cart. She has rain dots for "toes" and the trim on the bottom of her shell is a Martha Stewart punch. Belated birthday day tag is computer generated and I used Nestabilites to cut it out. Party hat is Cuttle Bugged with swiss dots and then sanded. I tied a ribbon underneath her chin and added a flower. Rhinestones and pom-pom added for some bling. Lots of doodling and inking! I made this card for another wonderful Sister-In-Law!!
Rain Dots on Roses: Candy Corn Kisses and Halloween Wishes
http://raindots
http://raindots
Candy Corn Kisses and Halloween Wishes
 Anothe Halloween Card using Doodle Charms for the Candy Corn. I cut them in 3 different layers so that I could emboss them all differently. I used Co'rdinations card stock and then sanded it. I love this stuff!! The Candy Corn is part of a cut that includes other pieces of candy, but I didn't want them to cut so I used the "Hide Contour" button in Design Studio. I am so happy they came up with that feature and I use it all the time!
Brittany's shower – Cards, Stamps and Paper Crafts at Splitcoaststampers.com
http://www.spli
http://www.spli
 |
| Brittany's shower |
Stamp With Ann: Cricut
http://stampwit
http://stampwit
Thanks Gerbera Daisy Card
Yes, another Gerbera Daisy card. I love making these daisies!!! Daisy directions HERE. For the Certainly Celery frame, I used a cool dingbat font, which I found at Clever Someday Blog. I downloaded the dingbat to my computer and used my Cricut machine and SCAL software cut it. Too easy!! This dingbat will cut 94 different frames and other miscellaneous cool images which are perfect for scrapbooks, cardmaking & papercrafts! When using SCAL, you can make your dingbat any size you want!
Recipe:
SU! CS: Riding Hood Red, Pumpkin Pie, So Saffron, Certainly Celery & White
SU! DSP: Good Morning Sunshine
SU! stamp Set: Kind & Caring Thoughts
SU! ink: Close to Cocoa
SU! dimensionals
 For the Certainly Celery frame, I used a cool dingbat font, which I found at Clever Someday Blog. I downloaded the dingbat to my computer and used my Cricut machine and SCAL software cut it. Too easy!! This dingbat will cut 94 different frames and other miscellaneous cool images which are perfect for scrapbooks, cardmaking & papercrafts! When using SCAL, you can make your dingbat any size you want!
Recipe:
SU! CS: Riding Hood Red, Pumpkin Pie, So Saffron, Certainly Celery & White
SU! DSP: Good Morning Sunshine
SU! stamp Set: Kind & Caring Thoughts
SU! ink: Close to Cocoa
SU! dimensionals
SweetTreat Birthday IceCream cone – Cards, Stamps and Paper Crafts at Splitcoaststampers.com
http://www.spli
http://www.spli
|

Free SVG (Sure Cuts A Lot) 06.24.09 Ice Cream Cone


Summer is here! So is the heat! SVGCuts.com wants to help you beat the heat with this “cool” multi-layered SVG file! Perfect for scrapbooks and cards or any other paper project! Use it on Birthday cards and invitations! Use your imagination! Another great way to “Welcome Summer”!!!
Click on the image above or just click here to begin your download.
Instructions:
- Size the three ice cream cone layers to the same width with “Keep Proportions” checked in the Shape Properties window.
- Size the cherry appropriately using your best judgement and enjoy!
- Get nutty and add sprinkles using your favorite embellishments!
jenndspencer first birthday invite! – Cards, Stamps and Paper Crafts at Splitcoaststampers.com
http://www.spli
http://www.spli
|

Got Rubber...Will Stamp!
http://gotrubbe
http://gotrubbe
Here's the backside of his overalls....

Here's his little striped shirt.....

Here's the outfit....

I mean invite.... :)

RECIPE
CS: Chocolate Chip, Baja Breeze
DSP: Parisian Breeze
Stampin' Write Marker: Chocolate Chip
Punches: Small ticket, square and small star punches,
old SU! buttons
A Place For My Cards: Celebrate... Inspired by Carole Beath
http://aplacefo
http://aplacefo
Celebrate... Inspired by Carole Beath


This is a card inspired by one of Carole's cards... wa-la you can actually make a balloon that isn't a basic color...until her card I didn't realize that for some silly reason... Thank you much Carole... the balloons are from the Cricut cart Stretch You Imagination cut at 4 inches .... the Celebrate is cut from Stamped at 2 inches real dial size as was the Jasmine corners.... the balloons are pop-doted up.
A Place For My Cards: Doodle Charms
http://aplacefo
http://aplacefo
Heres Peepin @ You Kid

I was inspired by the post on the Cricut message boards and by some cards at work for this one. I used the Cricut cart. Doodle Charms for the Bunny Face..cut at 3.5 inches (I think) the basket is from Doodle Charms at 4.75 inches.... the chick is from Stretch Your Imagination at 3 inches (again I think) and the eggs are from Doodle Charms at 2.5 inches. The sign is hand made. I had lots of fun making this card...for the shading I used colored pencils, mineral spirits and ink.
Thanks for looking!
Jeannie


~Tammy's Place~: Happy Birthday Card
http://tammyspl
http://tammyspl

Snail Mail... Got my new Paisley cart...so excited.
Designed by Jeannie Phillips ~ Southside, AL
Click on any picture to enlarge.

I got my new Paisley card in the Mail on Monday...was busy all day!!...then at the doctor yesterday I laid out this card.... and today I found some wonderful scraps... and I am so excited at how this turned out!!... I hope that you like it too... the layers are a little tricky..but once you figure them out..they make such cute creatures!!... thank you so much for looking... Hugs, Jeannie
CRICUT & GYPSY
Paisley
Snail and all its layers cut @ h 1.88 inches... set the height and the all the widths will be right.
The layers include the black full snail, the full snail with the eyes cut out, the snail shell, the sun, the sun center, and the cheeks.... on the Cricut I would cut these at 1 3/4 inches.
Walk in My Garden
Ladybug and its layer cut @ h 0.89 inches... the width will be right with this height....on the Cricut I would cut this at 3/7 and inch.
Pooh and Friends
Clouds cut @ w 3.60 x h 2.06...I flipped the second one..and overlapped the small clouds and welded to save paper...On the Cricut I would cut these @ 2 1/4 inches.
Doodlecharms
Envelope cut @ w 1.12 x h 0.70 inches... on the Cricut I would cut this at 3/4 and inch.
George
Tiny Heart for envelope cut @ w 0.34 x h 0.27 inches... on the Cricut I would cut this at 1/4 and inch.
Zooballoos
Grass cut @ w 3.38 x h 1.53 inches... 4 times...I welded two of the grasses together to get the total link I wanted... this cut is on layer and shift on the bottom row of Zooballoos... on the Cricut I would cut these on real dial size at 3/4 and inch 4 times and overlap to get the length you need.
Gypsy Font
"Snail Mail" cut @ h 0.91 inches..set the height and the width will be right on all the letters... I welded the letter together on "snail"...and then on "mail."...on the Cricut I would cut this @ either 3/4 an inch or 1 inch.


You might also like:
cricut-storybook-cards.jpg (JPEG Image, 884x421 pixels)
http://lovemycr
http://lovemycr


Hope the Sun Peeks Out Soon
Designed by Jeannie Phillips - Southside, Al
Click on any picture to enlarge.

I have had this card in my head for some time.... just didn't know exactly how I wanted to do it... then today with the rain... and the prayer before my nap for a card ... I woke up with it in my head just the way to work it out!!!... I am so excited about it... wasn't sure I liked the Animal Kingdom mice...but they turned out really cute!!... hope everyone is having a blessed day... Thank you all for blessing me all the time!... Hugs Jeannie
CRICUT & GYPSY
Animal Kingdom
Mice (border cut) cut @ w 2.71 x h 1.63...I cut it twice and trimmed the heads off the second cut to pop from the bodies of the first cut.... on the Cricut I would cut this @ 1 1/2 inches.
Walk in My Garden
Flowers and the layer cut for the center cut @ w 3.08 x h 1.97... you will need to unlink the width and height to get these dimensions....cut twice and popped the second layer from the first and the first layer from the background...on the Cricut I would cut these at 2 inches.
Everyday Paper Dolls
Clouds cut @ w 4.14 x h 2.57... you will have to unlink the width and height to get these dimensions....I cut three one for the inside and two for the front...the top one is popped...on the Cricut I would cut these at 2 1/2 inches several times and glue together to get the width you want.
A Child's Year
Raindrops...(teardrops) cut @ w 0.43 x h 0.86 ....On the Cricut I would cut these @ 3/4 an inch.
Dreams Come True (Disney)
Rose (I only used the stem) cut @ 2 3.30 x h 3.59...on the Cricut I would cut this @ 3 1/2 inches.
Water Splashes (welded to the rectangle for the water at the bottom of the page) cut @ w 1.18 x
h 0.76...on the Cricut I would cut these @ 3/4 and inch.
George
Rectangle cut @ w 0.55 x h 3 1/2 inches...I would cut this with a paper cutter if I were using the Cricut.


Slow Basket of Love
Designed by Jeannie Phillips - Southside, Al
Click on any picture to enlarge.

I have to thank TerriBerri for this card... she made the cutest snail card ever with presents on it.... and this is how I ended up with this turtle card.... My son's girlfriend, Robin loves turtles... so this is her Valentine's card.... I sure hope that she likes it!!... thank you so so much for looking... hugs, Jeannie
CRICUT & GYPSY
Doodle Charms
Sun cut @ w 0.43 x h 2.29 I cut two of these...forgot to save again on my Gypsy so it isn't on the screen shot... on the Cricut I would cut these @ 2 1/4 inches.
Baskets cut @ w 1.32 x h 1.29... I cut 5 of these...two were welded to the turtle shells... 1 for the inside... one to pop from the one that is glued directly to the top turtle shell... on the Cricut I would cut these at 1 1/4 inches.
Going Places
Cloud (small) cut @ w 1.97 x h 1.0... on the Cricut I would cut this @ 1 inch.
Cloud (large) cut @ w 2.40 x h 1.21... on the Cricut I would cut this @ 1 1/4 inch.
Walk in My Garden
Turtle and its shells cut @ w 3.45 x h 1.83 with the link button off...on the Cricut I would cut this at 2 inches... but on the Gypsy I did change the shape some.
Zoobaloos
Grass (short) cut at w 4.69 x h 0.93 with the link button off and on real dial size its the layer feature with shift on....on the Cricut I would cut this twice @ 1 inch on real dial size... you will need to cut it twice and trim the extra.
Grass (tall) cut at w 4.73 x w 1.19 x h 0.93 with the link button off and on real dial size its the layer feature with shift on....on the Cricut I would cut this twice @ 1 inch on real dial size... you will need to cut it twice and trim the extra.


Luv 2 Scrappp
http://luv2scra
http://luv2scra


Luv 2 Scrappp
http://luv2scra
http://luv2scra
also made by Alisa Bangerter!!!
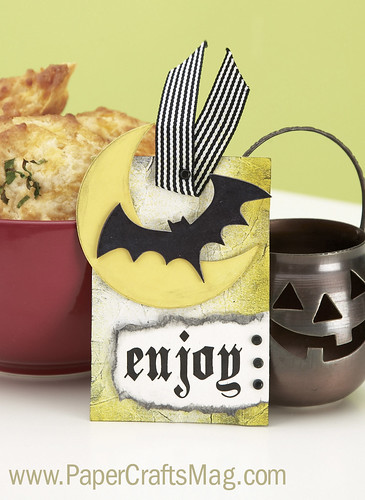
SUPPLIES: Cardstock: (ivory) Dye ink: (Black) Stewart Superior Corp.; (Summer Sun) Stampin’ Up! Specialty ink: (Mango Lemonade color wash) Stewart Superior Corp. Color medium: (black chalk) Craf-T Products Accents: (black brads) Making Memories; (chipboard bat, moon) Melissa Frances Fibers: (black striped ribbon) Pebbles Inc. Font: (Black Family) www.dafont.com Adhesive: (foam tape) Finished size: 3" x 4 1/2"
1 Make tag from cardstock. 2 Crumple tag and smooth out. Spray edges with color wash; let dry. Apply chalk. 3 Ink chipboard moon; let dry. Chalk edges and adhere. 4 Ink chipboard bat; let dry. Adhere with foam tape. 5 Print sentiment on cardstock; trim and tear edges. Chalk edges and adhere with foam tape. Attach brads. Attach ribbon with brad.
Luv 2 Scrappp
http://luv2scra
http://luv2scra
I hope you play along with us this week!!!


You might also like:
Boys Wallet G.C. Holder – Cards, Stamps and Paper Crafts at Splitcoaststampers.com
http://www.spli
http://www.spli
Wallet:
Outside piece 9 1/2 x 3 1/2
Inside piece is 9 1/2 x 3
Credit card pockets I just measured to fit gift card.
Outside piece 9 1/2 x 3 1/2
Inside piece is 9 1/2 x 3
Credit card pockets I just measured to fit gift card.
Creations by Patti
http://creation
http://creation
Love U Flag Card
I saw this card at Leadership. Someone was literally holding it up in their hands. Creator unknown. I tried my best to recreate this from photos taken. Whoever it is: Thank you for being an enabler! Finished card size: 4-1/4" x 5-1/2" (can you believe it?) What great is this project used only (1) sheet of DSP!!! I love this DSP!!! And, I love this type of card style.
Left photo: close up of front
Right photo: Back of card


Left photo: look at what's inside.......

Left photo: close up of small flags stamped with Define Your Life words: "always - XOXO - you"

Left photo: inside right pocket with (3) small tags


Here's what is needed to make this project:


Left photo: Fold the scored lines as shown


Left photo: use the tag stamps on the small flags as shown.

Left photo: Stamp the small/large flowers on the large flags. Versamark was used for the real red. Pretty in Pink was used for both the Very Vanilla and Pretty in Pink CS.


Left photo: close up of front
Right photo: Back of card


Left photo: look at what's inside.......
Right photo: and the card revealed...............

Left photo: close up of small flags stamped with Define Your Life words: "always - XOXO - you"
Right photo: close up of large flags stamped with the flowers from With All My Heart. The Real Red was stamped using Versamark Ink and the Pretty in Pink Ink was used for the Very Vanilla and Pretty in Pink CS.


Left photo: inside right pocket with (3) small tags
Right photo: inside left pocket with (2) large tags

Finished card fully extended measures 5-1/2" x 17-1/2"

Here's what is needed to make this project:
(1) 5-1/2" x 11-3/4" Sending Love DSP for the card base. Score along the 11-3/4" side 4-1/4", 1-1/2", 1-1/2", 1-1/2", 1-1/2"
(1) 5-1/2" x 6-1/4" Sending Love DSP for the card base. Score along the 6-1/4" side 1/2", 1-1/2"
(1) 2-1/4" x 5-1/4" Sending Love DSP for inside left pocket, punch along one of the 5-1/4" side (see photo below)
(1) 3-3/4" x 4" Sending love DSP for inside right pocket, score 1-1/4" on the 4" side, punch one side (see photo below)

Left photo:
(2) Large tags: 1 EACH in Pretty in Pink and Very Vanilla CS
(3) Small tags: 1 EACH in Real Red, Pretty in Pink, and Very Vanilla CS
(3) Small flags: 1 EACH in Real Red, Pretty in Pink, and Very Vanilla CS cut 1-3/4" x 4"
(3) Large flags: 1 EACH in Real Red, Pretty in Pink, and Very Vanilla CS cut 3-1/2" x 4"
(2) cut 5" long 1/4" Real Red Grosgrain Ribbon
(3) cut 5" long 1/4" Pretty in Pink Grosgrain Ribbon
(1) Pretty in Pink Belly Band (not Real Red as shown in Photo) cut 1" x 9-1/2"
(1) 3" x 3" Pretty in Pink CS, punch all sides (not shown in photo)
oops..........no punch flower was used
Right Photo: apply sticky tape and connect the 2 pieces

Left photo: Fold the scored lines as shown
Right photo: Punch along one edge of the inside pockets, adhere to inside card with sticky tape.


Left photo: use Crop-o-dile large hole to punch through all (3) small tags. Thread the grosgrain ribbon through.
Right photo: Use 3/16" corner punch on 2 corners of both the small and large flag
Right photo: Use 3/16" corner punch on 2 corners of both the small and large flag


Left photo: use the tag stamps on the small flags as shown.
Right photo: use the tag stamps on the large tags as shown.

Left photo: Stamp the small/large flowers on the large flags. Versamark was used for the real red. Pretty in Pink was used for both the Very Vanilla and Pretty in Pink CS.
Right photo: Position the small flags as shown right next to the fold lines. The stamped words should be facing the right side.


Left photo: position the large flags as shown. The 1st large flag should be on the 1st fold line.
Right photo: to assemble the front belly band, wrap 1" strip around the card. The seam should be at the front and will be covered. Position the punched square above the belly band to be a guide to position the dimensionals as shown. Remove the back of dimensionals and place the punched square on top.

Right photo: to assemble the front belly band, wrap 1" strip around the card. The seam should be at the front and will be covered. Position the punched square above the belly band to be a guide to position the dimensionals as shown. Remove the back of dimensionals and place the punched square on top.


Additional info for the front embellishment:
Left photo: Finished front embellishment
Right photo: Die Cut "U" using the Sending Love DSP, use Full Heart Punch in Real Red and put through dot textured impression folder. Position onto "U". Use 1/16" circle punch on CS, then punch one of the flowers from the Trio Flower Punch. Use 1/16" circle punch on CS, then stamp "love", punch out using the Medium Jewelry tag punch. Sewing thread used to tie tag onto the "U". Pop with dimensionals as shown, adhere to punched square.


Optional Last step: (not shown in any photos) use scraps of DSP to punch small hearts (Heart to Heart Punch). Adhere to the backside of the small flags. Regret no photo of this.
Supplies:
- Stamps: Vintage Vogue, With All My Heart, Tiny Tags, Define Your Life
- CS: Real Red, Pretty in Pink, Very Vanilla, Sending Love DSP
- Ink: Real Red, Pretty in Pink, Close to Cocoa, Versamark
- Accys: SU Exclusive Big Shot Two Tags Die, SU Big Shot Serif Essentials Alphabet Die, Heart to Heart Punch, Full Heart Punch, Trio Flower Punch, 1/16" Circle Punch, Medium Jewelry Tag Punch, Scallop Trim Boarder Punch, Scallop Corner Punch, 3/16" Corner Punch, SU Perfect polka Dots Textured Impressions Folder, 1/4" Real Red and Pretty in Pink Grosgrain Ribbon, Sticky Tape, Dimensionals, Red Sewing Thread (non SU).
Creations by Patti
http://creation
http://creation
Love You Flag Card #2
Here's another color of the Love You Flag card (previously posted on 1/22/10) using the Sending Love DSP. The front belly band panel has been changed to have the "love" die cut from the Big Shot Join in the Cheer Decorative Strip Die. I can't decide which color I like best (but of course, silly: the RED one posted 1/22/10). Love this double sided specialty DSP - one side has glitter and one side is regualr print.......love this!!!
A closer look at the belly band. The Tiny Tag is using sewing thread to tie onto the "e". The Scallop Trimmed Pretty in Pink Panel finished measurement is 3-1/4" x 2-1/4". The DSP is then popped with dimensionals while the Polka Dot punched Full Hear is adhered on top using snail adhesive. "Love" is also applied on top of the heart using snail adhesive, too.

Here's the card slightly opened to show the flag message: always, XO XO, and you. Note there is a change I made in the right and left inside: the pocket panels are flush with the card edge. This provides a bit more stability.

Top view:

Right side tags:

Right side pocket :

Left side Tags:

Card fully opened:

Here is the "you" definition:

And here is the "X O X O" definition:
And the "always" definition: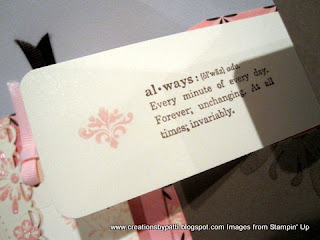


A closer look at the belly band. The Tiny Tag is using sewing thread to tie onto the "e". The Scallop Trimmed Pretty in Pink Panel finished measurement is 3-1/4" x 2-1/4". The DSP is then popped with dimensionals while the Polka Dot punched Full Hear is adhered on top using snail adhesive. "Love" is also applied on top of the heart using snail adhesive, too.

Here's the card slightly opened to show the flag message: always, XO XO, and you. Note there is a change I made in the right and left inside: the pocket panels are flush with the card edge. This provides a bit more stability.

Top view:

Right side tags:

Right side pocket :

Left side Tags:

Card fully opened:

Here is the "you" definition:

And here is the "X O X O" definition:

And the "always" definition:

Another peek inside when the card is almost opened:

For measurements on how to make this card, refer to posting on 1/22/10.
Bits of Paper
http://jamielan
http://jamielan
Valentine Candy Card
This little Valentine Candy Card was made in SCAL, you can get the file HERE. The paper is scored at 3 1/2", 7 1/4", and 7 3/4". The bottom is brought up and stapled on each edge to form a pouch. This is perfect for individual "fun sized" candies!


Welcome to the Practical Scrappers Blog Hop!
**This post will remain at the top this weekend - scroll down to see new posts**
Thank you for stopping by my blog during the Practical Scrappers Designer Blog Hop. I have created a 3D Valentine card to share with you! This card was designed in Cricut Design Studio using Plantin Schoolbook. You can grab the cut file HERE! The base scores at 4" and the inside heart inset scores at 2" from each edge (vertically) and the the center fold is down the middle of the heart. The inset glues in just off the edges of the base. If you want that little heart scallop, it is a SCAL download on my right side bar.
Thank you for stopping by my blog during the Practical Scrappers Designer Blog Hop. I have created a 3D Valentine card to share with you! This card was designed in Cricut Design Studio using Plantin Schoolbook. You can grab the cut file HERE! The base scores at 4" and the inside heart inset scores at 2" from each edge (vertically) and the the center fold is down the middle of the heart. The inset glues in just off the edges of the base. If you want that little heart scallop, it is a SCAL download on my right side bar.


Heart Candy Card - Cricut Cut File
I designed this card in Design Studio using George and Basic Shapes and it will fit the 6x12 mat (remember to change the mat size). The cut file contains two tabs, the tri-fold card base with welded hearts and then the second tab contains the inside large mat and the three hearts so you can change their color! You can download the Cricut cut file HERE. There are two score marks which can be created based off the curves of the card. The middle section folds in and the front section folds out (back side of the paper will be seen). The front section needs adhesive down the open side and along the bottom to form the candy pocket. I used Heidi Swapp's double-sided paper for this card so both sides would remain the same through the folds.


Grilled Chipotle-Chicken Quesadillas - Main dishes - Great Mexican recipes - Photos - Sunset.com
http://www.suns
http://www.suns
Okie's Sketch Challenge
 Ok... I was finally talked into doing one of Okie's Sketch Challenges by Melissa aka Buggincrazy from the Cricut Message Boards.... sketch challenges usually leave me all blank.... I can't think past the sketch..... so they usually make me loose all my creativity.... the Jeannie part of my card just disappears.... but since Melissa asked me to do it I got my mind thinking and I chose the sketch above... there are always 2 so this is the one I chose... and this is my take on it... really really interested in what you think!!!... I turned it counter clockwise and went from there... ~~Hugs, Jeannie
CRICUT
ZoobalooGrass cut @ 3/4 inches on real dial size.
Walk In My Garden
Flower Stem cut @ 2 inches for the outside and 2 1/2 inches for the inside.
Flower cut @ 1 inches for the outside and 1 1/2 inch for the inside.
GeorgeBrackets cut @ 2 3/4 inches.
Lots of brown ink.
ZoobalooGrass cut @ 3/4 inches on real dial size.
Walk In My Garden
Flower Stem cut @ 2 inches for the outside and 2 1/2 inches for the inside.
Flower cut @ 1 inches for the outside and 1 1/2 inch for the inside.
GeorgeBrackets cut @ 2 3/4 inches.
Lots of brown ink.


You might also like:
WANTED … for stealing hearts!!
I love this digi-stamps so much that I made a new card! :)
I just visited Pink Cat Studio and guess what? We have raised the amount of $525.99 so far!! Isn’t this great news?? I also fell in love with the card that Lauren made and wanted to try my own. Here is the final result.


Do you like it? Want to try yours? Want to take the chance the win this beautiful set?
Please visit Lauren’s, Vicki’s and Heather’s blog to read about wow you can win.

Thank you so much for all your sweet comments and for supporting this good cause!!!! I’ll have more projects soon ;)
by Odette

Hope you have a great day! :)
by Odette

and a complete view :)

It’s a Baby Boy
Happy Tuesday everyone! I have to recognize that I’ve been pretty lazy these days of summer, besides I have no idea where my “musa” is … :(. Anyways, i just wanted to show you a card i made a few months ago (my musa was lost by that time too) … believe me, i don’t know what’s going on…!

I used to find inspiration in music (most of time), or in the new stuff that i buy, but lately nothing has happened! really worry about this …

I used to find inspiration in music (most of time), or in the new stuff that i buy, but lately nothing has happened! really worry about this …
Choo Choo … You are Invited !
Hi girls, I really hope you are having a great day!! Can you believe that I made another Train card which can be used as invitation as well ? I am in a train mood lately :) and who blames me? my kiddos love trains … who doesn’t love them? they can be the perfect touch in a baby boy project! this little card is just one of my favorites, love the color combo.

I used my bug-machine to make this gorgeous project … and the Mickey & Friends Shapes Cartridge.

This is another view of my card/invitation …

Well my ladies, thank you so much for taking the time to stop by, have a great day! :)

I used my bug-machine to make this gorgeous project … and the Mickey & Friends Shapes Cartridge.

This is another view of my card/invitation …

Well my ladies, thank you so much for taking the time to stop by, have a great day! :)


For this Christmas tag I used one of Sizzix latest snowman dies … I bought it a few days ago and could not resist the temptation to create something really
Baby’s First Christmas …
Good Monday friends!! :)
I ordered this stamp and got it a few days ago, and I just love it!! It is the cutest baby-Christmas stamp ever!! It is perfect to make the cards for the babies that were born in this year and will have their first Christmas, just take a look :
Other views from different angles …


For those of you interested, this stamp is from Pink Gem Designs. I used PTI
I ordered this stamp and got it a few days ago, and I just love it!! It is the cutest baby-Christmas stamp ever!! It is perfect to make the cards for the babies that were born in this year and will have their first Christmas, just take a look :
Other views from different angles …
For those of you interested, this stamp is from Pink Gem Designs. I used PTI
Be Inspired #65 –Asian Theme Project
Hello my friends & welcome back! — I really hope you’ve had a very good end of year and had fun as much as I did with family and very close friends!!
Today I would like to share some happy news… :) –A few days ago, Maggie from Cuttlebug Challenge asked me to join her Design Team, WOW! … I felt really honored that she had asked me to be part of a group of fabulously talented ladies. I really love Cuttlebug products, so, how could I possibly say no! –Here I go with my first submission:

For this week, we were challenged to create an Asian theme project featuring white as the focus color using the new Asian Line embossing folders, a previous Summer release embossing folders or any Provo Craft Folders. Since I haven’t got my Asian Line yet, I used “Leafy Branch” embossing folder.

I so love the simplicity of the card …
Today I would like to share some happy news… :) –A few days ago, Maggie from Cuttlebug Challenge asked me to join her Design Team, WOW! … I felt really honored that she had asked me to be part of a group of fabulously talented ladies. I really love Cuttlebug products, so, how could I possibly say no! –Here I go with my first submission:
For this week, we were challenged to create an Asian theme project featuring white as the focus color using the new Asian Line embossing folders, a previous Summer release embossing folders or any Provo Craft Folders. Since I haven’t got my Asian Line yet, I used “Leafy Branch” embossing folder.
I so love the simplicity of the card …
Cookie Box and Bear Swing Card - Cuttlebug Challenge
I had a great time designing the  projects for this weeks Sweet Treat Thursday on Cuttlebug Challenge featuring the Cricut! Make sure to visit and sign up for the prizes on the Cuttlebug Challenge for the month of January. They are giving away Everyday Paper Dolls and Sweet Treats cartridges for your Cricut!
I chose the bear from Doodlecharms for the theme of my projects this week. I used Plantin Schoolbook for the box cut, Mini Monograms for the circle cut and scallop circle and the rest of the cuts are from the fabulous and oh so versatile Doodlecharms!
It's getting closer to Valentine's day and I know many of you still have kids in school and are always looking for the extra special way to deliver treats so for this week's project over at I made a COOKIE BOX and BEAR SWING CARD set. The cookie box will fit the Lofthouse from Walmart.
Card instructions -
These are the cuts you end up with for the card. The mats are all labeled for you. If you wish to use the same words as I have used then you can download the BEARY SWEET MSWORD file. I used a 1.5" punch for the You're so Beary Sweet and a 1.75" punch for the Be My Valentine. Of course I think they would look darling with stamped sentiments as well!
To assemble the card first assemble your scallop cirlce to your circle tag cut. Then apply your sentiment circle on top of the scallop circle. Put your finished tag on top of the card and see where you want to place it, making sure not to cover up the bear cut out at the bottom. Apply with a brad so the tag will swing over. Next take your 1.75" circle and place it under where the tag will be when straight down.
Next apply your card top to your card base using adhesive or glue. If you do it this way then the brad prongs won't be visible and it makes for a neater looking card. Embellish your bear as you wish. Since it was such a small cut I used a fine point marker to do the face with. I dotted the small heart with a white gel pen and used a piece of mounting foam to add it on top of the bear. I then glued the bear into the area of the cut out on the card.
That's it...your card is done!
Assembling the envelope is easy. Just score from corner to corner and then fold the larger side in. Add adhesive to the short side along the length and then the bottom flap and press down.
I inked the edges of the little envelop and added some white s titching with a white gel pen. I applied some ribbon across the front and topped it with the bear cut out from the card front. A heart brad was added to his belly.
COOKIE BOX instructions - I used Plantin Schoolbook for the box, Mini Monograms for the circle cut out and scallop circle ring and Doodlecharms for the bears and hearts
Here are the cuts you will end up with. I already have my bears and hearts embellished. I drew on the bears faces, using a white gel pen for the eyes. I did cut the nose out and glued it on and then added some Glossy Accents. I also used a white gel pen to write "You're" "Beary" "Sweet" on the hearts.
The scoring is done from V cut to V cut and then along the length of the box as shown in the picture. I did add the score lines in the picture to give you a better idea of where to score. You will also need to cut a 3" square of acetate and cover the circle cut out with it. I just used my ATG gun and did the edges and then placed over the hole. Make sure you apply this to the inside of the box.
Now apply the scallop circle ring to the outside of the box, lining up with the circle cut out. I used the Scotch quick dry glue to apply the scallop ring. I inked my scallop ring and added Stickles to the humps.
I used my ATG gun to add tape to each of the tabs on the box, making sure to apply the tape on what would be the outside print side. Fold the sides of the box over the tabs, the tabs will be on the inside of the box. The top of the box will just close over the bottom as seen in the last picture.


And now your project is all done! I hope you guys enjoy this project!
 projects for this weeks Sweet Treat Thursday on Cuttlebug Challenge featuring the Cricut! Make sure to visit and sign up for the prizes on the Cuttlebug Challenge for the month of January. They are giving away Everyday Paper Dolls and Sweet Treats cartridges for your Cricut!
I chose the bear from Doodlecharms for the theme of my projects this week. I used Plantin Schoolbook for the box cut, Mini Monograms for the circle cut and scallop circle and the rest of the cuts are from the fabulous and oh so versatile Doodlecharms!
It's getting closer to Valentine's day and I know many of you still have kids in school and are always looking for the extra special way to deliver treats so for this week's project over at I made a COOKIE BOX and BEAR SWING CARD set. The cookie box will fit the Lofthouse from Walmart.
Card instructions -

These are the cuts you end up with for the
 card. The mats are all labeled for you. If you wish to use the same words as I have used then you can download the BEARY SWEET MSWORD file. I used a 1.5" punch for the You're so Beary Sweet and a 1.75" punch for the Be My Valentine. Of course I think they would look darling with stamped sentiments as well!
To assemble the card first assemble your
 scallop cirlce to your circle tag cut. Then apply your sentiment circle on top of the scallop circle. Put your finished tag on top of the card and see where you want to place it, making sure not to cover up the bear cut out at the bottom. Apply with a brad so the tag will swing over. Next take your 1.75" circle and place it under where the tag will be when straight down.
Next apply your card top to your card base using adhesive
 or glue. If you do it this way then the brad prongs won't be visible and it makes for a neater looking card. Embellish your bear as you wish. Since it was such a small cut I used a fine point marker to do the face with. I dotted the small heart with a white gel pen and used a piece of mounting foam to add it on top of the bear. I then glued the bear into the area of the cut out on the card.
That's it...your card is done!
Assembling the envelope is easy. Just score from
 corner to corner and then fold the larger side in. Add adhesive to the short side along the length and then the bottom flap and press down.
I inked the edges of the little envelop and added some white s
 titching with a white gel pen. I applied some ribbon across the front and topped it with the bear cut out from the card front. A heart brad was added to his belly.
COOKIE BOX instructions - I used Plantin Schoolbook for
 the box, Mini Monograms for the circle cut out and scallop circle ring and Doodlecharms for the bears and hearts
Here are the cuts you will end up with.
 I already have my bears and hearts embellished. I drew on the bears faces, using a white gel pen for the eyes. I did cut the nose out and glued it on and then added some Glossy Accents. I also used a white gel pen to write "You're" "Beary" "Sweet" on the hearts.
The scoring is done from V cut to V cut and then along
 the length of the box as shown in the picture. I did add the score lines in the picture to give you a better idea of where to score. You will also need to cut a 3" square of acetate and cover the circle cut out with it. I just used my ATG gun and did the edges and then placed over the hole. Make sure you apply this to the inside of the box.
Now apply the scallop circle ring to the outside
 of the box, lining up with the circle cut out. I used the Scotch quick dry glue to apply the scallop ring. I inked my scallop ring and added Stickles to the humps.
I used my ATG gun to add tape to each of the tabs on the box, making sure to apply the tape on what would be the outside print side. Fold the sides of the box over the tabs, the tabs will be on the inside of the box. The top of the box will just close over the bottom as seen in the last picture.


And now your project is all done! I hope you guys enjoy this project!
No comments:
Post a Comment