
Cricut Messageboards
http://www.cric
http://www.cric
.jpg")
happy birthday colorblock (Medium).jpg
Cricut Messageboards
http://www.cric
http://www.cric
.jpg")
happy b - printing press (Small).jpg
Cricut Messageboards
http://www.cric
http://www.cric

Cricut Messageboards
http://www.cric
http://www.cric

Happy Birthday Jack
Cricut Messageboards
http://www.cric
http://www.cric

Cricut Messageboards
http://www.cric
http://www.cric

Cricut Messageboards
http://www.cric
http://www.cric

Happy Birthday Kristi
Cricut Messageboards
http://www.cric
http://www.cric

Bday Chely.jpg
Cricut Messageboards
http://www.cric
http://www.cric

Cricut Messageboards
http://www.cric
http://www.cric

Cricut Messageboards
http://www.cric
http://www.cric

Cricut Messageboards
http://www.cric
http://www.cric

Bonus-2s4u-Katie-2.jpg
Cricut Messageboards
http://www.cric
http://www.cric

Cricut Messageboards
http://www.cric
http://www.cric

Cricut Messageboards
http://www.cric
http://www.cric

Cricut Messageboards
http://www.cric
http://www.cric

Cricut Messageboards
http://www.cric
http://www.cric

Cricut Messageboards
http://www.cric
http://www.cric

A Child's Year
garden 2 cut @ 3" in black, white and shadow in grey
Walk In My Garden
Susans cut @ 1 3/4" and 1 1/4"


 **Afte
HI ALL
A LADY AT OUR CHURCH IS TURNING 100 THIS WEEK
AND THE PASTOR THOUGHT IT WOULD BE GREAT IF
A 100 PEOPLE FROM THE CHURCH SENT HER CARDS
SO I MADE ONE FOR HER
I USED STORY BOOK FOR....100
CALLGRAPHY....THE SWIRL
CUTTLE BUG....EMBOSSING FOLDER SWISS DOTS/HAPPY BIRTHDAY
MARTHA STEWART SCALLOP BOARDER PUNCH
FOAM TAPE/GLITTERED THE SWIRL WITH GLITTER GLUE / USED PEARLS
AND SPARKLY RIBBON
TFL

 Attachment (1)
A LADY AT OUR CHURCH IS TURNING 100 THIS WEEK
AND THE PASTOR THOUGHT IT WOULD BE GREAT IF
A 100 PEOPLE FROM THE CHURCH SENT HER CARDS
SO I MADE ONE FOR HER
I USED STORY BOOK FOR....100
CALLGRAPHY....THE SWIRL
CUTTLE BUG....EMBOSSING FOLDER SWISS DOTS/HAPPY BIRTHDAY
MARTHA STEWART SCALLOP BOARDER PUNCH
FOAM TAPE/GLITTERED THE SWIRL WITH GLITTER GLUE / USED PEARLS
AND SPARKLY RIBBON
TFL
Attachment (1)
| |||||


| ||||||||||
 RE: Two butterfly cards -


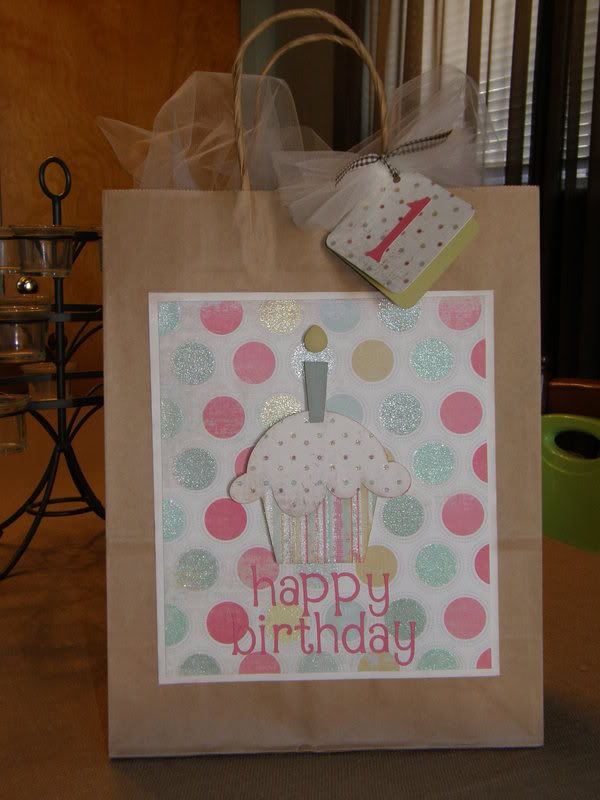
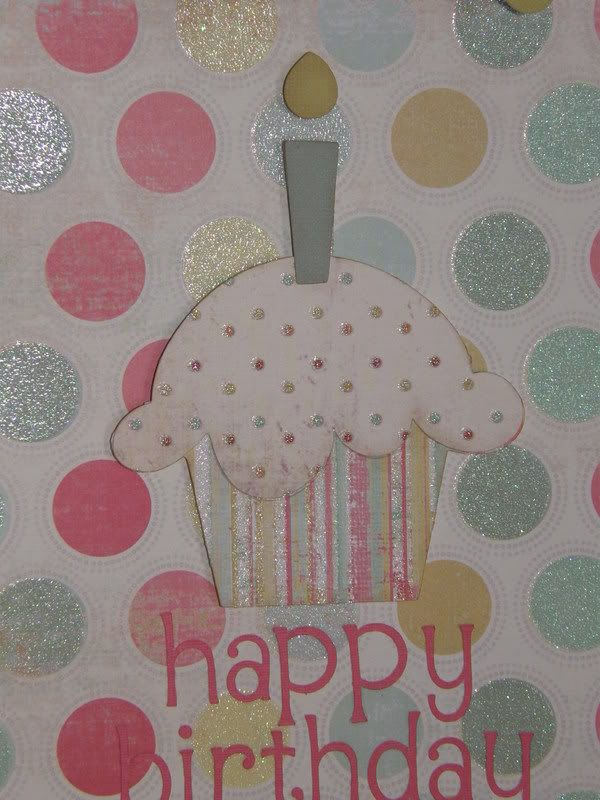
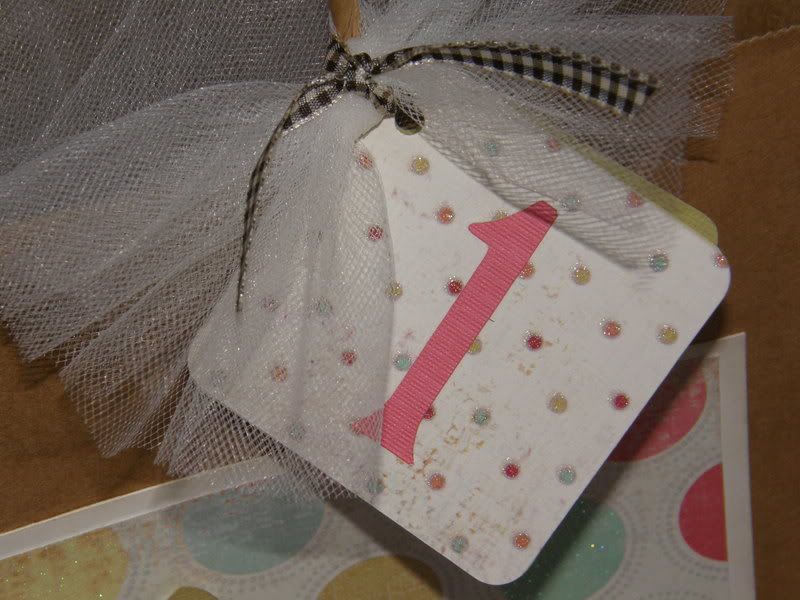
This is the gift bag I made for my husband's cousin's little girl. She is having her 1st Birthday party Friday evening. Recently, you may have seen the little boy gift bag I made for my cousin's little boy. Well, this time I was able to make a girly bag. The theme of her party is cupcakes so I thought the cupcake from the Doodlecharms cart would be great. "Happy Birthday" & "1" (on the card) are from Alphalicious. Also, I used pop dots to help the cupcake stand out.
< Message edited by SarahS. -- 2/19/2009 2:16:24 PM >
< Message edited by SarahS. -- 2/19/2009 2:16:24 PM >
Busy with the Cricky
http://spartans
http://spartans
BBTB Interstate Sign - New Driver Set

Have you been by Bitten by the Bug today? The designers were challenged to use the Interstate sign from the Going Places Cartridge. All I can say is AMAZING!
My design is called New Driver. It includes a gift box and a matching card. The box was cut using the 12 x 24 cutting mat and includes a peek-a-boo window. The card is embellished with the car front cut from Graphically Speaking.
The paper is from Darci's and Bazzill aqua and brown card stock.


You might also like:
Busy with the Cricky: Mushroom Madness, BBTB Blog Hop & BLOG CANDY!!
http://spartans
http://spartans


Busy with the Cricky
http://spartans
http://spartans
BBTB 2 - OR - A Quick Post for Donna

In a previous post I mentioned that I created two projects for this week's Bitten By the Bug challenge. I was not sure which was better, or if either was worth sending. I trusted my husband to choose one. He surprised me by going for the bright, fun card. Not that this card is dark... But anyway, Donna asked to see my "other" BBTB (almost) entry. :)


Busy with the Cricky
http://spartans
http://spartans
Baby Shower Embellies

I spent part of the day creating embellishments for a diaper cake and a matching baby shower card. The women I work with are hosting a baby shower for a co-worker's daughter. A few of us have gone in together to create a multi-layer diaper cake complete with lots of accessories.

I thought the cake could use a few New Arrival cuts to finish it off. I made "It's a Boy" for the top of the cake, along with four other shapes for added embellies. I mounted the cuts on white florist wire so that we just have to insert then into the diapers.

I also made a matching card... and was able to use my new LONG RECTANGLES nesties. The card was also made using the New Arrival cartridge. So ... now that I am ahead for the week, I can relax for the rest of the weekend!!!

You might also like:


Stamp Things: So Swirly, Snow Swirled Cards (Ghosting Tutorial)
http://www.stam
http://www.stam
So Swirly, Snow Swirled Cards (Ghosting Tutorial)
The last post left off with this card which uses the Snow Swirled Stampin' Up!Stamp Set and some other great Stampin' Up! products that you either lover already or our going to love.
What the heck is so GREAT about this card? The fun in making this card it the awesome pattern paper which I'm going to show you how to make. In the picture below the paper is barely visible under the vellum. Trust me you won't want to hide it under vellum. You are going to want to show the world.
The pattern that we are going to make will look some thing like the paper pattern shown in the photo below. This paper pattern is just like a snow flake no two patterns will be the same.
What will you need to make the pattern paper is listed below.
- Brayer Handle with Rubber Attachment (PN 102395)
- VersaMark Ink Pad (PN 102283)
- Snow Swirled Stamp Set (PN 111690)
- Glossy White Card Stock (PN 102599)
- Baja Breeze Stampin' Pad (PN 111833)
Step 1: Randomly Stamp various snow stamps using the VersaMark Ink over the gloss surface of the Glossy White Card Stock.
Step 2: Ink your brayer. Remember only roll the brayer in one direction as discussed in the Baby Wipes - Brayer Tutorial. Do not Roll it forwards and pull it back like you are painting a wall!!!! Only Roll in one direction as the animation below shows.
Step 3 - Ink an 4-1/4" x 11" piece of Glossy White card stock, using the same motion as the animation shown above. The photo below shows the resulting image. Continue to ink the brayer and the paper until an even coating of ink is on the paper. This can be as light or dark as you wish. Remember to make sure that you only ink the brayer in one direction.
Step 4 - Lightly rub the Versa marked stamped images to remove the ink from the brayer off the image.
Step 5 - Enhance the printed paper and give it more depth, using the same stamps, stamp over the pattern randomly using the same ink that was used on the brayer. The image below shows the before and after of the stamping.
The picture does NO justice to the actual final paper, but you'll see when you make your own.
To make the card shown below, I know you can feel it coming. I just had to use the Bigz Snowflake #2 die (PN 113460), but I digress.... easily I might add...
The material needed to complete the card above includes
- Bigz Snowflake #2 die (PN 113460)
- A random Snowflake punch that I had, but you could use the Sizzlitz Snowflake set #2 (PN 113449)
- Vellum Card Stock (PN 101856)
- double stitched ribbon from last years in-colors &
- SNAIL Adhesive.
Tips
- Adhesive shows through vellum paper, so plan to hide the adhesive that attaches the vellum to your card with some sort of embellishment.
- Glue can often pucker ribbon, the SNAIL adhesive doesn't.
- Try not to stamp too hard when stamping on glossy paper, this can smudge the image.
- Brayers are not paint rollers, roll them in one direction only.
- Use Glossy Paper with the Brayer, it produces a nice smooth image.
- Make a bunch of backgrounds at a time if you can, you can always use the extra paper for scrapbook pages or cards.
6" x 6" Scrapbook page:

Posted by Clarissa Imamura at Thursday, September 10, 2009


Cuttlebug Challenges
http://cuttlebu
http://cuttlebu
 |
Cuttlebug Challenges
http://cuttlebu
http://cuttlebu
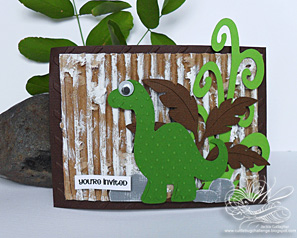
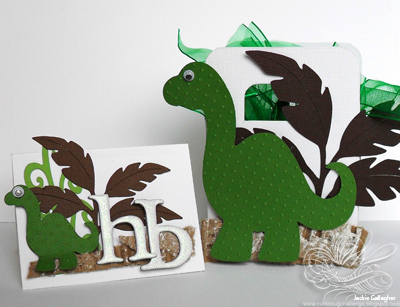
Jackie Gallagher: Dinosaurs Birthday Party | |
 |  |
Cuttlebug Challenges
http://cuttlebu
http://cuttlebu
Cupcake Box by Hanneke
Hello, I am Hanneke, from the Netherlands, and I hope you are having fun with the birthday party palooza! Here is a fun and easy way to share a yummy cupcake birthday treat !


SUPPLIES:
HOW TO:


SUPPLIES:
- box template, anywhere from Google
- Cuttlebug Cuttlebug comboset - With Gratitude
- My Mind's Eye patterned papers
Melissa Frances RubOn
Ribbon, pin, flowers and pearls
Border punch
HOW TO:
- Start by decorating the box with patterned papers
- Emboss a little tag, decorate it with a rubon
- Take two pieces of ribbon, wrap it around the upper site
- Add embellishments to make the cupcake box complete. DONE!!
CBC+Sunday+Spolight_Hello+Kitty+Treat+Basket_500.jpg (image)
http://1.bp.blo
http://1.bp.blo
![[CBC+Sunday+Spolight_Hello+Kitty+Treat+Basket_500.jpg]](https://blogger.googleusercontent.com/img/b/R29vZ2xl/AVvXsEgh9mubcEsPOVSpzlHYSKq29JvzKiQ_Vua19yutT_Adiq7NKNWP8o5ovGxqpZdl9FOHi877XM0DFVC5A1vYLBXKLi788w6bhpQF0oq7gvYsl34DSOr5j6l6P_HJZnaEDxt_9mIF3oiGb0NE/s1600/CBC+Sunday+Spolight_Hello+Kitty+Treat+Basket_500.jpg)
Cuttlebug Challenges
http://cuttlebu
http://cuttlebu
A Quick & Easy 'CELEBRATE TAG'
Hello Everbody, it's me again.... Hanneke!
I would love to share this quick & easy TAG with you today….. to go with the box tutorial earlier.

SUPPLIES
• a "home made" tag, you can use any size you want
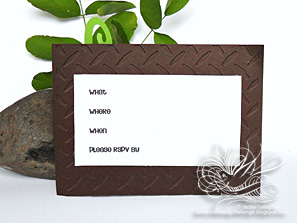
• Provo Craft Cuttlebug Embossing Stencil "Dimond Plate"
• My Minds Eye patterned papers ‘Ooh la la’
• Melissa Frances RubOn
• Ribbon, pin, flowers and strass
• Border punch, Sizzix Bigz Die "Hello Kitty Flower Bouquet"
HOW TO
• Start by cutting the tag in the size you like
• Emboss the tag halfway, decorate it with the patterned Papers.
• Use your Cuttlebug to make the swirl from your die
• Add embellishments to make the quick
I would love to share this quick & easy TAG with you today….. to go with the box tutorial earlier.

SUPPLIES
• a "home made" tag, you can use any size you want
• Provo Craft Cuttlebug Embossing Stencil "Dimond Plate"
• My Minds Eye patterned papers ‘Ooh la la’
• Melissa Frances RubOn
• Ribbon, pin, flowers and strass
• Border punch, Sizzix Bigz Die "Hello Kitty Flower Bouquet"
HOW TO
• Start by cutting the tag in the size you like
• Emboss the tag halfway, decorate it with the patterned Papers.
• Use your Cuttlebug to make the swirl from your die
• Add embellishments to make the quick
Cuttlebug Challenges
http://cuttlebu
http://cuttlebu
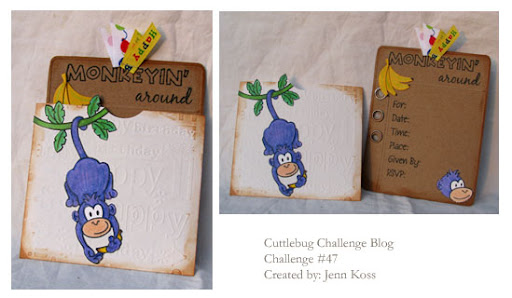
Jenn Koss: Monkey Birthday | |
 |
Cuttlebug Challenges
http://cuttlebu
http://cuttlebu
 | |
June Houck: Spa Birthday |
Cuttlebug Challenges
http://cuttlebu
http://cuttlebu
Jackie Gallagher: Dinosaurs Birthday Party | |
 |
are a few of those: 


Angelosity
http://angelosi
http://angelosi
Valentine Treats
Who doesn't like Ghirardelli Chocolates?  When I saw this tutorial for making these adorable Ghirardelli boxes, I knew I would be making some to send to my kids! I always try to get them a little package for every holiday. Valentines is one of my faves! Each of these little boxes holds 3 little chocolate wafers. I maybe could have gotten 4 in, but I think it was pushing it so I stuck with 3.
 The tutorial was well-written and easy to
When I saw this tutorial for making these adorable Ghirardelli boxes, I knew I would be making some to send to my kids! I always try to get them a little package for every holiday. Valentines is one of my faves! Each of these little boxes holds 3 little chocolate wafers. I maybe could have gotten 4 in, but I think it was pushing it so I stuck with 3.The tutorial was well-written and easy to Angelosity
http://angelosi
http://angelosi
Sympathy card later.
Thinking of You CardStamps~ 5th Ave Floral, PSX Thinking of You stamp
Ink~ Choc Chip, Pink Pirouette
Paper~ Pink Pirouette, Choc Chip, White, Bella Birds DP
Accessories~ Textile Texture DP, Choc Chip grosgrain, Pearls (Mikes), Shimmerz, in Celery and Bubblegum to color in the rose, Small square punch
Angelosity
http://angelosi
http://angelosi
Nugget BDAY Box
My daughter sometimes asks me to make a friend or teacher something for their birthday. I think this little nugget box would be perfect!
Angelosity
http://angelosi
http://angelosi
thing really did lead to another!

A Place For My Cards
http://aplacefo
http://aplacefo
Dragonfly Dream


I woke up with this idea...the dragonfly is cut with my Cricut Expressions machine...using the Pooh and Friend cart...I cut it at 3 inches twice...one is the shadow under the green square which I mounted on pop dots... the letters are cut from Allphalicious at 1 inch.... the corners are from Jasmine at 2 inches real dial size.... I used a Rain Drop on the Dragonfly's head.
Thanks for looking
Jeannie
A Place For My Cards
http://aplacefo
http://aplacefo
Take It Slow & Get Well Soon

 I had all this green paper laying on my work table...I said to myself what is pretty green... then I thought well turtles are green and there is a good one on Pooh and Friends... and what the heck turtles can be pretty too.... this is what I ended up with.... All the cuts I did with my Cricut E... the turtle is cut at 2 inches... (it cuts large)... the snail is from Walk in My Garden cut at 3/4 inch and the letters from SLOW are from Street Signs at 1 1/2 inches the other letter I did on my computer....
Thanks so much for looking
Jeannie
A Place For My Cards
http://aplacefo
http://aplacefo
YOU DESERVE ICE CREAM!

 I made this with my Cricut I cut the ice cream from Stretch Your Imagination cart at 4 inches and the frame from SYI at 1 3/4 and the word Summer at 1 1/4 inches..."its" is cut at 3/4 inches from Street Signs... the flower strip on the inside is the bottom of a frame that I cut at 2 1/4 inches that was too big so I used it on the inside... I used lots of ink and did the doodling with a Sharpie fine point marker..... oh and the cherry has Liquid Glass on it to make it shine.
Thanks so much for looking
Jeannie
A Place For My Cards
http://aplacefo
http://aplacefo
Backyard Road Trip
 Nancy on the Halkmark message boards did one of these buses with animals hanging out and a Christmas tree on top.... I put a little different spin on it... I could just picture a little boy..(mine son is a red head with a big imagination when he was little)...with his pets planning a trip in a broken down SUV... the tires are flattened... and there is rust on the bus... its hard to see in the picute.....and of course any excuse to use those cute little Garden Brads.....I had so much fun making this one! ~~Jeannie~~ Thanks for looking.
Cricut Expressions
Doodle Charms
Cat cut @ 1 inch
Dog cut @ 1 1/2 inch
Bus cut @ 3 1/4 inches
Paper Doll Dress Up
Face and hair cut @ 3 inches
Zooballoos
Tall Grass cut @ 1 3/4 inch
Short Grass cut w/layer feature @ 1 3/4 inch
Jasmine
Corners cut w/real dial size @ 2 1/2 inches
A Place For My Cards
http://aplacefo
http://aplacefo
Butterfly Thanks

 My daughter, Madison along with two other girls spent this past semester doing an internship at Edgar and Assc. Accounting Firm... James and Teresa the owners have been wonderful to Madison and the other girls.... Friday they took the girls and their parents out to eat at a really nice restaurant and had wonderful gifts for the girls...this is a thank you card for them... Thank you for looking... ~~Jeannie
CRICUT EXPRESSIONS
Home Essentials
Butterfly cut @ 2 inches
Flourish on cover cut @ 3 1/2 inches
Flourish on inside cut @ 1 1/2 inches
Frame for "friends" cut @ 1 1/4 inches
Opposites Attract
Thanks cut on upright @ 1 inch
The butterfly is glued down only in the middle so that the wings stand out... I scanned it in so they flattened out...but they are folded out... much pettier in person.
A Place For My Cards
http://aplacefo
http://aplacefo
THANKS and more THANKS

 I woke up this morning and realized I had not made my give-a-way card for this week and had to get to work...this is what I came up with...hope everyone likes it... Please forgive me I had some cuts already cut out from "mistakes on other cards" and don't know the size cuts I made...hope you like... thanks for looking. ~~Jeannie
CRICUT
Opposite Attract
"THANKS" cut @ ?
Jasmine
Corners cut @ 2 1/2 inches real dial size.
George
Hearts cut @ 2 1/2 inches and 2 3/4 inches
Flowers cut @ i inch
STAMPIN UP
White and Black ink
Stamp
I also used brads.
A Place For My Cards
http://aplacefo
http://aplacefo
A WOW! DAY

 My husband, Robby and I went canoe-ing for the very first time Saturday... it was WOW... we had the best time both of us...and I am not even an outside person...we absolutely loved it... Robby said it was one of his best days ever!...so I was so excited when I saw this canoe on the Paper Doll cartridge and I had to make Robby this card... please tell me what you think...~~Jeannie
CRICUT
Doodle Charms
Trees cut @ 2 1/2 inches on border option.
Zooballoos
Grass cut @ 2 1/4 inches on layer option.
Paper Doll Dress Up
Canoe cut @ 2 inches - paddles (x2).
Alphalicious
WOW! cut @ 1 1/2 inches.
A Place For My Cards
http://aplacefo
http://aplacefo
Happy Birthday Cory

 This is a card I made for my DD, Madison's boyfriend...his birthday is today...we are celebrating it next Saturday with mine.... Guy cards are so hard to make... he loves to read but I just could not think of a book card..I hope he likes it!! Thanks for looking ... ~~Jeannie
CRICUT
Doodle Charms
Icecream cone cut @ 4 inches.
Watermelon's cut @ 1 inch.
Street Signs
Street Signs
Larger letters cut @ 1 1/2 inches.
Smaller letters cut @ 1 inch.
Rain Dots and Basicgrey paper.
You might also like:
A Place For My Cards
http://aplacefo
http://aplacefo
Kindness Monogram Card

 I was in a card making mood.... didn't have a story card in my head...those are my favorites... so I looked at my definition stamps and came up with this... hope you like it its outside of my box.
Thank you for looking..~~Jeannie
CRICUT
Stretch Your Imagination
Cover flourish cut @ 4 inches.
Inside flourish cut @ 2 inches.
Flourish bookplates cut at 2 and 4 inches.
Bookplate for stamp cut @ 1 3/4 inches on shadow.
(I didn't write these down so forgive me if I am off by a bit but I do think that these are the correct measurements.)
Plantin Schoolbook
"K" cut @ 3 inches.
Bookplate behind rhinestones (which I added because I removed a rain dot and tore the paper) was cut with a paper trimmer and the corners were made with a very small hole punch.
A Place For My Cards
http://aplacefo
http://aplacefo
Heartfelt Thanks

 I finally got enough creative energy to make a card...it helped my feelings some too... this is for one of the wonderful men who spoke at Papo's and Cleo's (MIL) memorial services... I was really proud of it when it was FINALLY finished... tell me what you think...~~Jeannie
 CRICUT
Dreams Come True
Heart cut @ 2 3/4 inches.
Flourish on inside of card is left over from cutting the heart.
Opposites Attract
Thanks cut @ 1 inch...
(2 inches is huge by the way)
Joys of the Season
Doves cut @ ?
(the doves were already cut a long time ago..not sure the size)
Jasmine
Corners cut @ 2 1/4 inches on shadow and real dial size.
You might also like:
A Place For My Cards
http://aplacefo
http://aplacefo
Heartfelt Thanks #2

 This is the card for the other wonderful gentleman that spoke at both memorial services.... he is such a sweetheart...I hope that he likes it... ~~Jeannie
CRICUT
Opposite Attract
Thanks cut @ 1 inch.
Heartfelt letters cut @ 1 1/2 inch.
"A" cut @ 1 inch on upright.
George
Hearts cut @ 4 1/2 and 1 1/2 inches.
Stampin Up ink.
You might also like:
CRICUT
Wedding Solutions
Glasses cut @ 1 inch.
George
Black circle cut @ 2 inches.
Storybook
Scalloped circle cut @ 2 1/4 inches.
Scalloped circle cut @ 2 1/4 inches.
Scalloped circle with flourishes cut @ 2 1/2 inches.
CUTTLEBUG
Swiss Dots Embossing Folder
SCORE-IT
(for my embossed lines)
All words computer generated.
For the circle text I used Print Artist and selected the double arch feature... I fitted it inside my
1 1/2 inch grid line square... then when I printed it I was able to cut it out using a 1 3/4 inch circle punch.


CRICUT
Wedding Solutions
Hearts cut @ 1 inch.
Wedding Bells cut @ 1 inch.
Storybook
Scalloped circle cut @ 2 inches in red.
Scalloped circle w/ flourishes cut @ 2 1/4 inches.
This cut is the shadow blackout of a flower.
Both inside flourishes cut @ 3/4 inch.
CUTTLEBUG
D'vine Swirls
All text computer generated.


You might also like:
Wishing You A Happily Ever After
Designed by Jeannie Phillips - Southside, ALClick on any picture to enlarge.Ever hav


Good morning, all!
A Place For My Cards
http://aplacefo
http://aplacefo
DREAM

 I started this card this morning...the papers were so pretty!! it was hard to know exactly what I wanted to do with them..... I cut the flowers because they matched the flowers on the brown paper.... then I went and visited a friend that I hadn't seen in 10 years.... I was so excited to get to see her!!..we had the best visit....and when I got home I knew just how to finish what I had started.. hope you like... ~~Jeannie
CRICUT
Walk In My Garden
Flowers cut @ 1 1/4 and 3/4 inches.
Vase cut @ 2 1/2 inches twice.
The brown part was trimmed off the second cut to make the top contrast of the vase.
Home Accents
Flourishes cut @ 1 1/4 inches and 1 1/2 inches.
The flourish below dream was a larger corner flourish cut into two parts and put together differently.
Stampin Up Ink
Close to Coco
Brads
A Place For My Cards
http://aplacefo
http://aplacefo
Deer in the Snow Fall
 I needed some mental therapy!... so I took time to make a card while I was home for a while... couldn't sleep anyway... and now I do feel a little less stressed...thank goodness... to get the glitter on the snow clouds and ground snow I ran the cut images through my Xyron upside down and then added the glitter.... I hope you like this one!! ~~Jeannie
 CRICUT
Camping Out
Deer cut @ 1 1/2 and 1 1/4 inches.
Christmas Cheer
Snowflakes cut @ 3/4 inch.
K&Company
Paper
A Place For My Cards
http://aplacefo
http://aplacefo
No Peeking
 close up
 close up
 inside
 inside close up
 Oh I have just gotten even more excited about making cards...I can hardly contain myself... this one is different for me...I hope that you like it!! ~~Jeannie
Cricut
Joys of the Season
Stockings cut @ 2 inches
Ticket Punch
Hobby Lobby Stamp
Hobby Lobby Stamp
A Place For My Cards
http://aplacefo
http://aplacefo
Butterfly Stamp
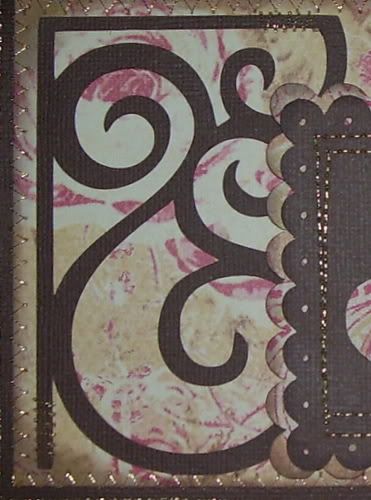
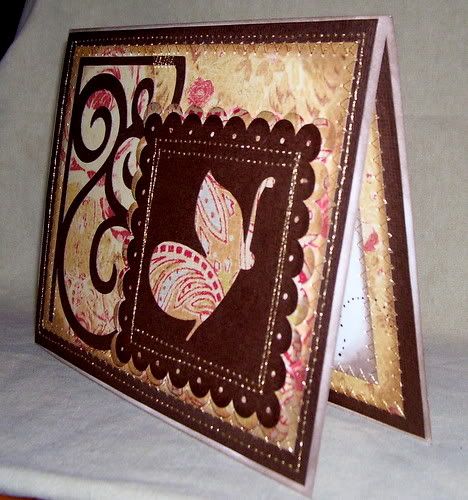 I have had this paper for a while ...its K&Company... wasn't sure what I was going to do with it...when I got out my Storybook cart I knew which paper I was going to use for sure!... this card is so vintage looking I think... I hope that you like it.... ~~Jeannie
CRICUT
Storybook
Butterfly Stamp cut @ 3 1/4 inches.
Stamp shadow cut at 3 1/2 inches.
Corner flourish cut @ 4 inches.
Inside butterfly cut @ 1 1/2 inches.
The true color is the brighter lighter pictures.
close up
 close up
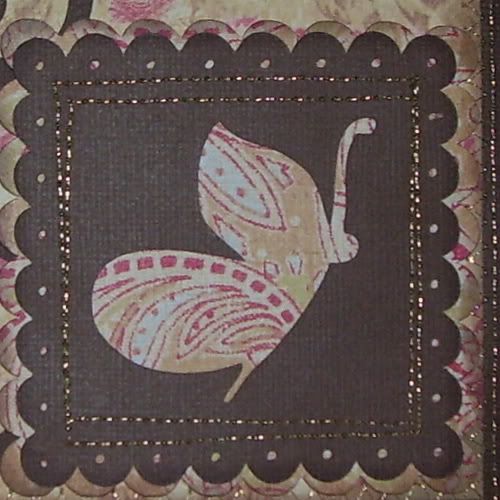 inside
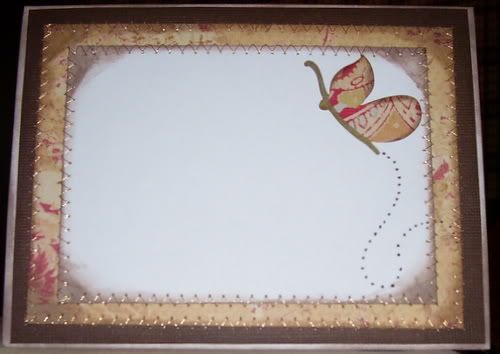 close up inside
A Place For My Cards
http://aplacefo
http://aplacefo
CRICUT
George
Heart cut @ 1 1/2 inch.
Storybook
Accent Frame cut @ 2 inches... (its the accent frame from the number 7 key).
Oppsites Attract
"Thanks" cut @ 1 1/4 inches with the upright feature.
CUTTLEBUG
Swiss Dots Folder
Frills Boarder Folder
MARTHA STEWART
Butterfly Punch
I know I use this alot...but when a card need a little something else this always seems to work!
Lots of inking with brown ink.


A Place For My Cards
http://aplacefo
http://aplacefo
CRICUT
GeorgeHearts cut @ 2 3/4 inches.
Oppsited Attract"love" cut @ 1 1/4 inches on the upright feature.
CUTTLE BUG
Stylized Flowers FolderOn the inside white square I embossed the corner with the same folder.
MARTHA STEWART
Butter Fly PunchI used lots of brown ink and red foam balls cut in half... from the floral dept.
(thank you Jeannene)
I learned from Shelly to make the butterfly lines... she is such a card brain.


You might also like:
Labels: butterfly card
A Place For My Cards
http://aplacefo
http://aplacefo
CRICUT
Campin OutTrees cut @ 1 3/4 inches... 4 times each on regular cut and shift.
Fish cut @ 1 1/4 inch on regular cut, shift cut and shadow blackout then mounted with pop-dots.
Lots of inking! Old World Stack paper.
Campin OutTrees cut @ 1 3/4 inches... 4 times each on regular cut and shift.
Fish cut @ 1 1/4 inch on regular cut, shift cut and shadow blackout then mounted with pop-dots.
Lots of inking! Old World Stack paper.


You might also like:
A Place For My Cards
http://aplacefo
http://aplacefo
CRICUT
Storybook
Flower accent cut @ 2 inches... three times for each card.
Accent frame cut @ 2 1/2 inches one for each card.
Wild Card
Cup cake cut @ 3 inches the bottom cut once and the icing 2 times for each card.
I like having more icing...more icing is always better don't you think!?!
CUTTLEBUG
With Love Border Folder
RAINDOTS
Lots of inking... and them some more inking.


A Place For My Cards
http://aplacefo
http://aplacefo
CRICUT
Paper Doll Dress UpDoll and all her parts cut @ 2 3/4 inches...
I was thinking I cut it at 3 3/4 inches.... but got confused later...so if 2 3/4 doesn't work for you its the larger size after all.Wagon cut @ 4 1/2 inches... 2 times once in red once in black.ZoobaloosGrass cut @ 1 1/4 inches on real dial size 2 times.MARTHA STEWART
Butterfly Punch
PEACHY KEEN FACE STAMP
When I cut the legs out I trimmed off the shoe part and rounded each end...to look like the top of the knee... I took the black circles from the center of the wagon and trimmed off the top to make a sort of oval for the shoes.... to make them look like you were looking at them from the front ... cut these twice so that I could pop dot the top layer.....I cut the arms from the body so that I could position them the way that I wanted them.... and of course I cut the legs from the body.... I set the dress at the top of the wagon then added the legs to create the sitting effect!!
I kept thinking...these carts are all about paper piecing.... and I need to utilize that fact to the fullest of my ability... it would give me so many more options... it just got me all excited!


A Place For My Cards
http://aplacefo
http://aplacefo
CRICUT
Pooh & FriendsDragonfly cut @ 2 inches.
CUTTLEBUG FOLDERS
Frills Folder
Swiss Dot Folder
D'vine Swirl
Pooh & FriendsDragonfly cut @ 2 inches.
CUTTLEBUG FOLDERS
Frills Folder
Swiss Dot Folder
D'vine Swirl


A Place For My Cards
http://aplacefo
http://aplacefo
CARD
CRICUT
Wedding Solutions
Hearts cut @ 2 inches on regular cut, layer cut and shadow blackout ... they are on the envelope, the outside of the card and the inside of the card.
CUTTLEBUGDe vine Swirls embossing folder used on the top of the card.
Just My Type border embossing folders used on the bottom of the card.
Scor-it used for the embossed lines.
Computer generated names on the card and envelope.

A Place For My Cards
http://aplacefo
http://aplacefo
CRICUT
Plantin SchoolbookScalloped edges cut @ 3/4 inch.
New Arrival
Tub cut @ 1 3/4 inches 6 times... I put one tub directly on the background paper.. then cut the shower head away and popped the next tub up from the back tub... cut the legs off the top tub and added two more rims of the tub directly to that piece for depth and popped that tub up from the second tub.
Wedding Solutions
Tag cut at 2 1/2 and 2 3/4 inches.
Inked with Sage Shadow from Stampin UpAdded Rain Dots


A Place For My Cards
http://aplacefo
http://aplacefo
CRICUT
Graphically Speaking
Dream Big cut @ 5 1/2 inches.
Popped from the background.
Campin Out Solutions Cartridge
Cabin cut @ 2 1/4 inches.
Trees cut @ 3 1/4 inches.


You might also like:
CRICUT
Mickey & Friends
Movie real cut @ 2 1/4 inches once on blackout in white... and once on regular cut in black.
Pop-Corn is tree tops cut @ 1/2 and 3/4 inches on real dial size.
Mickey Fonts
Movie tickets cut @ 1 inch or 1 1/4 inch... forgot to write it down and now I don't remember for sure...sorry!
The words on the tickets are computer generated and the black frame was added at that time too.
Plantin Schoolbook
Numbers " 3, 2, 1, 0" cut @ 1 1/4 inches.
George
Red circle cut @ either 1 3/4 inches or 2 inches... (where was my mind that day!).
CUTTLEBUG
D'vine Swirls
Pop-Corn ran through the folders after I cut them.
This was such a fun use of my CB folder!!


You might also like:
I used the dress from Dreams Come True.
Stickles on the trim
A Making Memories rub-on
Inside is the cauldron from PDDU
Paper is a Halloween pack from Recollections.


Stickles on the trim
A Making Memories rub-on
Inside is the cauldron from PDDU
Paper is a Halloween pack from Recollections.


A Quick and Easy Male Birthday – Cards, Stamps and Paper Crafts at Splitcoaststampers.com
http://www.spli
http://www.spli
 |
| A Quick and Easy Male Birthday |
Birthday Card for my Husband – Cards, Stamps and Paper Crafts at Splitcoaststampers.com
http://www.spli
http://www.spli
|

Short Notice BIL Happy Birthday – Cards, Stamps and Paper Crafts at Splitcoaststampers.com
http://www.spli
http://www.spli
|

Stampin'Up! Demonstrator Stamping Videos Stamp Workshop Classes Scissor Charms Paper Crafts: May
http://www.dawn
http://www.dawn
More Butterflies
I am going to be so sad to see the Pink Pirouette " In color" retired this
Bridal Shower – Cards, Stamps and Paper Crafts at Splitcoaststampers.com
http://www.spli
http://www.spli
|

My Sentiments Exactly! - Creative Center
http://www.sent
http://www.sent
| |

My Sentiments Exactly! - Creative Center
http://www.sent
http://www.sent
| |

Scallop card and tag freebie! « Thefrugalcrafter’s Weblog
http://thefruga
http://thefruga
 Stamps: The Rubber Cafe. Download the card/tag template below
 Tone on Tone Wedding – Cards, Stamps and Paper Crafts at Splitcoaststampers.com
http://www.spli
http://www.spli
|

Bridal shower – Cards, Stamps and Paper Crafts at Splitcoaststampers.com
http://www.spli
http://www.spli
|

Angelosity
http://angelosi
http://angelosi

Angelosity
http://angelosi
http://angelosi
 It was a great way to showcase some
 Angelosity
http://angelosi
http://angelosi
 I know a LOT of graduates this year. Along with my own 2 college grads and 1 high school graduate, I needed 3 other cards to send. And since my schedule hasn't allowed me a lot of stamping time, I needed them to be on the simple side. So I came up with this easy money holder. I started with 9x12 piece of cardstock and just scored it at 3" intervals. Then I cut the last panel at a diagonal and folded it inward. (I didn't find it necessary to glue this panel down.)

#1949 * Mother's & Father's Day * Gallery - Heart Prints
http://www.hear
http://www.hear

#2849 * Congratulations * Gallery - Heart Prints
http://www.hear
http://www.hear

#2888 * Congratulations * Gallery - Heart Prints
http://www.hear
http://www.hear
| Current Card: #2888 (#13 of 18 in Congratulations) | Next Card (#2866) |
 |
 I embossed the vellum with the Birds and Swirls cuttlebug folder and the card took on a wedding look. So I cut some Whisper White card stock with my butterfly die and then used the letterpress technique to cut and ink my butterfly.
To finish off the card I used a lots of tags die to make the sentiment panel and punched a small butterfly .
I have a Whisper White panel on the inside of the card for messages.
Labels: butterfly card, cuttlebug, wedding card
#3569 * Congratulations * Gallery - Heart Prints
http://www.hear
http://www.hear

InkingOutOfTheBox.com - Natasha Zandbergen, Stampin Up! Demonstrator, Calgary, Alberta CANADA
http://inkingou
http://inkingou

I’ve loved this stamp set for many months but just treated myself with it this month! A
Chic Bridal Shower – Cards, Stamps and Paper Crafts at Splitcoaststampers.com
http://www.spli
http://www.spli
|

So Saffron Anniversary Card – Cards, Stamps and Paper Crafts at Splitcoaststampers.com
http://www.spli
http://www.spli
|

Lovey Dovey – Cards, Stamps and Paper Crafts at Splitcoaststampers.com
http://www.spli
http://www.spli
|

Wedding or Anniversary Texture – Cards, Stamps and Paper Crafts at Splitcoaststampers.com
http://www.spli
http://www.spli
|

Pat's corner of the world
http://patslitt
http://patslitt

Pat's corner of the world
http://patslitt
http://patslitt
Pat's corner of the world
http://patslitt
http://patslitt

Pat's corner of the world
http://patslitt
http://patslitt

Pat's corner of the world
http://patslitt
http://patslitt

Here is the layout:

Pat's corner of the world
http://patslitt
http://patslitt

Pat's corner of the world
http://patslitt
http://patslitt

Pat's corner of the world
http://patslitt
http://patslitt

Carla's.JPG (image)
http://2.bp.blo
http://2.bp.blo
![[Carla's.JPG]](https://blogger.googleusercontent.com/img/b/R29vZ2xl/AVvXsEhDPtyH_6Xnpno3SZMKZf3n6psbW8B73W_QzVMTeoc819mRe0MPHfjOYRns2Zv97-zsJLz1m3QOTKLmvB49pHXq4sMwPOSu7TSPlX9Lhn3FhfwdAFE-XlWSS57AFzWg9A_dyTuRQ69Puc4/s1600/Carla's.JPG)
Me, Myself, and my Stamps
http://memyself
http://memyself

Happiness Is. . .
http://happines
http://happines

 Beautiful Bride
 Stampin'Up! Demonstrator Stamping Videos Stamp Workshop Classes Scissor Charms Paper Crafts
http://dawnssta
http://dawnssta
More One Sheet Wonder samples ...
Here are more samples from that one sheet wonder I shared with you yesterday ..
gift set – Cards, Stamps and Paper Crafts at Splitcoaststampers.com
http://www.spli
http://www.spli
 |
| gift set |
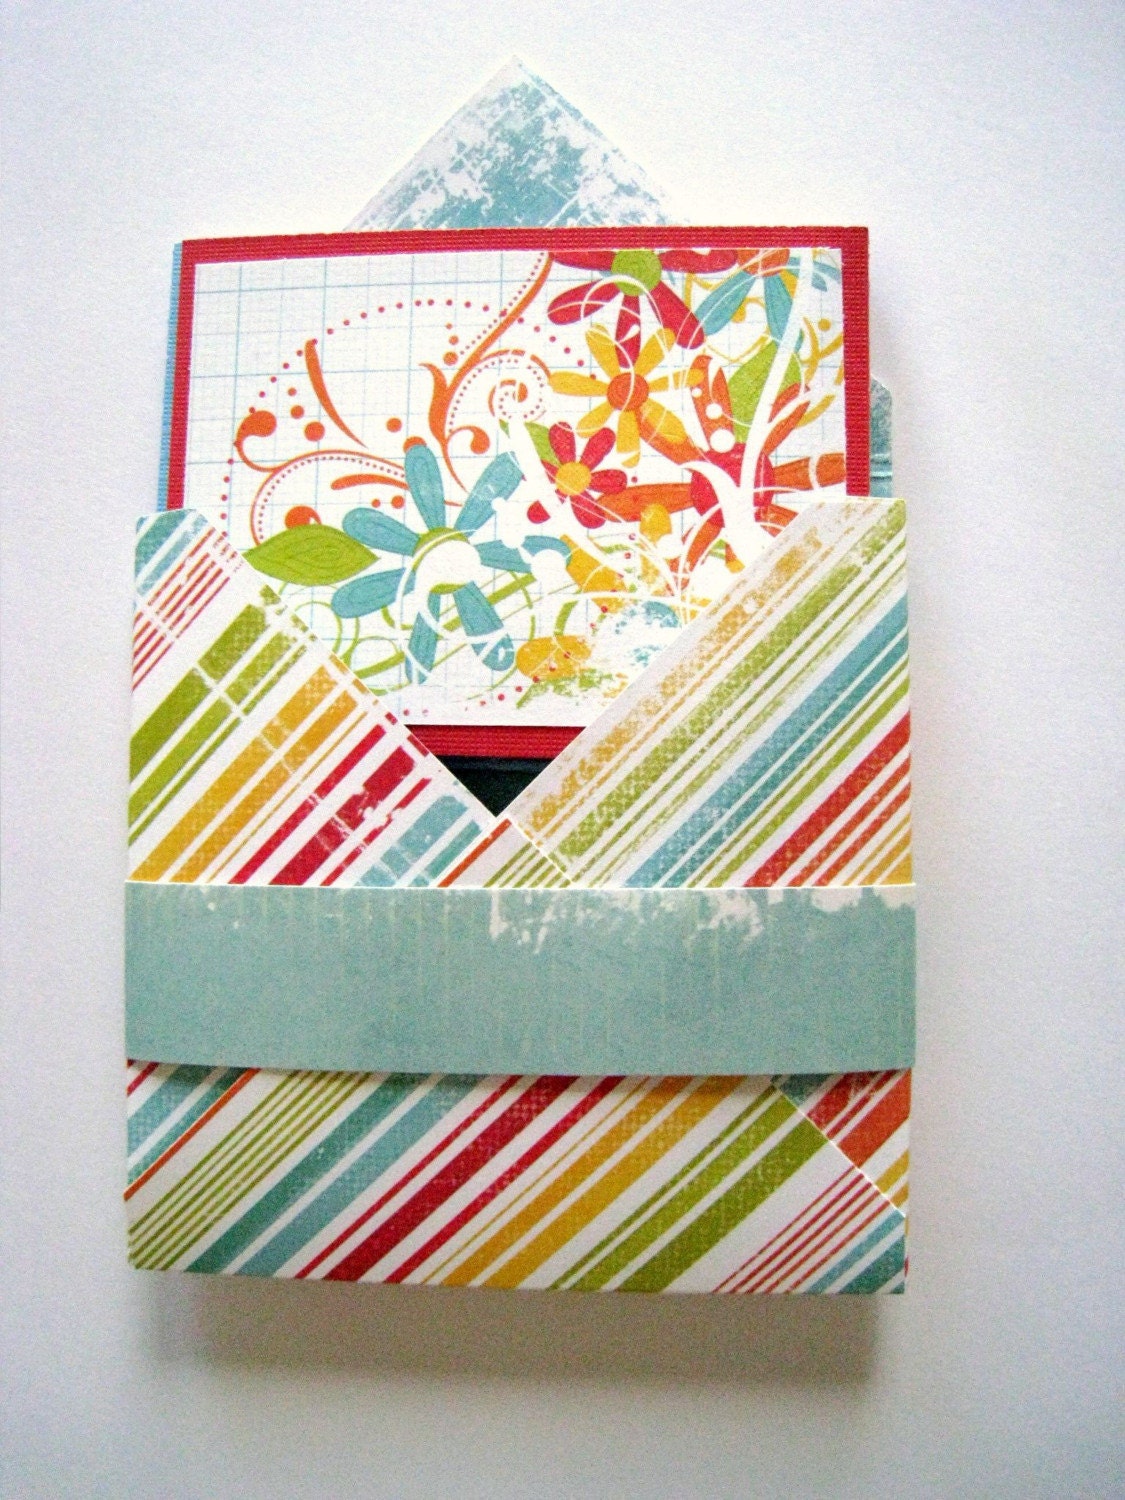
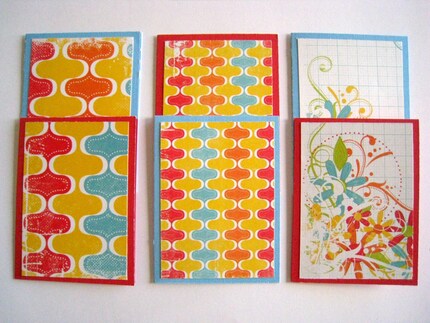
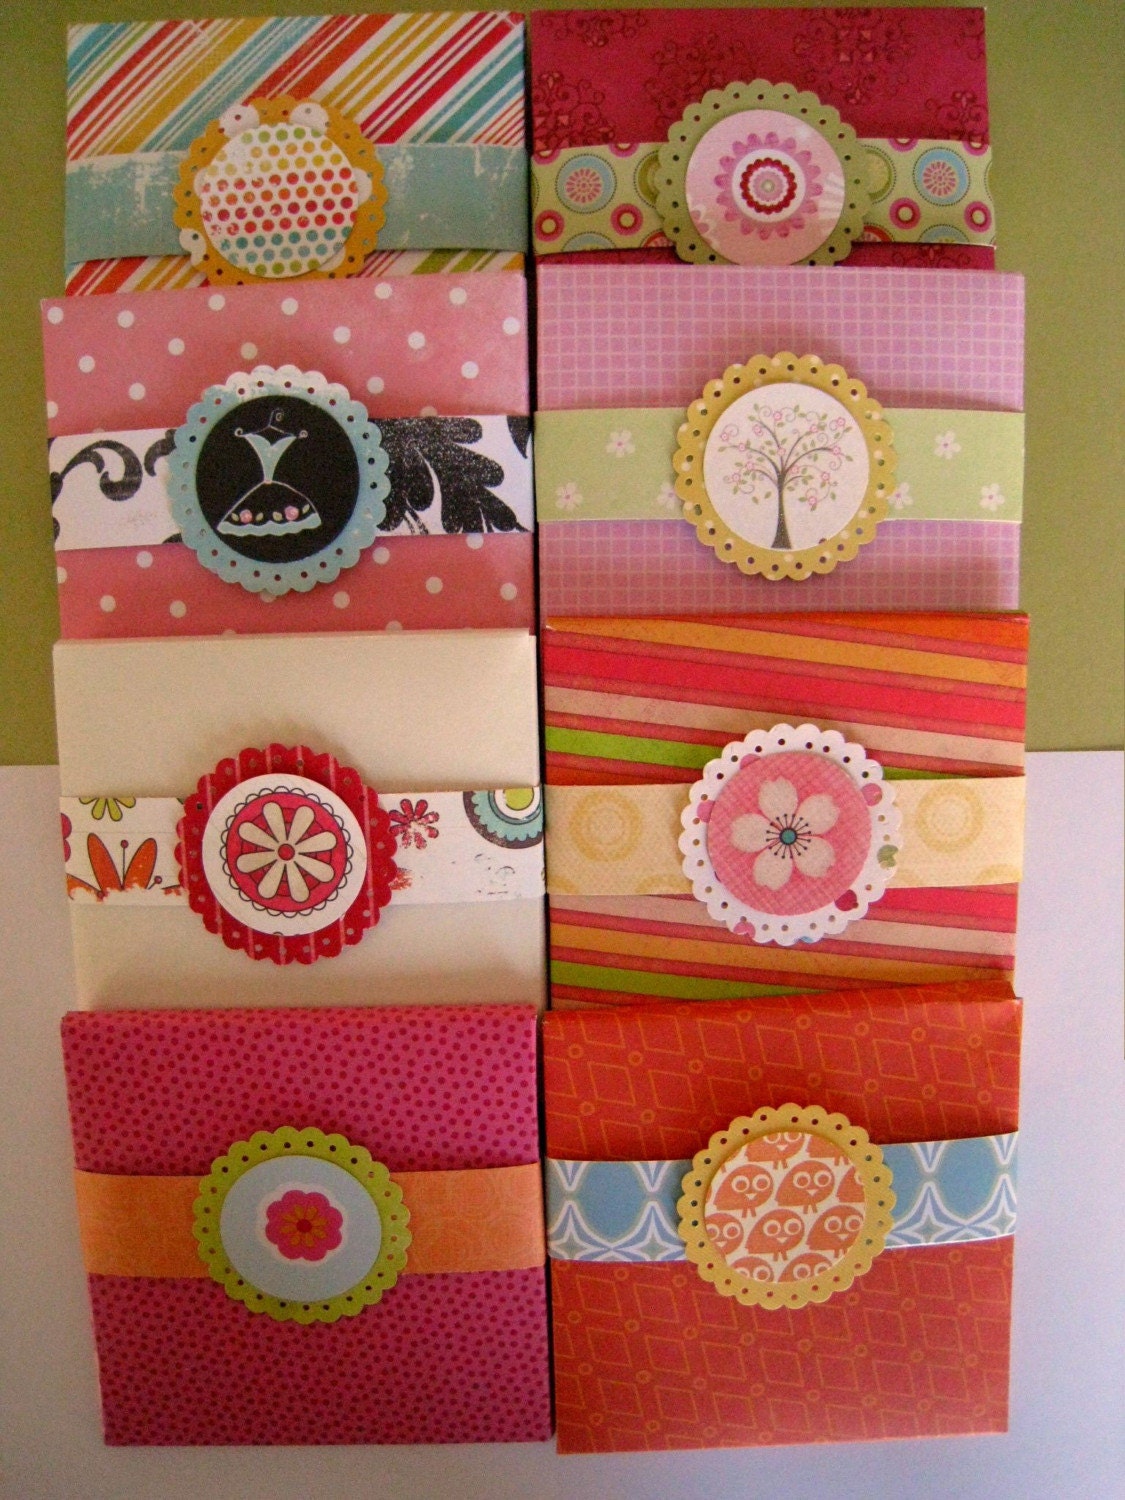
Groovy - Mini Notecard Set (6) with Storage Envelope Box by pinkpatrice on Etsy
http://www.etsy
http://www.etsy
Groovy - Mini Notecard Set (6) with Storage Envelope Box | ||||||||
 | ||||||||
|
the cuttlebug spot
http://thecuttl
http://thecuttl

the cuttlebug spot
http://thecuttl
http://thecuttl

the cuttlebug spot
http://thecuttl
http://thecuttl

the cuttlebug spot
http://thecuttl
http://thecuttl

Bronwyn

the cuttlebug spot
http://thecuttl
http://thecuttl

the cuttlebug spot
http://thecuttl
http://thecuttl


the cuttlebug spot
http://thecuttl
http://thecuttl


the cuttlebug spot
http://thecuttl
http://thecuttl


Lynn's Craft Blog
http://bfscraft
http://bfscraft


The papers I used for these cards are from Doodlebug Designs (some of them are glittered). I chalked the monkey to make it more furry looking. The cupcake card with the heart brad was designed to be a party invitation. To cover the black paper behind the monkey eyes and nose, I cut out another head and glued it on but you could glue on a whole monkey and that would make the card even sturdier. The cupcake card can be used to hold a gift card or money. I will be working on projects using the other cupcake dies and perhaps I will find the time to write up this monkey cupcake card project and put the instructions on our craft club website (www.bfcraftclub.com). (Since the monkey cupcake card is rather large, I used a 12x12 sheet of scrapbook paper to make an envelope.)
 Oh, don't forget this weekend is the time to use your 40% off coupon at Ben Franat Ben Franklin Crafts!
 klin
klin


the cuttlebug spot
http://thecuttl
http://thecuttl

the cuttlebug spot
http://thecuttl
http://thecuttl


 |
| 118th Luna-versary Card |
 Photo Details Photo Details | |||
| Poster: rdm
|
Sara's Creative Adventures: SCA3C20 My Card
http://sarastud
http://sarastud
SCA3C20 My Card

I love the color combo for this week so very yummy. IRL this card is beautiful, the scan takes so very much away from it.

Sara's Creative Adventures: Happy Birthday Cupcake
http://sarastud
http://sarastud
Happy Birthday Cupcake

I played along with the same cupcake and color combo as the card from Monday however, I did enlarge the cupcake and made one the focal point.
Product list...
SU Bold Brights Card stock and ink
SU word window punch
PTI Beyond Birthdays Stamp Set
Gemstones
Cricut
Cricut Doodle Charms Cartridge
White paint pen
dimensionals
Sweet Cakes

I so needed to get busy and make some boy and manly cards this fit the bill perfectly and I love the clean look of this card. Now I am set once again with birthday cards and it feels grrrrrreat!
Product list...
Cricut
Doodle Charms Cartridge
SU Bold Brights card stock and ink
dimensionals
PTI Beyond Birthdays stamp set
White paint pen
Isn't that a cool fold?! It looks much harder than it is! It is, in fact, one of the easiest fancy fold cards I have ever made.
 | Cuttlebug Baby Embossing Folders Set of 4 Cuttlebug Baby Die Cuts Pink Chalk for shading 2 shades of Pink Bazzill CS Pink Pindot Paper Scallop Scissors Needle Tool for Small Holes Various Pink Ribbons Paper Shapers PSPWP01 Circle Punch (1 3/4") 3D foam tape The card size is 5"x7" so I could accommodate all three circles. Lots more time consuming than I usually do, but I thought it turned out well. |
 | Cuttlebug Collage Embossing Folder Set Cuttlebug Just a Note Embossing Folder Set Various Colored Bazzill Paper Making Memories Springtime Large Circle Brads Needle Tool for small holes Chalk for color on Daisies Card measures 5.5" square and opens at top |
 | Cuttlebug It's a Boy Embossing Folders Cuttlebug Tiny Tags Dies Bazzill Cardstock 1 3/4" circle punch 2" circles from Cricut Small Colored Safety Pins Scrapbook Paper Card measures 5"x7" The circles are set with 2 layers of 3D foam tape. |
 | Tall card that fits a business sized envelope. Embossed circles are from Cuttlebug. Snowflake is Cuttlebug die. Saying is from Stampendous. I cut the square windows with a paper punch. |
 | Penny Black: 3464F Basket Case Magic Colored Pencil Technique a.k.a. Gamsol Magic Baby Cuttlebug Embossing Folder Hand doodling Nestabilities Classic Scallop Circle Die |
 | Cuttlebug: Baby Embossing Folder Swiss Dots Embossing Folder Scor-Pal Inkadinkado: 95319-N Stork Congratulations (now discontinued) Stickles Magic Colored Pencil a.k.a. Gamsol Magic Cloud 9 Design Rain Dot Hearts |
 | This is a total copy of a card that Sharon Johnson did this week. She does exquisite work. Mine measures 4.5" x 6" with rounded bottom corners. Birds and Swirls Cuttlbug Embossing Folder Nestabilities |
 | A4 Card 3.5" x 5" A Muse: 3-1074D Hailey*s Snowman 8-8363B Frosty Greetings Snowflakes Cuttlebug Embossing Folder- I cut this folder in half to get the size I used on this card Swiss Dots Cuttlebug Embossing Folder Stickles Nestabilities Scor-Pal- 2 more parallel lines are also on the right side of the snowflake embossing that didn*t snow on the photo. Cloud 9 Blue Rain Dots and clear heart |
 | A4 Card 3.5" x 5" Stylized Flower Cuttlebug Embossing Folder CUT in half Check the Cuttlebug Tutorial for cutting instructions A Muse: Just a Little Note Scor-Pal Stickles Doodlebug Designs Flocked Brad- I added a tiny touch of brown prismacolor pencil. |
 | A4 Card 3 1/2" x 5" Cuttlebug: With Love Set With Gratitude Die/Folder Combo Hero Arts: CL181 Clear Messages Set Scor-Pal Cloud 9 Rain Dot Hearts |
 | A2 Card 4.25" x 5.5" Cuttlebug: With Love Embossing Folder Set Scor-Pal Scallop Scissors |
 | A6 4.5" x 6" Cuttlebug Folders: Pumpkin Harvest Pumpkin Spice Die/Folder Combo Hero Arts: CL119 Clear Design Happy Thanks Clear Set Small twigs from a wreath for the word part. I was trying to find raffia, but used this instead. Pastel Chalk Pencils for color on the embossed image |
 | Diorama Card Measures 4.25" x 5.5" when flattened for mailing Cut 2 pieces of cardstock at 4.25" x 5.5" Score 2 lines, 1/2" each, on both short end of each piece. Lighter colors look better on the back piece. Cut a 3" circle out of the front of the top layer piece. Run both pieces thru the cuttlebug using the Swiss Dots folder. Stamp and decorate the design you wish and cut that out with a 3" circle. That will go on the inside piece of paper. I used 3D foam tape on mine. You can also just stamp on the back piece and color if you use white CS, but I wanted to use the swiss dot folder. Fold the 2 score lines as shown in next the picture and run a strip of glue tape along the outermost fold lines. Stick the 2 layers of CS together. Cuttlebug:
|
 | A2 Card 4.25" x 5.5" Cuttlebug:
Scor-Pal Pastel Pencils for coloring on Candlelight Beckett Expression 80 lb cardstock (looks pink in the photo) |
 | Card size is 4 3/4" x 5 5/8" Turned out to be an odd size due to the even measurements of the 4 strips. Next time I will do something different for sizing. Cuttlebug:
|
 | This uses an acetate candy bag, but anything will do. I did not use googlie eyes on this because of a choking hazard for young ones. I am making this for Emily's day care class/teachers. I used a white gel pen and then a black sharpie. Saw this idea on SCS by wildbasket. Cuttlebug:
http://www.heartprints.net/gallery/candybgx/card/3236/ |
 | A2 Card Cuttlebug:
|
 | A2 Card This is a blatant copy of a card made by Sharon Johnston. Her work is just gorgeous. It took me a while to figure out how she did the bow, but I think I got it. Here is her gallery: http://notimetostamp.blogs.splitcoaststampers.com/ Cuttlebug:
|
 | A10 Card Cuttlebug
|
 | Small Gift Bag Directions Shown here: http://www.stampingvideos.com/ Scroll down to the Mini Gift Bag Cuttlebug:
|
 | A2 Card This card was inspired by Suzy-S1104 on SCS. LOVED her card! Cuttlebug:
Hero Arts
Adorable Font Size 18 |
 | 4" circle coaster Gift Card Holder Gold shiny cardstock Cut the circle first, then emboss. Cuttlebug:
McGill Punches:
Stardust Stickles The back part has a cut circle that has the top third cut off. Glue that to the back of the coaster along the curved edge so you can slip the gift card inside |
 | A2 Card Gold heat embossing on White Linen paper. The Beckett does not take the embossing ink very well, so that is the reason for the Linen. Besides, linen is so luxurious for the holidays. Gold metallic cardstock layer underneath. Cuttlebug:
|
 | A2 Card Cuttlebug:
5mm flat pearl Silver metallic cardstock for the unerneath layer. Stardust Stickles |
 A2
A2Cuttebug:
- Swiss Dots Folder
- Snowflakes Folder
- Snowflake #2 Die
- Ornament Die/Folder
Hero Arts:
- CL108 Holiday Tags Clear Set (words)
- 5mm and 3mm flat pearls
Stardust Stickles
 | A2 Card Cuttlebug:
Stardust Stickles 5mm Flat pearl |
 | A2 Card Cuttlebug:
|
 | A2 Diorama Card- I was awake at 4:30 this morning, having a hard time going back to sleep because I kept thinking about this card. Third try, I think I finally got it. First two times, I had glitter on the houses and then on the foreground. Finally made it plain. Instructions are: Cut 2 pieces of cardstock at 4.25" x 5.5" Score 2 lines, 1/2" each, on both short end of each piece. Top view card is shown on #2830. I can't get it to link properly. Cut a 3" circle out of the front of the top layer piece. Run it thru the cuttlebug using the Snowflakes folder. Emboss the Winter House folder on the back panel. Fold the 2 score lines as shown and run a strip of glue tape along the outermost fold lines. Stick the 2 layers of CS together. Cuttlebug:
3mm and 5mm flat pearls Nestabilities |
 | A10 Cuttlebug:
|
 | A2 This card was inspired by one from Luanne Ford on SCS. Here is hers http://www.splitcoaststampers.com/gallery/photo/1140175?limit=last1 Cuttlebug:
|
 | A7 Gift Card Holder Penny Black:
Stardust Stickles |
 | A7 3D pop dots between the snowflakes. Cuttlebug:
5mm flat pearl 3mm pearl |
 | #10 Card Cuttlebug:
Marvy:
Glossy Accents Diamond Dust Glitter Scor-Pal |
 | A2 card Cuttlebug:
EK Success
|
 | A2 Cuttlebug:
Glossy Accents and Diamond Dust Glitter Marvy:
|
 | A2 Cuttlebug:
|
 | Ghirardelli Chocolate Box, Holds 3 chocolates Template found here: http://www.splitcoaststampers.com/resources/tutorials/ghirardellibox Cuttlebug:
|
 | A2 This was double embossed. I used the swiss dots folder first and then embossed the Stylized Flower right over the top of the first one. I used Beckett Expression Radiance 80 lb cardstock. Cuttlebug:
|
 | A2 Cuttlebug:
Words are hand written Hero Arts
|
 | A2 Cuttlebug:
Scallop scissors |
 | #10 Business Size. I embossed the folder design 3 times on the front of the single panel, adjusting the design as needed to fit the size of the panel. Cuttlebug:
|
 | 04/14/09
|
 | 04/23/09
|

congrats folder

 | 05/03/09
|
 | 05/04/09
|
 | 05/12/09
|
 | 05/18/09
|
 | 05/19/09
|
 | 05/26/09
|
 | 05/30/09
|
 | 06/08/09
|
 | 06/10/09
|
 | 06/12/09
|

Cuttlebug:
Martha Stewart:
- Birds & Swirls Folder
- Heart #1 2 Step Die
3mm flat pearls
- Scalloped holes border punch
Stardust Stickles on the die cut hearts

Paper, Scissors, Ink: Cricut creations
http://www.pape
http://www.pape
Easter Egg Tri-fold card


I just love Easter eggs, and I just ordered a new stamp set from stampin up that has an "have an egg-cellent Easter" stamp in it...so I needed a card to go with it. This was done with Plantin Schoolbook and doodlecharms (DS). The first time I did this I did it with blue paper (so the blue sky would show through the eggs), then layerd the grass on top, and the eggs in cardstock. The second time I did it in green (so I didn't have to layer grass) then used a white insert and sponged some blue on the top for sky. The third time, I just used white, then sponged on both the grass and the sky and used pattered paper for the eggs. I'm not sure which method is best, just whatever your in the mood for I guess, so all parts are included in the file. Try it every way and see what works best for you. That cute little scalloped oval is also a new punch from Stampin Up - it will be availible April 1st. If you have a hard time keeping it closed (as is often a problem with trifolds), try tucking one or two strands of grass behind the eggs (see second photo) and that should keep it down. Finished size of this card is standard A2 (4.25 by 5.5 inches). Click HERE to see my other Easter projects
Now get crakin' on those cards! hehehe:)
Gerbera Daisys - Sure-Cuts-A-Lot

With half a sheet of paper and a few minutes work, you can make these great gerbera daisys. Here's how:
Use the file below with sure cuts a lot (this is a sure cuts a lot file, NOT DS) and cut your flowers -I have reposted this as a svg file. After importing, size in SCAL so that the largest flower is about 3.5 inches in diameter.
Use the file below with sure cuts a lot (this is a sure cuts a lot file, NOT DS) and cut your flowers -I have reposted this as a svg file. After importing, size in SCAL so that the largest flower is about 3.5 inches in diameter.
If that one doesn't work for you, here is a new one:
Using inks or chalks, darken your edges of the flowers - getting darker as you do each smaller size. The backs of the flowers will show, so do both sides.

Lay flowers on a cushioned surface (I use a sheet of kids craft foam) and a stylus, make a crease down the center of each petal on the 4 largest flowers. This will cause them to curve a bit in and up.

Use a toothpick to wrap the petals of the smaller 4 flowers.

Layer the flowers with a small dot of glue between each layer.

Use your flowers to decorate cards, gifts, photos or attach to a stem to with florist tape for an arrangement.

My C.A.S.E. Studies: Cuttlebug embossing folders
http://mycasest
http://mycasest
Birthday Shaker Card
 We're going to a first birthday party today so I needed a cute birthday card. I remembered I had this Darcie's stamp that would make a great shaker so I dug it out of storage and came up with this:
I popped up all the pink frosting parts on foam tape and there's a bit of yellow stickles on the candle for sparkle. I diecut the number 1 out of medium weight chipboard and also white cardstock and glued them together. I then stamped it with the top frosting portion of the same birthday cake stamp and colored with Copics to match.
 A little added touch: If you look at the close-up shot, you can see I colored the edges of the craft foam layer with Copics so that it wouldn't be stark white.
I totally CASE'd the design from a card by Anne Sanborn on p. 128 of the April 2008 issue of Cards magazine. The stamp was a little too tall for a standard 1/4 sheet card so I had to make it extra tall and the design by Anne was just perfect! When I was planning the card, I was going to change up more of the elements, but as I was creating, I just loved her card too much to change it! Thanks so much to Anne for this wonderful design!!
My C.A.S.E. Studies: Cuttlebug embossing folders
http://mycasest
http://mycasest
You're Amazing
 Today's card was made for 2 different challenges: the Amy R. Friday Sketch #26 and the Verve Stamps August Project Parade which is to use pink and brown.
I used one of my new Verve sets, Artful Elegance, for the flower center and the smaller brown strip, and then I embossed the bigger brown piece with the D'Vine Swirls embossing folder. I traced over the embossed Swirls with a clear glitter pen and also drew in some lines on the Prima flower for just a bit of sparkle.
My C.A.S.E. Studies: Cuttlebug embossing folders
http://mycasest
http://mycasest
Witchybella
 Today's card was made with Jen's Sketch For You To Try. There is also a prize up for grabs if you use a Bella, so I took the opportunity to ink up my Witchybella for the first time.
The ribbon is velvet ric-rac from May Arts, the flowers are from Prima, and the centers are faux drops from Michael's that I covered with orange glitter glue. TFL!
My C.A.S.E. Studies: Cuttlebug embossing folders
http://mycasest
http://mycasest
 As soon as I saw this card, I knew I wanted to C.A.S.E. it. I just love all the embossing and tone on tone, and I'm such a sucker for hearts that this card spoke to me! I also love all the backgrounds where Sue combines the embossing with scored lines so I decided to do that as well and here's my finis
Lost in Paper Scraps: TPE Challenge #16
http://lostinpa
http://lostinpa
Here is my card using her FABULOUS sketch:
used my "Walk in the Garden" cart. with my Cricut for the flower petals.
![[dad-charm.jpg]](https://blogger.googleusercontent.com/img/b/R29vZ2xl/AVvXsEgtLjwhyphenhyphenUqCoxReCetjcFcMGOj_wYESQcICb-4due6oR_LGMBqGQoCqjR6pF4WYIpUIZJl7CIJEHvBSAz18OLFAA5iUYioKWcLbr-h12Kp0bc5oAGkvt0WQjyaYIWr7mNrVJ56NigUoEltr/s1600/dad-charm.jpg)

Today I made a quick card using the filigree file I shared earlier this year. (Here is a LINK to that post in case you missed it). It is a good idea to cut several of these card toppers at a time and then you will have them handy for when you want to make a card in a hurry!
The topper was cut in plain white cardstock and I used the "stylized flowers" Cuttlebug folder to emboss the plain area above the filigree.

I "fussy embossed" - carefully lining up the edges of the topper in the folder to try to have the embossing connect with the filigree design.
The butterfly was a spare from my very first use of the Storybook cartridge (when it had not been added to Design Studio and I just wanted to cut a sheet or two of images to try them out). I added Stickles to define the body and antennae and attached the butterfly to the card using foam squares for dimension.
Labels: butterfly card
2008 | Andrea Walford, Stampin' Up! Demonstrator, Sunny Stampin' Blog, Canada - Part 2
http://andreawa
http://andreawa

Thank heavens I had a back-up project for today! I WAS going to post a new video that I’ve been working on but for some reason, even though it looks fine when I play it on my laptop, when I upload it to You Tube, it’s blurry. And here I thought I had videos all figured out! NOT! Since I’ve tried to fix it and upload it twice already and it’s taken a whopping 2 hours each time, I figured I’d set it aside for now and try and tackle it tomorrow. So, today’s project is a super quick, super easy Christmas card.
I have a lot of the large snowflakes from the Little Felt Flurries collection left, so I was trying to figure out another easy way to use them. I’d also been wanting to use my background stamp Bella Toile, so, I put together a card using both these elements.
Step 1: Stamp your Bella Toile Background stamp in silver ink onto a 3 3/4″ x 5″ piece of Whisper White CS. Set aside to dry.
Step 2: Mat your Whisper White CS from Step 1 onto a piece of Brushed Silver CS that is 4″ x 51/4″. Take a 6″ piece of Double-Stitched Baja Breeze Ribbon and stretch it across the center of the white CS piece. Bring the ends of the ribbon around back and stick down using Snail adhesive.
Step 3: Take your felt snowflake and position it where you want it to be on your card front. Pierce a hole through the snowflake and all the way through both layers of CS using your paper piercer. Place a filigree brad in the center of the snowflake and then insert a large clear rhinestone brad through all layers and open the prongs at the back of the brushed silver CS.
Step 4: Center and mount your Brushed Silver CS onto your Baja Breeze card front.
Step 5: Stamp your greeting in the bottom left corner (I used the Merry Christmas from the Holidays and Wishes stamp set) in Black Staz On ink. You have to use Staz On, because regular ink will not stick to the silver ink.
2008 | Andrea Walford, Stampin' Up! Demonstrator, Sunny Stampin' Blog, Canada - Part 12
http://andreawa
http://andreawa

Yes I do realize it’s actually Friday and not Thursday *lol*! I made this set last weekend intending to share it with you all on Thursday, but had some issues with photographing the set, and wasn’t able to get the pictures taken and edited in time. Since I know you all look forward to my Template Thursday posts, I decided to share it with you anyways – just one day late.
I had a lot of fun creating this set. Since Stampin’ Up! released the Fresh Cuts Notes in June (which are 4" x 4" cards), I’ve really fallen in love with creating 4" x 4" cards – especially after I stumbled across THIS TUTORIAL by Cindy Lawrence, which showed how to make envelopes for 4" x 4" cards using our Medium Whisper White envelopes and designer paper (DP). So I pulled out my new Flower Fancy stamp set & Georgia Peach DP, and set about creating a set of six 4" x 4" cards (2 of each of the ones shown), 6 matching envelopes, and a cute box to hold them in. Notice the large half-back pearl in the center of the flowers. Those come from Stampin’ Up!’s Pretties Kit. Because they are so large, I haven’t used them as much as the other elements in the Pretties Kit, and had a lot left over. I was really pleased they fit in the center of the flowers so well, because it gave me the perfect opportunity to use them up. Here’s a close-up of the box:

Here’s a top view of the box:

I loved the way the cards and matching envelopes looked in the box, so I opted not to put a lid on it. Instead, I thought it would make a really pretty gift wrapped in cellophane and tied with our 1 1/4" pink pirouette grosgrain ribbon.
You can download a copy of the template I created for this box here.
Stamps: Flower Fancy, Fundamental Phrases, Boho BloomsStep 1: Download your template, follow the cutting, scoring and folding directions.
Ink: Pink Pirouette, Regal Rose, So Saffron, Basic Black
Paper: 12" x 12" pink pirouette CS, 8 1/2" x 11" Pink Pirouette, Regal Rose, So Saffron, Whisper White CS, Georgia Peach DP
Accessories: Regal Rose 5/8" grosgrain ribbon, Pretties Kit, mini glue dots, sticky strip

Step 2: Lay your CS piece face up. Stamp and decorate the front of your box. Place sticky strip on the two middle flaps as shown.

Step 3: Peel the red backing off of the sticky strip, bring up the back of the box, and stick the small flaps to the inside of the larger flaps. Place sticky strip along the inside of the large flaps (the ones on the box front piece).

Step 4: Peel the backing off of the sticky strip, bring up the box front and stick the large flaps to the outside of the side flaps of the box back piece. Your box is now assembled, finish decorating it as desired.
Quick and easy isn’t it? In order to create the envelopes I followed Cindy’s tutorial and first took one of our medium whisper white envelopes and sealed it shut. The envelopes are 4 3/8" high, so where you see the black line in the picture below, I cut the envelope using my tabletop paper cutter.

I then took a piece of DP that was 2 1/2" x 4 3/8", and scored it at 1"., I then glued the 1" flap to the envelope as shown in the picture below, and rounded the corners of the flap. It’s kind of hard to see in the picture below, but the "seam" (where I sealed the flap of the envelope down) is at the back of the envelopes.

Here’s a close-up of the finished envelope and one of the cards:

Unfortunately, Stampin’ Up! doesn’t carry their envelope glue anymore, which means to seal the envelope you’d have to use some other kind of double-sided adhesive. Also, please note that you cannot mail 4" x 4" in either the US or Canada, instead you’d have to give it someone in person or with a gift.
2009 | Andrea Walford, Stampin' Up! Demonstrator, Sunny Stampin' Blog, Canada - Part 11
http://andreawa
http://andreawa

I saw a card today that was just beautiful. It was this same color scheme and layout but used non-Stampin’ Up! stuff. Now most annoyingly I can’t remember where I saw it. I wanted to show you how to achieve the same type of card using our own products. So all I can say is imagine this card using little flowers and leaves, stamped to make a designer type paper, and no stamping on the top. Oh and I think it had brads in it also. I know this sounds kind of dorky, but I blog so sporadically in the small half minutes of the day. I look at as much as I can in as little time as possible. The simple sad truth is that I don’t have lots of time to spare. So please remember that I am not claiming to have created this card and if I could just remember who I got the idea off of I would be more than happy to tell you.
All Supplies Stampin’ Up! unless otherwise noted
Stamps: Cheep Talk, Inspired by Nature, Quick Thinking (retired)
Ink: Kiwi Kiss, Real Red, Basic Brown, Old Olive, Creamy Caramel Classic Ink, White Craft Ink
Paper: Kraft, Very Vanilla, Kiwi Kiss
Accessories: Mat Pack template for piercing, Real Red 5/8″ Grosgrain Ribbon, 2 way Glue pen, Dazzling Diamond glitter, Stampin Dimensionals, glue dots, Sewing Machine (not SU, with white thread)
Directions:
- Stamp red flowers on scrap of Vanilla CS, cut out and set aside.
- Ink up the grass stamp from Inspired by Nature with Kiwi Kiss and Old Olive, stamp on the Vanilla layer. Adhere down onto the Kraft card front.
- Sew a border all around (if your machine is anything like mine, don’t go on the bunny speed, I accidentaly raced past one of my corners)
- Stamp the little flower from Cheep Talk along the top of the Kraft layer
- Stamp your greeting, pierce along the the border of the greeting then sponge with Creamy Caramel
- Mat greeting on the Kiwi Kiss.
- Assemble your card. The bow is a faux bow which means I went around and adhered the ends under the greeting, then made a bow and attached it with glue dots.
2009 | Andrea Walford, Stampin' Up! Demonstrator, Sunny Stampin' Blog, Canada - Part 10
http://andreawa
http://andreawa

- You will need two Riding Hood Red Carousel Notes. One will be your card front, the second will be your card “back”. Take your first carousel note and dry emboss the little “dots” on each of the scallops using your empressor stylus and the Pick a Petal Classy Brass Template. Take your second carousel note and score it at about 2 1/2″. Fold along the score line and the stick the small “flap” you created to the back of the embossed carousel note. This creates your “card”.
- Cut a 5″ circle from So Saffron CS using your Circle Scissors Plus. Cut a 4 3/4″ circle from each of the two patterns of DP shown (the dotted and striped). Cut the circles in half and stick a half of each to the So Saffron CS circle. Save the other half for another card.
- Take a 5 3/4″ piece of Striped Baja Breeze grosgrain ribbon and lay it across the seam of the DP. Bring the ends of the ribbon around to the back of the So Saffron CS and stick down. Set aside for a moment.
- Take your chipboard number and pat your Encore Metallic Silver ink pad all over it, until the whole surface is covered. Let dry. Brush on Crystal Effects and then sprinkle on silver Chunky Glitter. Tap off the excess and then set aside to dry.
- Stamp your greeting just above the ribbon, towards the right of the card, in Basic Black ink.
- Stamp your Choo Choo train in Basic Black ink onto scraps of Whisper White CS. Cut out using your paper snips. Add a little Baja Breeze classic ink to the windows using your blender pen. Mount your train to the card front, towards the bottom edge of the ribbon, using Stampin’ Dimensionals.
- Mount your chipboard number to the card front using mini glue dots- position it so that it looks like it is “sitting” on the flat train car.
- Stamp the balloon from the Crazy for Cupcakes stamp set twice – once on a scrap of Slumber Party DP and once onto a scrap of So Saffron CS. I added a little So Saffron shading using the classic ink and a blender pen. Cut the balloons out using your paper snips. The blue balloon was mounted using Snail, the yellow balloon was mounted with a Stampin’ Dimensional.
- Pierce three holes along the bottom right of the card front using your paper piercer and foam mat. Insert three silver Jumbo 5/16″ brads. Take a 4″ piece of Baja Breeze Striped ribbon, tie it in a knot and stick it just above the brads using a mini glue dot.
- Mount your So Saffron CS circle to the Riding Hood Red Carousel Note card front. You’re done!
2009 | Andrea Walford, Stampin' Up! Demonstrator, Sunny Stampin' Blog, Canada - Part 9
http://andreawa
http://andreawa
Mar
26
Wagon Full of Fun Baby Card & Day 4 of the “Comment a Day” Contest
Posted by: Andrea | Comments (310)
Today I thought I’d share with you a card I made for my sister Soph to congratulate her on the birth of her brand new baby boy. I’ve barely spoken to her since my nephew was born as she’s right in the midst of the newborn craziness – if you’re a mom I’m sure you remember – endless feedings, sleepless nights – but of course, still loving every minute of it! Since she’s so busy I figure it’s probably safe to share the card with you since it’s highly unlikely she’s going to be doing much blog surfing. But, if she does see it, at least she’ll have something to look forward to *lol*! Here’s how I made this card:
- Cut a 4 1/4″ x 11″ piece of Bashful Blue CS, score it at 5 1/2″ and fold in half using your bone folder.
- You are now going to need a 3″ x 5 ” piece of Bashful Blue DP (the striped pattern) . Take a 5″ piece of ribbon, position it so that it is about 1″ up from the bottom of the DP, and stick the end of the ribbon at the back of the DP using Snail adhesive. Now stick you Bashful Blue DP to your card front being sure to leave about 1/4″ between the DP and the top, right and bottom edgesof the card front.
- Take a 1 1/2″ x 5 1/2″ piece of So Saffron CS and scallop the edge using the Scallop Edge punch. Stick it to a 2″ x 5 1/2″ piece of So Saffron DP, so that the scalloped border is about 1/4″ wide. Draw a small white dot in the center of each scallop using a Signo White Gel pen. Take another 5″ piece of Whisper White Organza Ribbon, and stick the end on the underside of the So Saffron DP, again about 1″ up from the bottom edge.
- Pierce two holes in the top left of the So Saffron DP and insert two of the large square light blue rhinestone brads. Stick the So Saffron DP to the card front. Tie the Whisper White Organza ribbon ends in a bow and trim the ends.
- Take the scalloped frame from the On Board Essentials chipboard collection and cover it in Bashful Blue Craft ink. While the ink is still wet, sprinkle on Heat and Stick powder. Heat it with your heat tool until it melts and then sprinkle on light blue Fine Cosmo glitter. Heat set the glitter.
- Take a 2 1/4″ x 2 1/4″ square of So Saffron DP (the pattern I used is actually some left over I had from the Sunshine Garden Simply Scrappin’ Kit, but you could use any So Saffron DP pattern). Stamp “it’s a boy” from the Nursery Necessities stamp set in Basic Black ink onto the DP. Attach the DP to the chipboard frame using mini glue dots. Mount the chipboard frame to your card front using mini glue dots.
- Stamp the duck from the Wagon Full of Fun stamp set in Basic Black ink onto a scrap of Whisper White CS. Color it in using a blender pen and So Saffron, Bashful Blue and Tangerine Tango Classic ink. Cut it out using your paper snips.
- Mount the duck to the card front using Stampin’ Dimensionals. You’re done!
2009 | Andrea Walford, Stampin' Up! Demonstrator, Sunny Stampin' Blog, Canada - Part 9
http://andreawa
http://andreawa
Apr
07

As I was playing around with my Big Shot yesterday making my faux die-cut/laser cut paper, I stumbled across another way to use my Swirly Big Shot Decorative Strip die – I used the reverse cut (i.e. what’s left-over after you die cut the swirls) to create the look of waves in my baby card. Now I do have to say that this was an “Aha” moment for me and that I personally have not seen this die used in this way before, so I decided to take the liberty of naming this the “Reverse Die Cut Technique.”
That’s not to say someone else hasn’t already come up with this idea – you know the saying “there’s nothing truly original.” If you are reading this, and you have already used the die in this way, then please do leave me a comment and in the comment make sure you include a link to your card because I’d love to see it. If you’re like me, and using the reverse cut of this die is an “aha” moment for you too, I’d love to challenge you to make a card using this technique and leave me a comment with a direct link to your card or project in the comments section of this post. It’ doesn’t have to be with this die in particular, it can be with any die. Of those that participate in the challenge, I will randomly draw 5 names, and “feature you” on my blog. If you are one of the ones featured I will post your card (or other project), a small picture of you (if you want), a brief bio (whatever you want to tell others about you) and a link back to your blog. I will let random.org choose my winners on Friday, and then the winners will have one week to email me their info and I’ll feature the winners next Friday.
I’ve put together a couple of pictures to show you the first few steps of creating this card, as it’s kind of hard to explain using only words. The first thing I did was take a 2 1/2″ x 8 1/2″ strip of Pacific Point CS and lay it across the center of my Swirly Sizzlets Decorative Strip Die. I then die cut it using my Big Shot. The picture below shows you what you have when you separate the “swirls” from the reverse cuts:

To create my first card (I have another one to show you at the bottom of this post), I used the piece that’s shown on the bottom of the above picture. I took that piece and laid it across my 4″ x 5 1/4″ Bashful Blue CS piece (see picture below).

As you can see from the picture above, the blue reverse cut is bigger than the Bashful Blue CS piece. I deliberately made my strip bigger than necessary because I wanted to be able to play with the best placement of the reverse cut on my card. Once you have it positioned, stick it down, and then trim off the excess with your personal paper trimmer. To create the rest of my card I did the following:
- I positioned the rock-a-bye baby greeting just above the CS “waves” so that the curve of the greeting followed the curve of the “waves”, and stamped it in Pacific Point Classic ink.
- I took the boat image from Nursery Necessities, inked it up in Pacific Point ink and stamped it onto a piece of Pacific Point DP. I did this because I wanted a bit of the DP’s pattern to show through the ink and give the boat bottom some texture. I then trimmed out the boat with my paper snips, and stuck it onto the crest of the wave, just to the left of the greeting.
- I cleaned the boat image, inked it up in Versamark and stamped it onto a scrap of So Saffron DP. While the VersaMark was still wet, I used the shine of the ink to help guide me in cutting out the sail. I did the same thing for the smaller sail on a second pattern of DP. The large sail was mounted with a Stampin’ Dimensional and the small sail was stuck on using 2-way glue. To create the small Pumpkin Pie piece of sail, I stamped the boat stamp in VersaMark ink onto a piece of Pumpkin Pie CS, cut it out and stuck it on using 2-way glue.
- Once my image was complete, I matted the Bashful Blue CS onto a 4 1/8″ x 5 3/8″ piece of Pumpkin Pie CS. I punched two holes in the top right corner using my 1/16″ handheld circle punch, and inserted two small Pumpkin Pie corduroy brads.
- I matted the Pumpkin Pie CS onto my 4 1/4″ x 5 1/2″ So Saffron card front (created by folding a 5 1/2″ x 8 1/2″ piece of CS in half).
- Finally, I drew a thin line of Crystal Effects glue along the top edge of the waves, and added on some white Chunky Glitter from the Chunky Essentials Glitter Collection. That’s it.

I followed pretty much the same steps for the rest of the card and created the card you see below. Now I do have to say, of the two of them, my personal favourite is the first card.

2009 | Andrea Walford, Stampin' Up! Demonstrator, Sunny Stampin' Blog, Canada - Part 7
http://andreawa
http://andreawa


2009 | Andrea Walford, Stampin' Up! Demonstrator, Sunny Stampin' Blog, Canada - Part 7
http://andreawa
http://andreawa

2009 | Andrea Walford, Stampin' Up! Demonstrator, Sunny Stampin' Blog, Canada - Part 5
http://andreawa
http://andreawa

I’m baaack! Although it’s wonderful to be home and I missed our youngest two like crazy, it was so hard to leave our vacation behind and come back to reality. This trip we took was one that I had been dreaming about since before we became parents (over 10 years ago). As most of you know, life for us has been anything but ordinary for the last year – it’s been filled with lots of stress and many difficult situations. It felt so good to leave it all behind, even if only for a little while. The “magic of Disney” really touched me and our family – yes it was crazy busy and yes we were totally exhausted at the end of each day – but through it all we enjoyed every moment of every day. I feel mentally and emotionally relaxed and rejuvenated. I do have some pictures to share with you (I took about 1300 *lol*!) but will share them a few at a time over the next few weeks. First though I thought I’d share with you a card I created for my husband for Father’s Day. This card is quite a different style for me - I was trying to achieve a vintage feel for my card and was trying to combine elements in a way that I’ve never tried before. Here’s how I made the card:
- Cut a 3 1/4″ x 4 1/2″ piece of Kraft CS. Ink up the ”To Do List” side of the It’s a Plan background stamp in Creamy Caramel in and stamp it onto your piece of Kraft CS. Ink up the largest stamp from the Sense of Time stamp set (from the Occasions Mini Catalogue) in Creamy Caramel ink and stamp it in the top left corner of your Kraft CS piece.
- Ink up the small gears stamp in Chocolate Chip Classic ink, stamp it off on a scrap of paper (I use my grid paper) and then stamp it onto the Kraft CS. Repeat one or two more times. Ink up the “perfect” stamp from the Define your Life stamp set in Chocolate Chip ink, stamp it off once and then stamp it onto the Kraft CS in the top left corner, just inside the large clock stamp.
- Sponge around the edges of the Kraft CS with Creamy Caramel Classic ink and then use Stampin’ Up!’s cutter kit to distress around the edges of the Kraft CS. Mount the Kraft CS onto a 3 3/8″ x 4 5/8″ piece of Very Vanilla CS and then mount this onto a 3 5/8″ x 4 7/8″ piece of Chocolate Chp CS.
- Take the letter D from the On Board Lots of Letters chipboard collection and ink it up in Chocolate Chip craft ink. Set aside to dry. In the meantime, punch a label out of Creamy Caramel CS using the Curly Label punch. Sponge the edges with Chocolate Chip Classic ink. Take a 1/2″ Chocolate Chip library clip and clip it onto the top of the label you punched. Tie an 8″ piece of hemp twine in a bow around the top of the clip. Mount your chipboard letter onto the label with a couple of mini glue dots. Set aside for a moment.
- Punch out an oval from a scrap piece of Manchester DP using the Wide Oval Punch. Sponge the edges of the Oval with Creamy Caramel Classic ink, and then brush the edges onto a Chocolate Chip ink pad. Ink up the small gears stamp from the Sense of Time Stamp set in Chocolate Chip Classic ink. Stamp off once and then stamp it onto the wide oval. Repeat if desired.
- Die cut a letter ”a” and a letter “d” out of Chocolate Chip CS using your Big Shot and the Naturally Serif Sizzlit Decorative Strip die. Stick them to the wide oval using a 2-way glue pen.
- Die cut a swirl from Chocolate Chip CS using the Swirls Scribbles die and your Big Shot. Arrange and then stick to the back of the wide oval using 2-way glue. Now stick the wide oval to the bottom right of your Kraft CS piece. Stick the label with the letter “d” onto your card – to stick it I placed a mini glue dot on the underside of the clip and then two Stampin’ Dimensionals (one on top of the other) at the bottom (on the back) of the label.
- Now stick your matted Kraft CS piece to your Baja Breeze card front (a 4 1/4″ x 11″ piece of CS folded in half). You’re done! Below I have a close up of the label portion of the card:

2009 | Andrea Walford, Stampin' Up! Demonstrator, Sunny Stampin' Blog, Canada - Part 3
http://andreawa
http://andreawa
May
28

Don’t you just LOVE that saying? It’s so true that everything is so much better when you have good friends to share it with. Right now I’ve really been missing my best friend (my husband) – as he’s been away on a business trip. The days & nights seem so much longer when he’s away. Thankfully he’ll be home this evening 
Today’s card is another “evolved card” – my term for a card that just happens when you keep adding and adding to it. At each stage in the card’s evolution it was just ”missing something” – so I kept on adding elements until I was happy with it. Thank heaven’s for embellishments. As far as I’m concerned, every papercrafter’s ”toolbox” needs to have lots of accessories. The picture below shows you a close up of the card’s focal point:

Although I love what each accent brings to the card, I think my favourite aspects of this card are the butterfly & the greeting frame. I just love the way three small clear rhinestone brads together make such a beautiful body for the butterfly and I love the “sparkle” that the iridescent ice embossing powder (EP) brings to the frame.
Here’s how I made the card:
- Fold your 5 1/2″ x 8 1/2″ piece of Basic Grey CS in half with a bone folder creating your card base.
- Take the flourish from the Baroque Motifs Stamp set, ink it up in Basic Gray Classic ink and stamp it in the top left corner of a 3 7/8″ x 5 1/8″ piece of Walk in the Park DP. Center and mat the DP onto a 4″ x 5 1/4″ piece of Whisper White CS using Snail adhesive.
- Take a 2″ x 5 1/8″ piece of Basic Grey CS and using a Scallop Edge punch, scallop along one 5 1/8″ side. Then using a 1/8″ handheld hole punch, punch a hole in the middle of each scallop. I used the retired 1/8″ handheld circle punch but you could use the 1/8″ hole punch on the Crop-a-Dile.
- Mat a 1 1/2″ strip of Walk in the Park DP to the top portion of the scalloped Basic Grey CS. Set aside for a moment.
- Lay a 6″ piece of Baja Breeze satin ribbon from the Ribbon Originals Valet collection across the matted DP. Adhere the ends of the ribbon to the back of the CS using Snail adhesive. Take a 10″ piece of Baja Breeze Satin ribbon, slide it under the other piece of ribbon and then tie a bow. Slide the bow towards the right of the card.
- On a scrap piece of Whisper White CS stamp your frame image from the Gallery stamp set in Basic Gray Classic ink. With a pair of paper snips cut out the image leaving a slight white border around the entire image.
- Take your VersaMark pad and apply directly to the frame image.
- Sprinkle your image with Irridescent Ice Embossing Powder. Heat using your heat tool. If the image is too hard to hold you can apply Dotto to the back of the image and stick to a piece of grid paper then heat the image.
- Stamp your greeting from the Great Friend stamp set onto a scrap of Whisper White CS using Basic Grey Classic ink. Center the greeting in the 1 3/8″ circle punch and punch. Using a wedge from a Stampin’ Sponge, sponge the edge of the circle with Baja Breeze Classic ink.
- Using the Circle Scissors Plus and Glass mat cut a 1 1/2″ circle from a scrap piece of Cameo Coral CS. Mat your greeting to the Cameo Coral circle using Snail adhesive. Mat this image to the center of the frame using 2 Stampin’ Dimensionals. Mat the frame to the right side of card just over the ribbon with 4 Stampin’ Dimensionals.
- Stamp your butterfly image onto a scrap piece of Whisper White CS using Baja Breeze Classic ink. With a pair of paper snips cut around the image leaving a slight border. Crease the center of the butterfly to crete the illusion that it is flying and stick to the DP just in the bottom left corner of the frame image, using mini glue dots.
- Using a paper piercer pierce 3 holes in the center of the butterfly and stick a small clear Rhinestone brad through each.
- Stick the scalloped strip to the matted Cameo Coral-colored DP approximately 1/2″ up from the bottom of the card, using Snail adhesive. Center and stick that to the Basic Gray card base.
2009 | Andrea Walford, Stampin' Up! Demonstrator, Sunny Stampin' Blog, Canada - Part 3
http://andreawa
http://andreawa

TGIF! I am so happy that Friday is finally here. It’s been gray and rainy all day so I wanted to create something bright and cheerful. I had some scraps on my table left over from a project I created with the Hoppy Memories Simply Scrappin’ Kit. In the “slide show” below you can see some close-ups of the various elements on the card.

So what do you think of the slide show? It’s something new I’ve been playing with. I don’t have it totally down pat yet but I’m pretty excited about how it turned out for my first attempt. Anyways, here’s how I made my card:
- To create your card base, take a 5 1/4″ x 10 1/2″ piece of Real Red CS (I used some textured CS that I had left from another project). Fold it in half to create a 5 1/4″ x 5 1/4″ card base. Set aside for a moment.
- Take a 4 1/2″ x 4 1/2″ piece of striped DP (from the Hoppy Memories Simply Scrappin’ Kit) and mat it onto a 4 3/4″ x 4 3/4″ piece of Tempting Turqoise CS. Take a 4″ piece of Kiwi Kiss polka dot ribbon from the Ribbon Originals Pig Tail collection, lay it across the top right corner of the matted DP, bring the ends around back and stick downwith Snail.
- Pierce two holes in the top left corner with your 1/16″ handheld circle punch and insert two silver 5/16″ jumbo brads. Set aside for a moment.
- You are going to need two chipboard flowers – a large and a small from the On Board Batch of Blooms collection. I placed some Tombow Multi-purpose adhesive on the chipboard pieces and stuck them to the REVERSE side of the DP patterns I wanted to use. I then trim each one out with paper snips. I used VersaMark and clear embossing powder on the flowers.
- Punch a hole through the center of each flower using your Crop-a-Dile. Position your large flower towards the bottom right corner of your matted DP. Use a paper piercer and foam mat to pierce a hole at the center of the flower, through the matted DP. Insert a large Pumpkin Pie Corduroy button through the center of the flower (through both layers of paper as well) and open the prongs on the back.
- Take the smaller flower, insert a small Kiwi Kiss Corduroy button through the center and open the prongs at the back. Now mount your Kiwi Kiss flower to the card front using Stampin’ Dimensionals.
- Take the letters to spell ”hi” from On Board Timeless Type. Cover them in Basic Black Craft ink, sprinkle on Black EP and heat with heat tool. Stick your letters to the card front with mini glue dots.
- Finally, mount the matted DP to the Real Red card base with Stampin’ Dimensionals. You’re done!

I absolutely love the Tri-Shutter fold card that was posted on Splitcoast by sheltyx1 in a challenge. This uses a 5-1/2 X 12 " piece of cardstock scored at 2", 4", 8" and 10".


Cuts are made horizontally 1-1/2" from the top and bottom edges from the 2" score line to the 10" score line. The top and bottom rows fold peak, valley, peak, valley. The middle row is folded valley, peak, valley, peak. These sold on Sunday at the tasting party like hotcakes. Now I need to make some more.
Amethystcat made a nice rough sketch on her blog that shows how to cut the DSP panels out of 1 8X8" sheet of paper.
Looks something like this (picture not to scale):

Punch Baby Bug Tutorial
By Andrea
Well I am so sorry ladies for having this post up so late. I was working on the Punch Bear Tutorial and realized that there was a couple of problems with the document I was using. So the Punch Bear will be coming soon, I just have to resolve a couple things with it. In the meantime, I have a Punch Bug Baby to share. I came across this image over here. It was such a cute image, and I really wanted to create something like it, but bigger. I just love fairy’s and bugs in a whimsical style, so this was right up my alley.

Step 1: Start by cutting out two 1″ circles from Blush Blossom CS and Riding Hood Red CS which I treated using last weeks tutorial. Next I took my Wide Oval Punch and punched 1 Blush Blossom oval, and half of my treated Riding Hood Red CS. Next you will take your Blush Blossom Wide Oval and trim away one side to create a tear drop shape.

Step 2: Take you 1″ circle punch and flip over. Place your punched Riding Hood Red CS circle inside and punch a crescent sliver from it. This will become the cap of the baby bug.

Step 3: Glue the sliver on to the baby face, and take the half Wide Oval in Riding Hood Red, and cut down to create Ladybug diapers. Sponge Creamy Caramel around the edges to give some dimension.

Step 4: Glue the head to the body. Place it so that it has a slight tilt as though the baby is turning his head and looking towards you. Place the body on a scrap of Blush Blossom and with a pencil, draw little legs. The feet and hands are just little half circles. Trace around the rest of the image with your pencil, then remove the baby and cut out.

Step 5: You should have a little body cut out. Now you can erase the pencil and glue your baby to the hand and foot base.

Step 6: Add a little sponging with Creamy Caramel to the hands and feet, and with a Creamy Caramel marker, draw a line for the foot to define it. Draw two little eyes and some hair tufts with Black marker, and then add some blush to the cheeks with some of your Rose Red SU chalk. Add little dots to the cheeks with your white gel pen.

Step 7: With a Large Oval Punch, punch out 2 ‘wings’ from some CS vellum. Sponge the wings with Baja Breeze Classic Ink. Glue it to the under neck of the baby. Glue the baby to a die cut Scallop circle (larger of the Scallop Circle #2 Die). The scallop circle was sponged first with Kiwi Kiss and Old Olive to give it a grassy look. Baby was mounted on a 4″ x 4″ Riding Hood Red card. Black polka dots were punched out using my Crop-a-dile and glued around the card. Naturally Serif alphabet provided the letters to spell BABY, and the polka dots were glittered with black glitter from the Fine Galaxy Glitter Pack. Last, using my 2-way Glue Pen, I added streaks to the wings and glittered with Dazzling Diamonds.
baby card - Homemade Cards, Rubber Stamp Art, & Paper Crafts - Splitcoaststampers.com
http://www.spli
http://www.spli
|

Splitcoaststampers Gallery - Priceless Baby
http://www.spli
http://www.spli
|

I happen to think Darling Dots is a happy set, and Sweet Always are happy papers, so I couldn't resist making a set of Happy Birthday cards!
The images were punched with a 1" circle punch and popped up on dimensionals and the flowers were finished with buttons. I placed the Pumpkin Pie panel behind and tied the ribbon over the panel...my comprimise! A couple of butterflies punched from the designer paper and adorned with Taylor's Tiny Twinkles finishes it off!
Recipe: Stamps: Darling Dots (SU!) Paper: Whisper White, Pumpkin Pie, Regal Rose. Sweet Always Designer Paper Ink: Pumkin Pie, Regal Rose Accessories: 1" circle punch, Regal Rose Grosgrain ribbon, scallop border punch (SU!), Martha Stewart butterfly trio punch, Taylor's Tiny Twinkles, dimensionals, Crystal Effects
I stamped the images, punching out the presents with the 3/4" square punch, and cutting out the cupcake. They were adhered the image panel cut out with the Labels Four Nestability, then layered on Regal Rose. The sketch called for a circle embellishment, so I added a layered flower with a rhinestone brad. I pulled the sentiment from last year's SAB set, Birthday Whimsy, and secured it with another rhinestone brad. Pretty cute don't you think?
Recipe: Stamps: Darling Dots, Birthday Whimsy (SU!) Paper: Whisper White, Regal Rose, Pumpkin Pie, Sweet Always DP Ink: Regal Rose, Markers Accessories: Pumpkin Pie striped grosgrain ribbon, rhinestone brads, corner rounder (SU!), Labels Four Nestability, Flowers (Prima), pop dots (Dollarama)
I stamped the little presents on the Whisper White,then punched out squares of designer paper, and tied ribbon around them for fun! They were popped up for fun, and layered on Pumpkin Pie, the a wide border of Regal Rose, and a thin border of Chocolate Chip.
The card base is Pumpkin Pie and I used two different prints of the designer paper for the card front. Pumpkin Pie grosgrain ribbon was tied twice around as per the sketch, and this time I pulled the sentiment from "A Little Birdie Told Me", and attached a tag with linen thread. The flower is an exact case of Amy's on this card here! I was checking to see if she had a sample done, and found what I was looking for in another of her amazing cards!
Recipe: Stamps: Darling Dots, A Little Birdie Told Me (SU!) Paper: Whisper White, Pumpkin Pie, Regal Rose, Chocolate Chip, Sweet Always DP (SU!), Ink: Regal Rose, Pumpkin Pie, Versafine Onyx Black Accessories: tag, Pumpkin Pie grosgrain ribbon, Regal Rose grosgrain ribbon, linen thread (SU!), felt flower (MM), petal flower (Prima), button (?), pop dots(Dollarama)
It started with the little red gems on the cherries on the cupcakes. They seemed so perfect, that as I was putting the card together it seemed to be lacking something. Actually, I think most cards without a little bling seem to be lacking something LOL! I had purchased these amazing little Zva gem flourishes from Taylored Expressions after seeing Taylor work her magic with them, so I decided I had hoarded them long enough, and I love the result! And so did my princess dd's!
The sentiment is a ribbon charm and is carefully positioned on the ribbon under the cupcakes. This was a really fun card to work on and I love how it turned out!
sentiments. Have a look!

I started with a card base of River Rock and pulled out the retired Ginger Blossom designer paper. I love the colours in these papers, and I was aiming for something cheerful and warm.
I stamped the cuppies in Versafine Onyx Black on Choice Snow White cardstock. The liners were pieced from the designer papers, and their faces were coloured with markers and an aquapainter. I added a gem to Dr. Mom, and a brad to the little guy.
The "prescription" was stamped on a post it note! I wanted lined paper, and it worked perfectly. I used a library clip and curled the edge of the note up just for fun!
The box of tissue was stamped on the designer paper and the red dots were coloured with markers. Isn't it as adorable as Tissues could be??? All the images are popped up with pop dots.
The side panel features designer paper, with River Rock ribbon. I tied buttons at the top and bottom to the ribbon with linen thread. Finally I stamped the sentiment on the lower right of the card and it was done!
Splitcoaststampers Gallery - wt221 it's a boy
http://www.spli
http://www.spli
|

Splitcoaststampers Gallery - Baby Boy card #4
http://www.spli
http://www.spli
|

Splitcoaststampers Gallery - Baby Girl One Sheet Wonder cards
http://www.spli
http://www.spli
|

Splitcoaststampers Gallery - WSC84 Adorable Little Baby
http://www.spli
http://www.spli
|

Splitcoaststampers Gallery - TLC221 Baby Card
http://www.spli
http://www.spli
|

The Freckled Fairies
http://thefreck
http://thefreck
another card I made for the challenge...but honestly I wasn't happy with it.

Close up of the safety pin with seed beads...

Member Gallery of Scrapbooking Layouts and Projects - Two Peas in a Bucket
http://www.twop
http://www.twop

Member Gallery of Scrapbooking Layouts and Projects - Two Peas in a Bucket
http://www.twop
http://www.twop
|

Member Gallery of Scrapbooking Layouts and Projects - Two Peas in a Bucket
http://www.twop
http://www.twop

WT160 - Now Here's the Rub......Rub-on that is!!
 I LOVE LOVE LOVE rub-ons. I remember having them as a child, but I must admit, I don't remember them being as expensive as they are. This one is from BasicGrey's new Sugared Collections. I really like anything Basic Grey. This was a very easy and simple cards.
Splitcoaststampers Gallery - Spring colors Graduation Card
http://www.spli
http://www.spli
|

| Photo Details | |||
| Poster: Andrea
|
|

Splitcoaststampers Gallery - live like you mean it
http://www.spli
http://www.spli

 VLVAPR01_-_Life_by_vdutchr
 |
| 2009 Graduation Card |
| Photo Details | |||
| Poster: Bliss Stamper
|
Carolina's Creative Pad: April 2009 posts
http://creative
http://creative
The thank you sentiment is from the Matchbox Messages set available through Stampin' Up! Occasions Mini. I'm also using some Sweet Always Designer Series Paper. The corners are turned into the middle to reveal the other color of the paper - isn't it just yummy! To make the sentiment pop-up a bit I added some Crystal Effects.
I scraplifted the idea from Princess Shari on Flikr.com. I used an A2 card & embossed the background with stylized flowers and inked it. I cut the bunny butt & eggs from doodlecharms. The flower pot is from WIMG. The hearts on the feet are from George. I embossed the eggs with Spots & dots and Swiss dots. I used stickles too. TFL!!

A2 with a 1" overlay flap- The idea for the flap came from a brand new card maker, Katie! LOVE the idea! Thanks Katie!
Cuttlebug:
* Birds and Swirls Folder
Scor-Pal
Pastel Pencils for Color
Liquid Pearls-Petal Pink

Cuttlebug:
* Birds and Swirls Folder
Scor-Pal
Pastel Pencils for Color
Liquid Pearls-Petal Pink
