
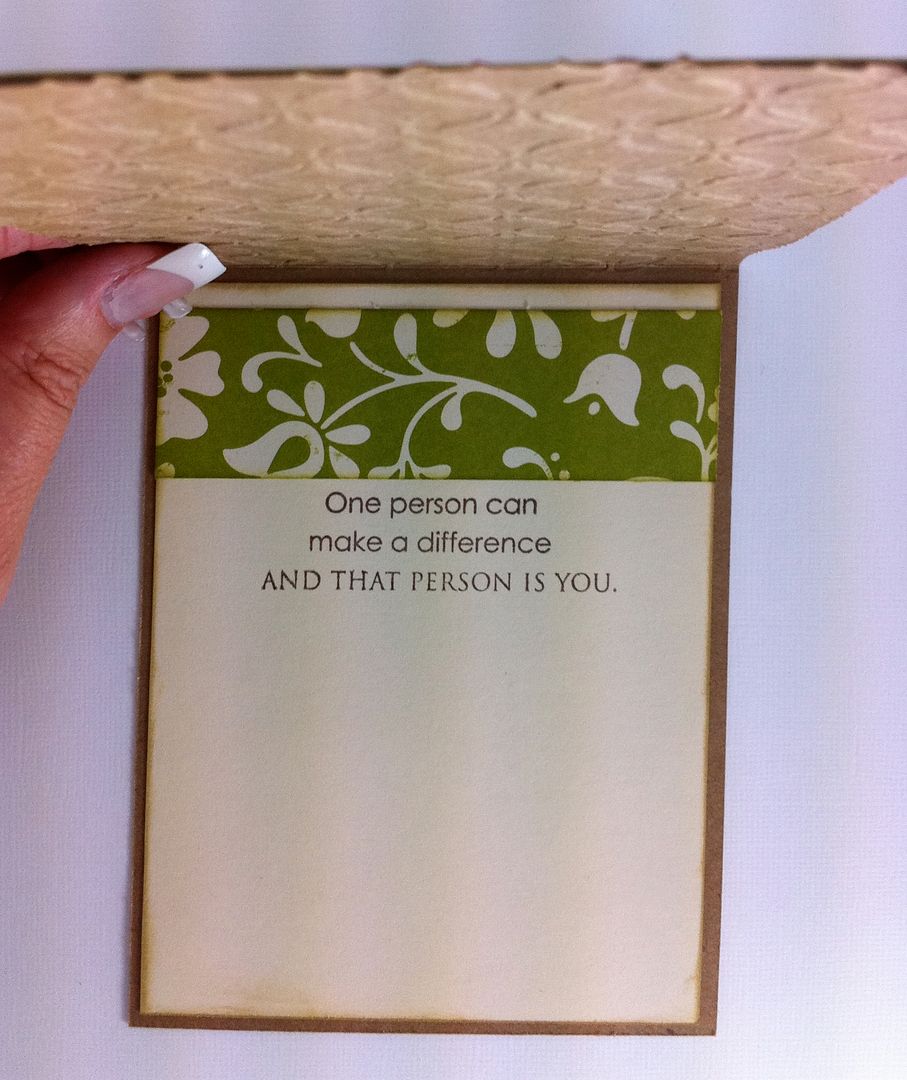
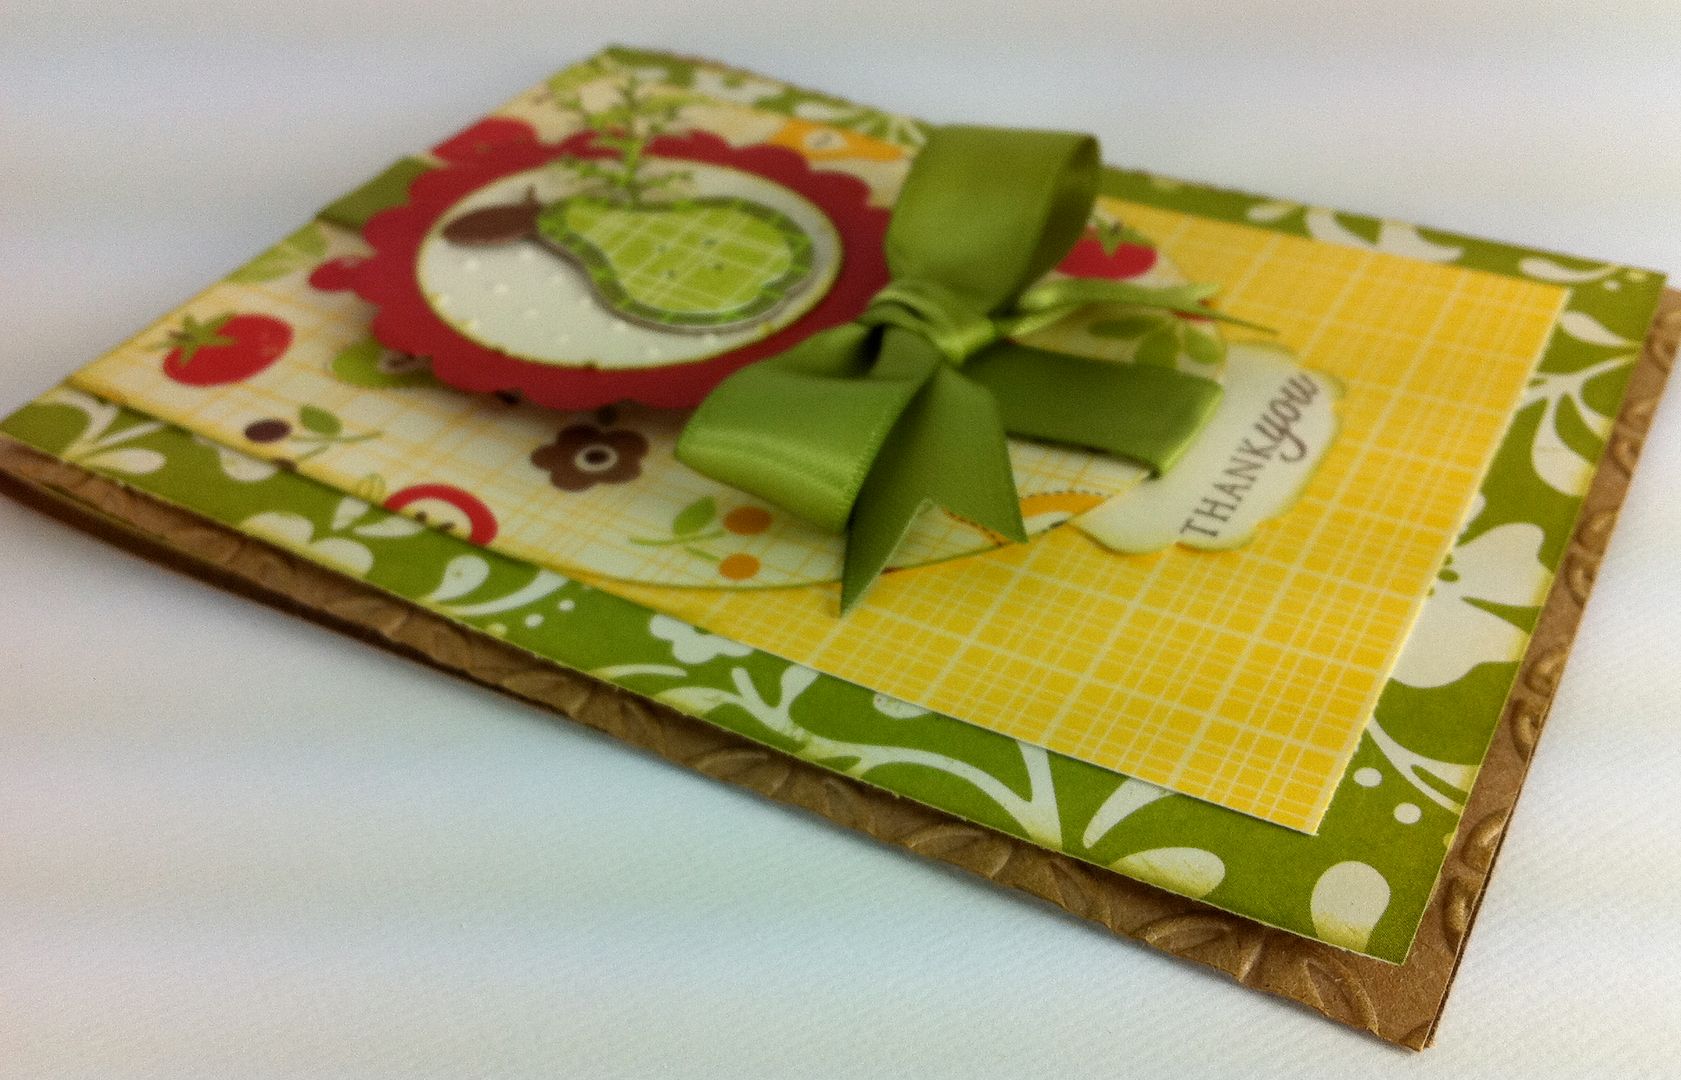
Here is the matching card that I made using the Sweet Treat cartridge's card function. The card and its layers are cut at 7 1/4".
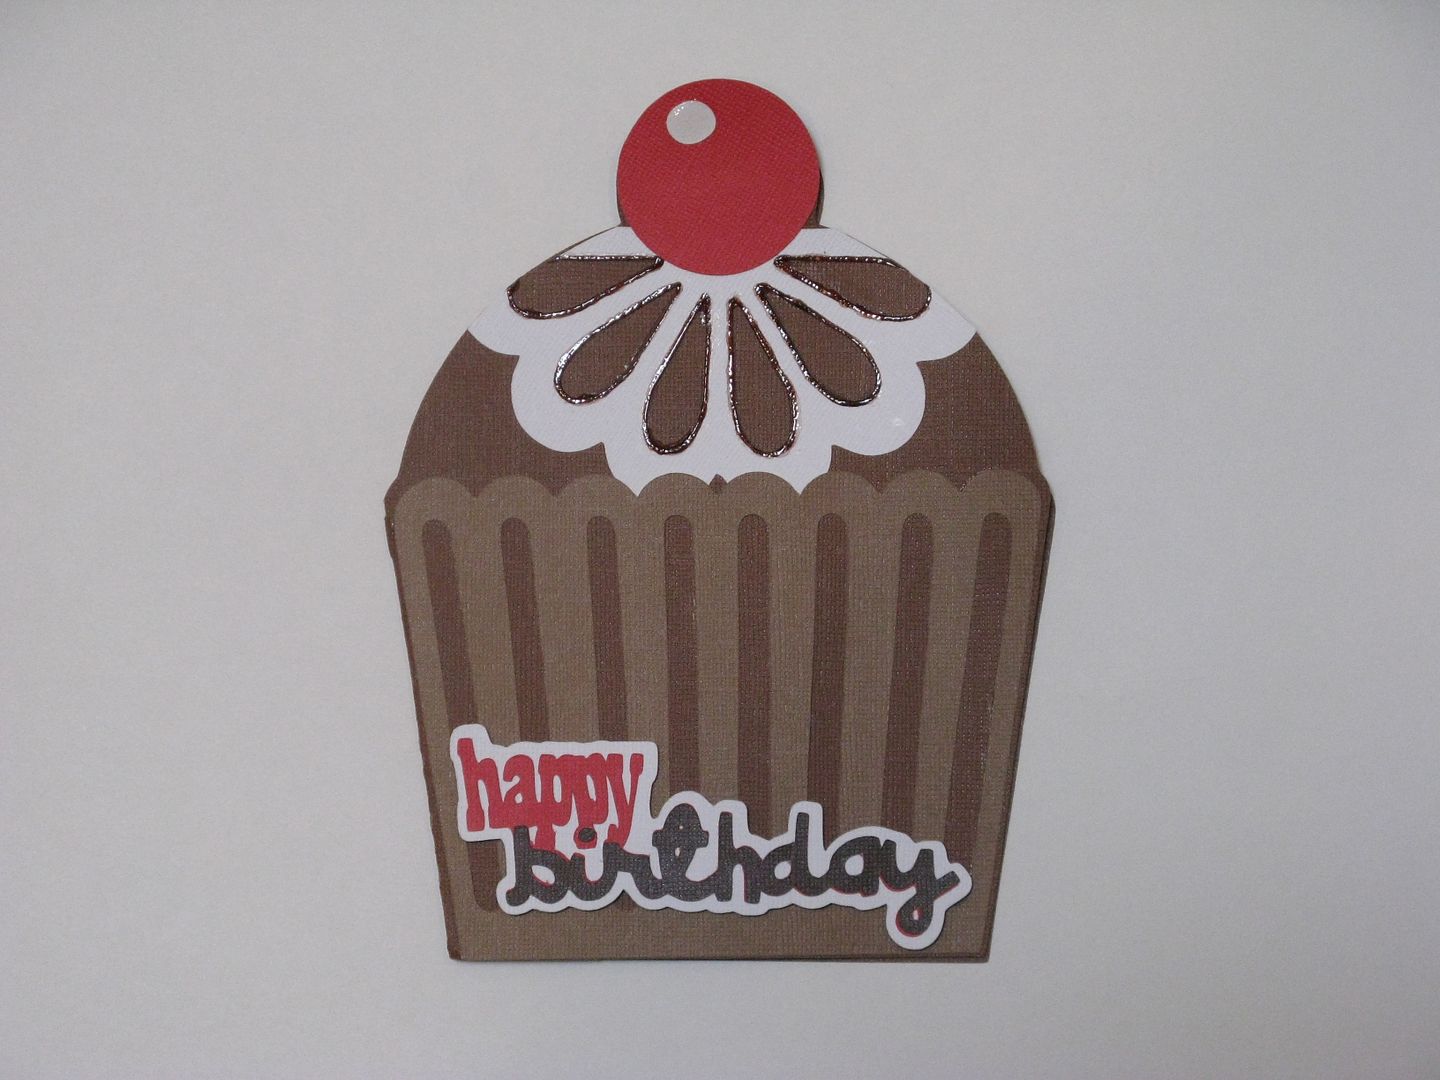
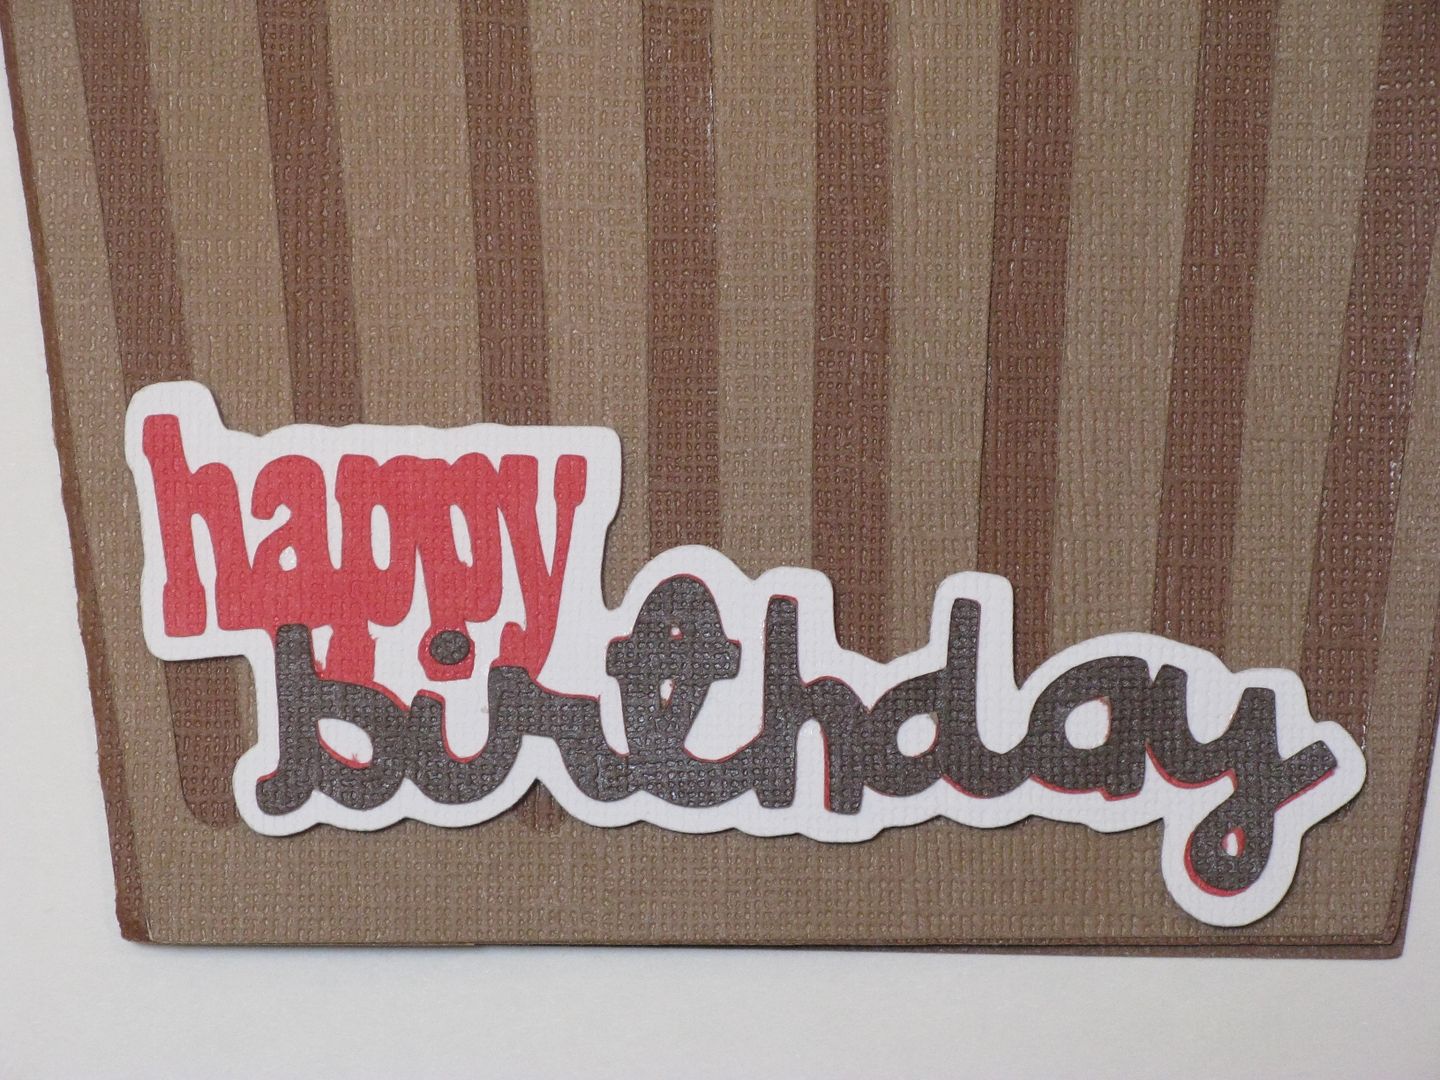
The sentiment is cut at 1 3/4".
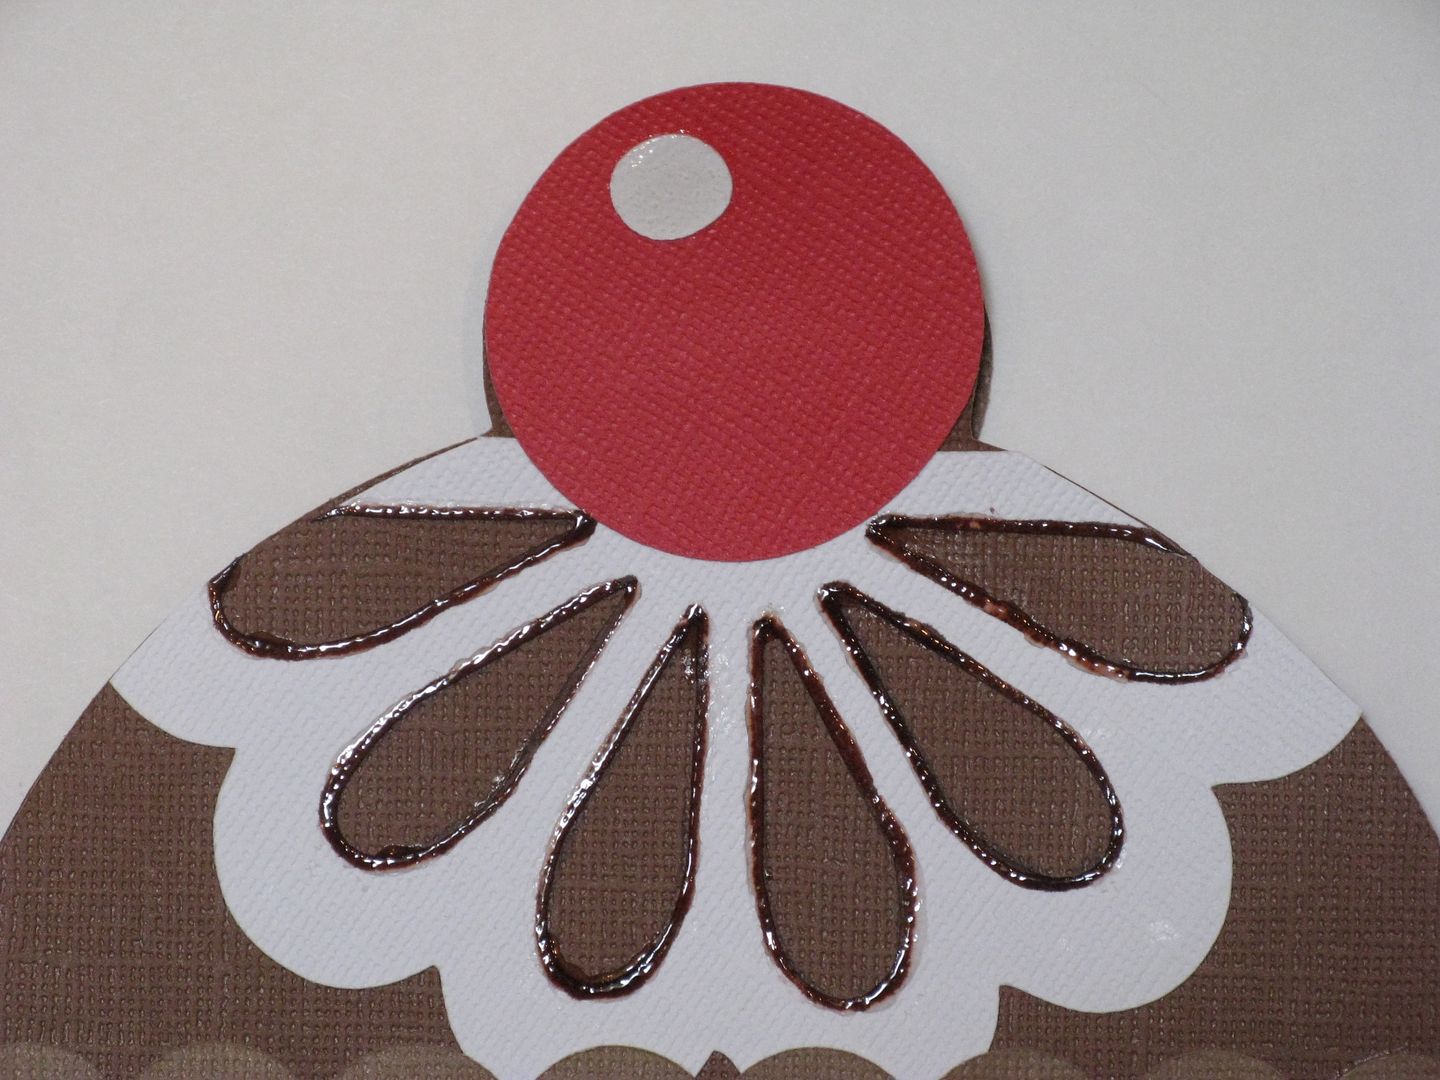
I cut another flower from Cake Basics and trimmed it to match. To mimic the frosting, I used a brown marker and liquid glass.
Thanks so much for stopping by today!! Make sure you come back tomorrow to check out Ms. Susan Edward's debut! She has something positively beautiful! You are really n
The sentiment is cut at 1 3/4".
I cut another flower from Cake Basics and trimmed it to match. To mimic the frosting, I used a brown marker and liquid glass.
Thanks so much for stopping by today!! Make sure you come back tomorrow to check out Ms. Susan Edward's debut! She has something positively beautiful! You are really n
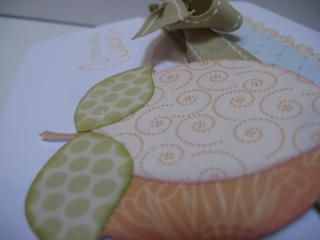
at I knew I would make as soon as I saw the Jillibean Soup paper with the lemons on it. I knew that there was the cutest glass of lemonade on Just Because cards that was just calling out to be paired.
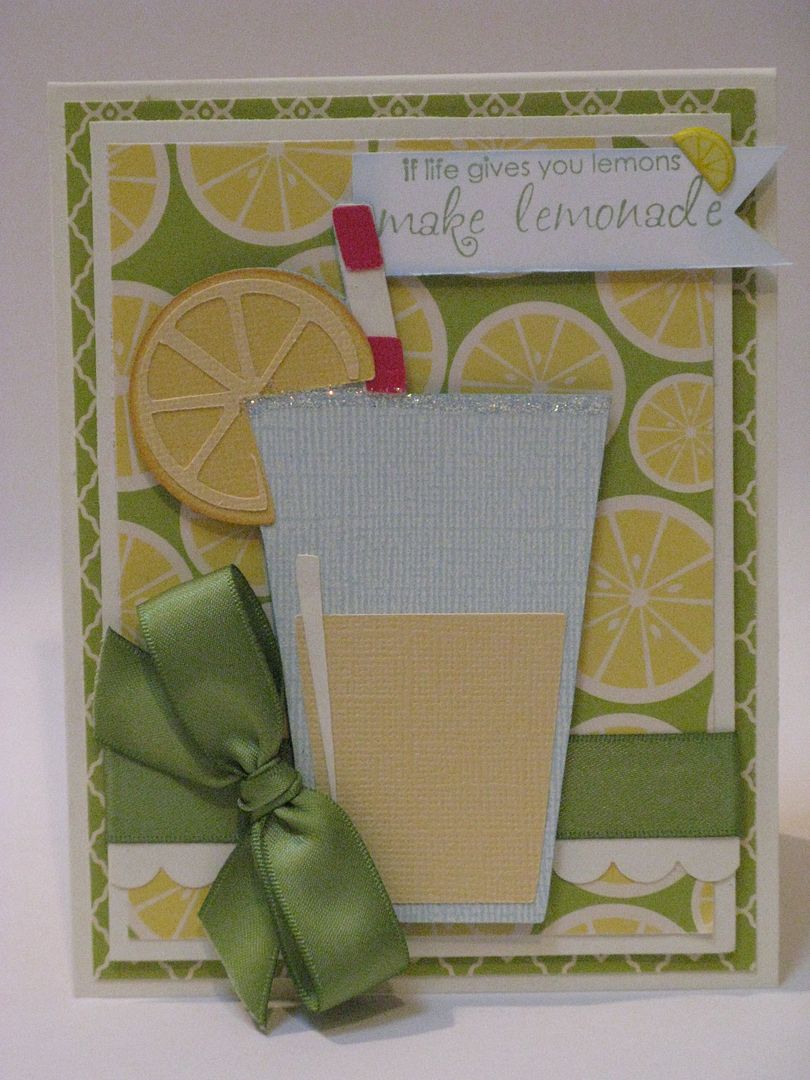
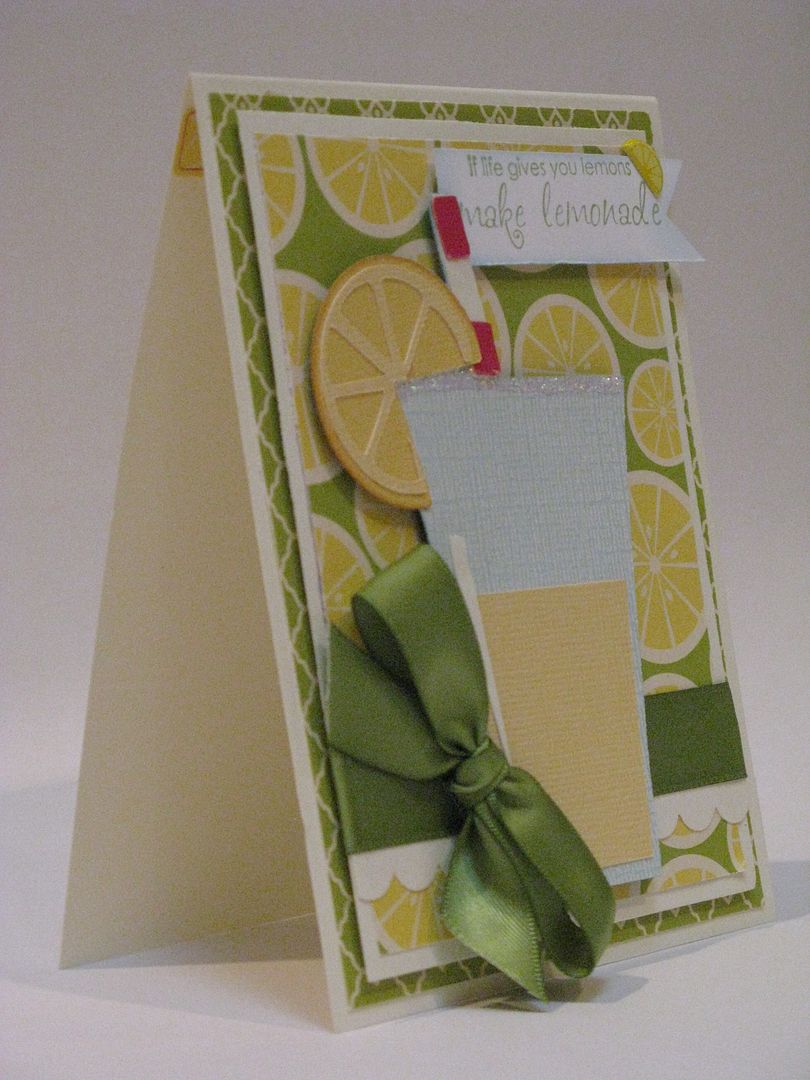
The card is the usual A2 size and the class of Lemonade is cut at 4 1/4".
I added a little bit of stickles across the top of my glass to look like it is sugared. This was totally Joy's idea. Isn't she clever!
the satin ribbon is from SU!
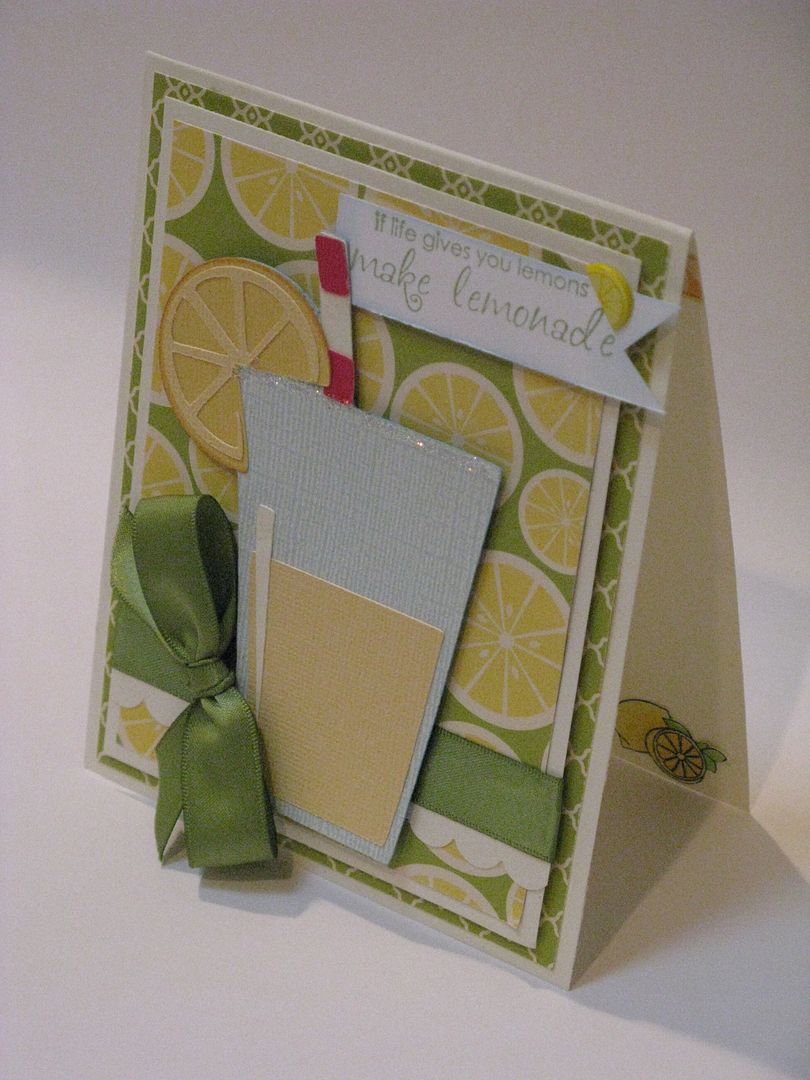
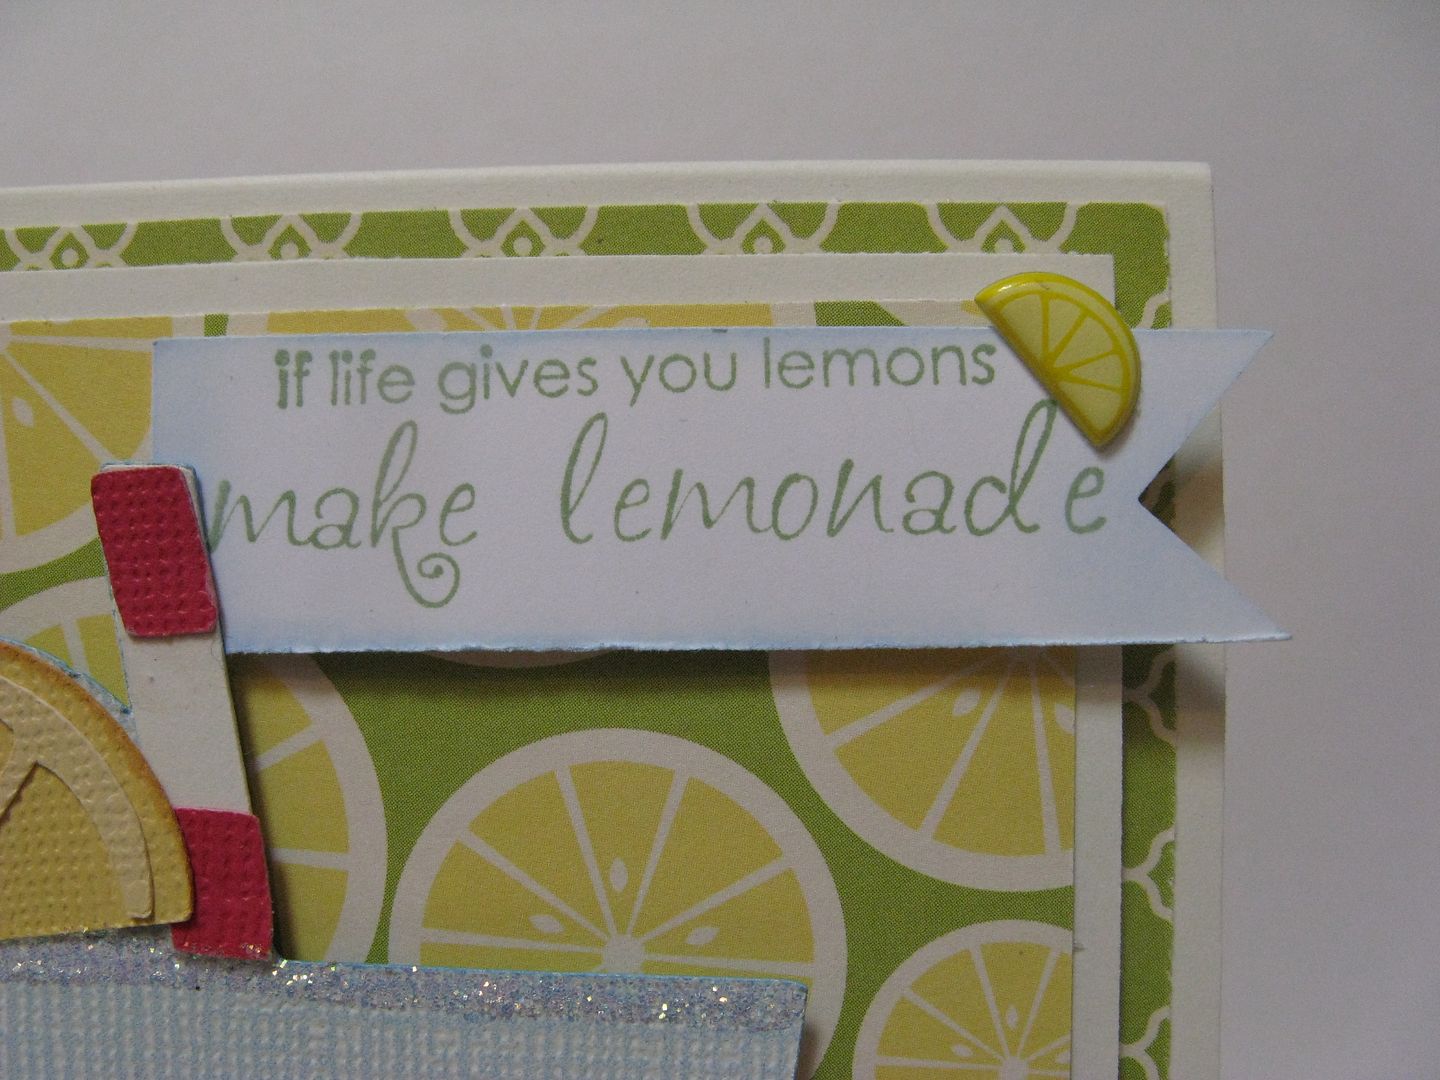
The stamped sentiment is from Taylored Expressions. I really love her stamps! I also stuck a lemon epoxy sticker on the card that I bought from JoAnn's. It is a perfect fit!
Thanks for stopping by today! Make sure you come back tomorrow to check out Joy's awesome layout!
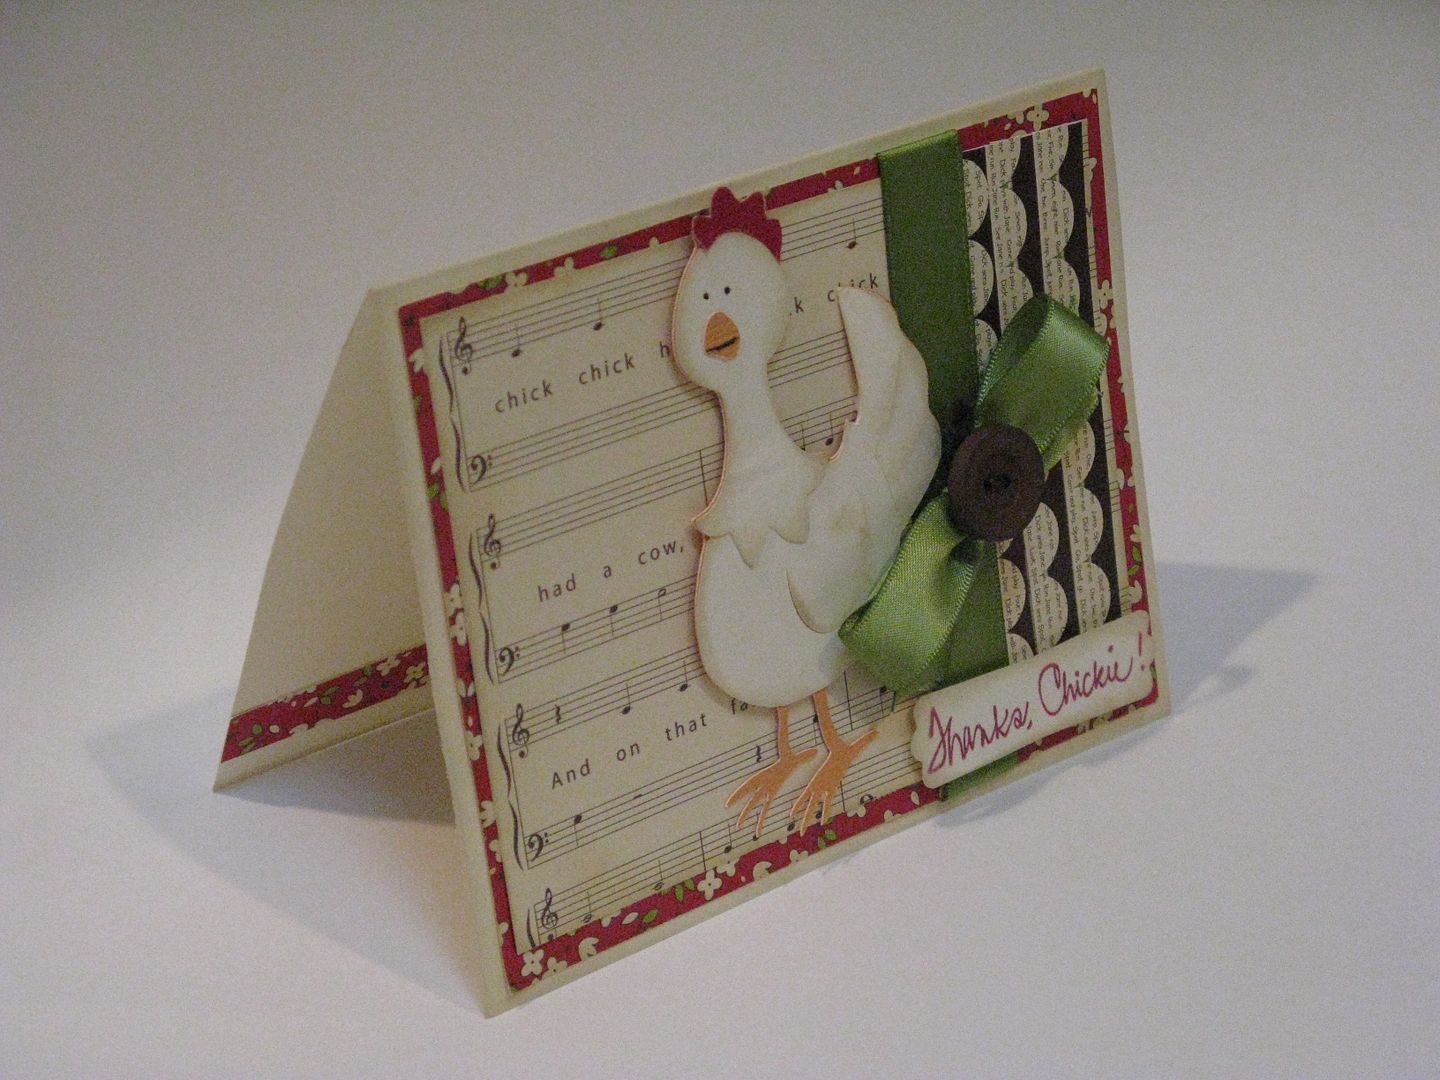
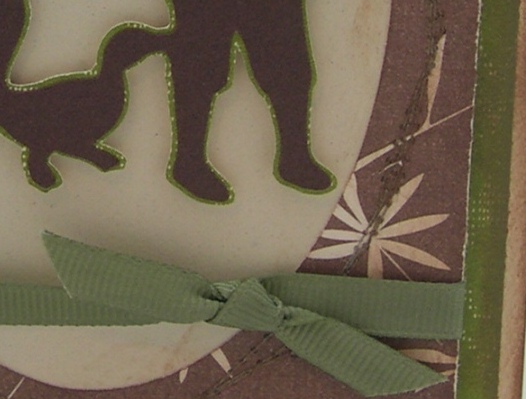
Hello, everyone! This is Melanie and today I have a card that I made using the Animal Kingdom cartridge. I have to admit this was not a cartridge that I had used all that often. I only used it once before this week, as a matter of fact. However, I think it is going to be in the regular rotation now. There are so many paper lines out now that have farm themes. This cartridge is the perfect match! One of those lines is the Chicken Noodle Soup line from Jillibean Soup!
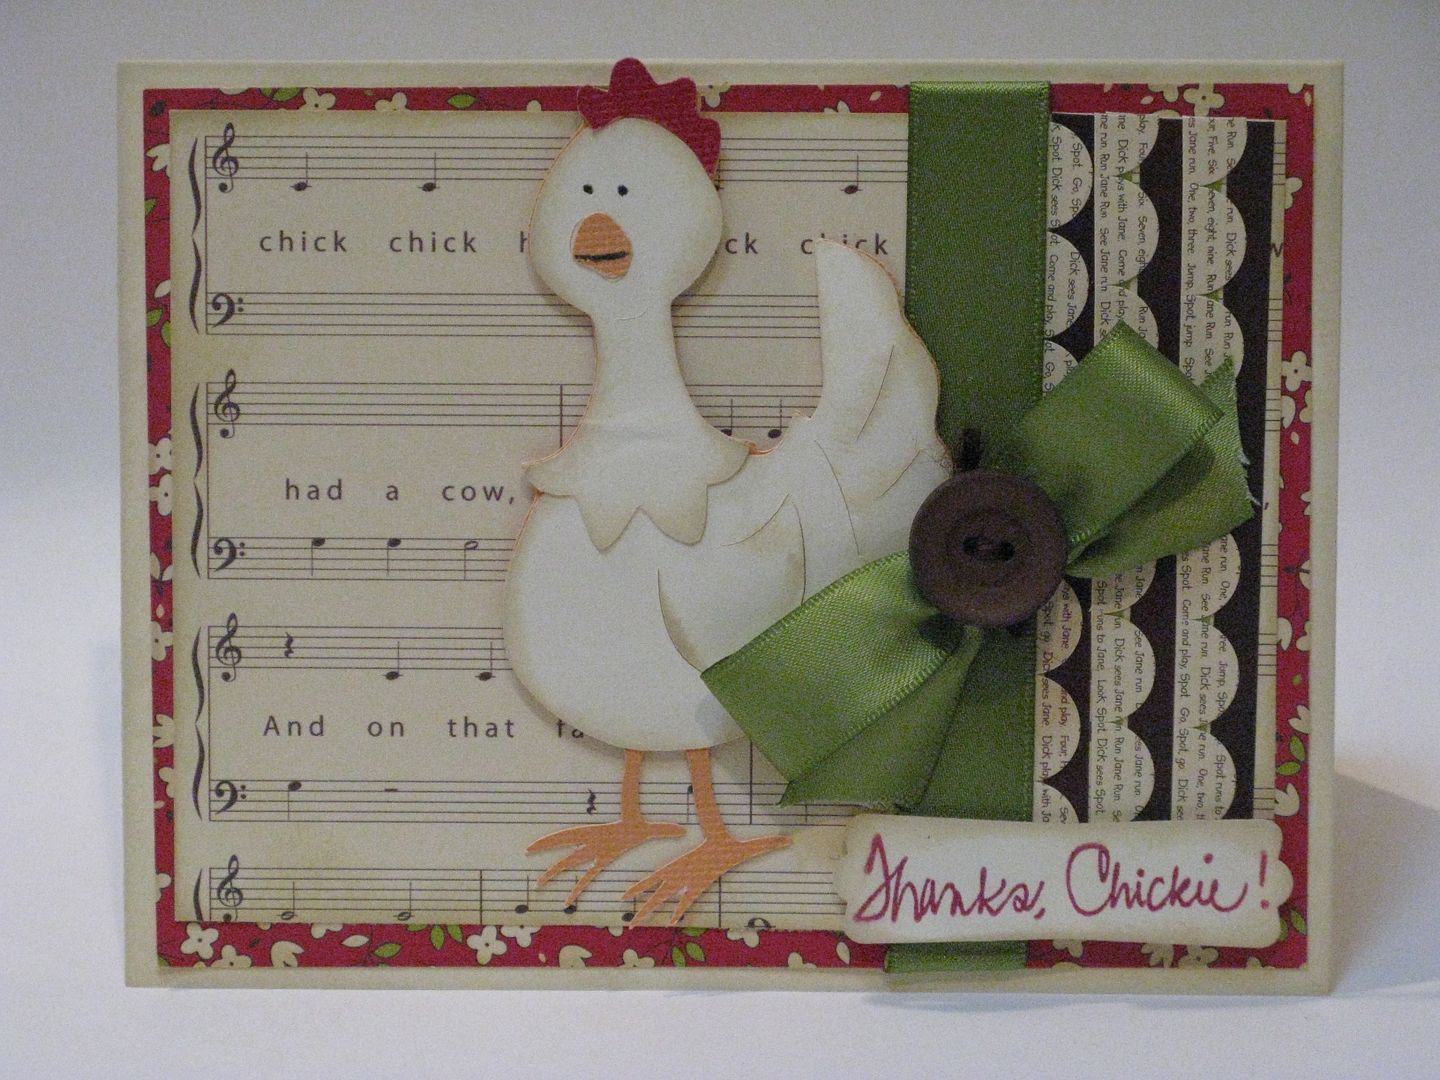
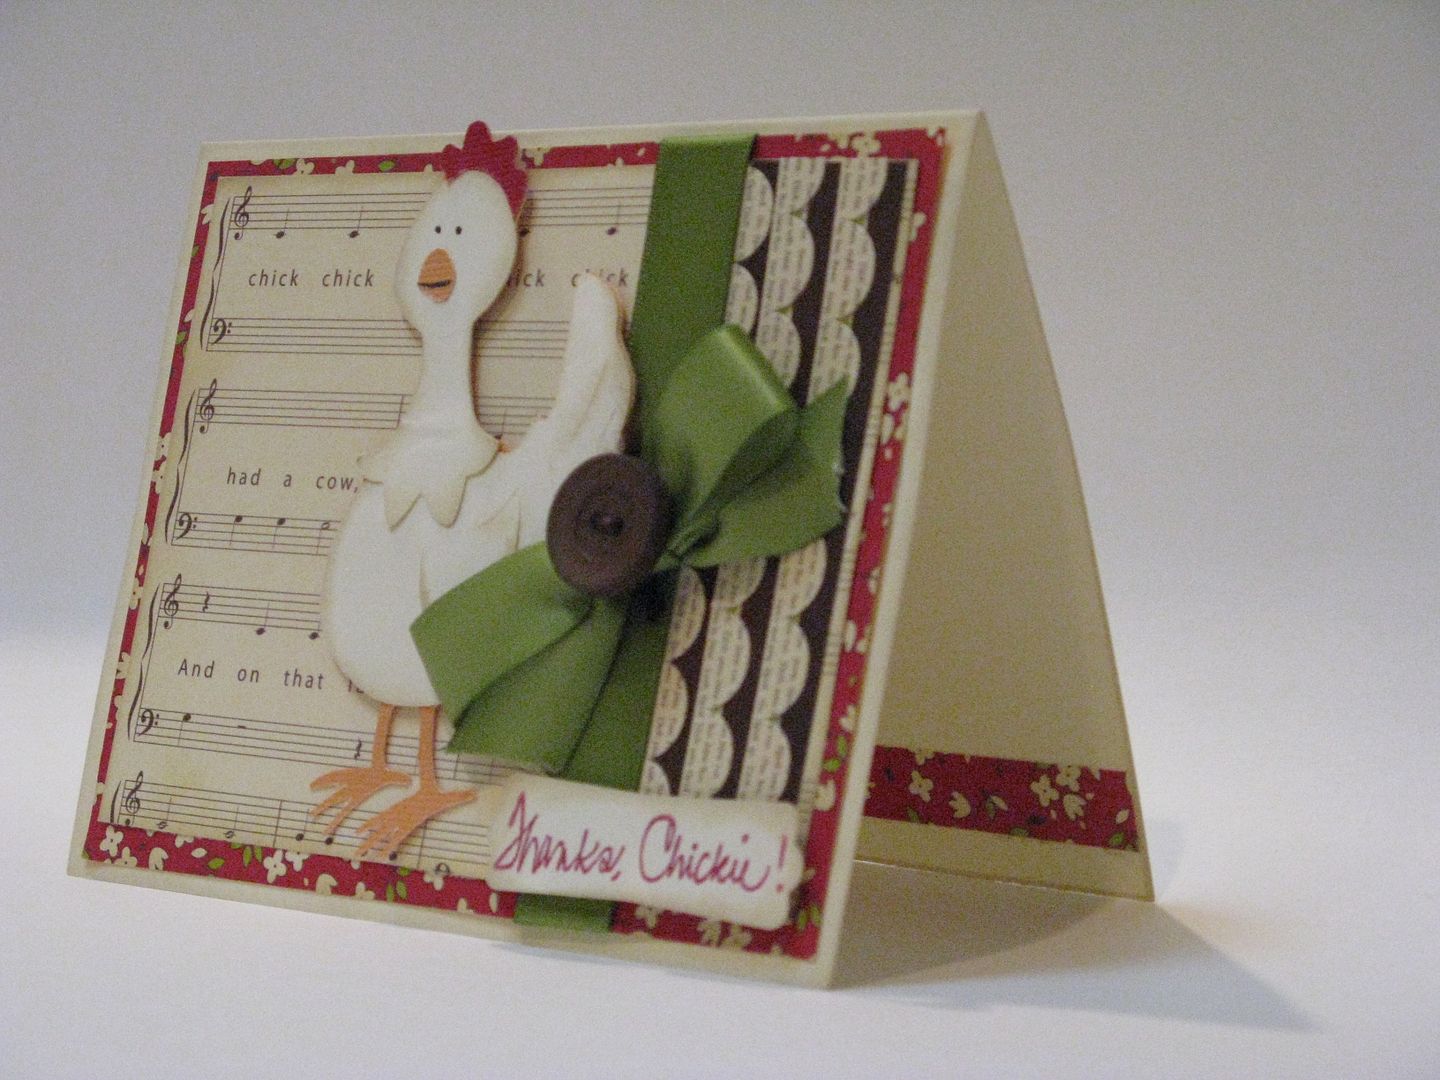
The chicken was cut at 4".
The ribbon is from SU!
Thank you so very much for stopping by today. Make sure you check back in tomorrow because it is Scrapguy's Saturday to post and you know he will have some FABULOUS stuff!
Butterfly Kisses from Straight From the Nest

Welcome back! It's Fancy Card Friday and I can't believe it's my last day here at Everyday Cricut. I've so enjoyed my time here with you and again want to thank Joy and Melanie for this marvelous opportunity. I hope you've learned alot because I certainly have and want to thank you all for your sweet comments and words of encouragement. They mean the world to me.
For my last post I wanted to do something from one of the giveaway cartridges this week. I chose Straight from the Nest because I was able to do another kind of shaped card I enjoy; a shaped sentiment card. Although I often do these by welding individual letters, there are all kinds of fun sentiments on the new cartridges already done for you. I always choose one with a shadow and here I've chosen "Butterfly Kisses".

All of the designing is done with Design Studio. It cannot be done with the gypsy until it is upgraded to include the "hide selected contour" feature. I welded the 2 sentiment shadows and hid the contours in the middle of the words so it would be solid enough to include a sentiment inside. I decided it need more stability (and also more room inside) so I also welded a large butterfly shape that overlapped the sentiment on both the front and back. That gave one additional joining place for the fold. Of course I made a mat that I cut in plaid to hide the fold from the front and complete the design.
The regular Butterfly Kisses cut is very delicate so take care when removing it from the mat. Again I recommend using a spatula. Whenever you have problems with delicate cuts there are several things you should check. First of all, some cuts just don't do well in a small size. Second, check your pressure. I have to admit I almost never change my pressure unless I'm cutting paper instead of card stock. I almost ALWAYS just keep it at high. Ditto for the speed. Actually, since I do everything in Design Studio, it doesn't matter what you have your speed set at because DS chooses it for you. you have no control.
What I have found is that the more delicate cuts do better if the card stock is smooth rather than textured and some textures are worse than others. Also, make sure your mat doesn't have any little bits on it. Clean it off with a wipe so the blade doesn't hit something stuck on your mat and tear the card stock.

Now don't laugh here. I do go a bit overboard on the foam, but it's important with an open cut like this that it is well supported. I used a combination of narrow strips and punched colored foam that I've made myself using double sided tape. (Just in case you missed that tip in a previous post.) You can always test the stability by turning your cut over with the backing still attached (so it doesn't stick to your table) and seeing if you need to add more. I noticed that the top part of the K was weak (I don't know why they didn't just keep it welded to the U above it) so I added a little piece across to support it. (that's what I'm pointing at here. It doesn't show from the front.

Each butterfly is cut 3 times. Twice for the front and once for inside. The first large pink one is glued directly over the turquoise layer and the smaller two are popped. This adds more of a multi dimensional effect. The pink top pink one was embossed with a the folder from the Sizzix Hello Kitty Spring Set and popped just in the middle so both wings are free. The other two are embossed with that little butterfly folder again (see the Twinkle Twinkle post) and are popped on one side only so the other wing is free. By the way, I forgot to mention that when using that small butterfly folder if you want the dots to be raised (embossed) rather than recessed (debossed) you have to use the folder upside down.

Here's a dimensional view. As usual I've added wads of adhesive pearls for embellishment. I get all of my adhesive beads, pearls and gems at Michael's. They are their own Recollections brand and come in 3 different sizes to a package for $1.99.

Inside I've designed a mat which was trimmed at the fold. It was difficult to design because of the openness of the sentiment. I will explain more about that in an article when the .cut file is available which will probably be Monday. Please check my blog, Popsicle Toes. Inside I added more butterflies including a few tiny punched ones from my Martha Stewart punch. I trimmed both the orange butterfly and the pink one because it just doesn't work to glue the whole thing over the fold, but there was enough of the pink one cut off to glue slightly above the fold, so that's what I did. The sentiment is computer generated and I doodled the butterfly's flight. In order to get the placement of the sentiment I first used my Printmaster program to design it and print it out on regular paper. Then I took my cut mat and use my light table (or you can hold it up to a window) for placement and used removable tape to stick it to the paper. Then I ran it through the printer again and Voila!
Just Buggin' Challenge #11: Create a project with an animal Cricut die cut! If you don't have a cartridge with an animal die cut, make up your own animal, think google eyes!!
 Cartridges Used:Animal Kingdom
I used the Cuttlebug embossing folder, "tiny bubbles, to add texture and sponging to show dimension. The word day was printed with my computer. A fun and easy project when someone needs a "cheer me up" card.
Into the Wild
 Cartridges Used:Animal Kingdom
I used the Cuttlebug embossing folder, "tiny bubbles, to add texture and sponging to show dimension. The word day was printed with my computer. A fun and easy project when someone needs a "cheer me up" card.
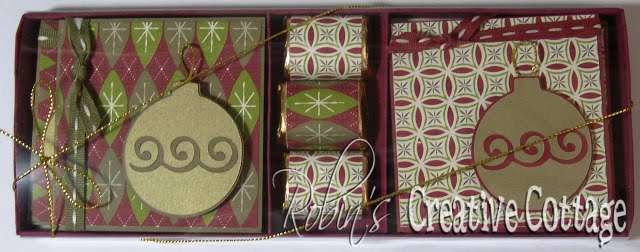
Giant Nugget Card Box
 Below is a photo of the pieces I used in this project.
Using "Joys of the Season" Cricut cartridge pg. 62 "ornament" I cut out the Christmas bulbs at 2", then cut a shadow from pg.79 "shadow" 2".
Card is cut 6" x 3" scored at 3"
Pattern paper is cut 2 7/8"
 Before I glued the bulbs, I cut off the top loop of the bulb with scissors).
 Next step adhering pattern paper and ribbon to card, then using pop-dots I added the bulb with a loop of gold cording at the top.
 I Wrapped 3 chocolate nuggets with pattern paper then using Becky's pattern made the adorable box. Wrapped gold cording around the box. So adorable, makes a wonderful gift.Giant Nugget Box pattern can be found- Here
If you have any questions let me know
Nugget Card Box Friendship
More nugget/card boxes, these are so fun to make!I like to get all my supplies cut then start the gluing process.


 Cricut cartridge used: A Child's Year
Nugget box can be found Here
Just Buggin' Challenge 13
Just buggin challenge #13 Sew it!This weeks challenge was to use sewing, faux sewing, or sewing stamps on your project!
I chose to use my sewing machine, I love to sew on paper.
Sew It

I cut the oval out using "George and Basic Shapes" cartridge, then carefully cut it down on each side eyeballing the distance from the edge.
 I used "A Child's Year" Cricut cartridge page 58
I used a brown ink pad to rub over the stitching and on the edges of each layer before assembling the card. I love popping up the images, I used pop-dots.
Just Buggin' has weekly challenges to inspire us to use our Cricut machines, come join the fun!
Labels: george and basic shapes, a childs year
Just Buggin' Challenge #19
Just Buggin' has a great challenge this week, it's titled -Stamping FunThe challenge is to stamp on you Cricut die-cuts
I have a super fun 3-D project this week using Tags, Bags, Boxes & More Cricut cartridge.
I had my daughter pull out her stamp sets so I could stamp on my project, I found an cute flower stamp set from Stampin' Up that I stamped all over my box.
I chose the flower box on page 120, perfect with flower stamps, don't you think?
I cut the box using the blackout feature so there were no windows or ribbon holes. I also used the "fit to page" button on my Cricut expression machine so I could get the largest possible cut on a 12 x 12 piece of cardstock, which cut at 8 3/4".
After I cut the image I stamped all over the box with flowers and leaves.
 I also stamped a larger flower for a gift tag
 The square box is aproximatly 2 1/2" high (not including the flower on top).
 Just Buggin' has weekly challenges to inspire us to use your Cricut machine.
Labels: tags bags boxes, birthday box, flower, present
Wild Card Series -Card #16 -Tweety
I love birdies and this card was of course fun to make! Wild Card #16 can be found on page 47 of the Wild Card booklet.
The images circled in red are what I cut for this card. I did cut them in various sizes.

I cut all the main images at 5" the envelope, card, liner and the birds on the branch (shift/frame).
The phrase "you made my day" was cut at 6". The frame using the pattern paper is cut at 7", and the blue frame cut at 7 1/4".
The icon birdies were cut at different sizes... the two tall green birds (shift/icon) were cut at 3"
The two shorter red birds (icon) cut at 3" and the short blue bird cut at 2 1/2".
The white piece of cardstock was cut using my paper trimmer to be placed on the inside of the card, this was cut at 4 1/2" x 4 3/4".

I used the bird branch (shift/frame) on the inside of my card.

 Tips & Tricks about this card can be found here
Labels: wild card, thank you card, bird
This weeks challenge at Just Buggin' there is another great theme... Monochromatic Challenge.
Use a monochromatic color theme on your cricut project.
My color theme is blue with a lovely little dancer from "A Child's Year" Cricut cartridge. The little dancer is on page 73, I also cut the card from this page as well. The card was cut at 5 1/2" the patterned paper layer on front was cut at 4 3/4" and my little dancer was cut at 3 1/2".

 Just Buggin' has weekly challenges to inspire us to use your Cricut machine.
Labels: a childs year, dancer
Wild Card #21 - A Lovely Doily
This wild card has some really lovely features; a doily shaped card, a rose and a beautiful square rose pattern icon.... hmm....how do you use that image on a card? I decided to challenge myself to use that square icon on my card. This wild card can be found on page 52 of the Wild Card Cricut cartridge booklet.
Circled in red are the images and quantities that I cut for this wild card.

Here is the cardstock and patterned paper I cut for my card, each image is cut a 5".
Note: I do not use the real dial size when cutting my wild card images.
The patterned paper is from Stampin' Up designer paper packet (discontinued). I only used the outer circle from the circle liner feature, the inner circle was discarded. For the phrase "How Thankful", I used my mini gel pen and holder in my cricut machine. The gel pens and holder I ordered from Custom Crops on line store.

I challenged myself to use the square rose icon feature for this card. I begain by tracing a circle using the outer circle image. Cut it out, then used my cricut spatula tool to lift/bend the cuts in the rose pattern.

I used three colorbox cats eye inks to add a distressed look to the rose. By lifting the edges the ink was able to scrape those edges and give a darker color there. I started with the light tan ink, then the dark brown, and finished off with just a little green.
Some of my edges of the rose did break away, but not to worry, I keep inking those as well, then when finished inking I adhered the rose to the same circle that I used to trace the original rose circle, the loose edges were easily put back in place, just like a puzzle. This image was now adhered to my doily card front.
 For the two roses I used the same lifting/bending technique, then inked the edges, yellow for the rose, then green for the leaf and stem. I cut off the leaves and stem of the yellow rose then adhered that rose over the top of the green rose
I used pop-dots to adhere my lovely yellow rose to my card front.

Here are the finished envelope and the inside of my doily card. I trimmed the phrase using my paper cutter, inked the edges, then placed it on the inside of the card.

Challenge yourself.... when you find image in your wild card booklet that you're not sure what to do with, remember to challenge yourself and find a way to make that image a part of your card.
Labels: shape card, scallop edge, flower, wild card, spring, birthday card
Wild Card #25 - Flower
A very simple yet lovely card. This is wild card #25, it can be found on page 56 of the wild card booklet.
Circled in red are the images that were cut for this card.
 Each image was cut at 4 3/4"
Using the smaller flowers I layered them using the three different patterned papers, then added a small jewel in the center of the flower.

This is the envelope closed and the inside of the flower card.

I used the extra flowers to decorate the back side of the card.

Thanks for coming to my blog :)
Labels: shape card, wild card, flower, birthday card, thank you card
Simply Classy
A simply classy card using the Forever Young Cricut cartridge.The emblem feature was used as well as the word "Classy", I also cut three tiny flowers. All are found on page 73 of the Forever Young cartridge booklet.

The emblem and word were embossed using the "Swiss dots" Cuttlebug embossing folder. Then gently rubbed using a light brown ink pad.

For the card background I used "Spots and Dots" embossing folder then gently added a brown ink over the embossed circles and edges.

Labels: forever young, cuttlebug, birthday card
Spring Showers
This card is one I designed specifically from the given sketch. One of my favorite Cicut cartridges is A Child's Year, I just love the silhouette images. This sweet little umbrella girl is found on page 34 of the booklet.

This is the sketch from Twisted Sketches
the additional twist was to use something transparent.
My card is transparent, and the raindrop, which was cut from A Child's Year as was the word "spring" I used design studio to weld the word together.


Labels: a childs year, umbrella, spring, birthday card
Fantabulous Cricut Challenge #001 -Balloon Shaped Card
Today is the day! Fantabulous Cricut Challenge Blog is having their very first challenge and the design team has created amazing projects for you to get inspiration from.Our first challenge is to include a word and shape on your project:
the word is "Birthday"
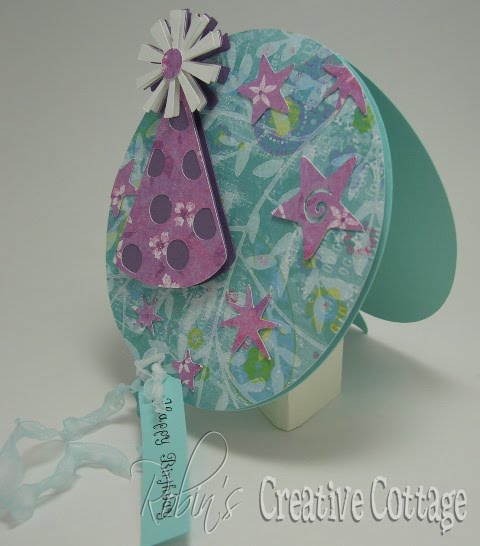
the shape is a "Balloon"Here is the card I made for the challenge. A balloon shaped card with layered party hat, and stars. I used the Celebrations Cricut cartridge for all images.


A simple Design Studio cut file available at the end of this post.

I tied the balloon using organdy ribbon but wanted to give it more of a curly effect.

Using my heat tool, I carefully waved it over the ribbon and the ribbon began to melt. The melting process happens very quickly so make sure the heat is not held on the ribbon to long.

I got just the look that I wanted for a curly balloon string effect.

I used tons of pop-dots to pop the pieces off the card.
 Click here for -Balloon Card -Design Studio cut file
Head on over to Fantabulous Cricut to see the great projects from the design team, and join us for this weeks challenge.
More Balloon Shaped Cards
Remember the balloon card I made a few days ago? I really loved the design and so wanted to made a few more, I thought they would be great to have on hand.To view the details of this card go Here. I also have a simple cut file for the card and a photo tutorial of how I made the ribbon curly.
More fun balloon cards!


Labels: shape card, balloon, celebrations, birthday card
Create a project that has something to do with "Rain or Water"
ideas/examples: hat, umbrella, life preserver.
I used "A child's Year" cricut cartridge for the adorable little girl watering her flowers. All of the rectangle shapes were cut using "George and Basic Shapes" cartridge. Then I used "Tiny Bubbles" Cuttlebug embossing folder on one of the rectangles, then gently rubbed a light brown ink pad over the bubbles.

This sweet saying was printed from my computer, and the edges were brushed with an ink pad.

 Fantabulous Cricut design team has been so clever with this weeks inspirational projects you'll just have to go take a took.
 Fantabulous Cricut Challenge Blog -and daily inspiration for your creative creations.
Labels: a childs year, flower, cuttlebug, birthday card
Spring Flower
I love spring, don't you? Even though Easter is over for this year, we can still continue to create using the Easter 2010 Cricut Cartridge just as I have here....
I used DCWV Glitter cardstock Stack. When I cut glitter paper I always cut it using the "multi-cut" feature and it cuts beautifully (speed 3, pressure 6, blade 6). I cut the flower at 4 1/4" in three different color cardstock, green, blue and yellow, then cut off the stem of the blue cardstock, the stem and flower of the yellow, and layered them all together. I cut out the shadow in a cream cardstock (not glitter).
The word "Spring" was cut at 1 1/2", I cut off the flower that was attached to the word, because I didn't want to use it this time. The shadow was cut using blue glitter cardstock.

The polka-dot paper is from DCVW Blossoms & Butterflies cardstock stack.

Labels: flower, spring, birthday card, easter 2010
Challenge #6 -Winged Thing Theme:
Create a project that includes something that fly's, birds, butterflies, dragons etc...
Here is my card & matching envelope

The paper is from DCWV Blossoms & Butterflies stack, and DCWV glitter stack, I love these papers! I use the multi-cut feature when cutting these papers with my Cricut machine, they cut beautifully. Cricut cartridges used are "Walk in my Garden" for the card and "Wild Card" for the envelope

Just a little bling for the dragonfly's eyes.

 Design Studio Cut Files
Dragonfly Card cut file -here
Envelope and Liner -here
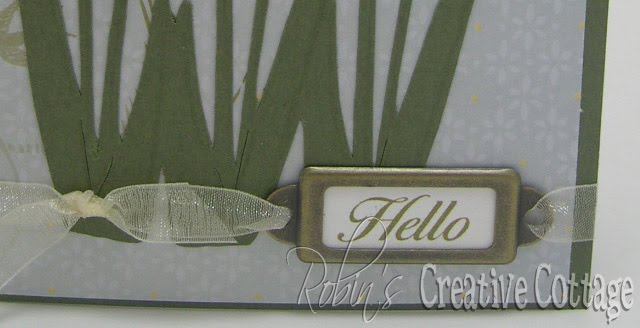
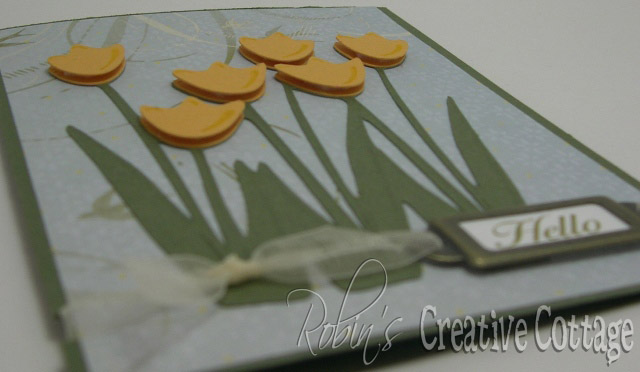
Hello Tulips
A lovely card using "Walk in my Garden" my favorite spring Cricut cartridge. The image is on page 99 in the booklet. I used the border feature cutting at 4". The tulips were cut in yellow cardstock twice, one set covered the green tulips cut with the border, the the second set I popped up using pop-dots.
The word "Hello" was printed using my computer
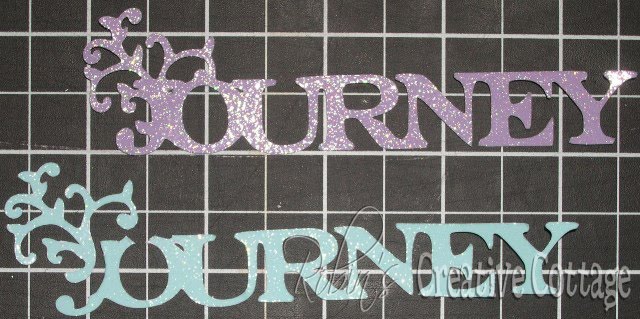
Bicycle Journey
I'm so excited to share my next "Cardabilities Sketch" #2.My card is a 6" x 6", it was fun to do a square card, not my usual style but I really liked making it.
The pattern cardstock is from DCWV Pockets full of Posies Stack. I used my new "Heritage" Cricut cartridge to cut out the bike pg 63 at 2" and the word Journey pg. 71 at 1 1/4". The fun shape behind the bike is from Accent Essentials Cricut cartridge pg. 79 cut the shape twice 3" for the patterned cardstock and 3 1/2" for the dark purple cardstock.

Here is the sketch, I flipped this design upside down for my card.

For the word I cut it twice then carefully cut the green flourish off and added on top of the purple flourish.


Teacher Appreciation, include an apple shape on your project:
Create something for a special teacher using an apple shape somewhere on your project.

I have enjoyed making shaped cards using design studio, so I couldn't resist creating an apple shaped card. Cut file available at the end of this post.

I used the "Doodlecharms and Storybook" Cricut cartridges.


I'm a Guest Designer today!!
So thrilled today for the opportunity to be the "Guest Designer" for Twisted Sketches! Twisted Card Sketch #008.
The card size measures 5 1/2" x 4 1/4".
I used the Heritage Cricut cartridge for the fence on pg. 21 cut at 2 2/3" the word Memories pg. 64 cut at 3/4".
 Go check out the sketch and what the rest of the amazing design team created using the same sketch -HERE.
Challenge #13 -For the Bride:
Create a project using one of the following;
something old, something new, something borrowed, something blue
Create a project using one of the following;
something old, something new, something borrowed, something blue
I'm using something "new" my brand new "Tie the Knot" cricut cartridge, this is the very first project that I've made using it.

For the "love birds" on page 36 of the handbook, I used the "blackout/shadow" +shift, cut at 1 1/2" cut in silver cardstock, then the sparkly shimmer cardstock (from Stampin' Up!) I cut using the same "blackout/shadow" but no shift key, then I cut out the two love birds using no special feature keys at the same 1 1/2", I used pop-dots to add to the card.
Mr & Mrs page 62 was cut at 1", using silver cardstock I pressed the "blackout/shadow" +shift key. Then the shimmer cardstock I cut out the Mr & Mrs using no special feature keys.
The cuttlebug folder is "Textile Texture".

Come see the lovely projects that the design team has created for this challenge -HERE.
Labels: tie the knot, wedding card, birds, cuttlebug
Today's card for Everyday Cricut I wanted to celebrate summer and a wonderful day at the beach. This little girl is totally enjoying herself in the shade of the umbrella and finding treasures in the sand.
I have a simple cut file at the end of this post.
I have a simple cut file at the end of this post.

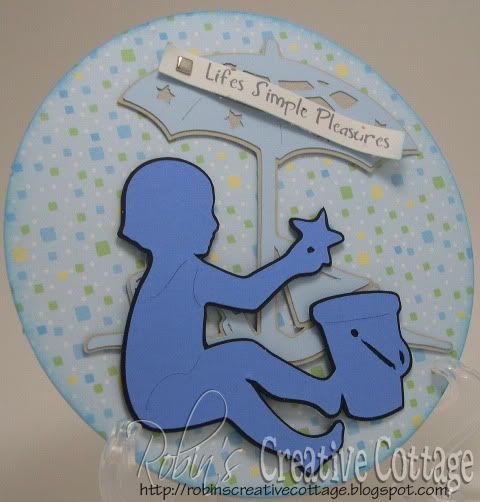

I used A Chid's Year Cricut Cartridge and Design Studio to create this card, it measures 5 1/2" accros. To create the circle shaped card I use the ball +shft key on page 43 of the handbook, and welded two of them together, then used the "hide selector" for the little circle in the tag.
**One tip I learned that when I copy and past an image in design studio, for the second image I'm not able to use the "hide selector" (only with the original image), however, I found that if I save the file, then reopen it, I can use the hide selector on the second image
The umbrella is from page 43 as well, I used the shadow +shift, then only the shift key for the top layer of the umbrella.
The cute beach girl is on page 44, using the shadow feature, then no features for the top layer of the girl.
I don't have measurements because I created this in design studo, a cut file is available on my blog.
If you donwload this file, please leave me a comment on this post. Thank you. :)
Design Studio cut file -HERE
Labels: a childs year, circle card, shape card, umbrella
Summer Time at the Beach:
Create a project for summer using something you would find at the beach.
 I used my new "Life is a Beach" cricut cartridge. The flip flops are on page 64 of the handbook and were cut at 3 3/4", the wave is on page 45 I used the border feature cut at 1 1/2", the escape word is on page 38 I used the Title Words feature cutting it out twice, then used scissors to cut off the leaf.
 The hanging charms are a fun feature on the cartridge, I cut the charms at 1 1/4" the sun is on page 44, flip flops page 64, the wave on page 45. Then on page 70 is the solid background charm using the shift key, I placed behind each charm.
 Come join us at Fantabulous Cricut Challenge Blog for this weeks "Summer Time at the Beach" theme. You can see the other wonderful project made by each of the Fantabulous Design Team projects -HERE.
One of my favorite summer time treats a cherry popsicle, so refreshing.
I have a design studio cut file at the end of this post.
 I chose to make a Popsicle shape card with a clear (wrapper) sleeve. Card size is approx. 3 3/4" x 5 1/2". I used 4 cartridges for this project, and design Studio.
The cartridges... Doodlecharms for the popsicle, Doodletype for the word "popsicle", George and Basic Shapes for the oval, and From my Kitchen for the cherries.
 Just think, you could do different colors of popsicles for you favorite flavors, like yellow for banana flavor, then add a banana instead of a cherry on the "wrapper", or how about grape... hmmm what could you do for the yummy rootbeer flavor. :)
 Thank you for visiting, I love visitors and comments!!
If you download this file, please leave me a comment on this post. Thank you.
Design Studio cut file -HERE
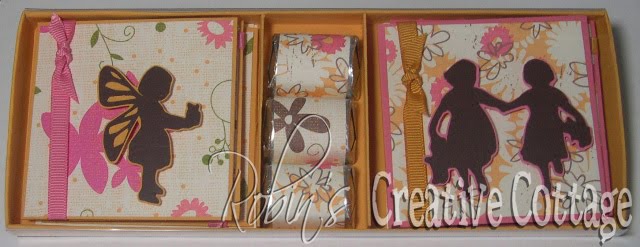
I created a gift package box using 12 x 12 cardstock, this box measures approx. 8" x 2".
The cricut cartridges that I used are Geroge and Basic Shapes, A Child's Year and Very Merry Tags.
 I used my Cricut Design Studio, and George and Basic Shapes cartridge to cut out a window in my 12 x 12 patterned paper, then cut a brown rectangle that was just a tad bit smaller then the window. The kids from A Child's year pg. 57 fit inside the window.
Each of the 12" x 12" cardstock papers were scored at 2" from each edge.
 I used a clear piece of plastic for the window.
 The tree tag cut from Very Merry Tags cartridge was cut approx. 3" I added clear embossing powder to the top green layer to give is some shine.
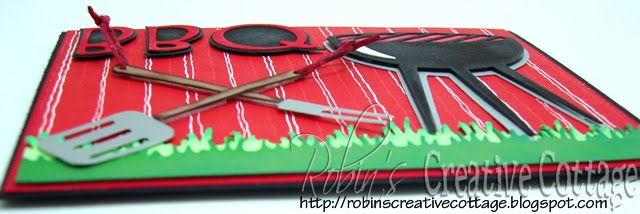
Summer B-B-Que
Create a project and incorporating b-b-q summer food /cooking
I used three Cricut cartridges for my card,George and Basic Shapes for the lettering, and From my Kitchen for the grill on pg. 41 of the handbook, the spatula is on page44 and page 55 is the fork I used (I show how I made a two pronged fork below). Then Everyday Paper Dolls for the grass on page 77 (accessories 2).

I used the regular fork and cut off two of the prongs as shown below. For the handles, I cut each of the utensils out of brown cardstock, then cut off the utensil part.

I also added brown ink to the edges of the handles, the fork did not have a hole so I made one with a piercing tool then added red twine.

 Come see the sizzling Fantabulous Cricut design team projects -HERE.
 My outdoor activity would be bird watching :)
I used the Serenade Cricut cartridge to create my bird bath scenery.

 Come see the other "Outdoor Activity" projects that the design team has created, and come join our challenge -HERE
 I made this card about a month ago but had not posted it yet because of my "technical" difficulties lol
It's good to be back, should be done with the craft room this weekend. Fully loaded for next week. Hope you all have a wonderful weekend =D
Hugs,
Giselle
I used Cricut Wild Card for card and envelope, Cricut Sampler for other cuts (same cuts from New Arrival)
The round tag is from Cricut Sampler also.


The stamp was embossed and die cut with the Cuttlebug small folders included with it.


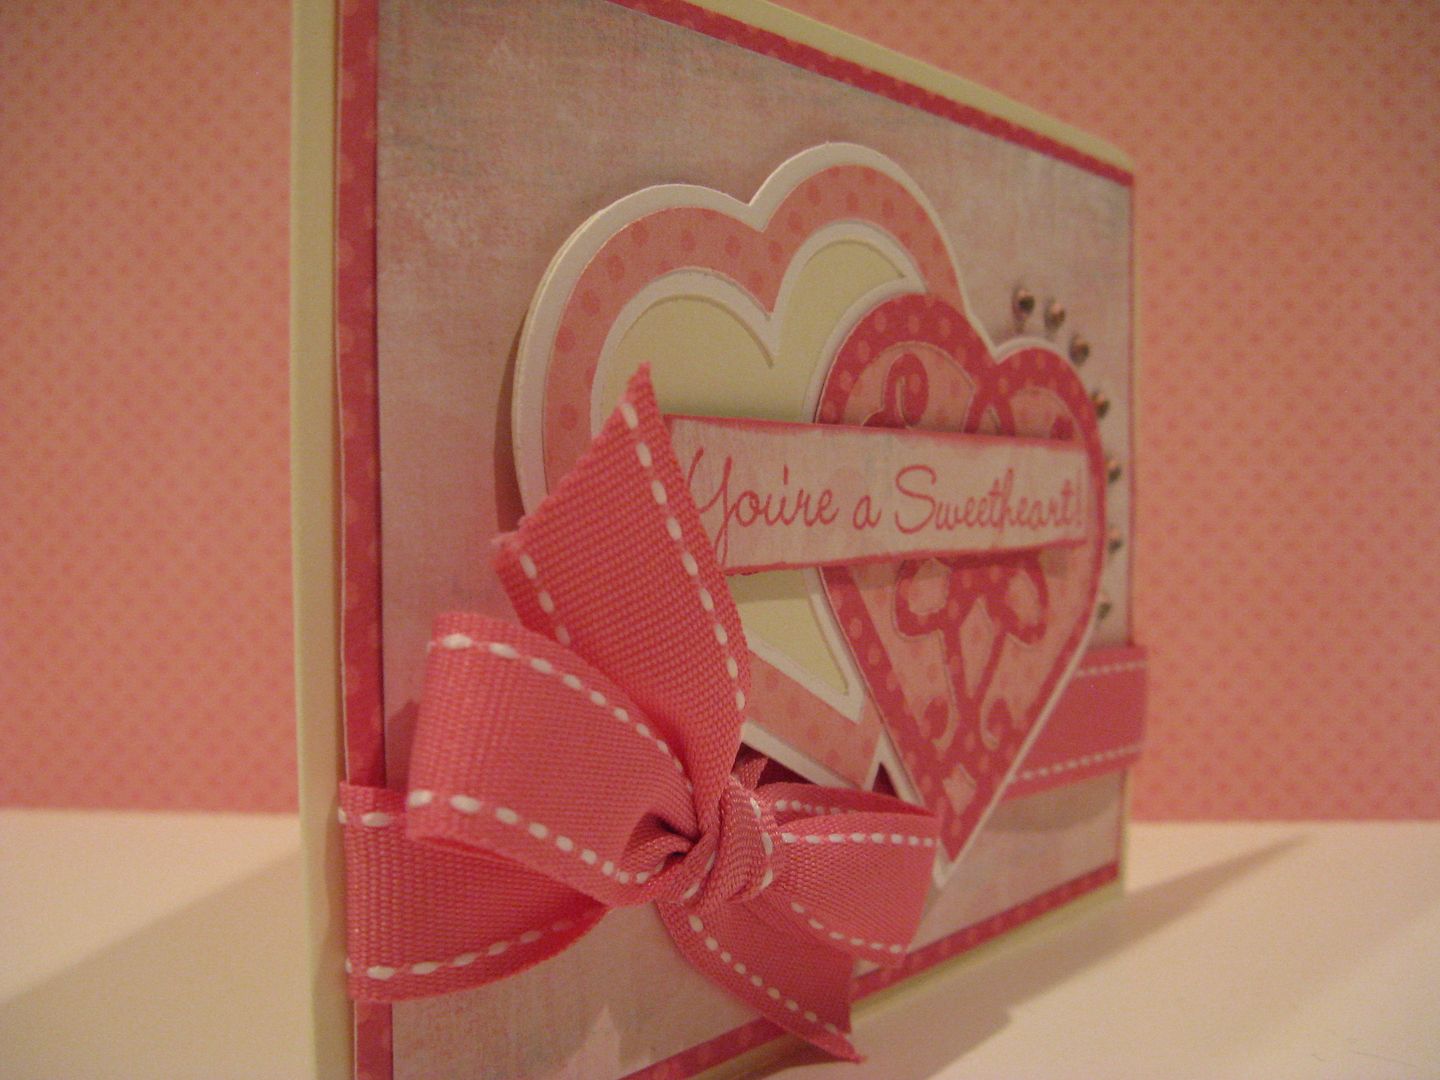
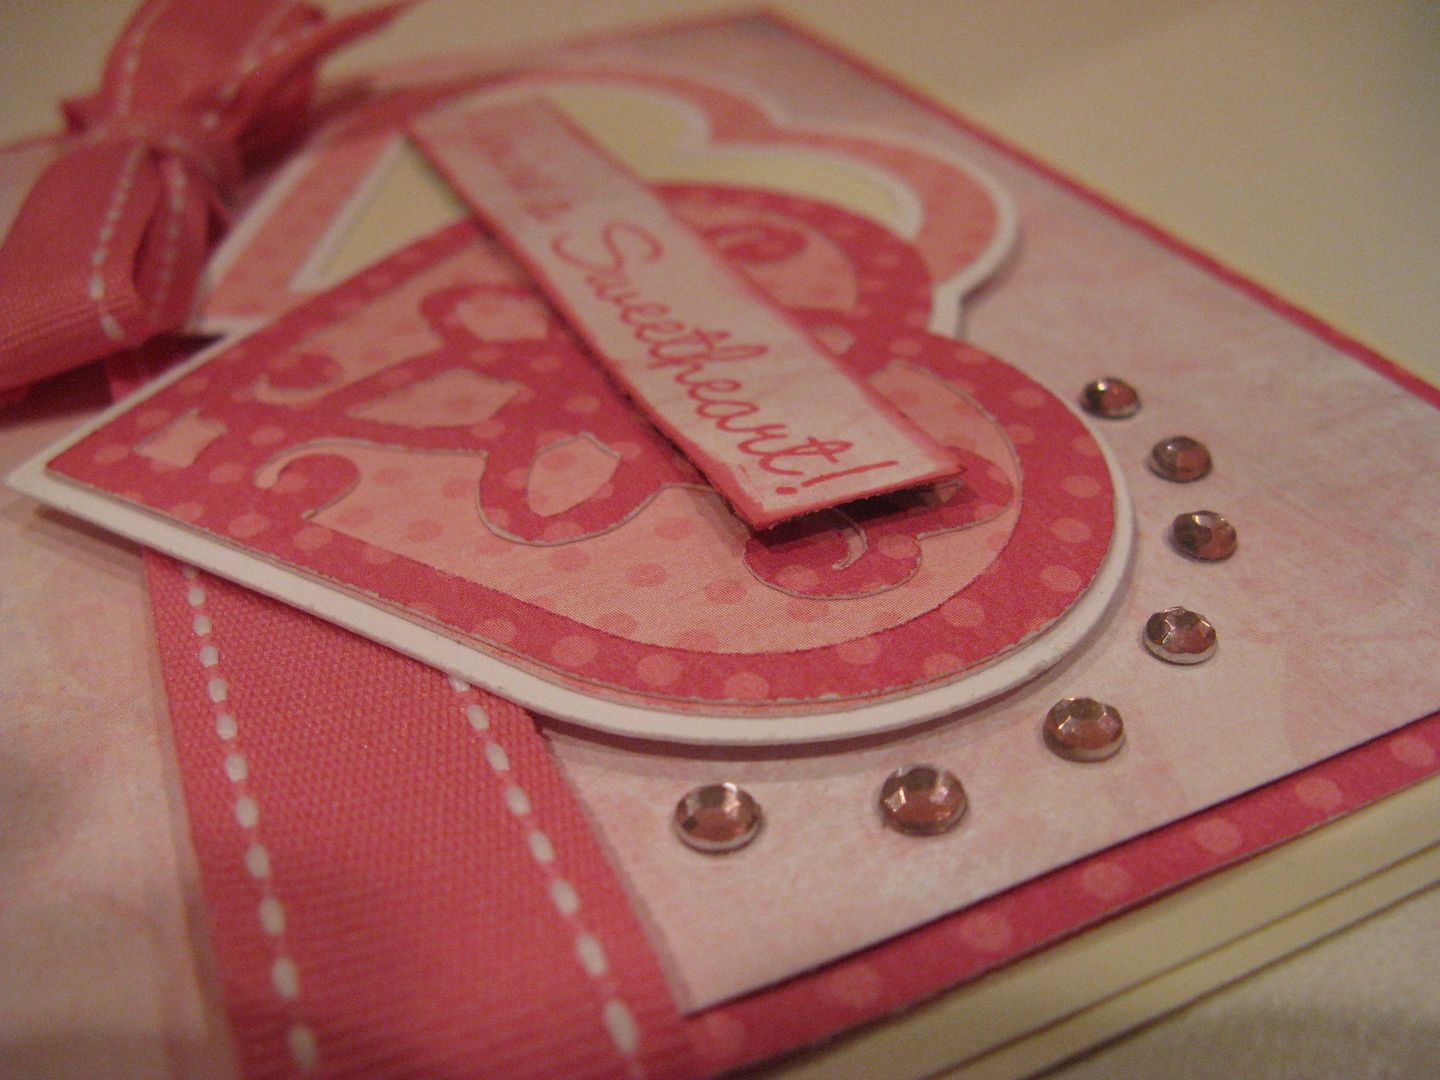
Vintage Valentine - Make your own Paper Lace Die-Cut!
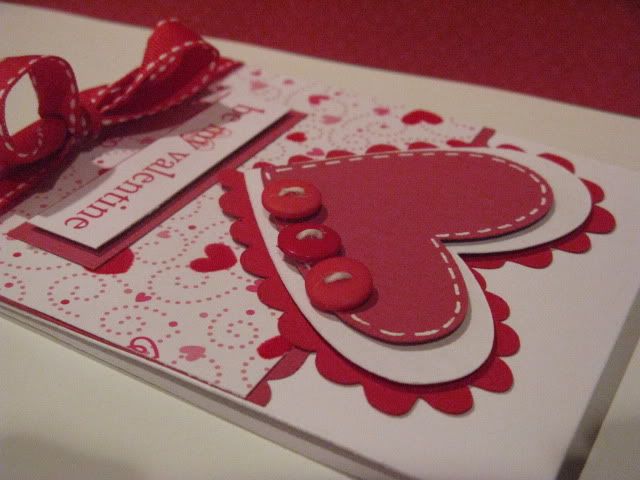
Peachy Keen Sketch Challenge # 43

I used the Heritage and Sweethearts Cartridges, but any cartridge with a heart and any lacy background (lacy labels) would work great! I also used Glossy Accents to give the heart and sentiments a little shiny dimension.


I used Vanilla Bean Crinkle Ribbon for this card. Scroll down for a video showing how I made the ribbon border!


Scroll down to watch a video showing how I made this heart with my Gypsy (super easy)!

The first video shows how I used my gypsy to create this layered heart:
The second video shows how I made the ribbon border:
Measurements for the heart: (These will make more sense after watching the video)
Background frame (Heritage) rotated - 3.20 x 2.68
Heart scalloped shadow (Sweethearts) - 2.81 x 2.68
Heart (Sweethearts) - 3.87 x 2.68
Heart Frame (Sweethearts) - Outer heart: 3.87 x 2.68
Inner heart: 3.50 x 2.39
Be sure to subscribe to my blog via email - at the top right of my blog - updates of new posts will be emailed to you!!
Wednesday, January 26, 2011
More fun with Country Life!
Hey everyone - I am loving this Country Life cartridge! There are soooo many fun cuts!

This card is 5 1/2 x 5 1/2 and all of the cuts came from the Country Life cartridge:
Pig and Chicken - 3 1/2 inches
Barn and layers - 3 1/2 inches
I hand cut the sun.
I hand cut the sun.

The stamped sentiment came from My Pink Stamper.

All of the patterned paper is Crate Paper. The black is the only paper that isn't patterned. I love the soft, subtle colors on the back side of brighter patterned card stock!

The blue background paper is 5 1/2 by 3 1/2 inches and the green background paper is cut at 5 1/2 by 2 inches.

I used glossy accents on all of the black pieces and dimensional squares to lift the pig and chicken up a bit.

Have a great day!
You might also like:
Road Trip ... Fantabulous Cricut Challenge
Oh the amazing places we go and people we meet on our road trip journeys... I love to go... but then it's nice to get home to my own bed.
This weeks Fantabulous Cricut Challenge #25
Road Trip
Create a card or project incorporating a vacation or travel theme
My card celebrates "Places to go... and People to see"

I used Zoobaloo cartridge for the trees on page 72 of the handbook. Locker Talk was used for the fabulous car on page 37 of the handbook, I only used the car and shadow feature. I used a 3/4 " circle punch for the wheels then added a flower brad.

The road was made from a piece of black cardstock then I used a white gel pen for the lines. My printer was used for the saying "Places to go... People to see" tied on using ribbon and added a sunshine charm. I also use a tan ink all over my paper pieces.

 Head over to Fantabulous Cricut to see what the design team has created for their "Road Trip" project. -HERE
I used Doodlecharms cratridge for the apple and apple boarder, I created the card in Design Studio and have a cut file available at the end of this post.
 The word "Thank you" was printed using my computer, the I used scissors to cut a tag shape, punched a hole and added twine to the tag.
*****
Come follow my blog and leave a comment on this post and you will be eligible to win my little prize package that I'm offering.
I will announce my winner on Wednesday the 22nd.
Come follow my blog and leave a comment on this post and you will be eligible to win my little prize package that I'm offering.
I will announce my winner on Wednesday the 22nd.
*****
Now it's your turn!
Incorporate a button on your own "Button Up For School" project. Make sure to include a Cricut cut somewhere on your project!
Incorporate a button on your own "Button Up For School" project. Make sure to include a Cricut cut somewhere on your project!
Next stop... my wonderful friend "Penny's" blog at Light Whimsy. Go see what she has in store for you today... And when you're done, make sure to link up your project to FCCB's Fantabulous Cricut Crawl post to be entered into the contest!
Have fun Cricut crawling and being inspired!
Sweet Treats Cake -Fantabulous Cricut Challenge
October celebrates National Bake and Decorate month and Fantabulous Cricut is celebrating with a yummy challenge.
The challenge: create a project that has something to do with baking, or if you have the Cricut Cake use it to make something delicious.
I decorated a cake using the Sweet Treats cricut cartridge, so delicious.

I used design studio to get the right sizing that I wanted to cut for my card. The cake is approx. 3" tall and the cake stand is approx. 1 3/4" tall, cutting each twice, the first was glued directly on my card and the second was pop up off my card. The scallop layers were cut once, then using a white ink pad I lightly dragged it over the scallop edges.
 I used tiny Prima flowers to decorate my cake.
Go see the other yummy projects by the Fantabulous Cricut design team -HERE and join us for this weeks challenge.
Labels: wedding card, cake, flower, prima flowers
Candy Corn Cricut Gift Tag -FREE cut file
It's Challenge Me Monday at Fantabulous Cricut the challenge is called "Frighten Me... or Not". OK, so my project is not frightening at all and I rarely, if ever, make any of my Halloween projects scary, it's just not in my nature.
I'm sharing a super quick gift tag that is perfect to add to a quick little gift or treat bag.
It's a Candy Corn gift card.
I have a simple Design Studio cut file at the end of this post
 For the mini card tag I scored in the center then folded.
 First layer (building from the tag base upward) is white with no slits, then next layer is orange, I cut off the top so the white would show. The top layer it is yellow and I cut at the bottom slit. I added brown ink to all the layers before adhering them to the tag.
 If you download this file please leave a comment on this post, it would mean a lot to me, Thank you!
Candy Corn Gift Tag video -HERE
Snowman Card --using Cricut Cartridge Winter Woodlands
It's Challenge Me Monday at Fantabulous Cricut Challenge Blog, and this week it's a Color and Shape challenge.
color "green" and shape "circle"
Use the shape-CIRCLE and color-GREEN somewhere on your Cricut project.
Do you love snowmen... I love snowmen and that saying "Snowmen melt your heart" is true for me. I do hope we will get lots of snow this year, however, I heard that it may be a mild one here, so we'll just wait and see. But in the mean time I can create the cutest snowman here in my crafting space. This snow man is from Winter Woodlands cricut cartridge on page 46 of the booklet and cut at 6 1/2".
 For my circle shape I added two green buttons to my cute snowman.
 I popped up the snowman from the card to add dimension.
Now you've got to see the clever and amazing projects that the FCCB design team has made, head over to Fantabulous Cricut -HERE.
Guest Designer for Everyday Cricut -Leaf Shape Card
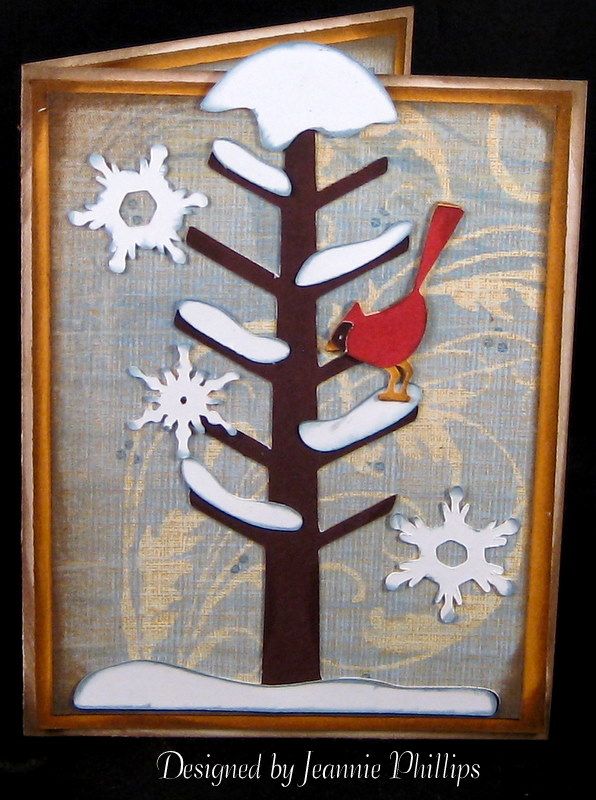
I'm so excited that Joy from Everyday Cricut asked me back as a guest designer this week, I had a blast in June when I go to share a few Summer and Father's day projects, view those posts -HERE. This week I'll have a few Fall, Thanksgiving and then Christmas/Winter projects. I hope you'll join me all week long and gather some awesome inspiration for your crafting projects.I love Fall, it's a gorgeous time of year, I love to see the beautiful colored leaves on the trees, although most are now covering the ground ready to be raked into a huge pile and then jumped into by smiling faces, young and old. :)
My first inspirational project this week is a lovely leaf shaped fall card, I added a birthday sentiment, but it surely could be used for any type of greeting. I have a Design Studio cut file for this project at the end of this post.
For details about this project please visit Everyday Cricut -HERE.
 Below is a photo of all that cuts that I used for my card, obviously they are different colors then the above photo, and that's because I'll will be making another card using different colors and this time I'll make a video of the step by step process and that will be coming soon, keep a watch out for it.


 I hope you liked the leaf card today and got inspired to create your next project.
If you donwload this file, please leave me a comment on this post, it really makes my day great! Thank you. :)
Design Studio cut file -HERE
"Snowy Delights"
Create a project and incorporate snow or snowflakes.
I'm beginning the New Year with this thank you card. I used my Winter Woodland cricut cartridge, the branch is on page 38, the bird on page59 of the handbook.
I was so excited to get a gypsy for Christmas and used it to create my first card... woo hoo...


There is so much inspiration at Fantabulous Cricut Challenge Blog, go see more "Snowy Delights" projects and get inspired to create your own project. -HERE
ollipop lollipop... Oh lolli lollipop.... *POP*
Today's challenge at Fantabulous Cricut is: Sweet Shop, create a project using something sweet, like ice cream, cake, candy etc.
I created a yummy lollipop shape card, isn't is delicous? I love how it turned out. I use the Accent Essentials cricut cartridge and designed it using my new gypsy. I welded two circles together, added a patterned paper circle then the swirl.
 Then added just the right amount of glitter on the swirl.
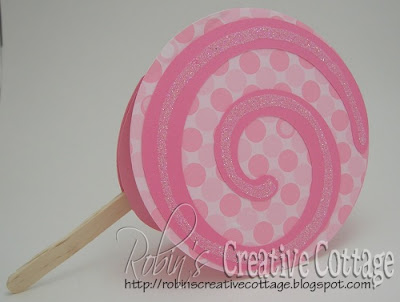 My favorite part... the packaging. I added a cello bag then curling ribbon to close it up. Then added a the "You're so SWEET" (oops I need to fix the 'You're' on the tag) glad I noticed before I mail this to my sweet friend.
 You'll have to go check out Fantabulous Cricut to see the yummy design team "Sweet Shop" creations and be inspired to create your own project. -HERE

Today's challenge at Fantabulous Cricut is: Sweet Shop, create a project using something sweet, like ice cream, cake, candy etc.
I created a yummy lollipop shape card, isn't is delicous? I love how it turned out. I use the Accent Essentials cricut cartridge and designed it using my new gypsy. I welded two circles together, added a patterned paper circle then the swirl.
 Then added just the right amount of glitter on the swirl.
 My favorite part... the packaging. I added a cello bag then curling ribbon to close it up. Then added a the "You're so SWEET" (oops I need to fix the 'You're' on the tag) glad I noticed before I mail this to my sweet friend.
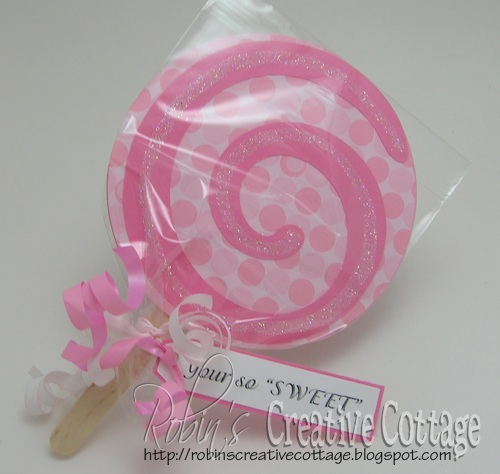 You'll have to go check out Fantabulous Cricut to see the yummy design team "Sweet Shop" creations and be inspired to create your own project. -HERE
Pilgrims Give Thanks -using A Child's Year Cartridge
Happy Tuesday everyone!Thanksgiving is a time of thanks, a time to gather family and friends together and eat all day long... ok some where in there we take a nap.
Today I'm sharing a lovely Thanksgiving card that I designed in Design Studio, I've used three cartridges for this card, A Child's Year for the pilgrim people, George and Basic Shapes for the oval frames and the rectangle layers, then I used Doodletype for the words "Give Thanks"
I do have a cut file available on my blog.
 I first traced the words using a gel pen, then cut out the letters. I purchased my gel pen holder from Amy Chomas -HERE. Remember, if you do not have a gel pen and holder, you can just omit the drawing part and cut out the letters, or use any cricut font cartridge that you have on hand.
 Below are the pieces that I cut out.
In my cut file I have labeled each mats that will be used to create this card. The first titled "Give Thanks draw 1a" this page you draw the letters "Give Thanks", then carefully with out removing the mat from your Cicut you replace the drawing pen with the cutting blade. Then in design studio you click on the next mat titled "Give Thanks cut 1b" below I have shown in a white box the pieces that are cut. After cutting remove your mat then move on to the design studio mat that reads "Give Thanks cut 2a" cut those pieces out.
The cream colored cardstock under the ovals is what I used as my card base, I cut it using my paper trimmer at 5 1/2" x 8 1/2" I scored half way at 4 1/4".
 I inked around the edges of the pilgrims before adhering to the brown shadow pilgrim image. Then used my scotch mounting tape to add them to the patten oval (I think this looks like wallpaper, prefect for the picture frame). The reason I cut out three ovals is I wanted my frame to be thick, each oval is just glued on top of each other.
 I added lots of dimension around the frame to give more of a 3D look.
 I'm so glad you visited to day. You can get the Pilgrim cut file on my blog
Robin's Creative Cottage -robinscreativecottage.blogspot.com
Tea For Two -using Once Upon a Princess cartridge
I couldn't decide if I should do a Fall/Thanksgiving project or a Winter/Christmas project, so I decided to do neither and play with my Once Upon a Princess cartridge, after all, it's the give-a-way cartridge this week here on Everyday Cricut.I have to admit this is the first time I used this cartridge and I've had it for about a month now. This is such a fun cartridge and quite cutesy, but I wanted to create a project that wasn't cutesy just to show the versatility that you can get by using different colors of paper.
I love the way this card turned out, and I think it could work for several occasions, friendship, birthday etc. The weathered patterned paper is a very old pack of Stampin' Up! designer paper I've had it for several years.
 The tag was printed from my computer then cut out by hand, then layered with tan cardstock and punched a hole then tied to the handle of the teapot using kite string.
 Below is a photo of the images that I cut and the page where each can be found in the Once Upon a Princess booklet.
 I didn't want to use the "crown" image for my layers of my teapot, so I cut two of the above image using the "shift" key on the keypad. On the white cardstock (pictured below) I cut a straight line to cut the top and bottom off the teapot, that way you would be able to see the green cardstock that was layered underneath.
 I inked all the edges of the images before gluing them together. You know how much I love to add dimension on my cards, so I used my scotch mounting tape and popped up the teapot, and the two teacups.
 Close up view of my sweet teacups.
 I hope you like today's card and can see that the Once Upon a Princess cartridge doesn't always have to be cutesy :)
Thanks so much for visiting today.
Come visit my blog and see what else I've created... Robin's Creative Cottage
Remember to leave a comment for your chance to win the Once Upon A Princess cartridge!
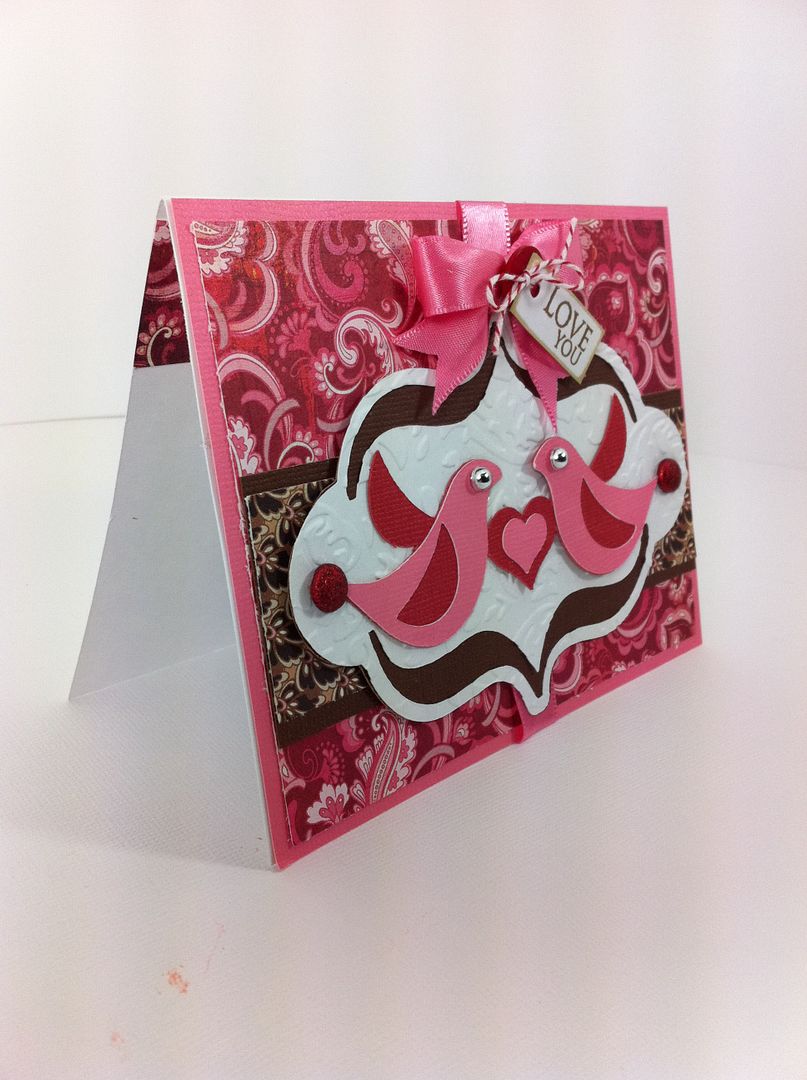
"Love You" Birds Card
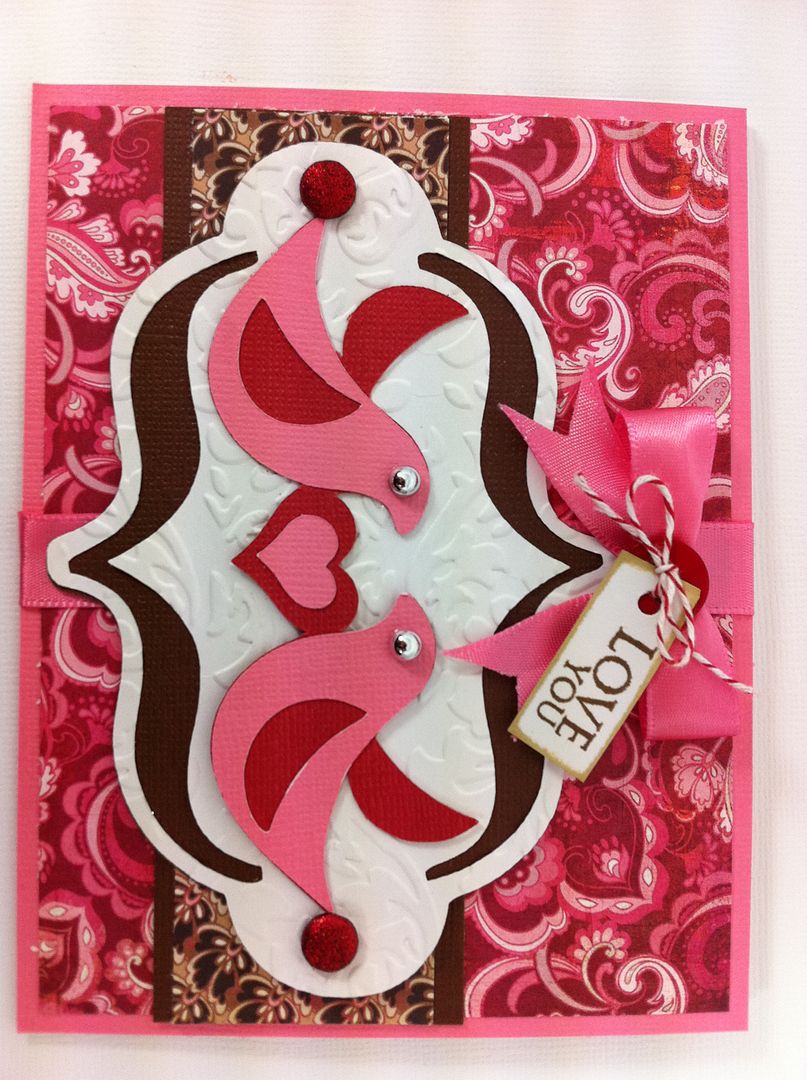
OK, so this is probably my favorite card I've made this year (ha, ha - only 6 days in...)! This A2 sized card (4-1/4" x 5-1/2") came together in a snap once I got my sizing figured out.
A tip for the newbies: Use the Fit to Length feature key on your Expression or Create to get just the right size you need on a project. I used that to determine what size to cut the label shape behind the birds.
Speaking of label shapes, can you believe this one came from the Twinkle Toes Lite cartridge? Be sure to look at your cartridges carefully - there are lots of labels and shapes on there that are parts of other images. This one was supposed to say "Tiny Dancer", if you cut all the layers.
I cut the label shape ("tinydncr") from Twinkle Toes at 3-1/4". Then, I ran it through the Cuttlebug using the Textile Texture embossing folder.
The love birds ("loveb") are from the Holiday Cakes cartridge and cut at 1-1/2". Remember that the Cake cartridges work in any of the machines and you can use the images to cut paper. Silver gems and glittered big brads are from Hobby Lobby.
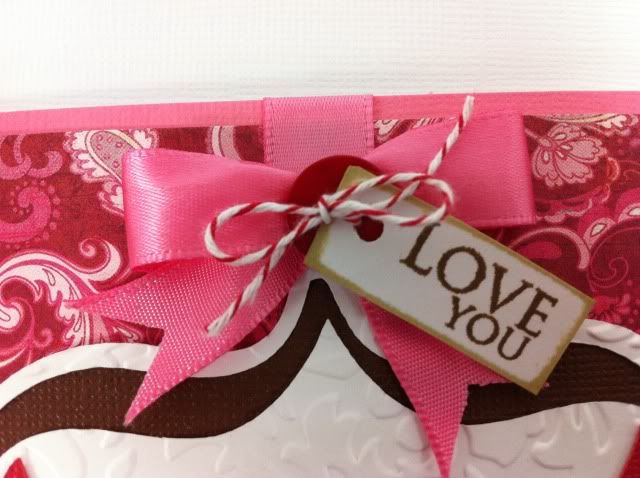
I added a red button on my bow, then tied it with Martha Stewart baker's twine and added my sentiment from Papertrey Ink. Button and ribbon by Papertrey Ink.
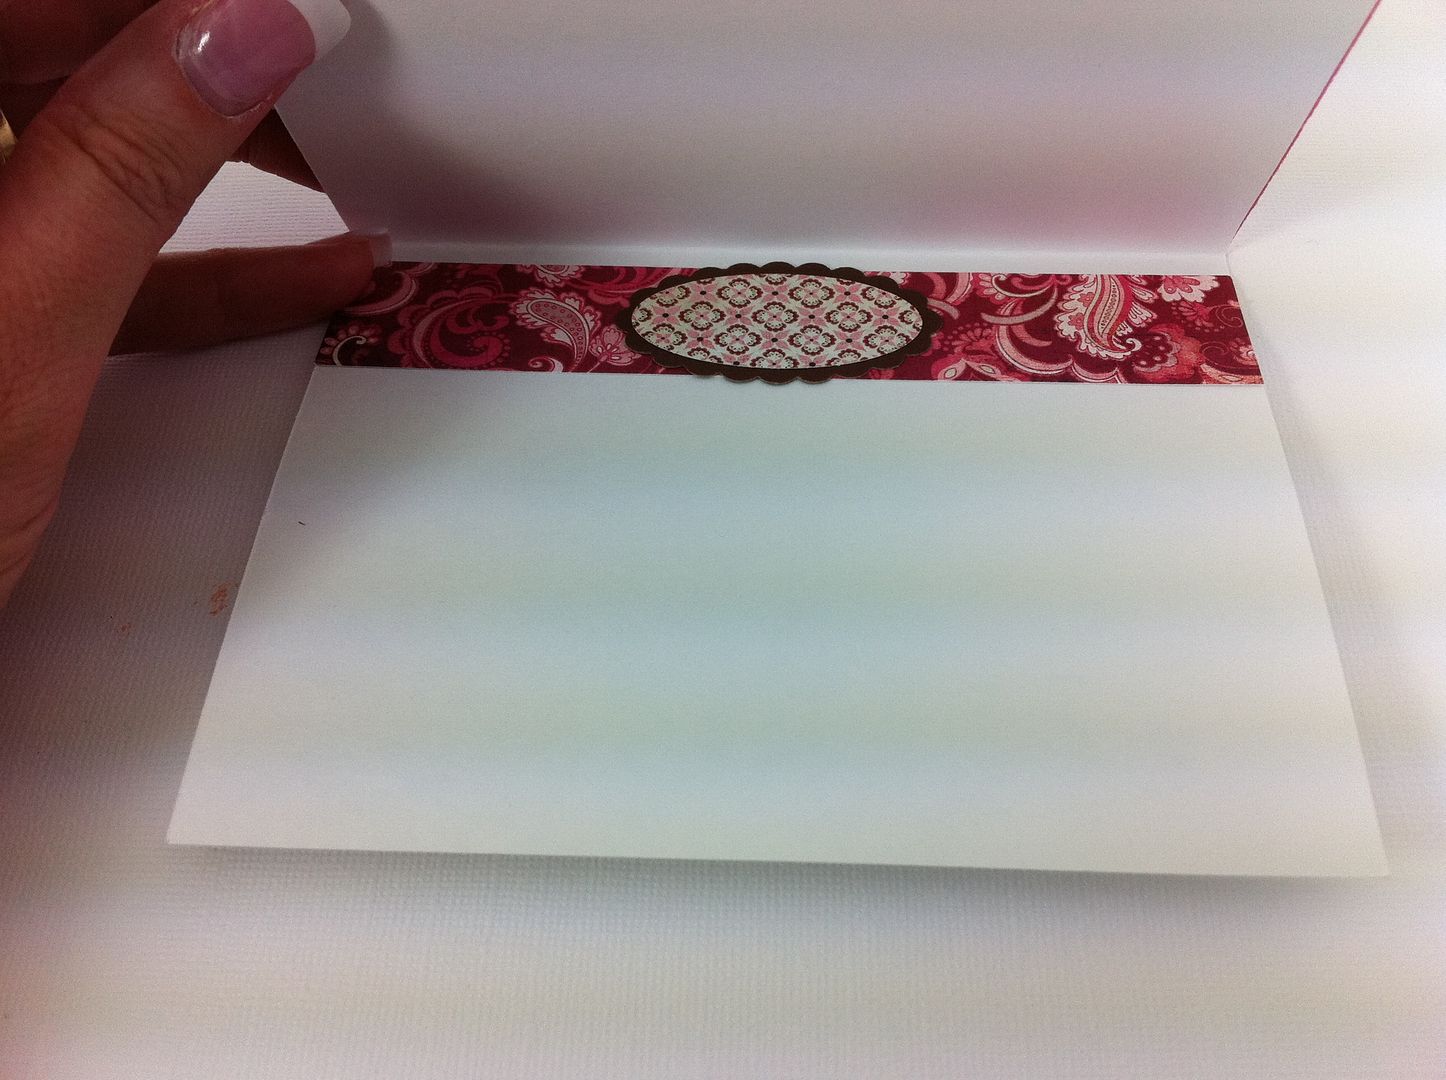
A finishing touch on the inside and we're done! Paper was by Core'dinations and Basic Grey's Bittersweet line.
Week 4: Simple Card Monday with Disney!!
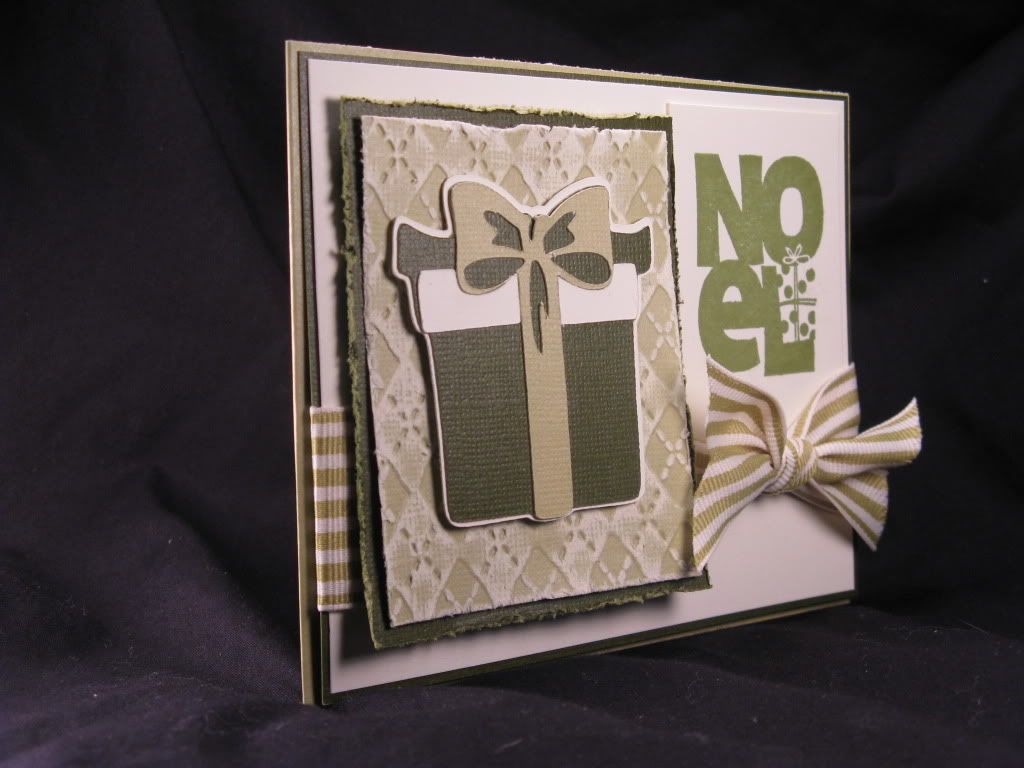
Hello, Everyone and thanks so much for joining us for Simple Card Monday.As you know this week is Disney week!! There is so much you can do with your Disney cartridges. Even though they may not seem Christmas'y' they totally can be!!
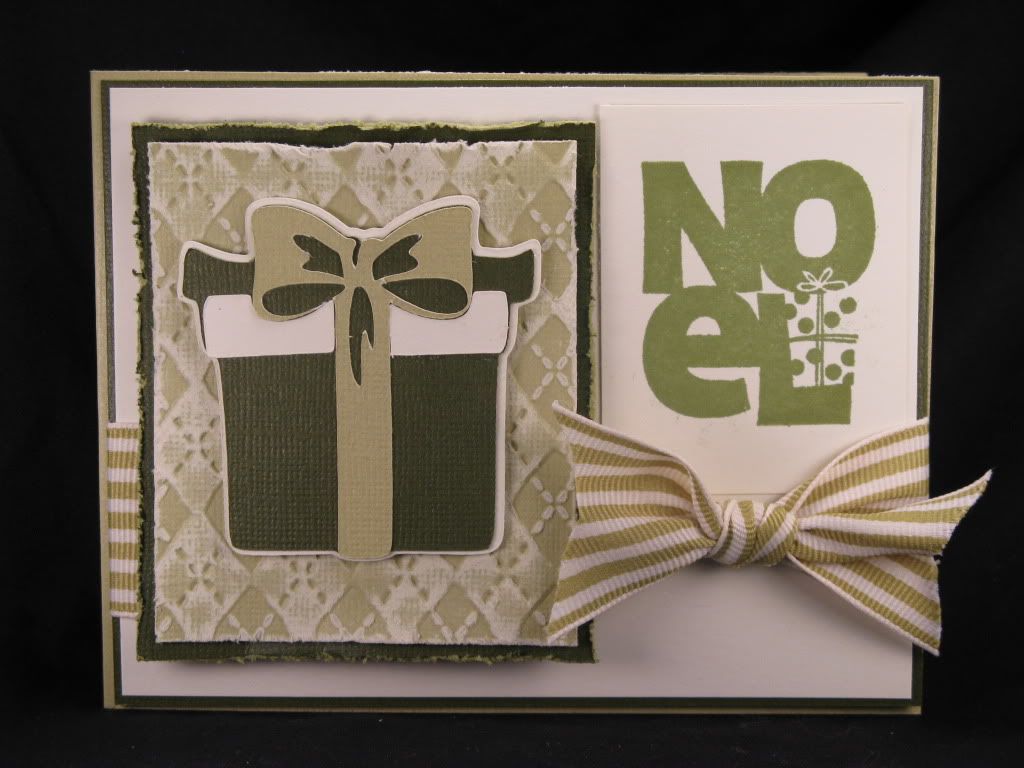
Take this week's simple card for example. I made it using the Pooh and Friends cart. Not a Christmas cartridge at all, but with a little creativity and my trusty Cricut voila a simple Christmas card is born!!
Here are the videos for the card. It was too long to be all in one so it is a two parter....sorry about that!
part 1:
part 2:
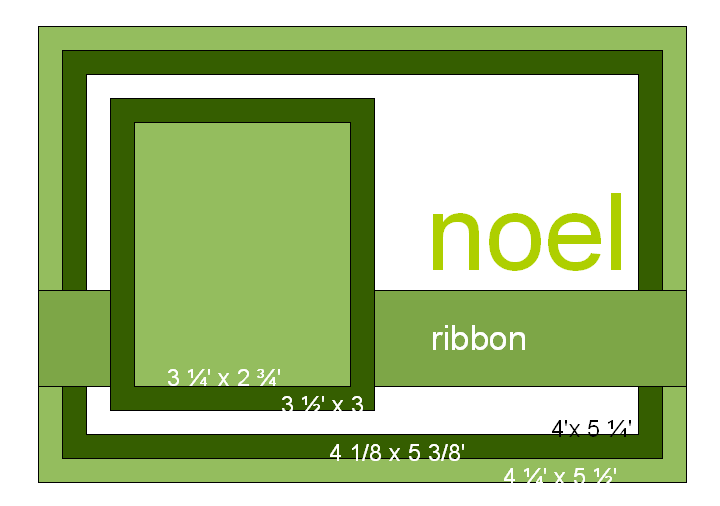
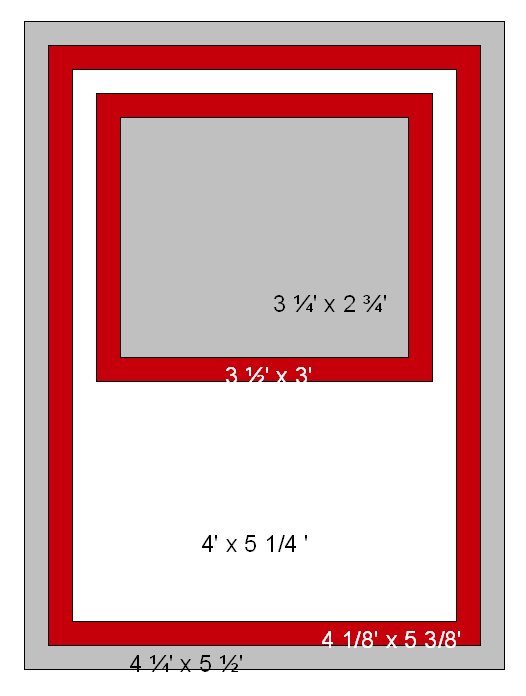
Here is the actual sketch for the week:
The 'gift' cut is on page 52 in your Pooh and Friends booklet. The shadow, icon, and icon/shift were cut at 2 1/4'.
All paper except for the cream card stock(which is CTMH) is Core'dinations from the Nostalgia super assortment. The ribbon is SU! 1 1/4' Old Olive striped grosgrain ribbon. The stamp set is Close to My Heart 'Holiday Jingle' and will be availiable September 1st. The embossing folder used is the 'Argyle' A2 embossing folder.
Check back in with us tomorrow for Home Decor Tuesday. Tammy will be posting something positively fabulous!! Also, make sure you are leaving comments on all of the posts. That way you can have an even better chance to with the Hannah Montana cartridge that we will be giving away on Sunday!
WEEK2: Simple Cards Monday
Here is the second installment of Simple Card Monday here on Christmas with the Cricut. This weeks card is made using the Christmas Cheer Cricut cartridge!
This cartridge was one of the first I ever bought. It has some super cute cuts on it and I think it is one that you will want to add to your Cricut cartridge library.
The cardstock is a mixture of Close to My Heart, SU!, and Bazzil. The stamp used is by Close to My Heart and is called 'Wonderful Season'.

Don't forget to check back with us tomorrow for Home Decor Tuesday! Also, make sure you are leaving comments so you can be one of the first people to own the New(but not yet for sale) Winter Woodland cartridge!!

Week 17: Simple Card Monday with Video and Winter Woodland!
This is Joy and today is everyone's favorite day, Simple Card Monday with Video!
I made today's card using the Winter Woodland Card feature key - so simple and quick! I cut out snowflake 4 with the card feature key at 5". Then, I used the Cricut to cut a circle out of a square to back the card - this required the "centerpoint" feature key and is shown in the video.
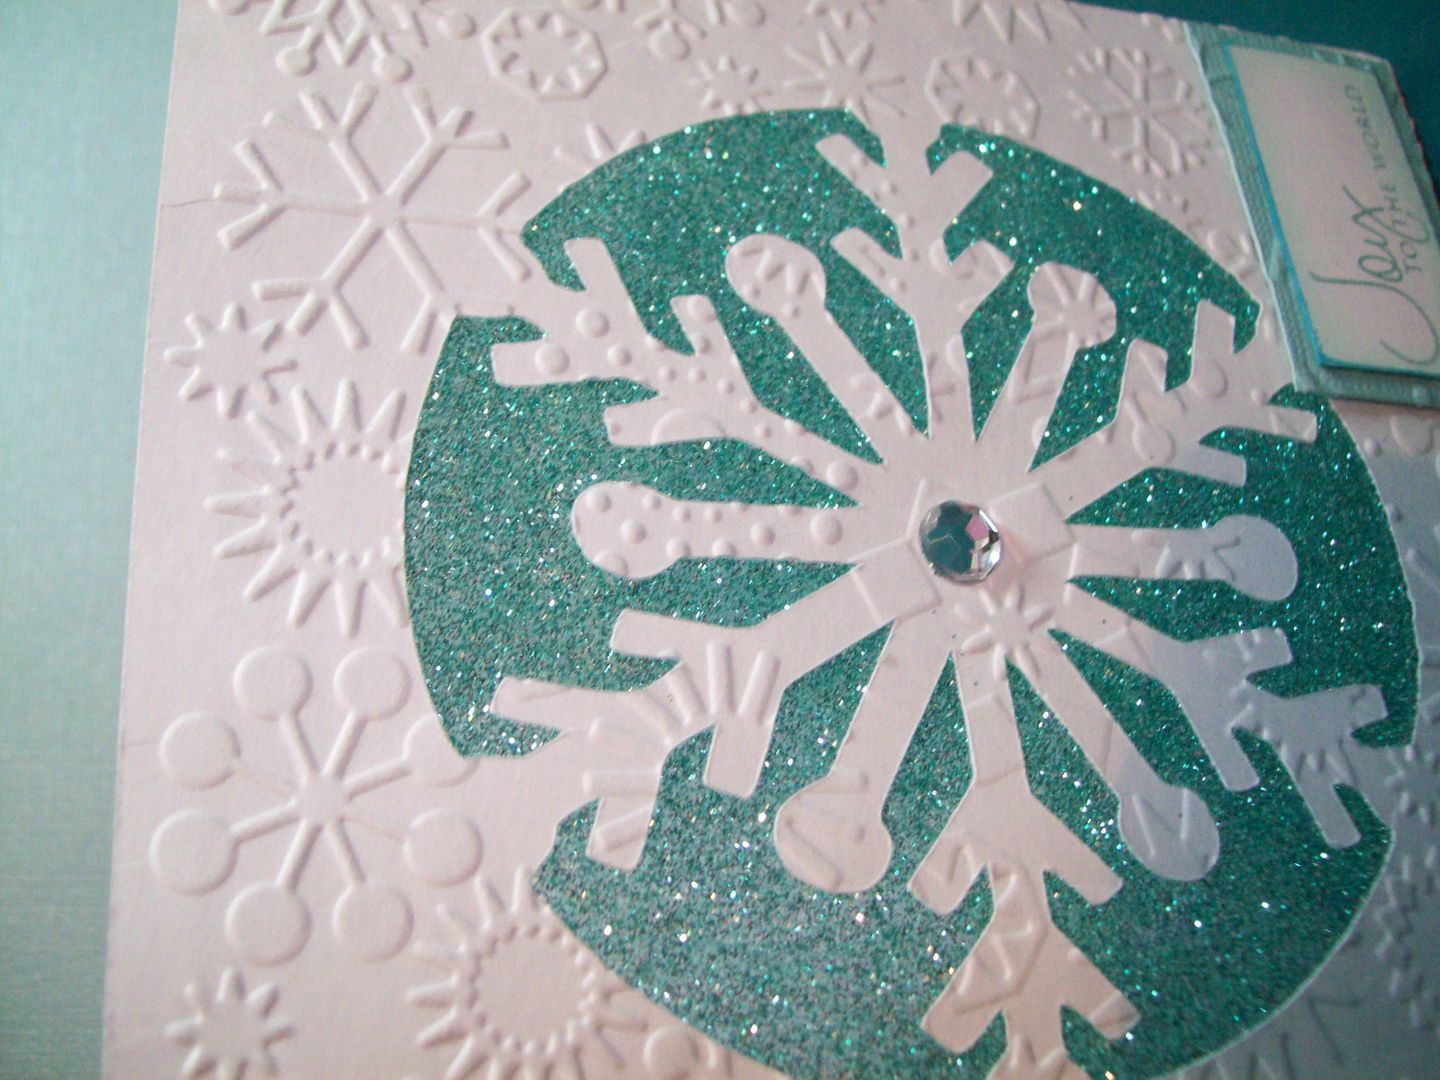
Next I ran the card through the Cuttlebug and glittered the card using a technique I learned from a Stampin Up! rep I know, Patti Dunham. Don't worry - I asked her if I could show the glittering technique and she was more than happy to share it with all of you! Thanks Patti! This is brilliant!
All the details are below in the video! You will love how easy this all comes together!
If you can't see the video, click HERE!
TWO BONUS DESIGNS FROM OUR FABULOUS GUEST DESIGNERS:
Isn't this elegant card just beautiful? Check out Jeannie's gorgeous SIMPLE CARD by clicking HERE
Monday, January 4, 2010
Simple Card Monday - Yummy Cupcake Card using Sweet Treats
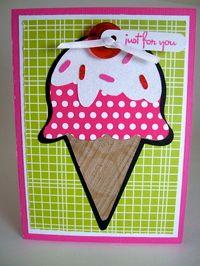
Hi, it's Joy and today's card is simply delicious! Well, deliciously easy, especially after you view the video and see how to make a smaller shadow for your ice cream cone!

I chose to make the icecream2 cut from the Sweet Treats cartridge and cut it at 4 1/4". Then, because I did not like how large the shadowing is on the shadow feature key, I instead used the shift icecream2 with the card feature key set at 5" to get a shadow I liked better. The video will show the differences. All the layers and such for the ice cream cone itself were cut at 4 1/4" using Jillibean Soup paper. I love this paper! Very versatile and great patterns on both sides!
The card when closed measures 4" x 5 1/2", a little smaller than the standard A2 size but you can still use an A2 envelope. It was cut using the cupcake2 card feature key at 5 1/2" with hot pink Core'dinations cardstock.
Check out the video below for more information! Click HERE if you can't see it!

Simple Card Monday- You're a Sweetheart using Wedding Solutions
Happy Monday, everyone! This is Melanie and I have a simple card for you today using the Wedding solutions cartridge and Bo Bunny paper.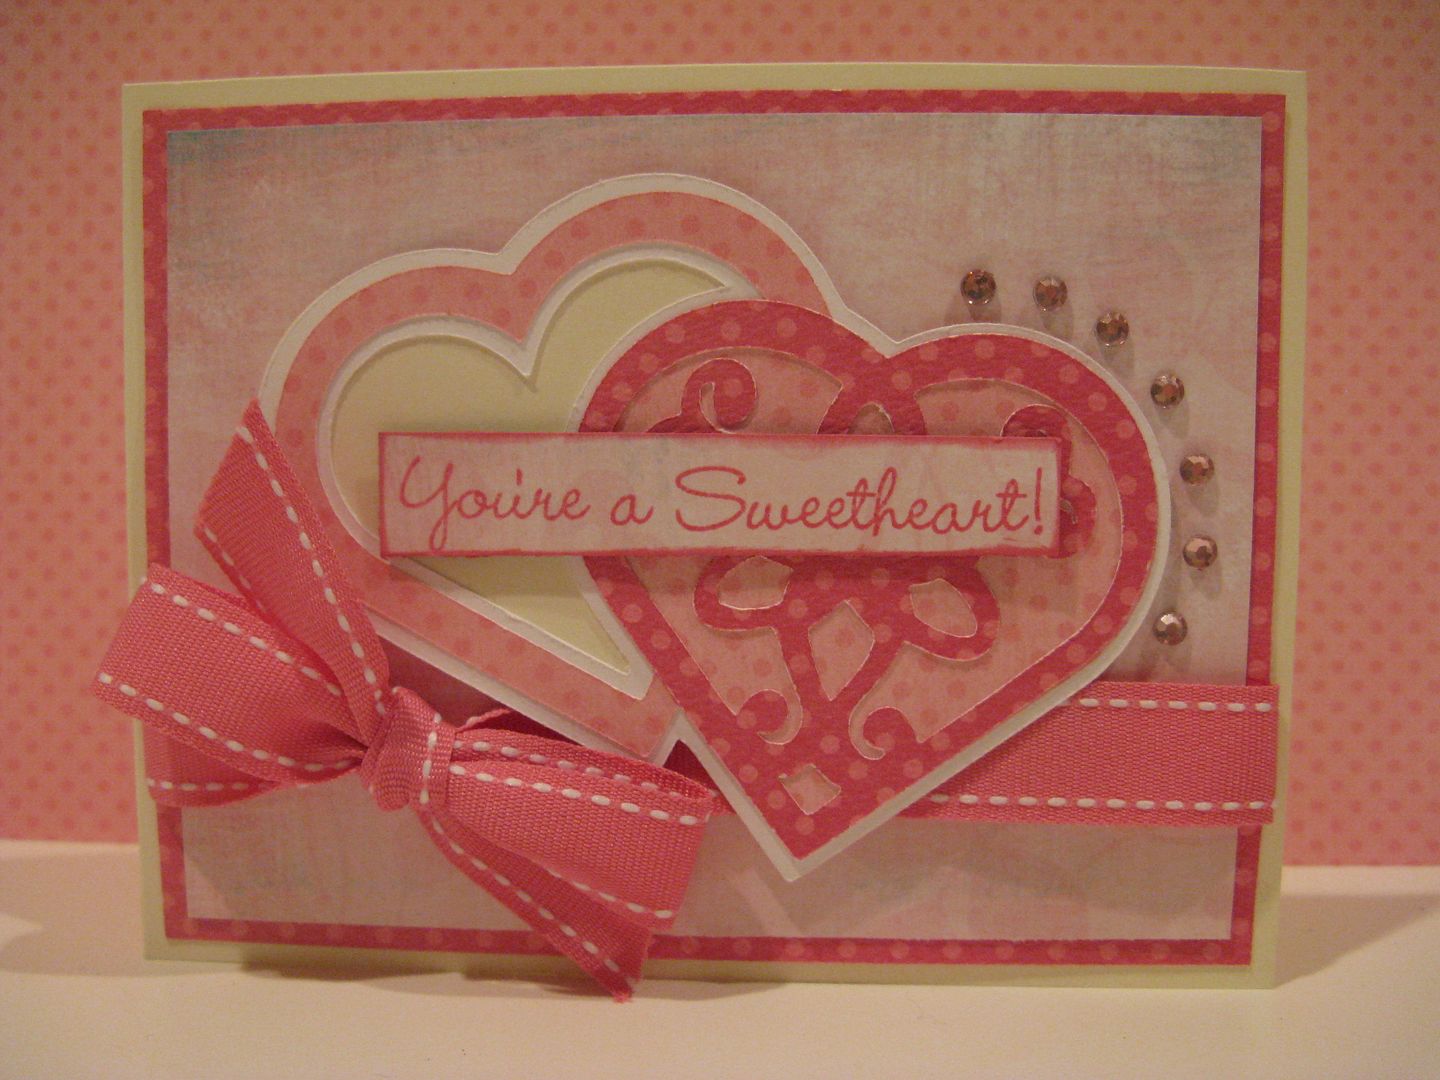
The sentiment is from a Hero Arts Valentine set that I bought at Archivers.
Here is the video:
Thanks so much for stopping by today. Make sure to leave comments all week long, so you can be eligible to win the Wedding Solutions cartridge and the Bo Bunny embellishment bundle.
"What They Call You After You Get Married" Card

Hi, this is Joy with today's Simple Wedding Card. I made this card using SEI Juliette papers (my new favorite papers) and two Cricut cartridges - Sweethearts and Songbird. The card measures 5" x 5" and there is a matching envelope that can be cut out on the Sweethearts cartridge.

This "Mr. & Mrs." sentiment is from the Sweethearts cartridge, page 63, and was cut at 3 1/2" for both the base cut and the corresponding shadow cut. I just used white and black cardstock.

I always like to use the Cuttlebug folders wherever I can and the base cut of the "Mr. & Mrs." seemed a perfect choice. I ran the word art through the Cuttlebug using the Swiss Dots folder.
Ribbon and rhinestones are from Michaels.

Above is a close-up of the word art so you can see the dots. The frame was cut using the Songbird cartridge, page 63, using both the base and shadow features. I cut it at 4". Apparently, all the good cuts are on page 63 today...strange!

No card is complete without some finishing touches on the inside! So, I went ahead and stamped "Congratulations" on a piece of white cardstock, then layered it with the peach and the gray. I also put down a piece of peach cut at 4 3/4" x 4 1/4". Stamp was from Michaels.
I am sorry there is no video to go with this today....my throat is still not back to normal. But, I hope to have one up on Friday for Fancy Card Friday.
Labels: wedding card, songbird, sweethearts, cuttlebug
and this is Melanie and this is my card that I made with the doodlecharms cricut cartridge and doodlebug paper.
The base and base/shift was cut out at 3" and I layered that with another base/shift cut that was cut at 2 1/2".
The stamp set is from Hero Arts and the ribbon is Papertrey Ink. This is an easy throw together in a pinch kind of card. Not a lot of steps and not many layers.
Be sure and leave a comment and follow/subscribe to us for a chance to win either a Sentimentals or Serenade Cricut cartridge! The drawing for those cartridges will take place tomorrow so don't wait!
On to today's card.......This week's card is made using the *new* Just Because Cards cartridge. I seriously love this cartridge!! It is full of really great cuts. For example, how about this sweet little peach!?!
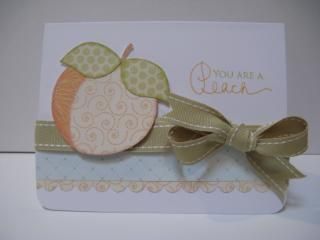
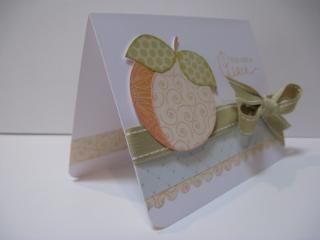
The peach is cut at 2 1/2".
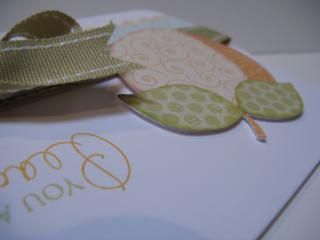
The Paper, ink, sentiment, and ribbon are from Papertrey Ink. Here is the blog of the stamp designer herself http://dawnmcvey.typepad.com/these_are_a_few_of_my_fav/ You are definitely going to want to add her to your daily routine!
Here is the video:
Thank you so much for stopping by today!! Make sure you are leaving comments on all of the post this week for even more chances to win one of the MANY prizes we are giving away this week!!
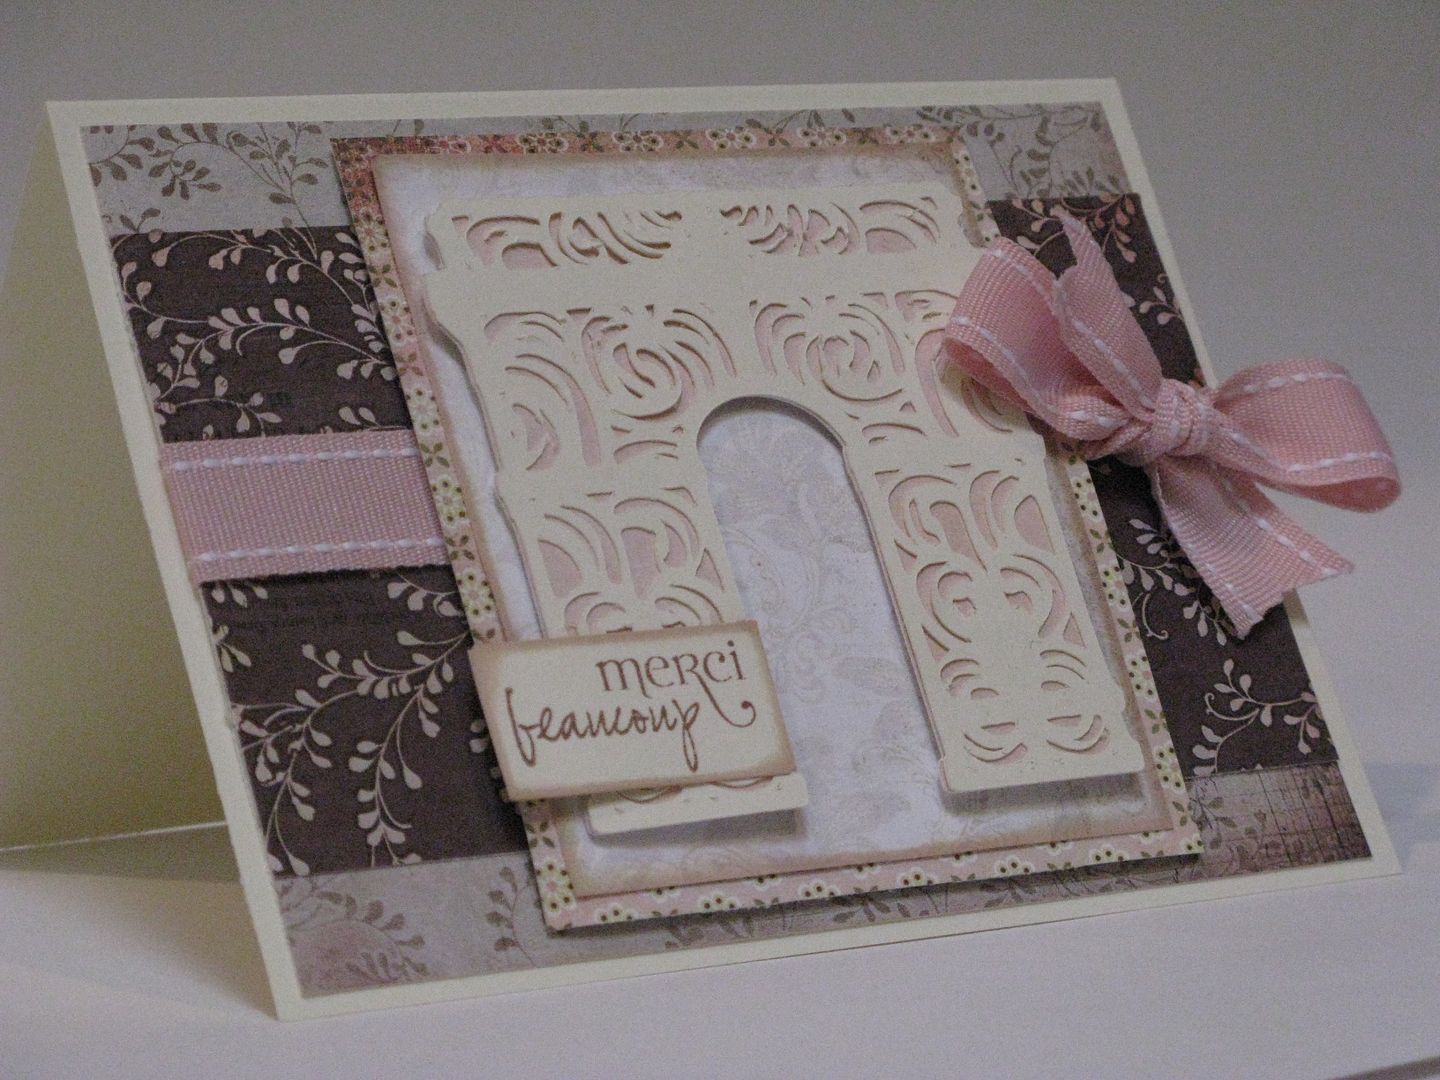
Merci beaucoup to you..and you...and you--card made using Summer in paris mini cricut cartridge.
Hello, friends! This is Melanie and I hope you are having a great Monday! Today is Simple card Monday of coarse and I have something for you that I made with the Summer in Paris mini. Let me tell you it is my favorite mini so far!I cut the Arc de Triomphe at 3".

The card is A2 sized and the patterned paper is from Basic Grey's Capella line.

and here is the video!
Simple Shaped Card using Hello Kitty Greetings

Happy Monday! This is Donna and I'm so excited to be spending the week with you here at Everyday Cricut.
Those of you who are familiar with my work know I'm a big fan of shaped cards and Cricut Design Studio. I received DS for Mother's Day (from the kitties) only a week or two after receiving my Expression and I hate to admit I almost NEVER use my Cricut without it, even for regular cards.
In the spirit of simple card Monday, however, I decided to do a shaped card WITHOUT my beloved DS. Many of the new cartridges have a shaped card feature but I chose the Flower1 (page 47) from Hello Kitty Greetings because of the shadow effect of the layers which I love. Besides the adorable kitties, there are loads of sweet shapes on this cartridge so I think it's definitely worth a look if you don't already own it.

First I used the Card feature at 5 1/2" for the card base. Then, to hide the fold, I cut what I always call a first mat using the Blackout feature and glue it directly to the card base. Now when I cut my layers I will have a full shadow around the entire card.

The petals and stem are found on the Clothes and Clothes shift Layer feature (top row, 2nd key) and are also cut at 5 1/2. The flower center is found on the White and Fur Layer feature (top row 1st key) and that's it for the front. WooHoo!
When the card is this simple, I like to use bright coordinating prints and, although you certainly can glue the layers directly to the card base, I prefer to pop them with foam dimensionals. I was able to find black ones at my LSS (made by EK Success so they virtually disappear. The particular paper I chose for this card was just that, paper, not card stock so to get the strength I needed to pop the layers I cut them out of inexpensive smooth white card stock and glued the paper to those first.
To add a little texture to the flower center I ran it right side down through my Xyron and flocked it. I could have also run it through my Cuttlebug for texture instead. I think it's always the little extra unexpected touches that make a card special.

Because the designs on this cartridge are so simple and almost childlike, I didn't ink the edges but doodled instead. For a finishing touch I tied a bow around the stem.

Inside I always mat my cards. Besides the fact that the base is black, it adds strength to balance the front layers. However, there was no solid flower to use that would fit properly. Instead I just cut the layers again, but I was forced to use Design Studio to hide the selected contour of the cut out center. Oops, I guess I lied about not using DS. The other option would have been to cut another blackout mat in white and trim it at the fold but there wouldn't have been any black edging like I wanted. Sorry about that. This was unforeseen.

Although it's simple, I think the shape of this card would bring a smile to almost anyone's face and could be used for a number of different occasions. I encourage you to explore your cartridges for the fun shaped cards that are available to cut directly with your Cricut.
Criss Cross Card from Tie the Knot 2 Ways

Isn't it amazing how different cards can look when you change the paper? Here are two examples of a criss cross cards that are essentially the same, but the Monogram card has an elegant feel, while the Celebrate card feels like a party.
I've always thought criss cross cards were pretty, but I could never cut them right using measurements or templates I found on the net. While browsing Tie the Knot, I realized that there was a scalloped one (with holes or not) right on the cartridge, there for the cutting. Who knew? It is on page 72 of the manual and is called "invitation". To cut the scalloped one without the holes, use the invitation feature (second key from top right) and the shift, and go all the way down to the bottom row, second to last key and you've got it.

I used Design Studio to do this card and cut it at 6". At this size you would have to rotate the cut in order to have it fit on a 12x12" mat, so if you aren't using DS or your Gypsy, the largest you can cut it is 5" unless you pull out your 12x24" mat.
I love the elegance of cream and black and one of my favorite paper stacks is the 8.5 x 8.5 black and ivory Designer Paper by K&Co that I get at Michael's. It's double sided and the coordinating patterns are fabulous.

Instead of using one of the cards that come on the cartridge, I tweaked the rounded rectangel2 from George to fit and welded the shadow of the monogram to the top of it. Then I cut a slightly smaller mat and glued it to the card, cut another shadow and regular cut of the D and glued it on top. The welding adds strenght to the monogram, but you certainly could just attach the monogram on top without the weld if you want to make the card without DS. The triangle mats are skewed to fit in DS using George as well. An option would be to measure and use your paper cutter or just cut the card out of patterned paper, but I like the scallops being a solid color for contrast.

I embossed the regular cut of the monogram using Swiss Dots and added adhesive beads (one of my FAVE embellishments) for interest.

The band is purely decorative because the criss cross is glued shut like an envie and doesn't open. I just cut a 1 1/2" x about 10" strip of back and wrapped it around the card, trimmed it to fit and added a srp of another pattern and more beads. That looked a bit more elegant and understated to me than a bow or flower embellishment. Besides an invitation, I really think this card could be used for any occasion, including a keepsake menu card for a special dinner party.

The second card says "PARTY"! It's done in exactly the same way as the Monogram card but "Celebrate" comes from Straight From the Nest. The fun bandana paper is from an 8"x 8" Martha Stewart pad.

Here I thought doodling was a better choice for a more casual feel. If you choose to make a card like this without the welding, I suggest you glue the word further down on the card for strength.

To finish this one off, I added some gingham ribbon and a watermelon slice brad. Wouldn't it be a great invitation for a Memorial Day or Fourth of July barbeque? I also think it would even make a fun birthday card or any other reason one might celebrate. I hope you enjoyed this and it gives you the inspiration to take a closer look at your cartridges and explore the card options. See you tomorrow!
Oh, and BTW, if you would like to win a pad of that favorite ivory and black K&Co paper, click HERE and leave a comment on my blog. The winner will be announced Friday, along with the winner of the Cutting Cafe set.
Simple Sweet Card with Mini Monsters Cartridge and Bella Blvd. Paper
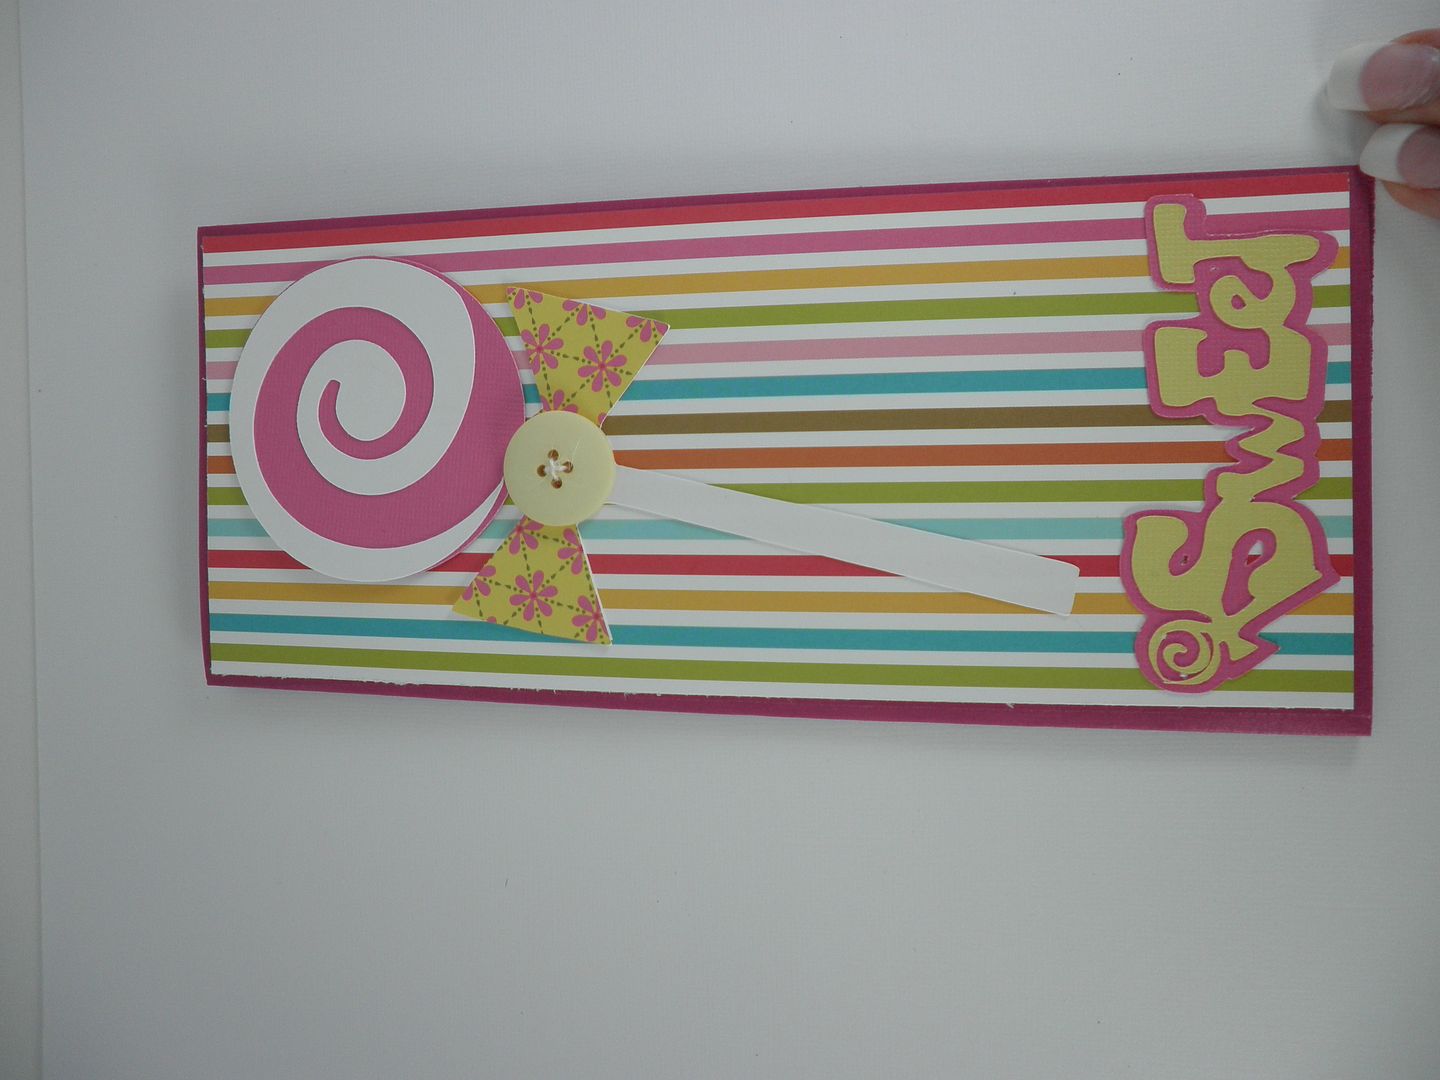
Hi, this is Joy and today's 4" x 9-1/4" card is from the new Mini Monsters Cricut cartridge. You wouldn't guess it to look at it since who knew there was this cute lollipop hidden on this cartridge? The colors on this are a true yellow and pink - I don't know why the computer distorted it so much.
All this week we will be featuring projects from the five new cartridges that Provocraft released this past Thursday - Mini Monsters, Toy Story, Cindy Loo, Wall Decor and More and Freshly Picked.
It's simple card Monday and so I've kept it very simple. I cut the lollipop on page 57 of the handbook at 7" and used all the layers but the shadow. This cartridge has thick shadows and when I tried it out on the card, I wasn't sure it worked.
I cut the "sweet" word art also on page 57 at 1-1/2", also without a shadow. A good way to fit your word art on the card is to use the "Fit to Length" button. In this case, I pressed "Fit to Length", then dialed in 3-1/2" and then hit the Phrase Feature key and the lollipop key. The machine then gave me the size of 1-1/2" as a height that would fit the length of 3-1/2" long.
Paper is from Bella Blvd. and Core'dinations cardstock.
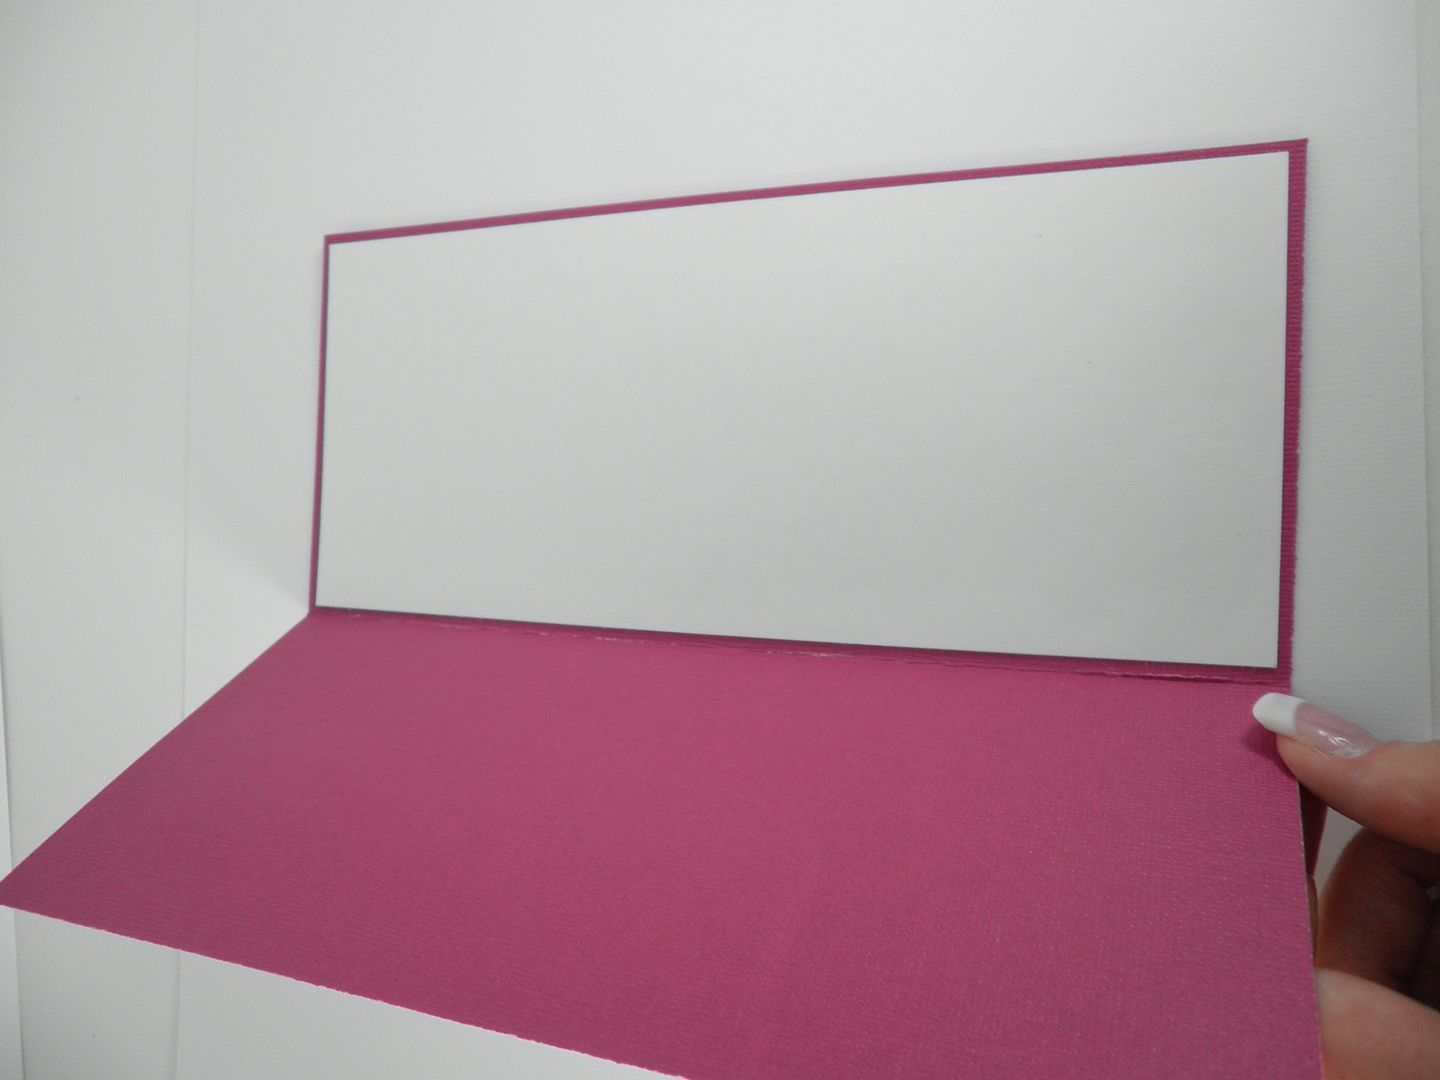
I just added in a sheet of white cardstock for the inside. This card fits in a standard business envelope so no problem finding one of those, huh?
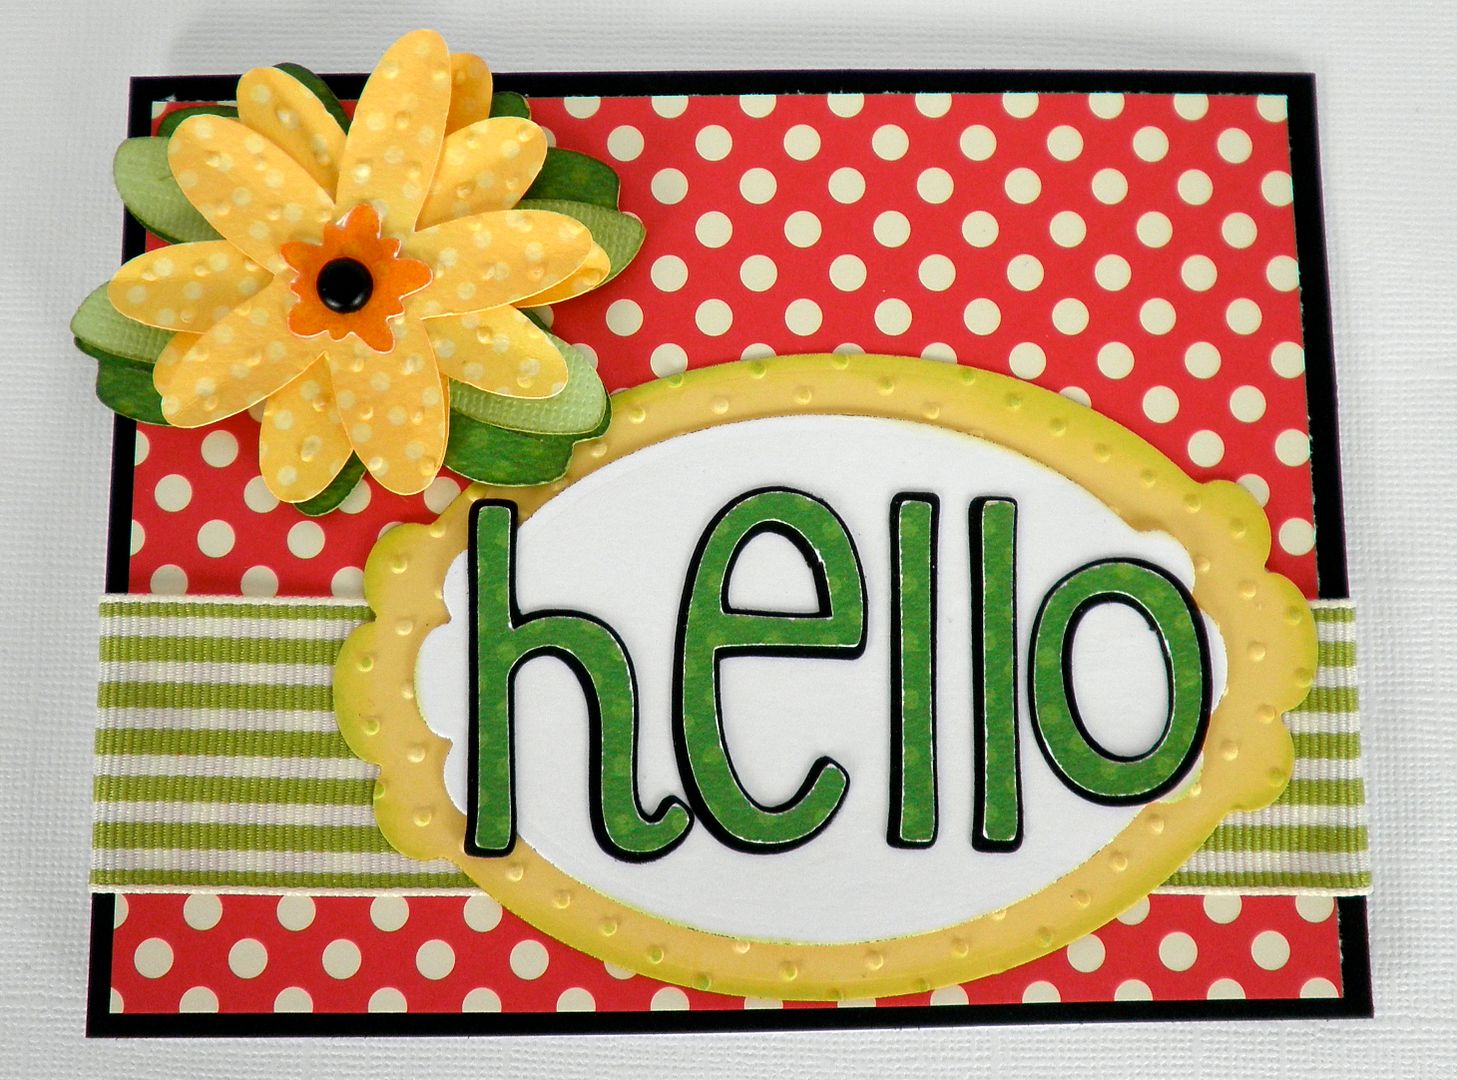
"Hello" Cricut Lite Cherry Limeade Card
A little change to the schedule - we're swapping projects and having a card today, layout tomorrow.
This is probably my favorite card of the 40-something plus I made! And it was so easy! I love this Cricut Lite Cherry Limeade cartridge! The font rocks and so does this flower image!
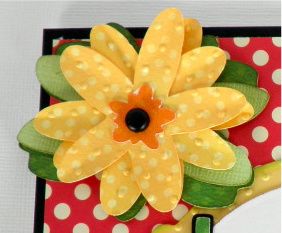
First off, I cut the flower (all layers) at 2" and instead of just one layer of flower, I cut three. I used the Bo Bunny double dot paper for the flower section and some of the leaves and Core'dinations for the other leaf sections. I ran these layers through the Cuttlebug using the Swiss Dots folder, after inking the edges. I had also inked the edges of the green leave parts and then layered the whole thing together and threaded a large black brad through the center.
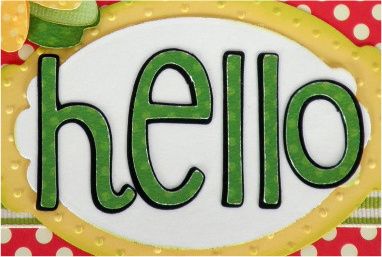
My card is a regular A2 size (4-1/4" x 5-1/2"). I cut the "hello" letters with the regular and shadow features at 1-1/2" and it cut like a dream. I am so loving this font! I mounted the word onto a background cut that went over the striped green ribbon from Stampin Up!
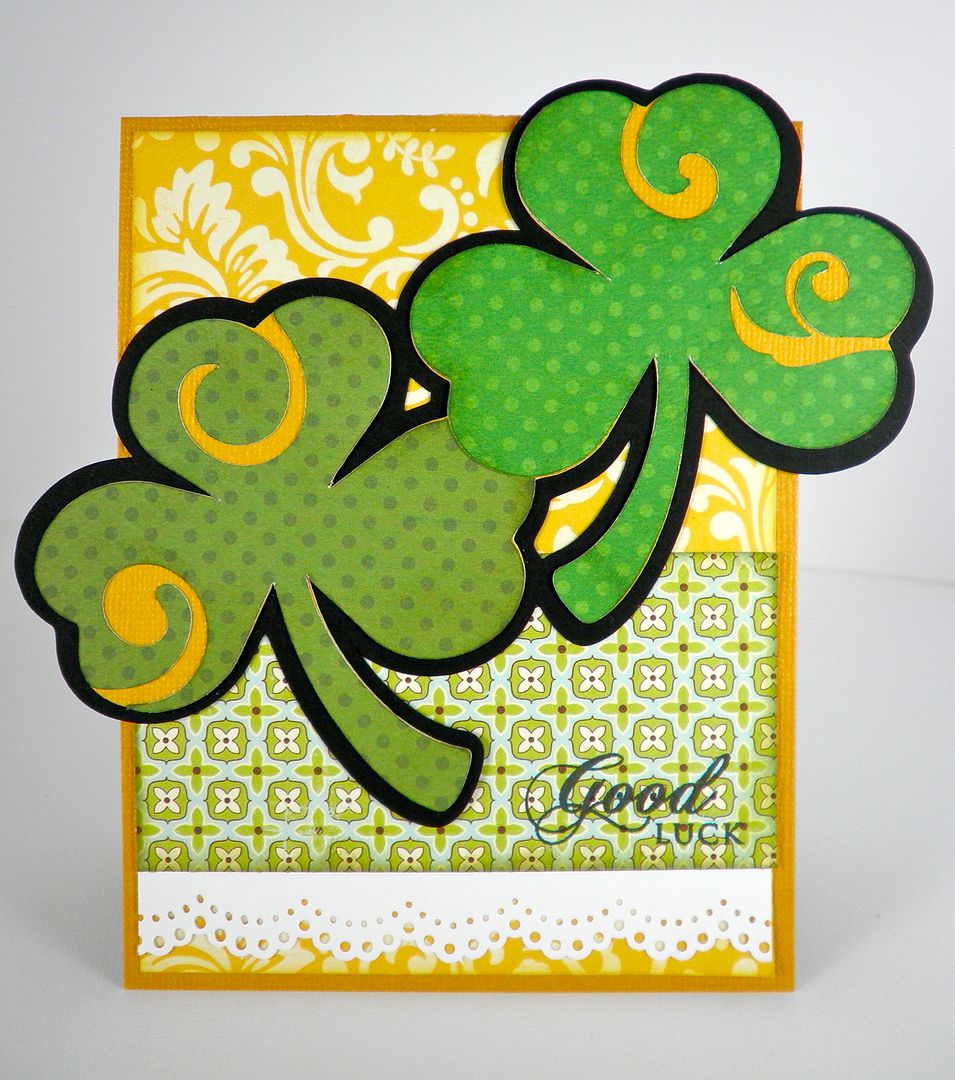
Surprise from Craft-E-Corner and Good Luck Card!
Guess what? We're all lucky today, as you're about to find out!
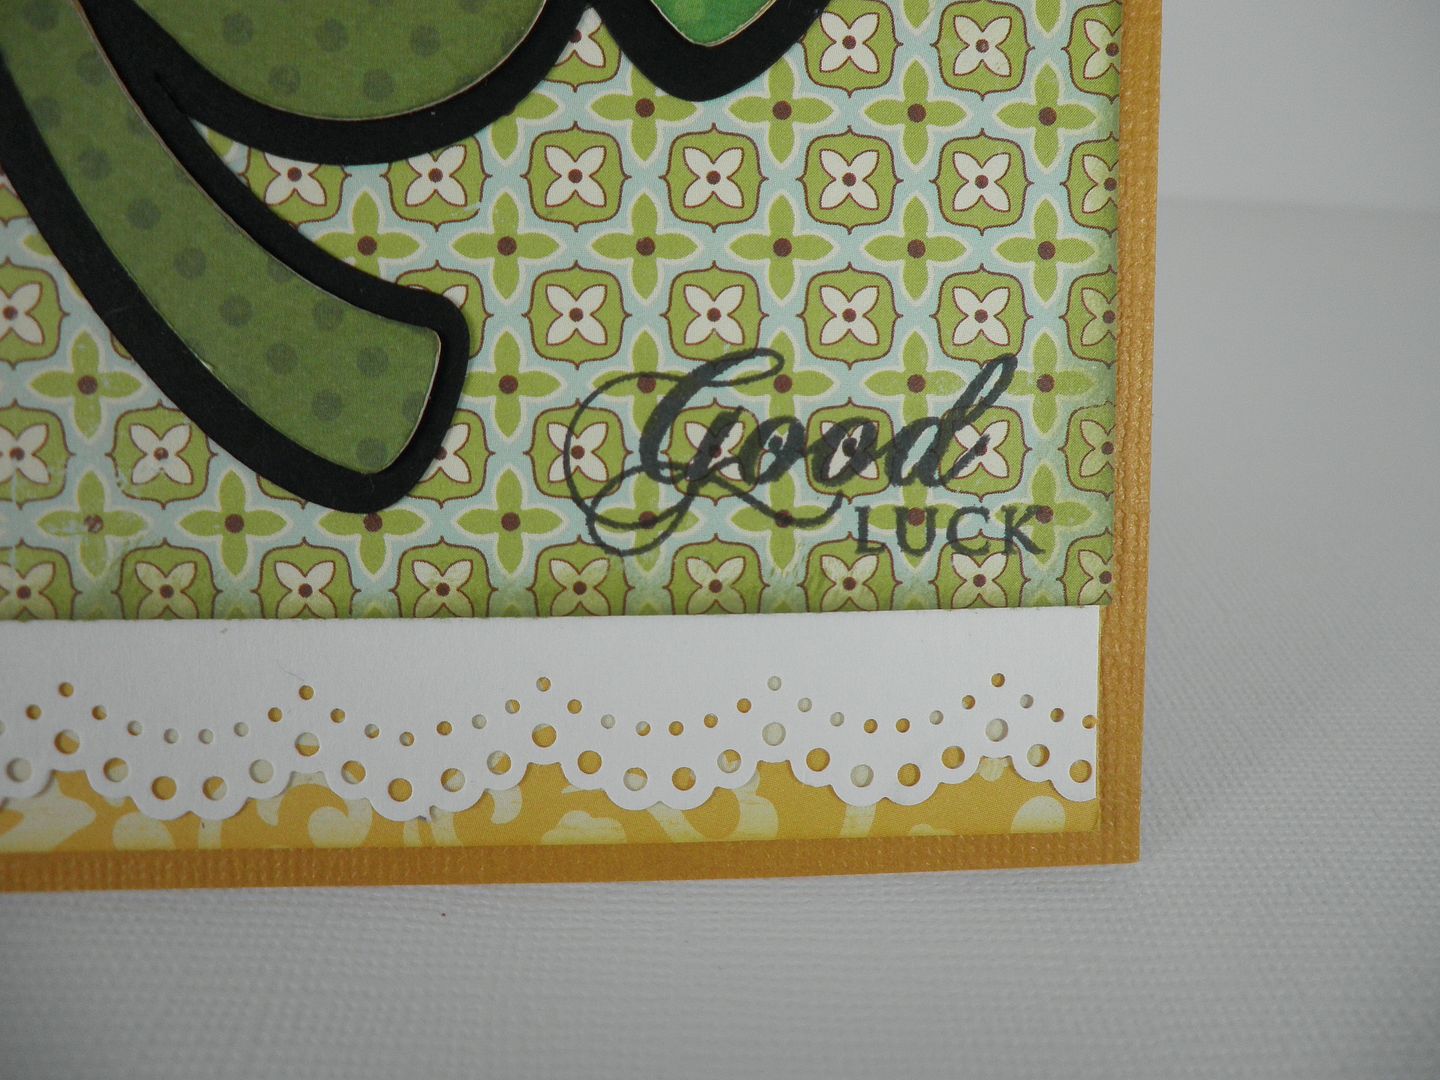
But, first, let's take a look at today's simple Good Luck card from the new Cricut Lite cartridge, Celebrate with Flourish! OK, I just have to say that this is probably my favorite cartridge from the new release of Cricut Lites! It's just so versatile!
My card is a standard A2 card (4-1/4" x 5-1/2" when folded) and I extended the shamrocks out, figuring I could use a little bit larger envelope to accommodate them. Sometimes, you just got to go outside the boundary lines, know what I mean? Or maybe since I live in Texas, I don't want to be fenced in...
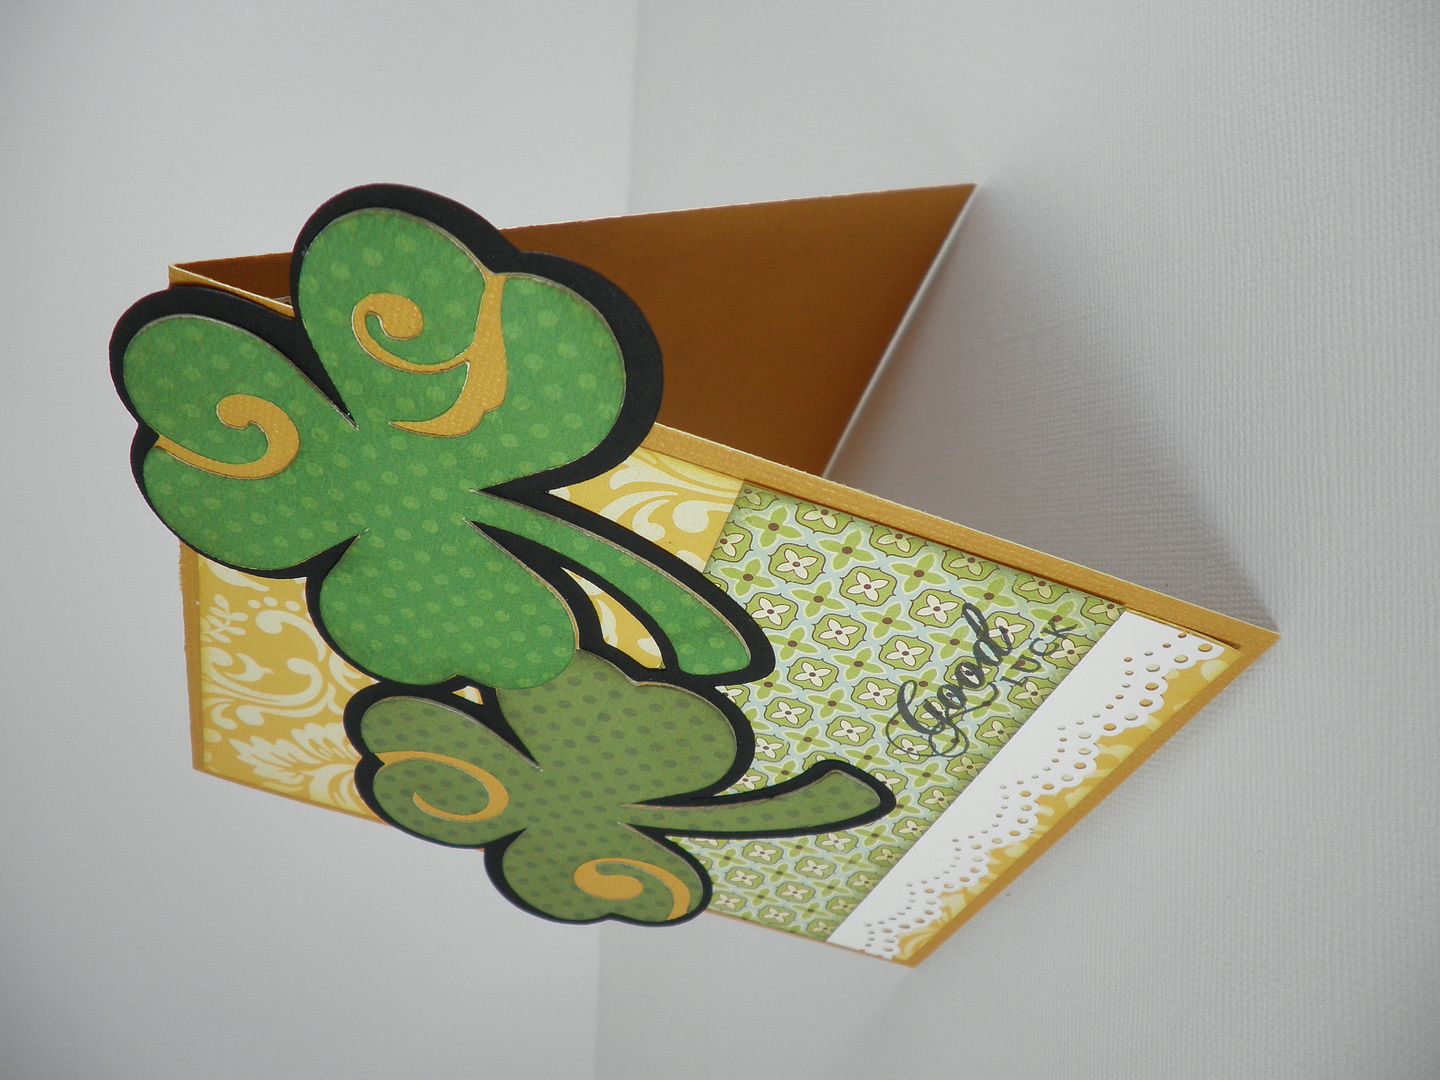
I cut these shamrocks at 4-1/2". Remember, with shadowed images, you always cut your shadow FIRST, making sure it is the size you want. Then, add in your base cuts. Sometimes, the shadows can be quite a bit larger than you might expect so this is very important.
The paper used on this card is from Core'dinations, Bo Bunny (dotted paper) and October Afternoon. Stamp from Papertrey Ink - their mixed mega messages set may be the last sentiment set you ever need to buy again - incredible for card makers! Lace cut is from the Martha Stewart Lace edge punch.
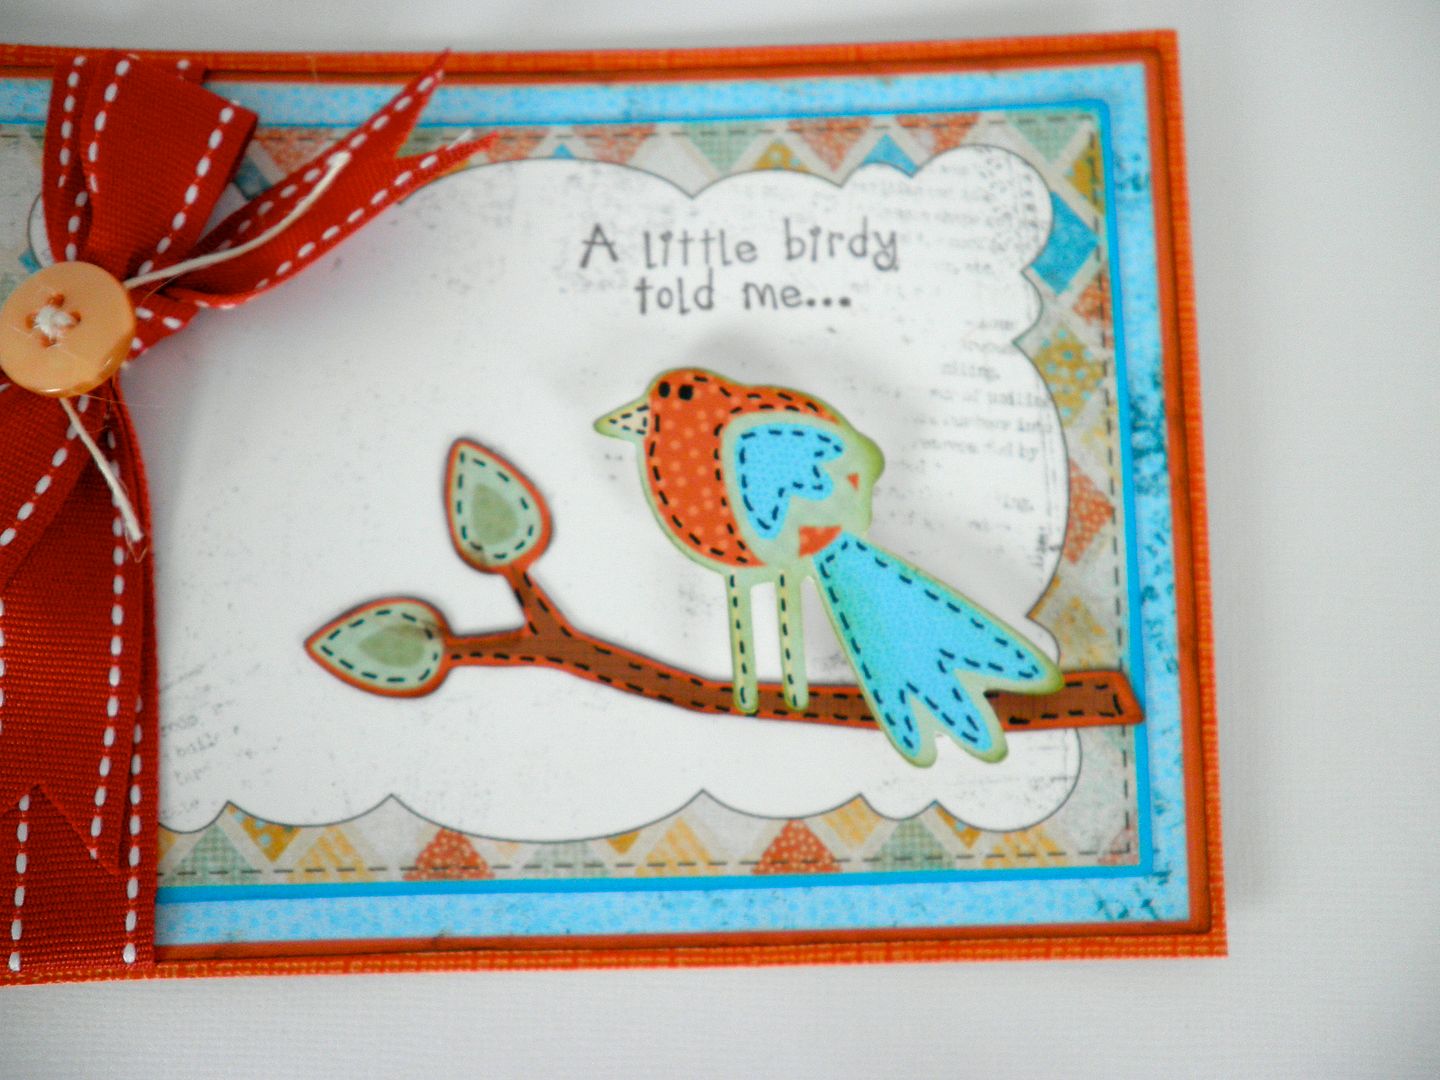
A Little Birdie Told Me Cricut Imagine Card with Videos!

WOW! This was one of the easiest cards I have ever made! I used the new Cricut Imagine Machine and cut out the bird, branch, frame with scallopy edges and blue background at 4". It took about 3 minutes! Card ends up sized at 4-1/4" x 6".

I added some pen marks on the bird and branch. The stitching on the frame printed out on the image. Then I popdotted the bird. I also inked edges throughout.
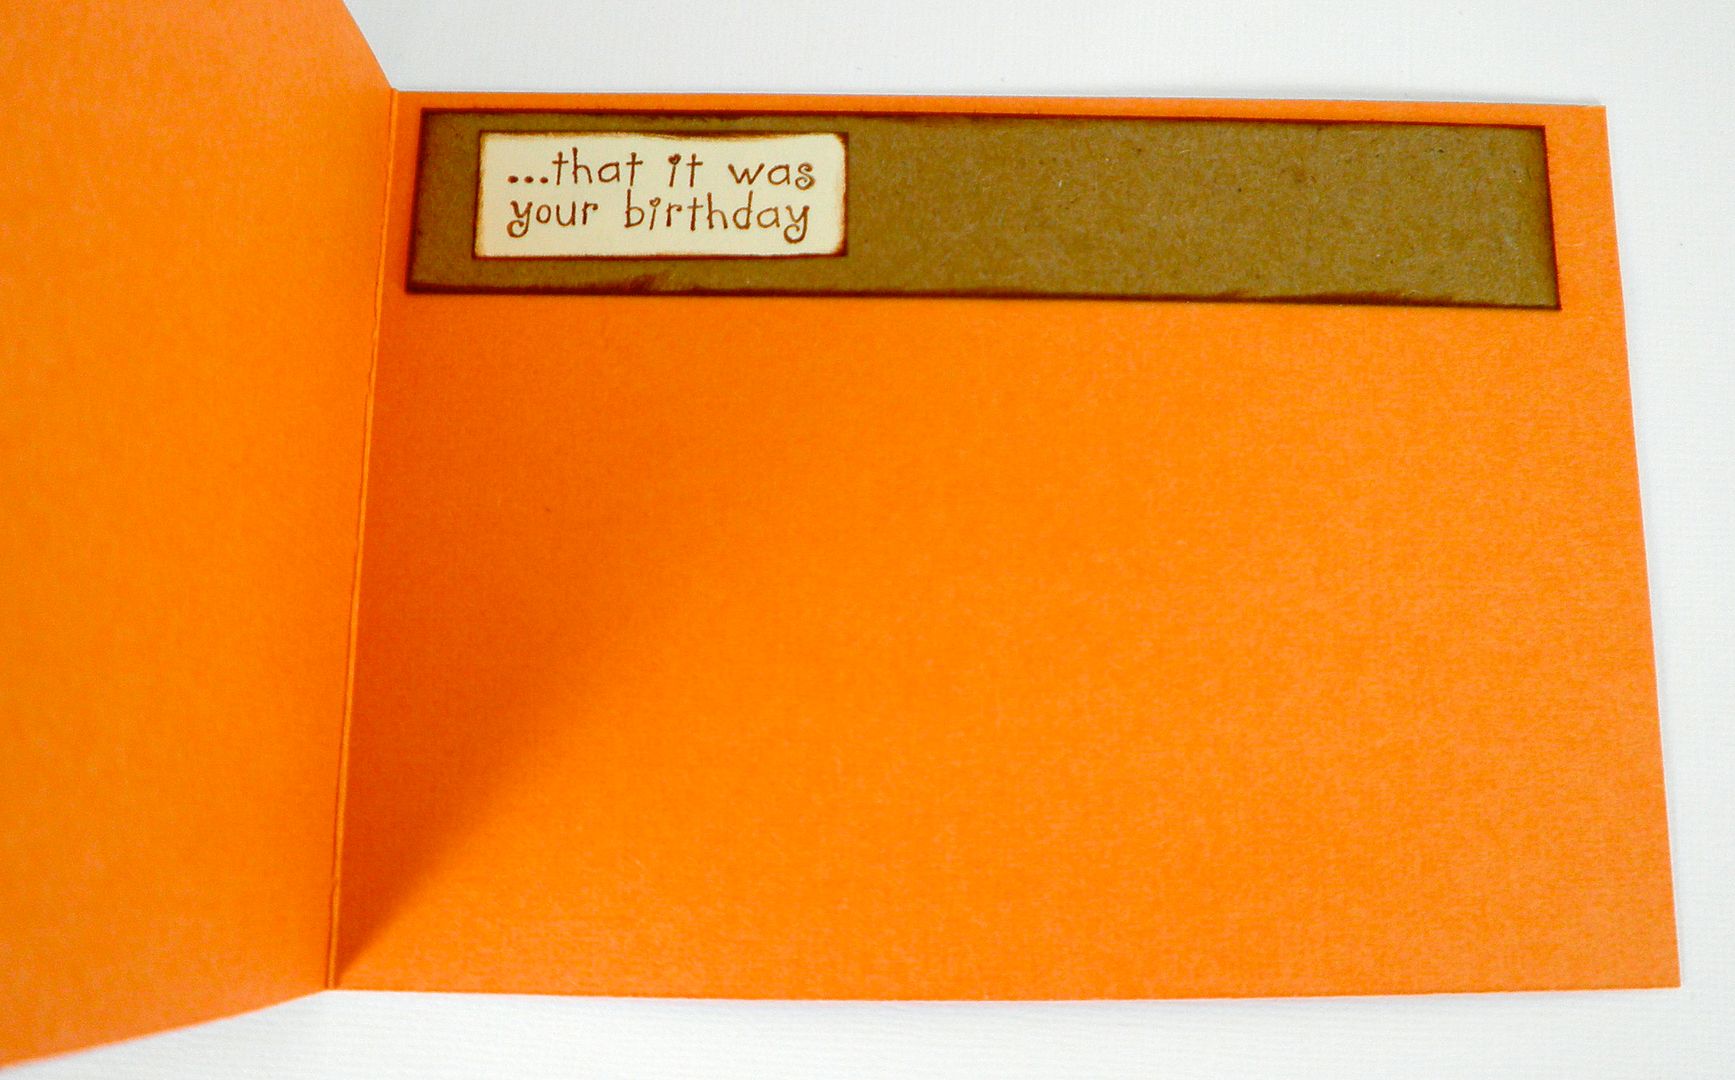
I added the rest of the sentiment to the inside:
Stamp sentiment is from Darcie's Stamps and cardstock is from Core'dinations. Ribbon and button from Papertrey Ink.
Ewe and Me - We're Meant to Be! Simple Card Monday
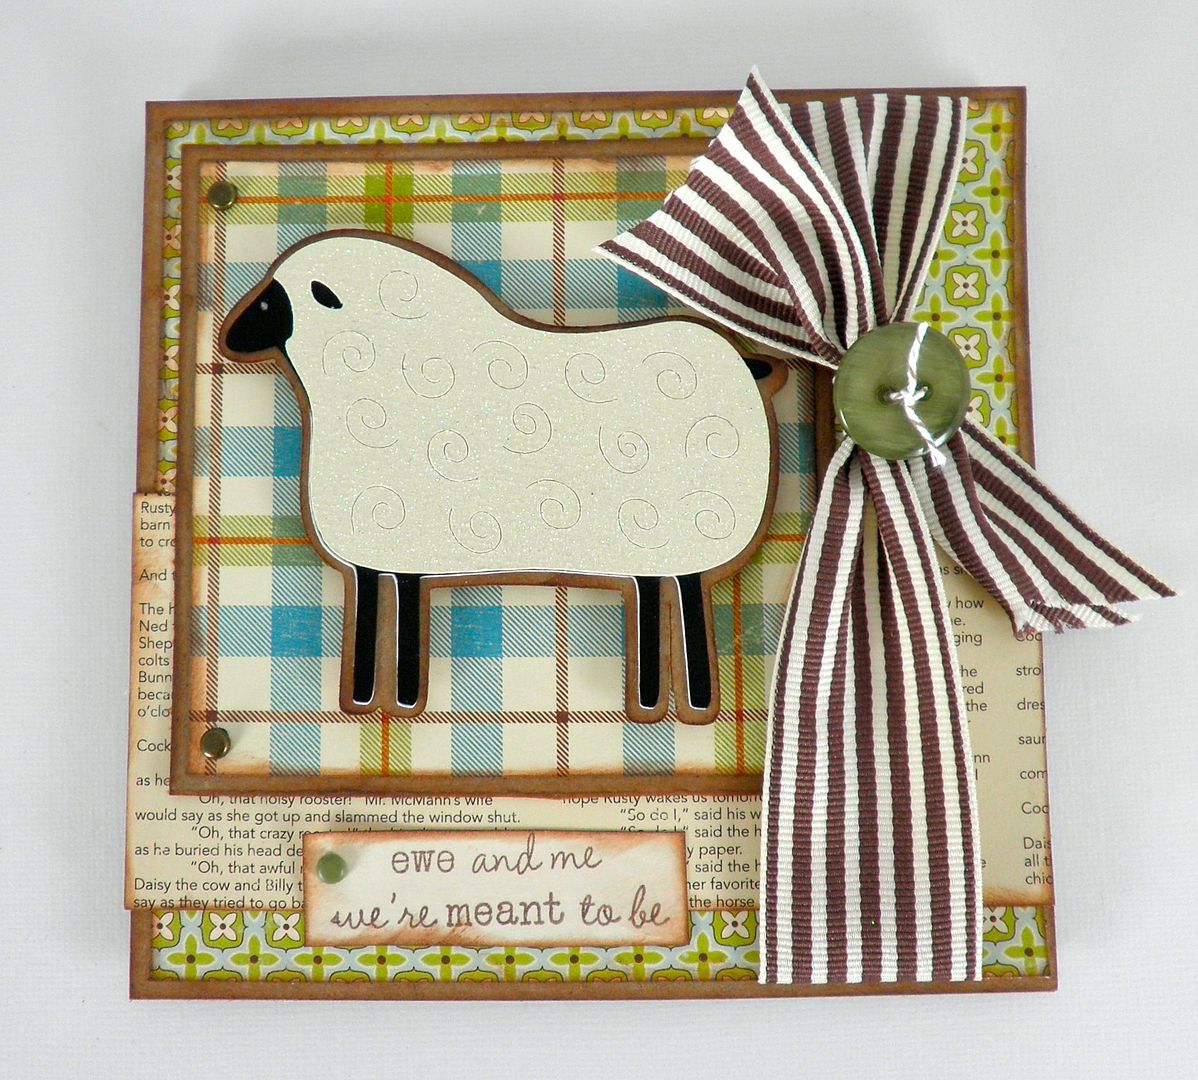
This 5-1/2" x 5-1/2" card was so fun to make! I had seen this ewe on the Cricut Country Life cartridge and thought she was just too cute! I knew using some off white glitter paper vy DCWV would help her get her bling on....ok, that was silly, but hopefully, funny...

I thought it would be fun to make this a stand-up card. The "ewe and me" stamp is by Waltzingmouse Stamps and the "I love you" stamp is from Papertrey Ink. Paper is by October Afternoon and Coredinations.

I cut the ewe at 3", all layers, and pop dotted her onto the front. I love the curly-Q cuts on the ewe! The ribbon and button are from Stampin Up!.
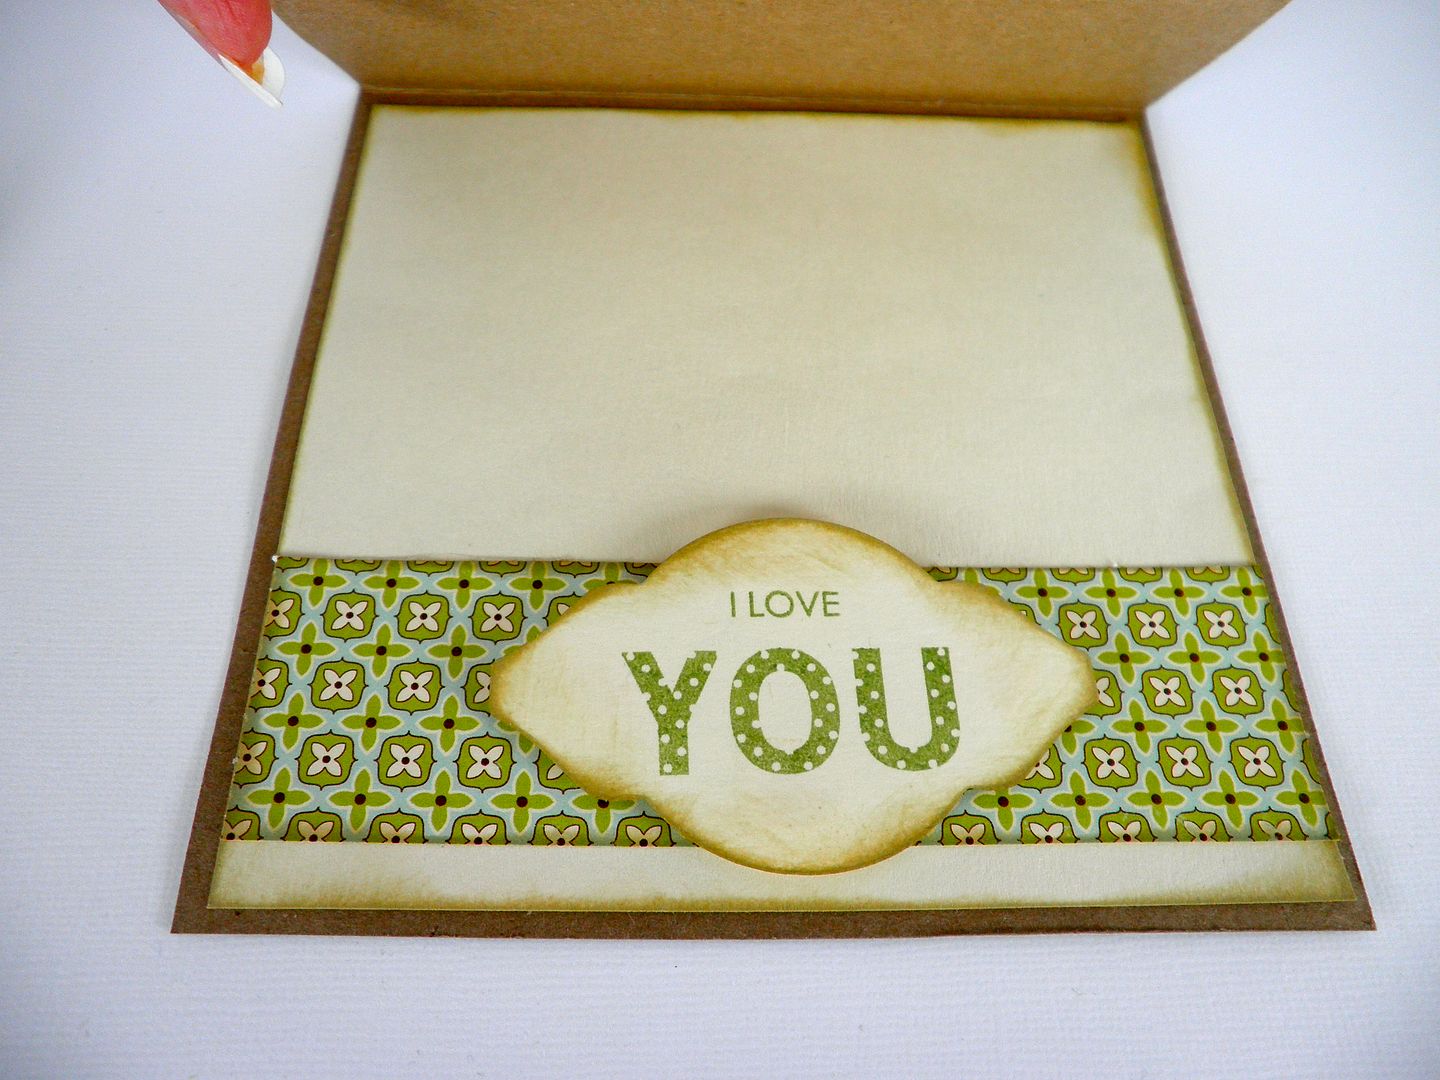
Here's what the inside looks like if you opened the card traditionally. This card is going to be for my husband, the love of my life...it's good to make a card for the hubby once in awhile!
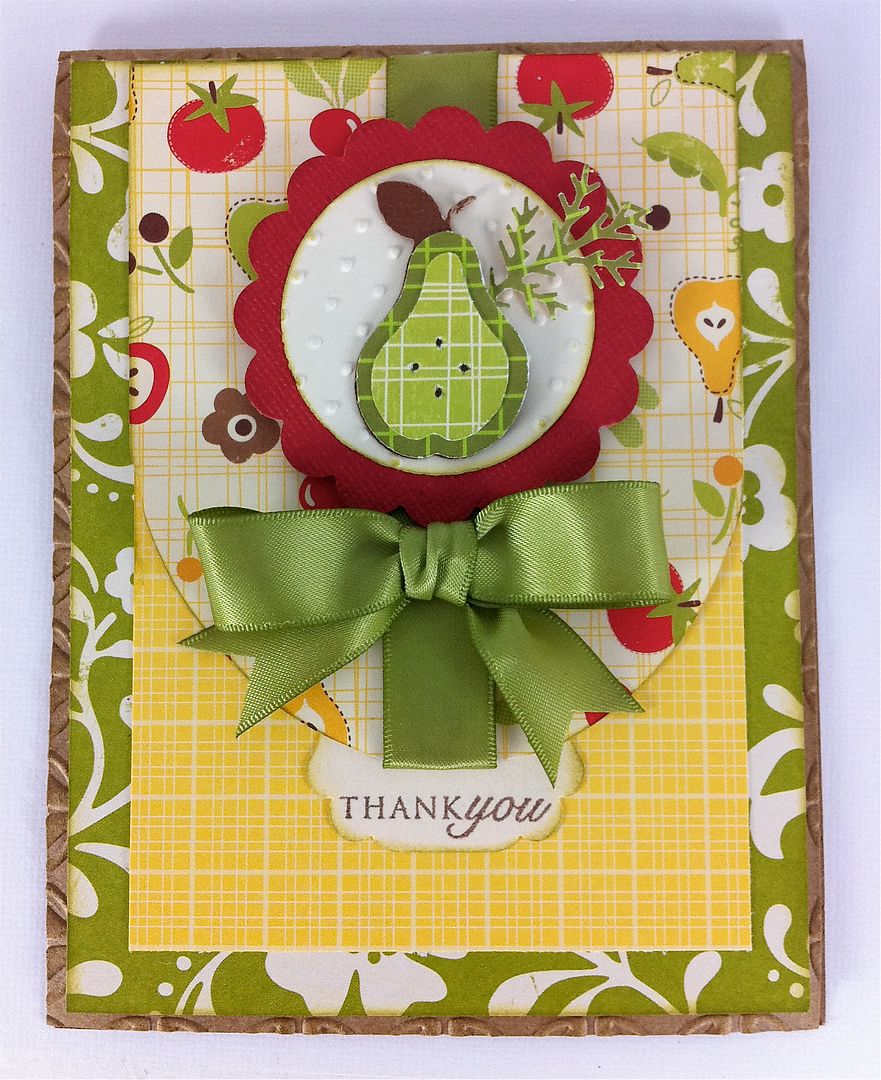
Hi, everyone! I thought it might be fun to revisit the Preserves Cricut cartridge, as I just got the Preserves Cricut companion folders. I decided to use them in an unusual way, which you will see below.
Also, today, I thought it would be fun (and maybe daring) to cut my focal image small (pear3 cut at 1-1/2"). This A2 sized card (4-1/4" x 5-1/2") required a smaller image. Lately I've been making larger cards but I thought I should go back to the standard sizing.
My scalloped and regular circles were actually punched out. Paper is by October Afternoon, Coredinations and JillyBean Soup. Ribbon by Stampin Up! and sentiment by Papertrey Ink. In fact, that "thank you" was stamped on the edge of an EK Success punch that I turned 90 degrees and cut down.
The little leaf sprig is from the Martha Stewart branch punch.
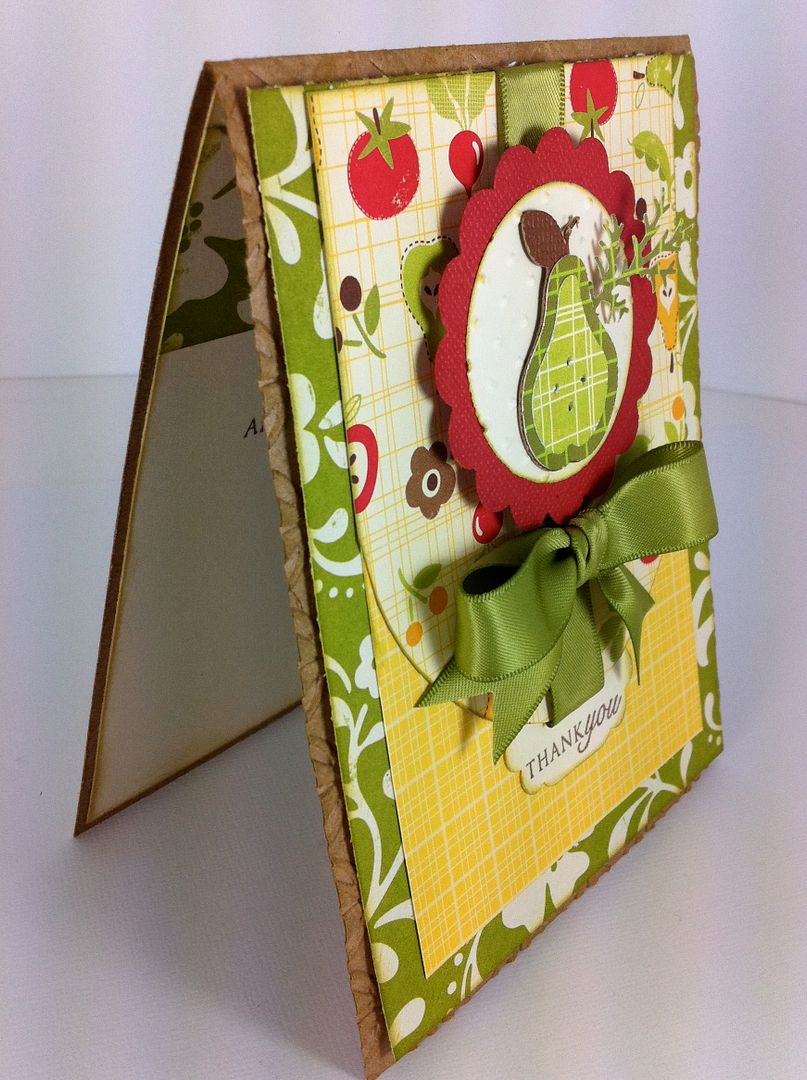
Here you can the see the inside and below you can see how the Cuttlebug folder embossing actually shows up on the inside of the card, for a different twist on things. I love these Preserves Cuttlebug Companion folders!

Below you can see the card - I pop dotted the focal image to give it more presence on the card. I also used the Swiss Dots folder to cuttlebug the background that the pear sits on. Most everything is better Cuttlebugged!
Tune in tomorrow for another oldie, but goodie, Cricut cartridge project!
Celebrate Football Treat Bags, Tags and a Card! with Cricut Wrap It Up!
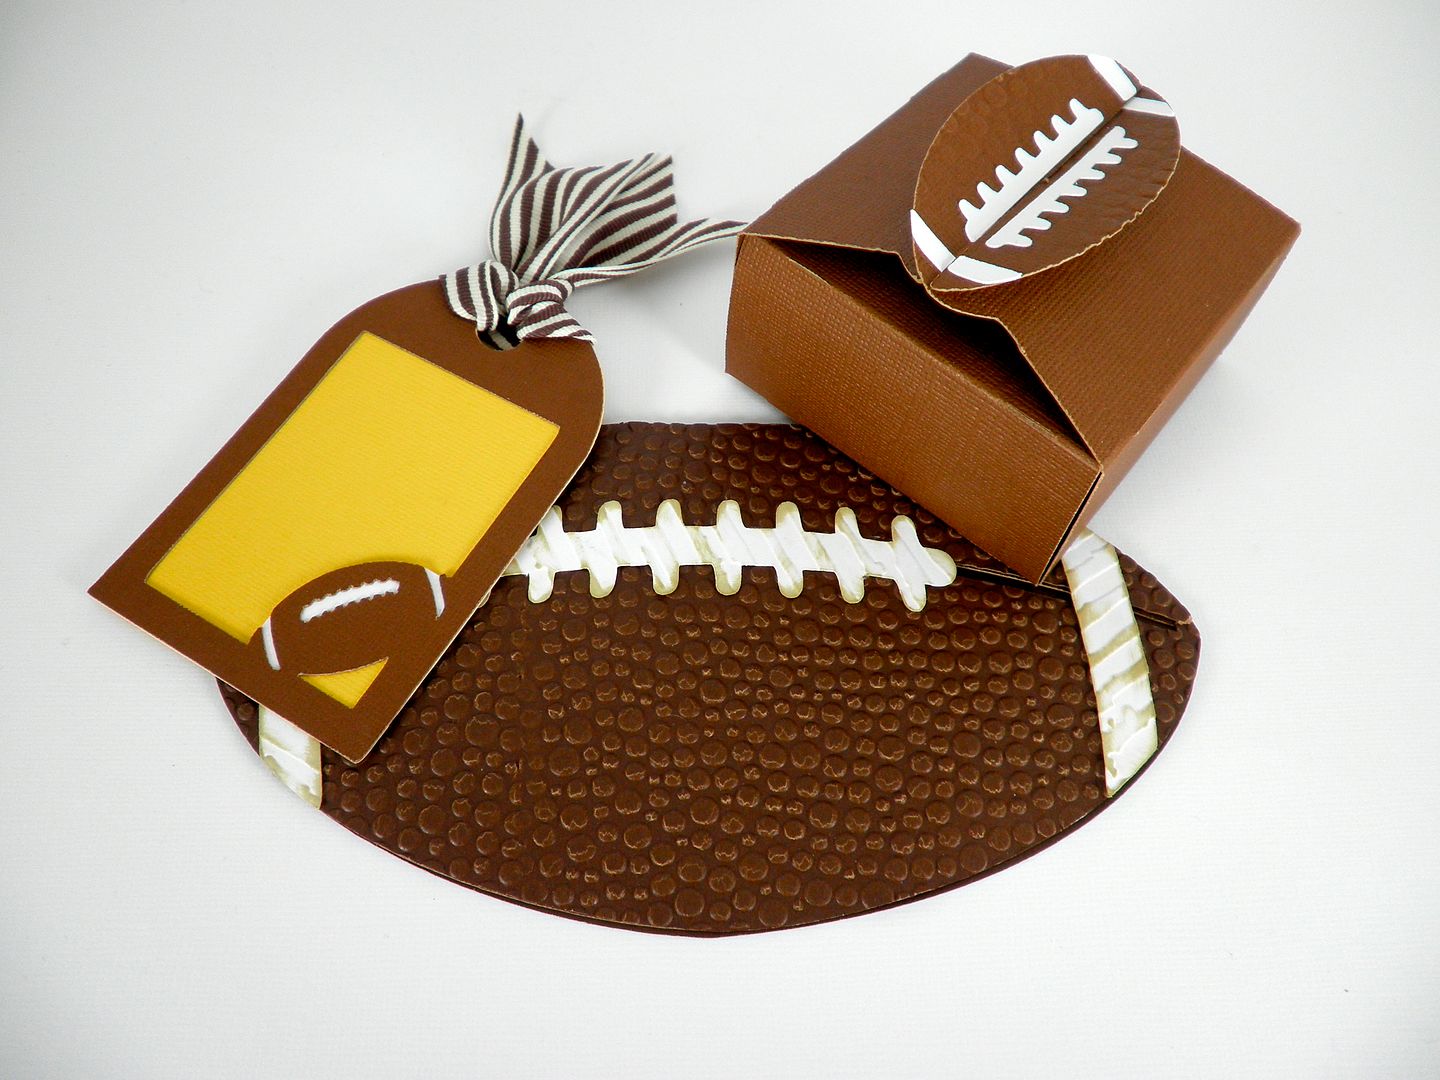
It's football season and I thought this card, tag and bag set from the new Cricut Wrap It Up! cartridge would be just perfect for that football fan in your house. My husband is a huge Notre Dame fan and so every Saturday he devotedly watches the game with the Notre Dame club while I am silently praying they will win so the weekend isn't ruined. Needless to say, if you know anything about college football, you know the last few years at our house have been difficult...
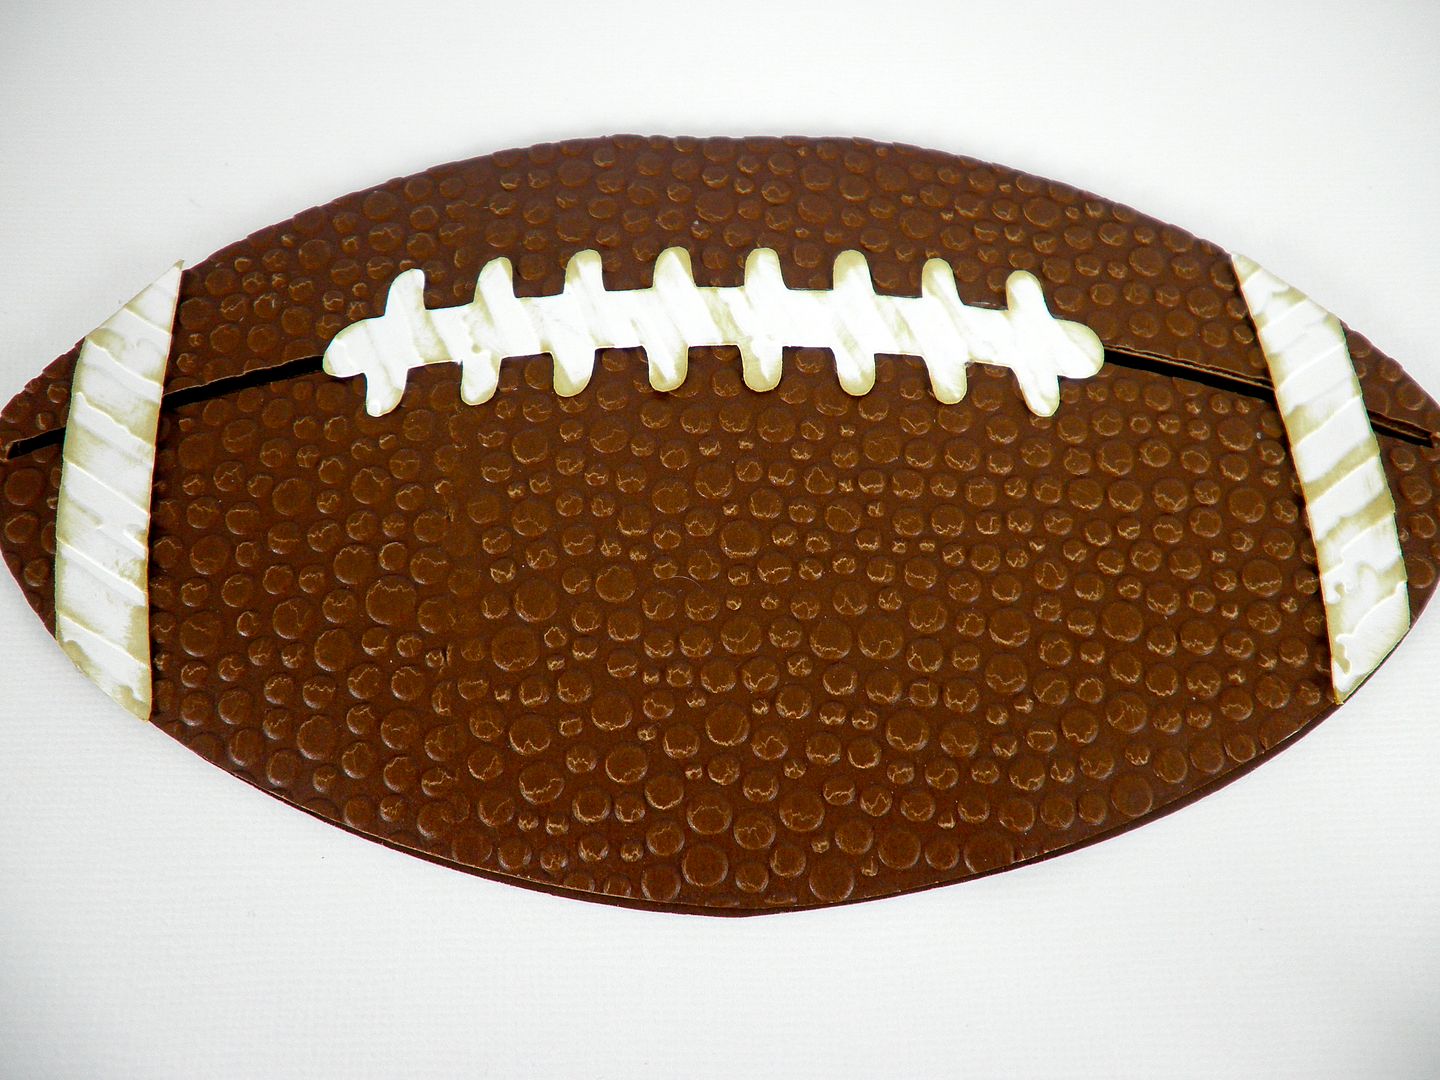
Moving on to the project - this card was cut at 4". I cut the card twice and then cut off the front layer so I could run it through the Cuttlebug using the Tiny Bubbles folder. I had to run it through twice. This folder is so convenient for adding texture to images like whales, various animals and now this football. I love the pebbly surface! The white edges were so stark that I ran them through the Cuttlebug also using the Distressed Stripes folder (another winner) and then I used some chalk ink to rough it up a little. The football was looking too stark...
This football box was a snap to put together! I cut it at fit to page using a 12x12 sheet of Core'dinations cardstock. Check out the photos below:


You could put a little bag of nuts inside this box as a quick snack - or maybe M & Ms.... yummo!

Finally, the tag is just two layers. Since I wanted the football to have white stripes, I backed just that section with a scrap of white paper and then used my scissors to trim around the football before I added the yellow layer. A bit of Stampin Up! ribbon in brown and cream seemed to be the perfect match!
So, let's get started!

My first card is a standard A2 size (4-1/4" x 5-1/2"). What I did first is print and cut a rectangular section of the background patterned paper.
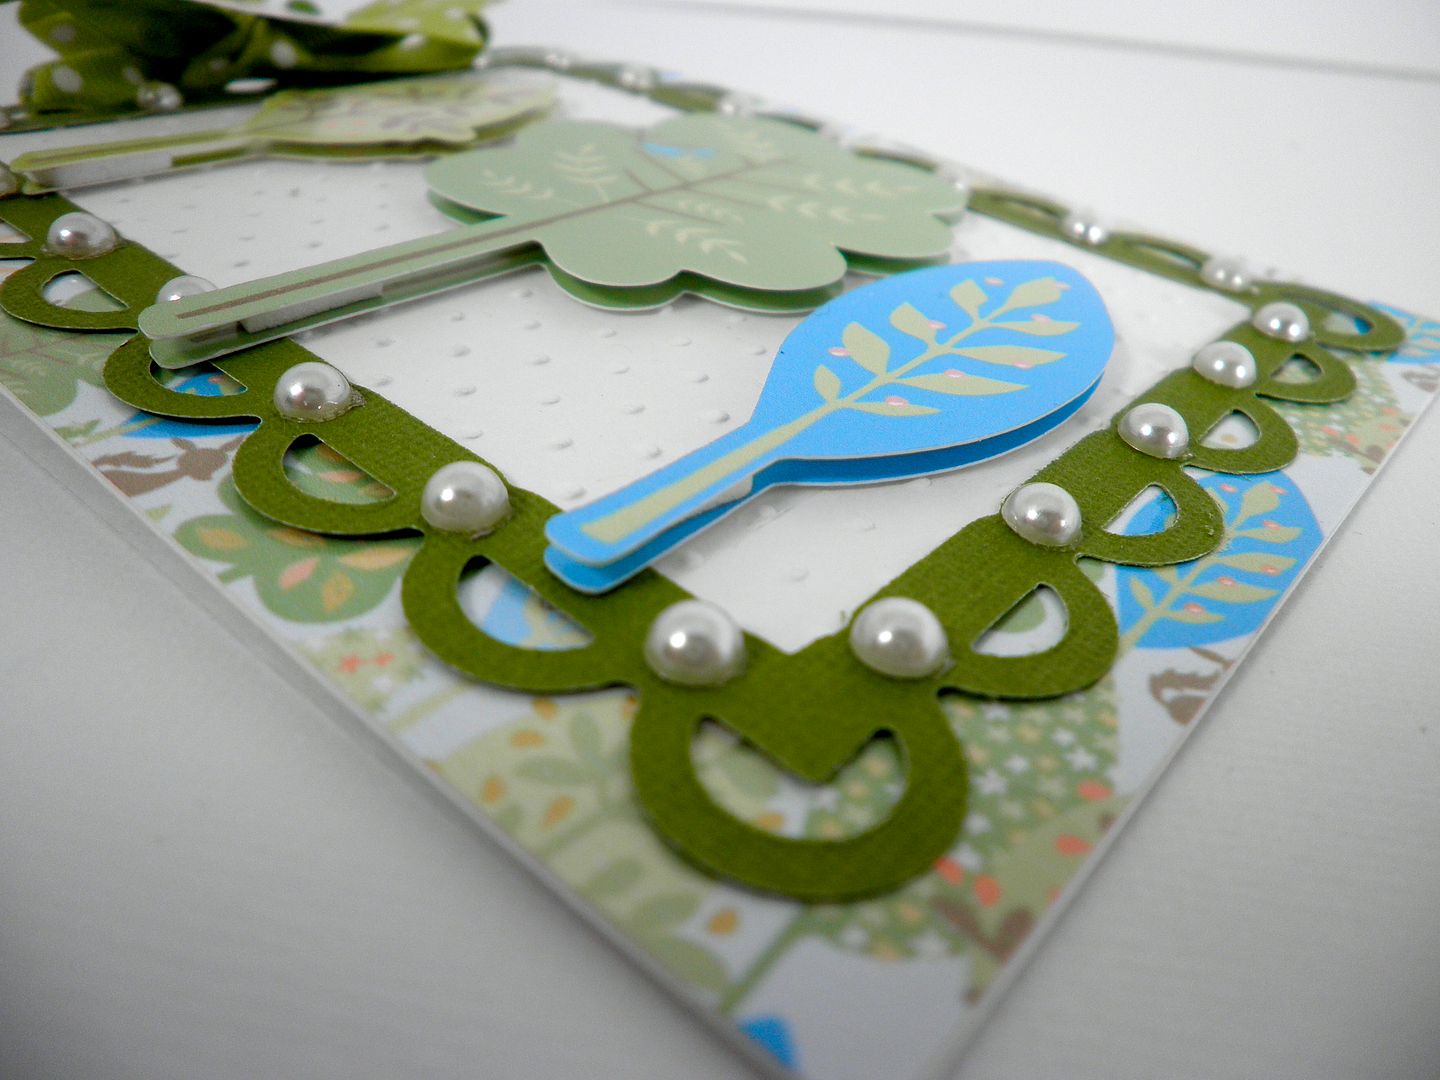
Then, I cut the three trees at 3" and 3-1/2", four times each. I wanted to layer the trees with pop dots to give them some dimension. You can see above how it adds a lot to the card. The frame is from Spellbinders. I also Cuttlebugged the white front section using the Swiss Dots folder (an essential)!

I added a stamped sentiment from Papertrey Ink and three more trees to the inside.

I used HP photo paper to print out the background patterned paper and the trees. I set the print settings on "glossy" and had NO TROUBLE at all. No smearing, no nothing. Not only that, the colors were so nice and vibrant when using the photo paper. I got a 150 sheets at Sams Club.
Verve Thanks by LodiChick - Cards and Paper Crafts at Splitcoaststampers
http://www.spli
http://www.spli
|
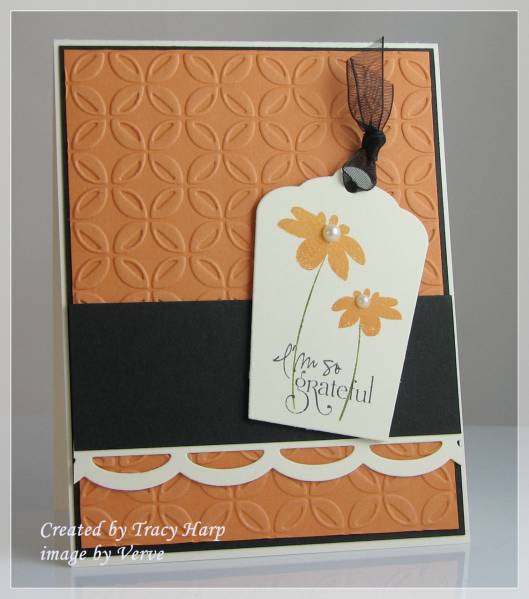
 Photo Details Photo Details | |||
| Poster: LodiChick | |||
| Date: Monday, January 17, 2011 GMT Views: 240 Favorited: 16 | |||
| Additional Info | |||
| Keywords: Verve | |||
| Stamps: Verve-Kind Words | |||
| Paper: peach parfait, black, vanilla | |||
| Ink: peach parfait, old olive, black | |||
| Accessories: Embossing folder (Cuttlebug Preserves 4 pack), MFT Open Scallop border die, Verve tag die | |||
| |
I made some cards with this cart using some computer generated sayings too. I have 5 cards...
strawberry- "so berry nice"
watermelon- "thanks a melon"
orange- "orange you sweet"
pear- "we make quite a pear"
apple- "you are the apple of my eye"

strawberry- "so berry nice"
watermelon- "thanks a melon"
orange- "orange you sweet"
pear- "we make quite a pear"
apple- "you are the apple of my eye"

You might also like:
Okay so now to my first ever crafting of the new year.........

I took my first trip out into town briefly today and stopped in at YTOC to pick out papers for the first class of the year coming up on 19th January. The theme is Valentine's Day and I had in mind to make a set of stacking boxes just perfect for filling with yummy sweet treats. I knew I wanted to make 'pillow' boxes in graduating sizes so the class is called 'pillow talk' - kinda cute huh? Well I thought so.
After several colour selections I finally settled on the pink, white and black combo and chose a couple of Jilli Bean dotty papers and 3 colours of Bo Bunny polka dot cardstocks for the actual boxes.

After making the boxes I stacked them on top of one another and tied them together with black ribbon. Then I decided to create a pretty decoration for the top using the Jilli Bean papers, glitter and nestabilities heart dies. The smallest of these boxes is 3" x 5" and the largest measures 6" x 7" so there's plenty of room for goodies.
This should be a fun, relaxed class to start the year, nothing too complicated so I hope there's enough demand and the class runs. I'm really looking forward to it already.
So many thanks! Peachy Keen "Let's Face it Friday" Challenge
Good afternoon!!! I am really excited about this card - because I was able to accomplish two things that I wanted to accomplish - enter the Peachy Keen "Let's Face it Friday" Challenge, and use my Simply Charmed cartridge for the first time (the cartridge I am giving away on Monday morning SEE HERE FOR MORE INFO!)
Besides using Simply Charmed and Peachy Keen faces (Dolly Dumplins face assortment), I also used a sentiment from one of my Unity Stamp sets. Added some ribbon a bit of doodling on the leaves, and an edge along the bottom from one of my Martha Stewart branch punches. I think it came out really fun - and I LOVE the colors on this one! Thanks for looking - and feel free to join in on the fun HERE! There is a great prize as well!

Birthday Wishes!
I just noticed before this post that I am up to 100 followers!!! Thanks to each and every one of you!!! Still can't believe it...
Anyway, I love how this card came out! I had some scraps of 3 colors of paper that I loved together and had set aside until I could think of something to make with them - when it hit me! Three scoops of ice cream! So I broke out my Sweet Treats cartridge, added some Peachy Keen faces (used the Everyday Character Face Parts and MORE), some inking, doodling, ribbon, buttons, and a stamped sentiment from my stash. Also went a little crazy with the pop-dotting, as the shadow is raised from the background, AND the ice cream cone is raised from the shadow! The second picture shows that a little better...
As always, thanks for looking, and have a GREAT day!!!


Made this for the challenge at My Pink Stampers Blog Hop! For some reason this just popped into my head! (Almost forgot that I also wanted to enter it in the Scrappy Moms Terrific Tuesday Challenge! The challenge was to use Birthday Bash - which I did!)
All cuts, including the shaped card, are from Birthday Bash. Added a Peachy Keen Face, a Prima flower with a stick on pearl for the center, and then pop-dotted the bird from the background. The sentiment is from My Pink Stampers Tweety Hoo Puns stamp set. Also added some pink pearls to the corners, and some doodlin', as well as LOTS of inking on everything!

Sweet baby
I love how this card came out! My only regret is that I made it HUGE - 6x6, since I had just gotten some envelopes that size. However...I didn't take into account the fact that it should have been slightly smaller to allow it to fit INTO the envelope until I was all finished! So...it will just have to either have no envelope, or just slip in one of the clear sleeves (which it does fit in fortunately!)
I started off with the umbrella from New Arrival, and added a Peachy Keen face from the Princess face assortment. The background shape came from Lacey Labels, and cut a circle out of the center and ran it through the Cuttlebug. Added some stick on pearls, LOTS of faux stitching, a bit of inking to the umbrella, some ribbon, and a stamped sentiment from my stash. Oh yeah...also pop-dotted the umbrella and the sentiment from the background.


Thanks for looking - and have a great day!
Snow much fun - Circle Challenge Card
So...I wasn't really in love with this card, but once it was finished, it wasn't too bad. I was trying to meet the requirements of the challenge on the Cricut Circle blog for the weekly challenge - to use metal, white paint, and a snowflake cut. There had to be a minimum of 2 cricut cuts to qualify.
So the metal is the four brads on the corners to loop the ribbon through. For the white paint I used perfect pearls (it's white, and it's paint!) and sponged it over the background that I had run through my Cuttlebug. For the snowflake and Cricut cuts, I used Winter Woodland and cut out 3 different snowflakes, several times and in a couple different sizes. I stacked them up with pop-dots in the middle, stamped a sentiment from my Pink by Design stamps in the center of one of them, and then sprayed them with Glimmer mist before I attached them to the card. Now if we could just get some snow here where we live...


Baby boy card or invite
Good morning! My best friend came over the other day to make baby shower invitations for her sister-in-law. Since she only needed to make 12, we decided they could be a little more elaborate than we would normally do for a large number. NOTE TO SELF: 12 invitations can still be a lot!!! Anyway, I think they came out really cute anyway! The first one is what we originally came up with, and then changed our mind a little, so the second one is what we actually ended up going with for the invitations. I'm saving the first one for a baby card though anyway!
The train came from New Arrival, and the banner cut on the first one is from Give a Hoot - resized on my Gypsy. The stamp on the first one is from a Pink by Design stamp set, the second one is from something in my stash...not sure what it was from. We added some ribbon for the tracks, LOTS of inking and some doodling.


Hang in there! Peachy Keen Sketch Challenge
I had so much fun with this one! This is for a sketch challenge over at Peachy Keen Stamps (see HERE for more info). I wanted to do something other than flowers or balloons for the 3 items on the circle - so I suddenly pictured kites with cute Peachy faces! Couldn't wait to make it!
I found the kites on Create a Critter cartridge, and added the Peachy keen faces from Basic Paper Doll Face Assortment. Those were pop-dotted from the background, both of which were cut from Preserves, and inked. The top layer was run through the Cuttlebug. I pop-dotted that whole thing from the background, added some bakers twine, and buttons, as well as a sentiment from my Pink by Design stamp set.
Suddenly, I'm not in the mood for snow, I'm in the mood for summer!


Forever Young Birthday Card
This card is one of my favorites. It is so simple and so cute. I'm also loving the color scheme.
I made this card for my aunt, today is her Birthday. Feliz Cumpleanos Tia <3

I did some stitching all around the card and the inside of the card.
The zebra, flower and purse are all from Create a Critter. I added pearls and some white gel pen faux stitching. I bought the stamp at Joann's on those new clear stamps sections for $2 or less. It is made by Studio 112 (K&Company). The paper stack is Sweet Stack by DCWV.


I embossed my handmade info on silver on the back. I'm loving the embossing, it resembles a seal :)
Hope you guys like it.
Glad you passed by. Hugs,
Giselle
June 13, 2010
Congrats on your Engagement!!
Yesterday night I got great news, well some friends of ours got engaged!! They were going to have a get-together today (... long story lol ). After my final exam today, I ran home and started crafting. My first pick was Sweethearts.
The card and envelope from page 80, were cut at 5 1/4 in. (Max. size for envelope on a 12x12)
The image and shadow were cut at 3 1/2 in.
***Don't forget to ink your edges =D


As you can see, the shimmery look of the Medalion (shift, page 78) was achieved by spraying a mix of perfect pearls, faded jeans refill inker and water.
Spray all over your image and let it dry (or use your heat tool to speed it up)
Add pearl accents and ribbon. Add some pop-dots to your image to give it dimension.
Tie your ribbon of choice & stamp your sentiment.


......... a closer look......... oh...ahhh... shimmery lol


Thank you so much for visiting & congrats to the newly engaged =D
Good night.
Giselle
shellys card blog
http://cardsbys
http://cardsbys
Wednesday, June 23, 2010
cricut cardz challenges
happy wednesday! this week over at CCC mary has chosen the theme of wedding. any cartridge any color.
be sure to go to the blog and give the rest of the dt a lil blog luv :)
for my card i used beyond birthdays cartridge for the hearts. i also used my cuttlebug and swiss dots folder colorbox fluid chalk and memorybox pearls. paper is dcwv luxury stack.hope ya like this one :) thank you so much for stopping on by i truly am grateful for you :) have a wonderful rest of day :) XXXshelly


Labels: wedding card, heart
shellys card blog
http://cardsbys
http://cardsbys
paper cutz challenges
happy TGIF! this week our theme at PCC is circles,squares or stars. make sure you pop on over to the pcc blog and see what shape the rest of the dt is in :) i chose circles.
i used my cricut and george cartridge for them, the elephant is a sizzix die cut which i attached a hero arts pearl heart . i added some kaiserkraft pearls and some buttons and of course used colorbox fluid chalk. paper is daisy d's. thanks so much for checking out my blog today :)XXXshelly


shellys card blog
http://cardsbys
http://cardsbys
Monday, June 28, 2010
BittenByTheBug2
happy monday :) this week over at BBTB2 our cut is the genie lamp from the Paper Dolls cartridge. be sure to pop on over to blog and see what magical projects the rest of the DT has whipped up for us :) ALSO theres a blog hop going on. sorry im not part of it this month as im taking care of some personal stuff still.
so, for my card i used paper dolls cart for the genie lamp and the castle. i actually meant to use the word wishes in my setiment instead of dreams, but once i realized what i did ..well i wasnt going to redo it ;) . other than the cuts i just added a couple of rhinestones and inked this up with colorbox fluid chalk. thats it very very easy.thanks for stopping by have a super rest of day :) XXXshelly


shellys card blog
http://cardsbys
http://cardsbys
craftycreationschallenges
happy wednesday :) this week at CCC claire is our host and sponsor and she has chosen cake or ice cream theme. yummo! i want both! she offered up one of her super digis to use, but i opted to use my cricut and from my kitchen (cake and stand) and hello kitty (strawberry) cartridges. the sentimentis from the hip hip hooray set from creative visions clear stamps. paper is dcwv. be sure to go see what the rest of the dt has designed to tempt ya :) thank you so much for stopping by your comments are always appreciated. have a fun rest of day :) xxxshelly


Okieladybug's Scrap N' More: Birthday
http://okielady
http://okielady
THE SU REPLICA TAG SET WORKS!
I couldn't resist! I just couldn't! I just had to try the tag set. I had gotten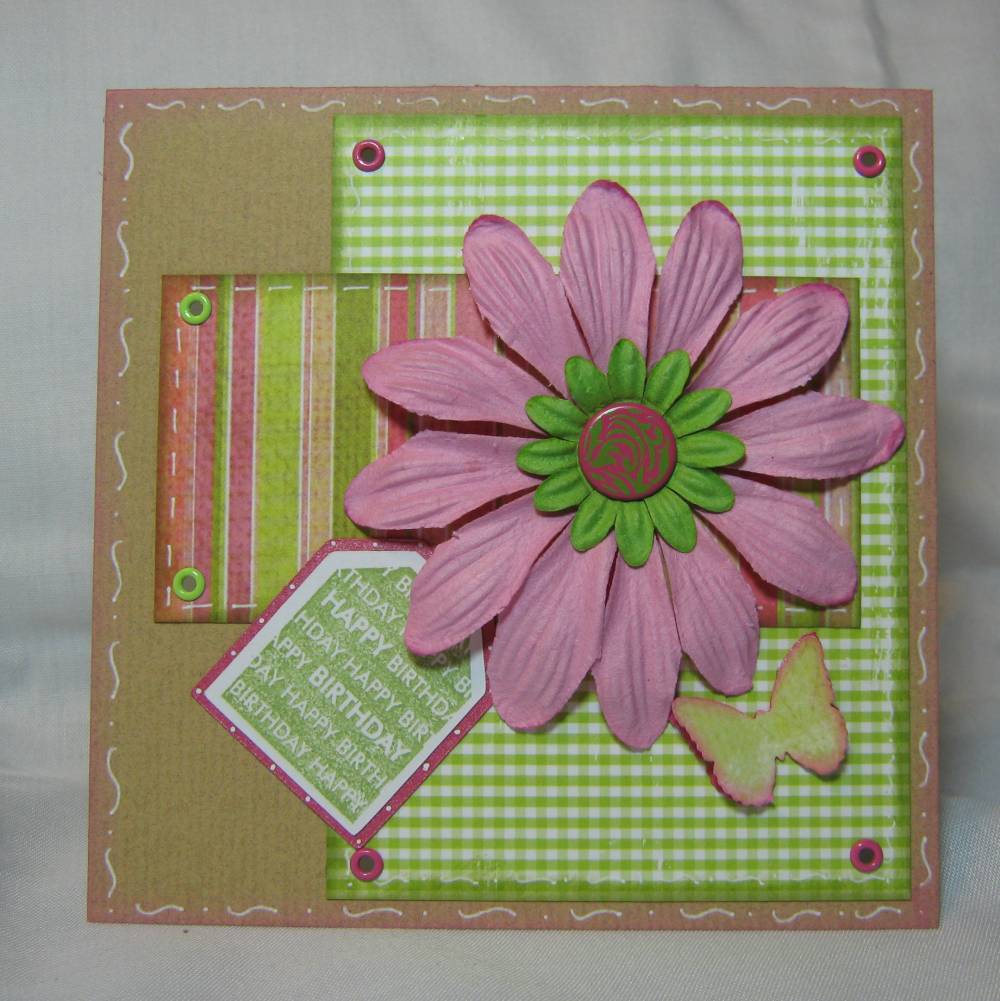 the Stampin Up Tag Set at the stamp garage sale a few weeks back and haven't really played with it because I wanted to get the smaller tag punch. I thought I should make a card to see if the .cut file I made worked, especially since I already posted the file for download. IT DID IT DID!! *okie says beaming with pride*
Since I don't have the small tag punch I couldn't compare but I did with the large tag punch I have and I got it within a hair of being exact!
The birthday stamp was part of the set I got. I did have some problems lining up the stamp, but I used one of the better ones for the card. The flowers are prima and the brad in the middle is one I got from Eyelet Outlet. The butterfly punch is Martha Stewart *okie wonders if Martha even knows she offers this punch*. I have no idea what the paper is as it was some more scrap I had. I did use some mica for the large tag and the bottom layer of the butterfly, but you can't really see it. I really like this card! You can click on the picture for a closer look.
the Stampin Up Tag Set at the stamp garage sale a few weeks back and haven't really played with it because I wanted to get the smaller tag punch. I thought I should make a card to see if the .cut file I made worked, especially since I already posted the file for download. IT DID IT DID!! *okie says beaming with pride*Since I don't have the small tag punch I couldn't compare but I did with the large tag punch I have and I got it within a hair of being exact!
The birthday stamp was part of the set I got. I did have some problems lining up the stamp, but I used one of the better ones for the card. The flowers are prima and the brad in the middle is one I got from Eyelet Outlet. The butterfly punch is Martha Stewart *okie wonders if Martha even knows she offers this punch*. I have no idea what the paper is as it was some more scrap I had. I did use some mica for the large tag and the bottom layer of the butterfly, but you can't really see it. I really like this card! You can click on the picture for a closer look.
Okieladybug's Scrap N' More: Birthday
http://okielady
http://okielady
This next one is for Valentines day I guess. I am not sure really. I have 6 of these too. My daughter said "uh....I like that, I need about 10" I told her "well I have 6" LOL. I used TBBM for the heart on this one and I did use George to cut the pieces for the ban at the bottom and the little ban across the heart.
I guess I better get looking for another card map and post another challenge for cards tomorrow! I also have to post my next LO challenge on the MB tomorrow also!
 I am not sure really. I have 6 of these too. My daughter said "uh....I like that, I need about 10" I told her "well I have 6" LOL. I used TBBM for the heart on this one and I did use George to cut the pieces for the ban at the bottom and the little ban across the heart.
I guess I better get looking for another card map and post another challenge for cards tomorrow! I also have to post my next LO challenge on the MB tomorrow also!
Okieladybug's Scrap N' More: Birthday
http://okielady
http://okielady
Here are my cards I made. This one is CELEBRATE FLOWER.
 I used the Stamped cartridge for it so you will need that cart to cut the pieces for the card. The file is set to cut 6 at a time. No sense in just making just one is my motto!!
Okieladybug's Scrap N' More: Birthday
http://okielady
http://okielady
Happy Birthday...a man card
I think this card would make a good card for a man for a birthday. I used some paper and 5.5 x 5.5 card blanks that my friend Carmen P. sent me. It was really hard not to add bling since I love bling!! I used rectangle nesties to put the sentiment on. I even decorated the inside which is something I don't usually do very often. The black cardstock on the inside is just some cheap stuff I got at Wal-Mart. This was a simple card really. I did use the argyle cuttlebug folder on the argyle strip and inked the edges...yes I am addicted to inking!!


Okieladybug's Scrap N' More: Birthday
http://okielady
http://okielady
Karen's Cupcake
My friend Karen has a birthday coming up. Her card won't get there by her birthday but the good news is that she won't get to the destination before the card does anyway! LOL
I used Home Decor for the cupcake and the swirl. I used glossy dimensions on the cherry to give it some shine. The icing is Bazzil bling, the swirl is mica cardstock. The mat paper is from Imaginisce, I think So Happy pack. I used Stampendous bling stickers on the swirl also. The paper for the cupcake is some that my friend Linda gave me. I pop dotted the icing for some dimension.
I am so lovin this cupcake!!
Oh yeah you can click on the picture if you want to see a closer loo
I used Home Decor for
 the cupcake and the swirl. I used glossy dimensions on the cherry to give it some shine. The icing is Bazzil bling, the swirl is mica cardstock. The mat paper is from Imaginisce, I think So Happy pack. I used Stampendous bling stickers on the swirl also. The paper for the cupcake is some that my friend Linda gave me. I pop dotted the icing for some dimension.
I am so lovin this cupcake!!
Oh yeah you can click on the picture if you want to see a closer loo
Okieladybug's Scrap N' More: Birthday
http://okielady
http://okielady
Cherry card
I have been looking for cherry paper and while this still isn't what I would really like I decided to use it. I couldn't think of a sentiment to use on the card and after some wonderful suggestions I decided to be lazy and use a stamp I had, which is the "Another Yummy Birthday".
Pattern paper is Cosmo Cricket and Bo Bunny
Card stock is Stampin Up Chocolate Chip and Old Olive, the yellow I am not sure what company it is.
Glossy Dimensions on the cherry
Cherry is from Home Decor
Scallop border is from Plantin Schoolbook
Sentiment stamp is Inque Boutique
Punches used are the Stampin Up Spiral and Key tag
Here is a close up view of the card showing the dimension a bit better.

Okieladybug's Scrap N' More: Birthday
http://okielady
http://okielady
Berry Sweet Birthday Wishes
I love that saying and have seen it in several magazines and also on the Cricut message board and I decided to use it. I made a cut file for the Berry Sweet Birthday Wishes card since I had to make the strawberry from scratch.
I used Plantin School book for the strawberry and the mats. I used All Mixed Up for the sentiment. I had gotten a K & Company paper pack that had all kinds of berries in it and I knew it would be great for some kinda berry card. It is set to cut 6 at a time, but you will have to cut the strawberries and leaves twice since I was too lazy to keep copy and pasting the parts for them.
I used the D'vine Swirls Cuttlebug folder on the strawberry and Swiss Dots on the white. I also used the Stampin Up scallop border punch on the white mat.
I used All Mixed Up for the saying.
Here is the front along with the saying inside. I used a stamp from an Inkadinkado cupcake set I had for the inside sentiment. I used Stampin Up Riding Hood Red ink.
Here is a close up of the berry and saying. You can see the detail better. I used diamond Stickles on the swirls and the words. The little round embellies are Robin's Nest embellies adhered with super glue *okie again hears the gasps* OH GET OVER IT! IT WORKS!! *okie cracks up laughin*.
This shows the dimensions better.
 love that saying and have seen it in several magazines and also on the Cricut message board and I decided to use it. I made a cut file for the Berry Sweet Birthday Wishes card since I had to make the strawberry from scratch.
I used Plantin School book for the strawberry and the mats. I used All Mixed Up for the sentiment. I had gotten a K & Company paper pack that had all kinds of berries in it and I knew it would be great for some kinda berry card. It is set to cut 6 at a time, but you will have to cut the strawberries and leaves twice since I was too lazy to keep copy and pasting the parts for them.
I used the D'vine Swirls Cuttlebug folder on the strawberry and Swiss Dots on the white. I also used the Stampin Up scallop border punch on the white mat.
I used All Mixed Up for the saying.
Here is the front
 along with the saying inside. I used a stamp from an Inkadinkado cupcake set I had for the inside sentiment. I used Stampin Up Riding Hood Red ink.
Here is a close up of the berry and
 saying. You can see the detail better. I used diamond Stickles on the swirls and the words. The little round embellies are Robin's Nest embellies adhered with super glue *okie again hears the gasps* OH GET OVER IT! IT WORKS!! *okie cracks up laughin*.
This shows the dimensions
 better.
 Cuttlebug Birthday

CROSS MY HEART PAPERCRAFTS by GISELLE VARELA: Cricut Campout
http://crossmyh
http://crossmyh
Birthday Card!
I was really happy with this card, I wanted a distress look appropriate for a guy who loves fishing =) I used Wild Card for the envelope and the card, CampOut Solutions for the fish and lots of distressing ink. By the way, the hook is real =)
Happy Birthday Jairo!


Each butterfly is cut 3 times. Twice for the front and once for inside. The first large pink one is glued directly over the turquoise layer and the smaller two are popped. This adds more of a multi dimensional effect. The pink top pink one was embossed with a the folder from the Sizzix Hello Kitty Spring Set and popped just in the middle so both wings are free. The other two are embossed with that little butterfly folder again (see the Twinkle Twinkle post) and are popped on one side only so the other wing is free. By the way, I forgot to mention that when using that small butterfly folder if you want the dots to be raised (embossed) rather than recessed (debossed) you have to use the folder upside down.

I know I promised you the cut file for the Twinkle Twinkle frame and it's coming. Please check my blog, Popsicle Toes , for updates and links and also for the winner of the K&Co paper pack and Cutting Cafe giveaway. Thank you all so much for making me feel welcome and again to Melanie and Joy for inviting to be Ms May. I hope you continue to stay in touch with me at Popsicle Toes because I so enjoy hearing from you.
 Below is a photo of the pieces I used in this project.
Using "Joys of the Season" Cricut cartridge pg. 62 "ornament" I cut out the Christmas bulbs at 2", then cut a shadow from pg.79 "shadow" 2".
Card is cut 6" x 3" scored at 3"
Pattern paper is cut 2 7/8"
 Before I glued the bulbs, I cut off the top loop of the bulb with scissors).
 Next step adhering pattern paper and ribbon to card, then using pop-dots I added the bulb with a loop of gold cording at the top.
 I Wrapped 3 chocolate nuggets with pattern paper then using Becky's pattern made the adorable box. Wrapped gold cording around the box. So adorable, makes a wonderful gift.
Giant Nugget Box pattern can be found- Here
If you have any questions let me know
I like to get all my supplies cut then start the gluing process.


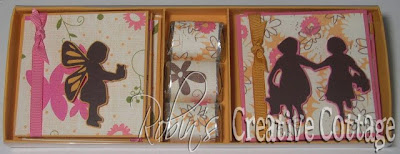 Cricut cartridge used: A Child's Year
Nugget box can be found Here
This weeks challenge was to use sewing, faux sewing, or sewing stamps on your project!
I chose to use my sewing machine, I love to sew on paper.

I cut the oval out using "George and Basic Shapes" cartridge, then carefully cut it down on each side eyeballing the distance from the edge.

 I used "A Child's Year" Cricut cartridge page 58
I used a brown ink pad to rub over the stitching and on the edges of each layer before assembling the card. I love popping up the images, I used pop-dots.
Just Buggin' has weekly challenges to inspire us to use our Cricut machines, come join the fun!
The challenge is to stamp on you Cricut die-cuts
I have a super fun 3-D project this week using Tags, Bags, Boxes & More Cricut cartridge.
I had my daughter pull out her stamp sets so I could stamp on my project, I found an cute flower stamp set from Stampin' Up that I stamped all over my box.
I chose the flower box on page 120, perfect with flower stamps, don't you think?
I cut the box using the blackout feature so there were no windows or ribbon holes. I also used the "fit to page" button on my Cricut expression machine so I could get the largest possible cut on a 12 x 12 piece of cardstock, which cut at 8 3/4".
After I cut the image I stamped all over the box with flowers and leaves.
 I also stamped a larger flower for a gift tag
 The square box is aproximatly 2 1/2" high (not including the flower on top).
 Just Buggin' has weekly challenges to inspire us to use your Cricut machine.

The images circled in red are what I cut for this card. I did cut them in various sizes.

I cut all the main images at 5" the envelope, card, liner and the birds on the branch (shift/frame).
The phrase "you made my day" was cut at 6". The frame using the pattern paper is cut at 7", and the blue frame cut at 7 1/4".
The icon birdies were cut at different sizes... the two tall green birds (shift/icon) were cut at 3"
The two shorter red birds (icon) cut at 3" and the short blue bird cut at 2 1/2".
The white piece of cardstock was cut using my paper trimmer to be placed on the inside of the card, this was cut at 4 1/2" x 4 3/4".

I used the bird branch (shift/frame) on the inside of my card.

 Tips & Tricks about this card can be found here

Circled in red are the images and quantities that I cut for this wild card.

Here is the cardstock and patterned paper I cut for my card, each image is cut a 5".
Note: I do not use the real dial size when cutting my wild card images.
The patterned paper is from Stampin' Up designer paper packet (discontinued). I only used the outer circle from the circle liner feature, the inner circle was discarded. For the phrase "How Thankful", I used my mini gel pen and holder in my cricut machine. The gel pens and holder I ordered from Custom Crops on line store.

I challenged myself to use the square rose icon feature for this card. I begain by tracing a circle using the outer circle image. Cut it out, then used my cricut spatula tool to lift/bend the cuts in the rose pattern.

I used three colorbox cats eye inks to add a distressed look to the rose. By lifting the edges the ink was able to scrape those edges and give a darker color there. I started with the light tan ink, then the dark brown, and finished off with just a little green.
Some of my edges of the rose did break away, but not to worry, I keep inking those as well, then when finished inking I adhered the rose to the same circle that I used to trace the original rose circle, the loose edges were easily put back in place, just like a puzzle. This image was now adhered to my doily card front.
 For the two roses I used the same lifting/bending technique, then inked the edges, yellow for the rose, then green for the leaf and stem. I cut off the leaves and stem of the yellow rose then adhered that rose over the top of the green rose

I used pop-dots to adhere my lovely yellow rose to my card front.
Here are the finished envelope and the inside of my doily card. I trimmed the phrase using my paper cutter, inked the edges, then placed it on the inside of the card.

Challenge yourself.... when you find image in your wild card booklet that you're not sure what to do with, remember to challenge yourself and find a way to make that image a part of your card. 
Circled in red are the images that were cut for this card.
 Each image was cut at 4 3/4"

Using the smaller flowers I layered them using the three different patterned papers, then added a small jewel in the center of the flower.
This is the envelope closed and the inside of the flower card.
I used the extra flowers to decorate the back side of the card.

Thanks for coming to my blog :)
The emblem feature was used as well as the word "Classy", I also cut three tiny flowers. All are found on page 73 of the Forever Young cartridge booklet.

The emblem and word were embossed using the "Swiss dots" Cuttlebug embossing folder. Then gently rubbed using a light brown ink pad.

For the card background I used "Spots and Dots" embossing folder then gently added a brown ink over the embossed circles and edges.


This is the sketch from Twisted Sketches
the additional twist was to use something transparent.
My card is transparent, and the raindrop, which was cut from A Child's Year as was the word "spring" I used design studio to weld the word together.


Our first challenge is to include a word and shape on your project:
Here is the card I made for the challenge. A balloon shaped card with layered party hat, and stars. I used the Celebrations Cricut cartridge for all images.


A simple Design Studio cut file available at the end of this post.

I tied the balloon using organdy ribbon but wanted to give it more of a curly effect.

Using my heat tool, I carefully waved it over the ribbon and the ribbon began to melt. The melting process happens very quickly so make sure the heat is not held on the ribbon to long.
I got just the look that I wanted for a curly balloon string effect.
I used tons of pop-dots to pop the pieces off the card.
 Click here for -Balloon Card -Design Studio cut file
Head on over to Fantabulous Cricut to see the great projects from the design team, and join us for this weeks challenge.
To view the details of this card go Here. I also have a simple cut file for the card and a photo tutorial of how I made the ribbon curly.

More fun balloon cards!


I used "A child's Year" cricut cartridge for the adorable little girl watering her flowers. All of the rectangle shapes were cut using "George and Basic Shapes" cartridge. Then I used "Tiny Bubbles" Cuttlebug embossing folder on one of the rectangles, then gently rubbed a light brown ink pad over the bubbles.

This sweet saying was printed from my computer, and the edges were brushed with an ink pad.

 Fantabulous Cricut design team has been so clever with this weeks inspirational projects you'll just have to go take a took.
Fantabulous Cricut Challenge Blog -and daily inspiration for your creative creations.

I used DCWV Glitter cardstock Stack. When I cut glitter paper I always cut it using the "multi-cut" feature and it cuts beautifully (speed 3, pressure 6, blade 6). I cut the flower at 4 1/4" in three different color cardstock, green, blue and yellow, then cut off the stem of the blue cardstock, the stem and flower of the yellow, and layered them all together. I cut out the shadow in a cream cardstock (not glitter).
The word "Spring" was cut at 1 1/2", I cut off the flower that was attached to the word, because I didn't want to use it this time. The shadow was cut using blue glitter cardstock.

The polka-dot paper is from DCVW Blossoms & Butterflies cardstock stack.

Just a little bling for the dragonfly's eyes.

 Design Studio Cut Files
Dragonfly Card cut file -here
Envelope and Liner -here

The word "Hello" was printed using my computer


My card is a 6" x 6", it was fun to do a square card, not my usual style but I really liked making it.
The pattern cardstock is from DCWV Pockets full of Posies Stack. I used my new "Heritage" Cricut cartridge to cut out the bike pg 63 at 2" and the word Journey pg. 71 at 1 1/4". The fun shape behind the bike is from Accent Essentials Cricut cartridge pg. 79 cut the shape twice 3" for the patterned cardstock and 3 1/2" for the dark purple cardstock.

Here is the sketch, I flipped this design upside down for my card.

For the word I cut it twice then carefully cut the green flourish off and added on top of the purple flourish.


The card size measures 5 1/2" x 4 1/4".
I used the Heritage Cricut cartridge for the fence on pg. 21 cut at 2 2/3" the word Memories pg. 64 cut at 3/4".
 Go check out the sketch and what the rest of the amazing design team created using the same sketch -HERE.
I'm using something "new" my brand new "Tie the Knot" cricut cartridge, this is the very first project that I've made using it.

For the "love birds" on page 36 of the handbook, I used the "blackout/shadow" +shift, cut at 1 1/2" cut in silver cardstock, then the sparkly shimmer cardstock (from Stampin' Up!) I cut using the same "blackout/shadow" but no shift key, then I cut out the two love birds using no special feature keys at the same 1 1/2", I used pop-dots to add to the card.
Mr & Mrs page 62 was cut at 1", using silver cardstock I pressed the "blackout/shadow" +shift key. Then the shimmer cardstock I cut out the Mr & Mrs using no special feature keys.
The cuttlebug folder is "Textile Texture".
Come see the lovely projects that the design team has created for this challenge -HERE.

I used A Chid's Year Cricut Cartridge and Design Studio to create this card, it measures 5 1/2" accros. To create the circle shaped card I use the ball +shft key on page 43 of the handbook, and welded two of them together, then used the "hide selector" for the little circle in the tag.
**One tip I learned that when I copy and past an image in design studio, for the second image I'm not able to use the "hide selector" (only with the original image), however, I found that if I save the file, then reopen it, I can use the hide selector on the second image
The umbrella is from page 43 as well, I used the shadow +shift, then only the shift key for the top layer of the umbrella.
The cute beach girl is on page 44, using the shadow feature, then no features for the top layer of the girl.
I don't have measurements because I created this in design studo, a cut file is available on my blog.
If you donwload this file, please leave me a comment on this post. Thank you. :)
Design Studio cut file -HERE
I would find flip flops, sunshine, and waves at the beach... a place to "Escape"
 I used my new "Life is a Beach" cricut cartridge. The flip flops are on page 64 of the handbook and were cut at 3 3/4", the wave is on page 45 I used the border feature cut at 1 1/2", the escape word is on page 38 I used the Title Words feature cutting it out twice, then used scissors to cut off the leaf.
 The hanging charms are a fun feature on the cartridge, I cut the charms at 1 1/4" the sun is on page 44, flip flops page 64, the wave on page 45. Then on page 70 is the solid background charm using the shift key, I placed behind each charm.
 Come join us at Fantabulous Cricut Challenge Blog for this weeks "Summer Time at the Beach" theme. You can see the other wonderful project made by each of the Fantabulous Design Team projects -HERE.
My outdoor activity would be bird watching :)
I used the Serenade Cricut cartridge to create my bird bath scenery.

 Come see the other "Outdoor Activity" projects that the design team has created, and come join our challenge -HERE


 I saw a picture of a Paper lace page background in a scrapbook magazine and thought it would be fun to try on a smaller scale! (Heart Shape)


Measurements for the heart: (These will make more sense after watching the video)
Background frame (Heritage) rotated - 3.20 x 2.68
Heart scalloped shadow (Sweethearts) - 2.81 x 2.68
Heart (Sweethearts) - 3.87 x 2.68
Heart Frame (Sweethearts) - Outer heart: 3.87 x 2.68
Inner heart: 3.50 x 2.39
Be sure to subscribe to my blog via email - at the top right of my blog - updates of new posts will be emailed to you!!


This weeks Fantabulous Cricut Challenge #25
Road Trip
Create a card or project incorporating a vacation or travel theme
My card celebrates "Places to go... and People to see"

I used Zoobaloo cartridge for the trees on page 72 of the handbook. Locker Talk was used for the fabulous car on page 37 of the handbook, I only used the car and shadow feature. I used a 3/4 " circle punch for the wheels then added a flower brad.

The road was made from a piece of black cardstock then I used a white gel pen for the lines. My printer was used for the saying "Places to go... People to see" tied on using ribbon and added a sunshine charm. I also use a tan ink all over my paper pieces.

 Head over to Fantabulous Cricut to see what the design team has created for their "Road Trip" project. -HERE
I used Doodlecharms cratridge for the apple and apple boarder, I created the card in Design Studio and have a cut file available at the end of this post.
 The word "Thank you" was printed using my computer, the I used scissors to cut a tag shape, punched a hole and added twine to the tag.


I used design studio to get the right sizing that I wanted to cut for my card. The cake is approx. 3" tall and the cake stand is approx. 1 3/4" tall, cutting each twice, the first was glued directly on my card and the second was pop up off my card. The scallop layers were cut once, then using a white ink pad I lightly dragged it over the scallop edges.
 I used tiny Prima flowers to decorate my cake.

Go see the other yummy projects by the Fantabulous Cricut design team -HERE and join us for this weeks challenge.
 For the mini card tag I scored in the center then folded.
 First layer (building from the tag base upward) is white with no slits, then next layer is orange, I cut off the top so the white would show. The top layer it is yellow and I cut at the bottom slit. I added brown ink to all the layers before adhering them to the tag.
 If you download this file please leave a comment on this post, it would mean a lot to me, Thank you!Candy Corn Gift Tag cut file -HERE
Candy Corn Gift Tag video -HERE
 I popped up the snowman from the card to add dimension.

Now you've got to see the clever and amazing projects that the FCCB design team has made, head over to Fantabulous Cricut -HERE.
I love Fall, it's a gorgeous time of year, I love to see the beautiful colored leaves on the trees, although most are now covering the ground ready to be raked into a huge pile and then jumped into by smiling faces, young and old. :)
My first inspirational project this week is a lovely leaf shaped fall card, I added a birthday sentiment, but it surely could be used for any type of greeting. I have a Design Studio cut file for this project at the end of this post.
For details about this project please visit Everyday Cricut -HERE.
 Below is a photo of all that cuts that I used for my card, obviously they are different colors then the above photo, and that's because I'll will be making another card using different colors and this time I'll make a video of the step by step process and that will be coming soon, keep a watch out for it.


 I hope you liked the leaf card today and got inspired to create your next project.
If you donwload this file, please leave me a comment on this post, it really makes my day great! Thank you. :)
Design Studio cut file -HERE 
Thanksgiving is a time of thanks, a time to gather family and friends together and eat all day long... ok some where in there we take a nap.
Today I'm sharing a lovely Thanksgiving card that I designed in Design Studio, I've used three cartridges for this card, A Child's Year for the pilgrim people, George and Basic Shapes for the oval frames and the rectangle layers, then I used Doodletype for the words "Give Thanks"
I do have a cut file available on my blog.
 I first traced the words using a gel pen, then cut out the letters. I purchased my gel pen holder from Amy Chomas -HERE. Remember, if you do not have a gel pen and holder, you can just omit the drawing part and cut out the letters, or use any cricut font cartridge that you have on hand.
 Below are the pieces that I cut out.
In my cut file I have labeled each mats that will be used to create this card. The first titled "Give Thanks draw 1a" this page you draw the letters "Give Thanks", then carefully with out removing the mat from your Cicut you replace the drawing pen with the cutting blade. Then in design studio you click on the next mat titled "Give Thanks cut 1b" below I have shown in a white box the pieces that are cut. After cutting remove your mat then move on to the design studio mat that reads "Give Thanks cut 2a" cut those pieces out.
The cream colored cardstock under the ovals is what I used as my card base, I cut it using my paper trimmer at 5 1/2" x 8 1/2" I scored half way at 4 1/4".
 I inked around the edges of the pilgrims before adhering to the brown shadow pilgrim image. Then used my scotch mounting tape to add them to the patten oval (I think this looks like wallpaper, prefect for the picture frame). The reason I cut out three ovals is I wanted my frame to be thick, each oval is just glued on top of each other.
 I added lots of dimension around the frame to give more of a 3D look.
 I'm so glad you visited to day. You can get the Pilgrim cut file on my blog
Robin's Creative Cottage -robinscreativecottage.blogspot.com
I have to admit this is the first time I used this cartridge and I've had it for about a month now. This is such a fun cartridge and quite cutesy, but I wanted to create a project that wasn't cutesy just to show the versatility that you can get by using different colors of paper.
I love the way this card turned out, and I think it could work for several occasions, friendship, birthday etc. The weathered patterned paper is a very old pack of Stampin' Up! designer paper I've had it for several years.
 The tag was printed from my computer then cut out by hand, then layered with tan cardstock and punched a hole then tied to the handle of the teapot using kite string.
 Below is a photo of the images that I cut and the page where each can be found in the Once Upon a Princess booklet.
 I didn't want to use the "crown" image for my layers of my teapot, so I cut two of the above image using the "shift" key on the keypad. On the white cardstock (pictured below) I cut a straight line to cut the top and bottom off the teapot, that way you would be able to see the green cardstock that was layered underneath.
 I inked all the edges of the images before gluing them together. You know how much I love to add dimension on my cards, so I used my scotch mounting tape and popped up the teapot, and the two teacups.
 Close up view of my sweet teacups.
 I hope you like today's card and can see that the Once Upon a Princess cartridge doesn't always have to be cutesy :)
Thanks so much for visiting today.
Come visit my blog and see what else I've created... Robin's Creative Cottage
Remember to leave a comment for your chance to win the Once Upon A Princess cartridge!
OK, so this is probably my favorite card I've made this year (ha, ha - only 6 days in...)! This A2 sized card (4-1/4" x 5-1/2") came together in a snap once I got my sizing figured out.
A tip for the newbies: Use the Fit to Length feature key on your Expression or Create to get just the right size you need on a project. I used that to determine what size to cut the label shape behind the birds.
Speaking of label shapes, can you believe this one came from the Twinkle Toes Lite cartridge? Be sure to look at your cartridges carefully - there are lots of labels and shapes on there that are parts of other images. This one was supposed to say "Tiny Dancer", if you cut all the layers.
I cut the label shape ("tinydncr") from Twinkle Toes at 3-1/4". Then, I ran it through the Cuttlebug using the Textile Texture embossing folder.
The love birds ("loveb") are from the Holiday Cakes cartridge and cut at 1-1/2". Remember that the Cake cartridges work in any of the machines and you can use the images to cut paper. Silver gems and glittered big brads are from Hobby Lobby.
I added a red button on my bow, then tied it with Martha Stewart baker's twine and added my sentiment from Papertrey Ink. Button and ribbon by Papertrey Ink.
A finishing touch on the inside and we're done! Paper was by Core'dinations and Basic Grey's Bittersweet line.
As you know this week is Disney week!! There is so much you can do with your Disney cartridges. Even though they may not seem Christmas'y' they totally can be!!
Take this week's simple card for example. I made it using the Pooh and Friends cart. Not a Christmas cartridge at all, but with a little creativity and my trusty Cricut voila a simple Christmas card is born!!
Here are the videos for the card. It was too long to be all in one so it is a two parter....sorry about that!
part 1:
part 2:
Here is the actual sketch for the week:
The 'gift' cut is on page 52 in your Pooh and Friends booklet. The shadow, icon, and icon/shift were cut at 2 1/4'.
All paper except for the cream card stock(which is CTMH) is Core'dinations from the Nostalgia super assortment. The ribbon is SU! 1 1/4' Old Olive striped grosgrain ribbon. The stamp set is Close to My Heart 'Holiday Jingle' and will be availiable September 1st. The embossing folder used is the 'Argyle' A2 embossing folder.
Check back in with us tomorrow for Home Decor Tuesday. Tammy will be posting something positively fabulous!! Also, make sure you are leaving comments on all of the posts. That way you can have an even better chance to with the Hannah Montana cartridge that we will be giving away on Sunday!
Here is the second installment of Simple Card Monday here on Christmas with the Cricut. This weeks card is made using the Christmas Cheer Cricut cartridge!
This cartridge was one of the first I ever bought. It has some super cute cuts on it and I think it is one that you will want to add to your Cricut cartridge library.
The cardstock is a mixture of Close to My Heart, SU!, and Bazzil. The stamp used is by Close to My Heart and is called 'Wonderful Season'.
Don't forget to check back with us tomorrow for Home Decor Tuesday! Also, make sure you are leaving comments so you can be one of the first people to own the New(but not yet for sale) Winter Woodland cartridge!!
This is Joy and today is everyone's favorite day, Simple Card Monday with Video!
I made today's card using the Winter Woodland Card feature key - so simple and quick! I cut out snowflake 4 with the card feature key at 5". Then, I used the Cricut to cut a circle out of a square to back the card - this required the "centerpoint" feature key and is shown in the video.
Next I ran the card through the Cuttlebug and glittered the card using a technique I learned from a Stampin Up! rep I know, Patti Dunham. Don't worry - I asked her if I could show the glittering technique and she was more than happy to share it with all of you! Thanks Patti! This is brilliant!
All the details are below in the video! You will love how easy this all comes together!
If you can't see the video, click HERE!
TWO BONUS DESIGNS FROM OUR FABULOUS GUEST DESIGNERS:
Isn't this elegant card just beautiful? Check out Jeannie's gorgeous SIMPLE CARD by clicking HERE
Hi, it's Joy and today's card is simply delicious! Well, deliciously easy, especially after you view the video and see how to make a smaller shadow for your ice cream cone!
I chose to make the icecream2 cut from the Sweet Treats cartridge and cut it at 4 1/4". Then, because I did not like how large the shadowing is on the shadow feature key, I instead used the shift icecream2 with the card feature key set at 5" to get a shadow I liked better. The video will show the differences. All the layers and such for the ice cream cone itself were cut at 4 1/4" using Jillibean Soup paper. I love this paper! Very versatile and great patterns on both sides!
The card when closed measures 4" x 5 1/2", a little smaller than the standard A2 size but you can still use an A2 envelope. It was cut using the cupcake2 card feature key at 5 1/2" with hot pink Core'dinations cardstock.
Check out the video below for more information! Click HERE if you can't see it!
I cut the hearts at 3". I cut the base, base shift, blackout, and shadow of this cut. I think it adds so much to the shape when it has all of those layers. I try to do it as much as possible.
Thanks so much for stopping by today. Make sure to leave comments all week long, so you can be eligible to win the Wedding Solutions cartridge and the Bo Bunny embellishment bundle.


It is a A2 size card (5 1/2" x 4 1/4").
I cut the Arc de Triomphe at 3".
The card is A2 sized and the patterned paper is from Basic Grey's Capella line.
updated to say: The stamp set I used is from Verve. The eraser technique I was talking about in the video is for acrylic or clear stamps only. It is because in the factory when they make the stamps there is sometimes a residue left on them that will cause the stamp to not hold the ink. If you take a regular eraser to the stamp it will take off the residue and not harm the stamp. Then your stamp will stamp perfectly every time!
and here is the video! 
Happy Monday! This is Donna and I'm so excited to be spending the week with you here at Everyday Cricut.
Those of you who are familiar with my work know I'm a big fan of shaped cards and Cricut Design Studio. I received DS for Mother's Day (from the kitties) only a week or two after receiving my Expression and I hate to admit I almost NEVER use my Cricut without it, even for regular cards.
In the spirit of simple card Monday, however, I decided to do a shaped card WITHOUT my beloved DS. Many of the new cartridges have a shaped card feature but I chose the Flower1 (page 47) from Hello Kitty Greetings because of the shadow effect of the layers which I love. Besides the adorable kitties, there are loads of sweet shapes on this cartridge so I think it's definitely worth a look if you don't already own it.

First I used the Card feature at 5 1/2" for the card base. Then, to hide the fold, I cut what I always call a first mat using the Blackout feature and glue it directly to the card base. Now when I cut my layers I will have a full shadow around the entire card.

The petals and stem are found on the Clothes and Clothes shift Layer feature (top row, 2nd key) and are also cut at 5 1/2. The flower center is found on the White and Fur Layer feature (top row 1st key) and that's it for the front. WooHoo!
When the card is this simple, I like to use bright coordinating prints and, although you certainly can glue the layers directly to the card base, I prefer to pop them with foam dimensionals. I was able to find black ones at my LSS (made by EK Success so they virtually disappear. The particular paper I chose for this card was just that, paper, not card stock so to get the strength I needed to pop the layers I cut them out of inexpensive smooth white card stock and glued the paper to those first.
To add a little texture to the flower center I ran it right side down through my Xyron and flocked it. I could have also run it through my Cuttlebug for texture instead. I think it's always the little extra unexpected touches that make a card special.

Because the designs on this cartridge are so simple and almost childlike, I didn't ink the edges but doodled instead. For a finishing touch I tied a bow around the stem.

Inside I always mat my cards. Besides the fact that the base is black, it adds strength to balance the front layers. However, there was no solid flower to use that would fit properly. Instead I just cut the layers again, but I was forced to use Design Studio to hide the selected contour of the cut out center. Oops, I guess I lied about not using DS. The other option would have been to cut another blackout mat in white and trim it at the fold but there wouldn't have been any black edging like I wanted. Sorry about that. This was unforeseen.

Although it's simple, I think the shape of this card would bring a smile to almost anyone's face and could be used for a number of different occasions. I encourage you to explore your cartridges for the fun shaped cards that are available to cut directly with your Cricut. And please be sure to visit me at my blog, Popsicle Toes! 
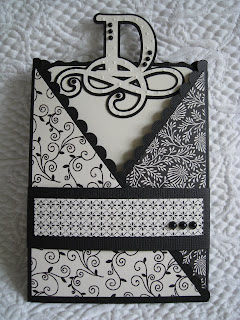


The band is purely decorative because the criss cross is glued shut like an envie and doesn't open. I just cut a 1 1/2" x about 10" strip of back and wrapped it around the card, trimmed it to fit and added a srp of another pattern and more beads. That looked a bit more elegant and understated to me than a bow or flower embellishment. Besides an invitation, I really think this card could be used for any occasion, including a keepsake menu card for a special dinner party.
The second card says "PARTY"! It's done in exactly the same way as the Monogram card but "Celebrate" comes from Straight From the Nest. The fun bandana paper is from an 8"x 8" Martha Stewart pad.

Here I thought doodling was a better choice for a more casual feel. If you choose to make a card like this without the welding, I suggest you glue the word further down on the card for strength.

To finish this one off, I added some gingham ribbon and a watermelon slice brad. Wouldn't it be a great invitation for a Memorial Day or Fourth of July barbeque? I also think it would even make a fun birthday card or any other reason one might celebrate. I hope you enjoyed this and it gives you the inspiration to take a closer look at your cartridges and explore the card options. See you tomorrow! Click HERE for the free .cut file.
Hi, this is Joy and today's 4" x 9-1/4" card is from the new Mini Monsters Cricut cartridge. You wouldn't guess it to look at it since who knew there was this cute lollipop hidden on this cartridge? The colors on this are a true yellow and pink - I don't know why the computer distorted it so much.
All this week we will be featuring projects from the five new cartridges that Provocraft released this past Thursday - Mini Monsters, Toy Story, Cindy Loo, Wall Decor and More and Freshly Picked.
It's simple card Monday and so I've kept it very simple. I cut the lollipop on page 57 of the handbook at 7" and used all the layers but the shadow. This cartridge has thick shadows and when I tried it out on the card, I wasn't sure it worked.
I cut the "sweet" word art also on page 57 at 1-1/2", also without a shadow. A good way to fit your word art on the card is to use the "Fit to Length" button. In this case, I pressed "Fit to Length", then dialed in 3-1/2" and then hit the Phrase Feature key and the lollipop key. The machine then gave me the size of 1-1/2" as a height that would fit the length of 3-1/2" long.
Paper is from Bella Blvd. and Core'dinations cardstock.
I just added in a sheet of white cardstock for the inside. This card fits in a standard business envelope so no problem finding one of those, huh?
A little change to the schedule - we're swapping projects and having a card today, layout tomorrow.
This is probably my favorite card of the 40-something plus I made! And it was so easy! I love this Cricut Lite Cherry Limeade cartridge! The font rocks and so does this flower image!
First off, I cut the flower (all layers) at 2" and instead of just one layer of flower, I cut three. I used the Bo Bunny double dot paper for the flower section and some of the leaves and Core'dinations for the other leaf sections. I ran these layers through the Cuttlebug using the Swiss Dots folder, after inking the edges. I had also inked the edges of the green leave parts and then layered the whole thing together and threaded a large black brad through the center.
My card is a regular A2 size (4-1/4" x 5-1/2"). I cut the "hello" letters with the regular and shadow features at 1-1/2" and it cut like a dream. I am so loving this font! I mounted the word onto a background cut that went over the striped green ribbon from Stampin Up!
Guess what? We're all lucky today, as you're about to find out!
But, first, let's take a look at today's simple Good Luck card from the new Cricut Lite cartridge, Celebrate with Flourish! OK, I just have to say that this is probably my favorite cartridge from the new release of Cricut Lites! It's just so versatile!
My card is a standard A2 card (4-1/4" x 5-1/2" when folded) and I extended the shamrocks out, figuring I could use a little bit larger envelope to accommodate them. Sometimes, you just got to go outside the boundary lines, know what I mean? Or maybe since I live in Texas, I don't want to be fenced in...
I cut these shamrocks at 4-1/2". Remember, with shadowed images, you always cut your shadow FIRST, making sure it is the size you want. Then, add in your base cuts. Sometimes, the shadows can be quite a bit larger than you might expect so this is very important.
The paper used on this card is from Core'dinations, Bo Bunny (dotted paper) and October Afternoon. Stamp from Papertrey Ink - their mixed mega messages set may be the last sentiment set you ever need to buy again - incredible for card makers! Lace cut is from the Martha Stewart Lace edge punch.
WOW! This was one of the easiest cards I have ever made! I used the new Cricut Imagine Machine and cut out the bird, branch, frame with scallopy edges and blue background at 4". It took about 3 minutes! Card ends up sized at 4-1/4" x 6".
I added some pen marks on the bird and branch. The stitching on the frame printed out on the image. Then I popdotted the bird. I also inked edges throughout.
I added the rest of the sentiment to the inside:
Stamp sentiment is from Darcie's Stamps and cardstock is from Core'dinations. Ribbon and button from Papertrey Ink.
This 5-1/2" x 5-1/2" card was so fun to make! I had seen this ewe on the Cricut Country Life cartridge and thought she was just too cute! I knew using some off white glitter paper vy DCWV would help her get her bling on....ok, that was silly, but hopefully, funny...
I thought it would be fun to make this a stand-up card. The "ewe and me" stamp is by Waltzingmouse Stamps and the "I love you" stamp is from Papertrey Ink. Paper is by October Afternoon and Coredinations.
I cut the ewe at 3", all layers, and pop dotted her onto the front. I love the curly-Q cuts on the ewe! The ribbon and button are from Stampin Up!.
Here's what the inside looks like if you opened the card traditionally. This card is going to be for my husband, the love of my life...it's good to make a card for the hubby once in awhile!
Hi, everyone! I thought it might be fun to revisit the Preserves Cricut cartridge, as I just got the Preserves Cricut companion folders. I decided to use them in an unusual way, which you will see below.
Also, today, I thought it would be fun (and maybe daring) to cut my focal image small (pear3 cut at 1-1/2"). This A2 sized card (4-1/4" x 5-1/2") required a smaller image. Lately I've been making larger cards but I thought I should go back to the standard sizing.
My scalloped and regular circles were actually punched out. Paper is by October Afternoon, Coredinations and JillyBean Soup. Ribbon by Stampin Up! and sentiment by Papertrey Ink. In fact, that "thank you" was stamped on the edge of an EK Success punch that I turned 90 degrees and cut down.
The little leaf sprig is from the Martha Stewart branch punch.
Here you can the see the inside and below you can see how the Cuttlebug folder embossing actually shows up on the inside of the card, for a different twist on things. I love these Preserves Cuttlebug Companion folders!
Below you can see the card - I pop dotted the focal image to give it more presence on the card. I also used the Swiss Dots folder to cuttlebug the background that the pear sits on. Most everything is better Cuttlebugged!
Tune in tomorrow for another oldie, but goodie, Cricut cartridge project!
It's football season and I thought this card, tag and bag set from the new Cricut Wrap It Up! cartridge would be just perfect for that football fan in your house. My husband is a huge Notre Dame fan and so every Saturday he devotedly watches the game with the Notre Dame club while I am silently praying they will win so the weekend isn't ruined. Needless to say, if you know anything about college football, you know the last few years at our house have been difficult...
Moving on to the project - this card was cut at 4". I cut the card twice and then cut off the front layer so I could run it through the Cuttlebug using the Tiny Bubbles folder. I had to run it through twice. This folder is so convenient for adding texture to images like whales, various animals and now this football. I love the pebbly surface! The white edges were so stark that I ran them through the Cuttlebug also using the Distressed Stripes folder (another winner) and then I used some chalk ink to rough it up a little. The football was looking too stark...
This football box was a snap to put together! I cut it at fit to page using a 12x12 sheet of Core'dinations cardstock. Check out the photos below:


You could put a little bag of nuts inside this box as a quick snack - or maybe M & Ms.... yummo!

Finally, the tag is just two layers. Since I wanted the football to have white stripes, I backed just that section with a scrap of white paper and then used my scissors to trim around the football before I added the yellow layer. A bit of Stampin Up! ribbon in brown and cream seemed to be the perfect match!
So, let's get started!
My first card is a standard A2 size (4-1/4" x 5-1/2"). What I did first is print and cut a rectangular section of the background patterned paper.
Then, I cut the three trees at 3" and 3-1/2", four times each. I wanted to layer the trees with pop dots to give them some dimension. You can see above how it adds a lot to the card. The frame is from Spellbinders. I also Cuttlebugged the white front section using the Swiss Dots folder (an essential)!
I added a stamped sentiment from Papertrey Ink and three more trees to the inside.
I used HP photo paper to print out the background patterned paper and the trees. I set the print settings on "glossy" and had NO TROUBLE at all. No smearing, no nothing. Not only that, the colors were so nice and vibrant when using the photo paper. I got a 150 sheets at Sams Club.


 Posted by Houses Built of Cards at 5:51 AM 14 comments


 Posted by Houses Built of Cards at 5:44 AM 3 comments


hope ya like this one :) thank you so much for stopping on by i truly am grateful for you :) have a wonderful rest of day :) XXXshelly


Here are my cards I made. This one is CELEBRATE FLOWER. I used the Stamped cartridge for it so you will need that cart to cut the pieces for the card. The file is set to cut 6 at a time. No sense in just making just one is my motto!! I love the birthday cuttlebug folder and then a friend of mine sent me a special set that came with some little emb


Here is the matching card that I made using the Sweet Treat cartridge's card function. The card and its layers are cut at 7 1/4".
The sentiment is cut at 1 3/4".
I cut another flower from Cake Basics and trimmed it to match. To mimic the frosting, I used a brown marker and liquid glass.
Thanks so much for stopping by today!! Make sure you come back tomorrow to check out Ms. Susan Edward's debut! She has something positively beautiful! You are really n
at I knew I would make as soon as I saw the Jillibean Soup paper with the lemons on it. I knew that there was the cutest glass of lemonade on Just Because cards that was just calling out to be paired.
The card is the usual A2 size and the class of Lemonade is cut at 4 1/4".
I added a little bit of stickles across the top of my glass to look like it is sugared. This was totally Joy's idea. Isn't she clever!
the satin ribbon is from SU!
The stamped sentiment is from Taylored Expressions. I really love her stamps! I also stuck a lemon epoxy sticker on the card that I bought from JoAnn's. It is a perfect fit!
Thanks for stopping by today! Make sure you come back tomorrow to check out Joy's awesome layout!
Hello, everyone! This is Melanie and today I have a card that I made using the Animal Kingdom cartridge. I have to admit this was not a cartridge that I had used all that often. I only used it once before this week, as a matter of fact. However, I think it is going to be in the regular rotation now. There are so many paper lines out now that have farm themes. This cartridge is the perfect match! One of those lines is the Chicken Noodle Soup line from Jillibean Soup!
The chicken was cut at 4".
The ribbon is from SU!
Thank you so very much for stopping by today. Make sure you check back in tomorrow because it is Scrapguy's Saturday to post and you know he will have some FABULOUS stuff!
Butterfly Kisses from Straight From the Nest
Welcome back! It's Fancy Card Friday and I can't believe it's my last day here at Everyday Cricut. I've so enjoyed my time here with you and again want to thank Joy and Melanie for this marvelous opportunity. I hope you've learned alot because I certainly have and want to thank you all for your sweet comments and words of encouragement. They mean the world to me.
For my last post I wanted to do something from one of the giveaway cartridges this week. I chose Straight from the Nest because I was able to do another kind of shaped card I enjoy; a shaped sentiment card. Although I often do these by welding individual letters, there are all kinds of fun sentiments on the new cartridges already done for you. I always choose one with a shadow and here I've chosen "Butterfly Kisses".
All of the designing is done with Design Studio. It cannot be done with the gypsy until it is upgraded to include the "hide selected contour" feature. I welded the 2 sentiment shadows and hid the contours in the middle of the words so it would be solid enough to include a sentiment inside. I decided it need more stability (and also more room inside) so I also welded a large butterfly shape that overlapped the sentiment on both the front and back. That gave one additional joining place for the fold. Of course I made a mat that I cut in plaid to hide the fold from the front and complete the design.
The regular Butterfly Kisses cut is very delicate so take care when removing it from the mat. Again I recommend using a spatula. Whenever you have problems with delicate cuts there are several things you should check. First of all, some cuts just don't do well in a small size. Second, check your pressure. I have to admit I almost never change my pressure unless I'm cutting paper instead of card stock. I almost ALWAYS just keep it at high. Ditto for the speed. Actually, since I do everything in Design Studio, it doesn't matter what you have your speed set at because DS chooses it for you. you have no control.
What I have found is that the more delicate cuts do better if the card stock is smooth rather than textured and some textures are worse than others. Also, make sure your mat doesn't have any little bits on it. Clean it off with a wipe so the blade doesn't hit something stuck on your mat and tear the card stock.
Now don't laugh here. I do go a bit overboard on the foam, but it's important with an open cut like this that it is well supported. I used a combination of narrow strips and punched colored foam that I've made myself using double sided tape. (Just in case you missed that tip in a previous post.) You can always test the stability by turning your cut over with the backing still attached (so it doesn't stick to your table) and seeing if you need to add more. I noticed that the top part of the K was weak (I don't know why they didn't just keep it welded to the U above it) so I added a little piece across to support it. (that's what I'm pointing at here. It doesn't show from the front.
Each butterfly is cut 3 times. Twice for the front and once for inside. The first large pink one is glued directly over the turquoise layer and the smaller two are popped. This adds more of a multi dimensional effect. The pink top pink one was embossed with a the folder from the Sizzix Hello Kitty Spring Set and popped just in the middle so both wings are free. The other two are embossed with that little butterfly folder again (see the Twinkle Twinkle post) and are popped on one side only so the other wing is free. By the way, I forgot to mention that when using that small butterfly folder if you want the dots to be raised (embossed) rather than recessed (debossed) you have to use the folder upside down.
Here's a dimensional view. As usual I've added wads of adhesive pearls for embellishment. I get all of my adhesive beads, pearls and gems at Michael's. They are their own Recollections brand and come in 3 different sizes to a package for $1.99.
Inside I've designed a mat which was trimmed at the fold. It was difficult to design because of the openness of the sentiment. I will explain more about that in an article when the .cut file is available which will probably be Monday. Please check my blog, Popsicle Toes. Inside I added more butterflies including a few tiny punched ones from my Martha Stewart punch. I trimmed both the orange butterfly and the pink one because it just doesn't work to glue the whole thing over the fold, but there was enough of the pink one cut off to glue slightly above the fold, so that's what I did. The sentiment is computer generated and I doodled the butterfly's flight. In order to get the placement of the sentiment I first used my Printmaster program to design it and print it out on regular paper. Then I took my cut mat and use my light table (or you can hold it up to a window) for placement and used removable tape to stick it to the paper. Then I ran it through the printer again and Voila!
Just Buggin' Challenge #11: Create a project with an animal Cricut die cut! If you don't have a cartridge with an animal die cut, make up your own animal, think google eyes!!
Cartridges Used:Animal Kingdom
I used the Cuttlebug embossing folder, "tiny bubbles, to add texture and sponging to show dimension. The word day was printed with my computer. A fun and easy project when someone needs a "cheer me up" card.
Into the Wild
Cartridges Used:Animal KingdomI used the Cuttlebug embossing folder, "tiny bubbles, to add texture and sponging to show dimension. The word day was printed with my computer. A fun and easy project when someone needs a "cheer me up" card.
Giant Nugget Card Box
Below is a photo of the pieces I used in this project.Using "Joys of the Season" Cricut cartridge pg. 62 "ornament" I cut out the Christmas bulbs at 2", then cut a shadow from pg.79 "shadow" 2".
Card is cut 6" x 3" scored at 3"
Pattern paper is cut 2 7/8"
Before I glued the bulbs, I cut off the top loop of the bulb with scissors).Next step adhering pattern paper and ribbon to card, then using pop-dots I added the bulb with a loop of gold cording at the top.I Wrapped 3 chocolate nuggets with pattern paper then using Becky's pattern made the adorable box. Wrapped gold cording around the box. So adorable, makes a wonderful gift.Giant Nugget Box pattern can be found- HereIf you have any questions let me know
Nugget Card Box Friendship
More nugget/card boxes, these are so fun to make!I like to get all my supplies cut then start the gluing process.
Cricut cartridge used: A Child's YearNugget box can be found Here
Just Buggin' Challenge 13
Just buggin challenge #13 Sew it!This weeks challenge was to use sewing, faux sewing, or sewing stamps on your project!
I chose to use my sewing machine, I love to sew on paper.
Sew It
I cut the oval out using "George and Basic Shapes" cartridge, then carefully cut it down on each side eyeballing the distance from the edge.
I used "A Child's Year" Cricut cartridge page 58I used a brown ink pad to rub over the stitching and on the edges of each layer before assembling the card. I love popping up the images, I used pop-dots.
Just Buggin' has weekly challenges to inspire us to use our Cricut machines, come join the fun!
Labels: george and basic shapes, a childs year
Just Buggin' Challenge #19
Just Buggin' has a great challenge this week, it's titled -Stamping FunThe challenge is to stamp on you Cricut die-cuts
I have a super fun 3-D project this week using Tags, Bags, Boxes & More Cricut cartridge.
I had my daughter pull out her stamp sets so I could stamp on my project, I found an cute flower stamp set from Stampin' Up that I stamped all over my box.
I chose the flower box on page 120, perfect with flower stamps, don't you think?
I cut the box using the blackout feature so there were no windows or ribbon holes. I also used the "fit to page" button on my Cricut expression machine so I could get the largest possible cut on a 12 x 12 piece of cardstock, which cut at 8 3/4".
After I cut the image I stamped all over the box with flowers and leaves.
I also stamped a larger flower for a gift tag The square box is aproximatly 2 1/2" high (not including the flower on top).Just Buggin' has weekly challenges to inspire us to use your Cricut machine.Labels: tags bags boxes, birthday box, flower, present
Wild Card Series -Card #16 -Tweety
I love birdies and this card was of course fun to make! Wild Card #16 can be found on page 47 of the Wild Card booklet.The images circled in red are what I cut for this card. I did cut them in various sizes.
I cut all the main images at 5" the envelope, card, liner and the birds on the branch (shift/frame).
The phrase "you made my day" was cut at 6". The frame using the pattern paper is cut at 7", and the blue frame cut at 7 1/4".
The icon birdies were cut at different sizes... the two tall green birds (shift/icon) were cut at 3"
The two shorter red birds (icon) cut at 3" and the short blue bird cut at 2 1/2".
The white piece of cardstock was cut using my paper trimmer to be placed on the inside of the card, this was cut at 4 1/2" x 4 3/4".
I used the bird branch (shift/frame) on the inside of my card.
Tips & Tricks about this card can be found here Labels: wild card, thank you card, bird
This weeks challenge at Just Buggin' there is another great theme... Monochromatic Challenge.
Use a monochromatic color theme on your cricut project.
My color theme is blue with a lovely little dancer from "A Child's Year" Cricut cartridge. The little dancer is on page 73, I also cut the card from this page as well. The card was cut at 5 1/2" the patterned paper layer on front was cut at 4 3/4" and my little dancer was cut at 3 1/2".
Just Buggin' has weekly challenges to inspire us to use your Cricut machine.
Use a monochromatic color theme on your cricut project.
My color theme is blue with a lovely little dancer from "A Child's Year" Cricut cartridge. The little dancer is on page 73, I also cut the card from this page as well. The card was cut at 5 1/2" the patterned paper layer on front was cut at 4 3/4" and my little dancer was cut at 3 1/2".
Just Buggin' has weekly challenges to inspire us to use your Cricut machine.Labels: a childs year, dancer
Wild Card #21 - A Lovely Doily
This wild card has some really lovely features; a doily shaped card, a rose and a beautiful square rose pattern icon.... hmm....how do you use that image on a card? I decided to challenge myself to use that square icon on my card. This wild card can be found on page 52 of the Wild Card Cricut cartridge booklet.Circled in red are the images and quantities that I cut for this wild card.
Here is the cardstock and patterned paper I cut for my card, each image is cut a 5".
Note: I do not use the real dial size when cutting my wild card images.
The patterned paper is from Stampin' Up designer paper packet (discontinued). I only used the outer circle from the circle liner feature, the inner circle was discarded. For the phrase "How Thankful", I used my mini gel pen and holder in my cricut machine. The gel pens and holder I ordered from Custom Crops on line store.
I challenged myself to use the square rose icon feature for this card. I begain by tracing a circle using the outer circle image. Cut it out, then used my cricut spatula tool to lift/bend the cuts in the rose pattern.
I used three colorbox cats eye inks to add a distressed look to the rose. By lifting the edges the ink was able to scrape those edges and give a darker color there. I started with the light tan ink, then the dark brown, and finished off with just a little green.
Some of my edges of the rose did break away, but not to worry, I keep inking those as well, then when finished inking I adhered the rose to the same circle that I used to trace the original rose circle, the loose edges were easily put back in place, just like a puzzle. This image was now adhered to my doily card front.
For the two roses I used the same lifting/bending technique, then inked the edges, yellow for the rose, then green for the leaf and stem. I cut off the leaves and stem of the yellow rose then adhered that rose over the top of the green roseI used pop-dots to adhere my lovely yellow rose to my card front.
Here are the finished envelope and the inside of my doily card. I trimmed the phrase using my paper cutter, inked the edges, then placed it on the inside of the card.
Challenge yourself.... when you find image in your wild card booklet that you're not sure what to do with, remember to challenge yourself and find a way to make that image a part of your card.
Labels: shape card, scallop edge, flower, wild card, spring, birthday card
Wild Card #25 - Flower
A very simple yet lovely card. This is wild card #25, it can be found on page 56 of the wild card booklet.Circled in red are the images that were cut for this card.
Each image was cut at 4 3/4"Using the smaller flowers I layered them using the three different patterned papers, then added a small jewel in the center of the flower.
This is the envelope closed and the inside of the flower card.
I used the extra flowers to decorate the back side of the card.
Thanks for coming to my blog :)
Labels: shape card, wild card, flower, birthday card, thank you card
Simply Classy
A simply classy card using the Forever Young Cricut cartridge.The emblem feature was used as well as the word "Classy", I also cut three tiny flowers. All are found on page 73 of the Forever Young cartridge booklet.
The emblem and word were embossed using the "Swiss dots" Cuttlebug embossing folder. Then gently rubbed using a light brown ink pad.
For the card background I used "Spots and Dots" embossing folder then gently added a brown ink over the embossed circles and edges.
Labels: forever young, cuttlebug, birthday card
Spring Showers
This card is one I designed specifically from the given sketch. One of my favorite Cicut cartridges is A Child's Year, I just love the silhouette images. This sweet little umbrella girl is found on page 34 of the booklet.This is the sketch from Twisted Sketches
the additional twist was to use something transparent.
My card is transparent, and the raindrop, which was cut from A Child's Year as was the word "spring" I used design studio to weld the word together.
Labels: a childs year, umbrella, spring, birthday card
Fantabulous Cricut Challenge #001 -Balloon Shaped Card
Today is the day! Fantabulous Cricut Challenge Blog is having their very first challenge and the design team has created amazing projects for you to get inspiration from.Our first challenge is to include a word and shape on your project:
the word is "Birthday"
the shape is a "Balloon"Here is the card I made for the challenge. A balloon shaped card with layered party hat, and stars. I used the Celebrations Cricut cartridge for all images.
A simple Design Studio cut file available at the end of this post.
I tied the balloon using organdy ribbon but wanted to give it more of a curly effect.
Using my heat tool, I carefully waved it over the ribbon and the ribbon began to melt. The melting process happens very quickly so make sure the heat is not held on the ribbon to long.
I got just the look that I wanted for a curly balloon string effect.
I used tons of pop-dots to pop the pieces off the card.
Click here for -Balloon Card -Design Studio cut fileHead on over to Fantabulous Cricut to see the great projects from the design team, and join us for this weeks challenge.
More Balloon Shaped Cards
Remember the balloon card I made a few days ago? I really loved the design and so wanted to made a few more, I thought they would be great to have on hand.To view the details of this card go Here. I also have a simple cut file for the card and a photo tutorial of how I made the ribbon curly.
More fun balloon cards!
Labels: shape card, balloon, celebrations, birthday card
Create a project that has something to do with "Rain or Water"
ideas/examples: hat, umbrella, life preserver.
I used "A child's Year" cricut cartridge for the adorable little girl watering her flowers. All of the rectangle shapes were cut using "George and Basic Shapes" cartridge. Then I used "Tiny Bubbles" Cuttlebug embossing folder on one of the rectangles, then gently rubbed a light brown ink pad over the bubbles.
This sweet saying was printed from my computer, and the edges were brushed with an ink pad.
Fantabulous Cricut design team has been so clever with this weeks inspirational projects you'll just have to go take a took. Fantabulous Cricut Challenge Blog -and daily inspiration for your creative creations.
Labels: a childs year, flower, cuttlebug, birthday card
Spring Flower
I love spring, don't you? Even though Easter is over for this year, we can still continue to create using the Easter 2010 Cricut Cartridge just as I have here....I used DCWV Glitter cardstock Stack. When I cut glitter paper I always cut it using the "multi-cut" feature and it cuts beautifully (speed 3, pressure 6, blade 6). I cut the flower at 4 1/4" in three different color cardstock, green, blue and yellow, then cut off the stem of the blue cardstock, the stem and flower of the yellow, and layered them all together. I cut out the shadow in a cream cardstock (not glitter).
The word "Spring" was cut at 1 1/2", I cut off the flower that was attached to the word, because I didn't want to use it this time. The shadow was cut using blue glitter cardstock.
The polka-dot paper is from DCVW Blossoms & Butterflies cardstock stack.
Labels: flower, spring, birthday card, easter 2010
Challenge #6 -Winged Thing Theme:
Create a project that includes something that fly's, birds, butterflies, dragons etc...
Here is my card & matching envelope
The paper is from DCWV Blossoms & Butterflies stack, and DCWV glitter stack, I love these papers! I use the multi-cut feature when cutting these papers with my Cricut machine, they cut beautifully. Cricut cartridges used are "Walk in my Garden" for the card and "Wild Card" for the envelope
Just a little bling for the dragonfly's eyes.
Design Studio Cut FilesDragonfly Card cut file -here
Envelope and Liner -here
Hello Tulips
A lovely card using "Walk in my Garden" my favorite spring Cricut cartridge. The image is on page 99 in the booklet. I used the border feature cutting at 4". The tulips were cut in yellow cardstock twice, one set covered the green tulips cut with the border, the the second set I popped up using pop-dots.The word "Hello" was printed using my computer
Bicycle Journey
I'm so excited to share my next "Cardabilities Sketch" #2.My card is a 6" x 6", it was fun to do a square card, not my usual style but I really liked making it.
The pattern cardstock is from DCWV Pockets full of Posies Stack. I used my new "Heritage" Cricut cartridge to cut out the bike pg 63 at 2" and the word Journey pg. 71 at 1 1/4". The fun shape behind the bike is from Accent Essentials Cricut cartridge pg. 79 cut the shape twice 3" for the patterned cardstock and 3 1/2" for the dark purple cardstock.
Here is the sketch, I flipped this design upside down for my card.
For the word I cut it twice then carefully cut the green flourish off and added on top of the purple flourish.
Teacher Appreciation, include an apple shape on your project:
Create something for a special teacher using an apple shape somewhere on your project.
I have enjoyed making shaped cards using design studio, so I couldn't resist creating an apple shaped card. Cut file available at the end of this post.
I used the "Doodlecharms and Storybook" Cricut cartridges.
I'm a Guest Designer today!!
So thrilled today for the opportunity to be the "Guest Designer" for Twisted Sketches! Twisted Card Sketch #008.The card size measures 5 1/2" x 4 1/4".
I used the Heritage Cricut cartridge for the fence on pg. 21 cut at 2 2/3" the word Memories pg. 64 cut at 3/4".
Go check out the sketch and what the rest of the amazing design team created using the same sketch -HERE.Challenge #13 -For the Bride:
Create a project using one of the following;
something old, something new, something borrowed, something blue
Create a project using one of the following;
something old, something new, something borrowed, something blue
I'm using something "new" my brand new "Tie the Knot" cricut cartridge, this is the very first project that I've made using it.
For the "love birds" on page 36 of the handbook, I used the "blackout/shadow" +shift, cut at 1 1/2" cut in silver cardstock, then the sparkly shimmer cardstock (from Stampin' Up!) I cut using the same "blackout/shadow" but no shift key, then I cut out the two love birds using no special feature keys at the same 1 1/2", I used pop-dots to add to the card.
Mr & Mrs page 62 was cut at 1", using silver cardstock I pressed the "blackout/shadow" +shift key. Then the shimmer cardstock I cut out the Mr & Mrs using no special feature keys.
The cuttlebug folder is "Textile Texture".
Come see the lovely projects that the design team has created for this challenge -HERE.
Labels: tie the knot, wedding card, birds, cuttlebug
Today's card for Everyday Cricut I wanted to celebrate summer and a wonderful day at the beach. This little girl is totally enjoying herself in the shade of the umbrella and finding treasures in the sand.
I have a simple cut file at the end of this post.
I have a simple cut file at the end of this post.
I used A Chid's Year Cricut Cartridge and Design Studio to create this card, it measures 5 1/2" accros. To create the circle shaped card I use the ball +shft key on page 43 of the handbook, and welded two of them together, then used the "hide selector" for the little circle in the tag.
**One tip I learned that when I copy and past an image in design studio, for the second image I'm not able to use the "hide selector" (only with the original image), however, I found that if I save the file, then reopen it, I can use the hide selector on the second image
The umbrella is from page 43 as well, I used the shadow +shift, then only the shift key for the top layer of the umbrella.
The cute beach girl is on page 44, using the shadow feature, then no features for the top layer of the girl.
I don't have measurements because I created this in design studo, a cut file is available on my blog.
If you donwload this file, please leave me a comment on this post. Thank you. :)
Design Studio cut file -HERE
Labels: a childs year, circle card, shape card, umbrella
Summer Time at the Beach:
Create a project for summer using something you would find at the beach.
I used my new "Life is a Beach" cricut cartridge. The flip flops are on page 64 of the handbook and were cut at 3 3/4", the wave is on page 45 I used the border feature cut at 1 1/2", the escape word is on page 38 I used the Title Words feature cutting it out twice, then used scissors to cut off the leaf.The hanging charms are a fun feature on the cartridge, I cut the charms at 1 1/4" the sun is on page 44, flip flops page 64, the wave on page 45. Then on page 70 is the solid background charm using the shift key, I placed behind each charm.Come join us at Fantabulous Cricut Challenge Blog for this weeks "Summer Time at the Beach" theme. You can see the other wonderful project made by each of the Fantabulous Design Team projects -HERE.One of my favorite summer time treats a cherry popsicle, so refreshing.
I have a design studio cut file at the end of this post.
I chose to make a Popsicle shape card with a clear (wrapper) sleeve. Card size is approx. 3 3/4" x 5 1/2". I used 4 cartridges for this project, and design Studio.
The cartridges... Doodlecharms for the popsicle, Doodletype for the word "popsicle", George and Basic Shapes for the oval, and From my Kitchen for the cherries.
Just think, you could do different colors of popsicles for you favorite flavors, like yellow for banana flavor, then add a banana instead of a cherry on the "wrapper", or how about grape... hmmm what could you do for the yummy rootbeer flavor. :)
Thank you for visiting, I love visitors and comments!!
If you download this file, please leave me a comment on this post. Thank you.
Design Studio cut file -HERE
I have a design studio cut file at the end of this post.
I chose to make a Popsicle shape card with a clear (wrapper) sleeve. Card size is approx. 3 3/4" x 5 1/2". I used 4 cartridges for this project, and design Studio.The cartridges... Doodlecharms for the popsicle, Doodletype for the word "popsicle", George and Basic Shapes for the oval, and From my Kitchen for the cherries.
Just think, you could do different colors of popsicles for you favorite flavors, like yellow for banana flavor, then add a banana instead of a cherry on the "wrapper", or how about grape... hmmm what could you do for the yummy rootbeer flavor. :)Thank you for visiting, I love visitors and comments!!If you download this file, please leave me a comment on this post. Thank you.
Design Studio cut file -HERE
I created a gift package box using 12 x 12 cardstock, this box measures approx. 8" x 2".
The cricut cartridges that I used are Geroge and Basic Shapes, A Child's Year and Very Merry Tags.
I used my Cricut Design Studio, and George and Basic Shapes cartridge to cut out a window in my 12 x 12 patterned paper, then cut a brown rectangle that was just a tad bit smaller then the window. The kids from A Child's year pg. 57 fit inside the window.
Each of the 12" x 12" cardstock papers were scored at 2" from each edge.
I used a clear piece of plastic for the window.
The tree tag cut from Very Merry Tags cartridge was cut approx. 3" I added clear embossing powder to the top green layer to give is some shine.
The cricut cartridges that I used are Geroge and Basic Shapes, A Child's Year and Very Merry Tags.
I used my Cricut Design Studio, and George and Basic Shapes cartridge to cut out a window in my 12 x 12 patterned paper, then cut a brown rectangle that was just a tad bit smaller then the window. The kids from A Child's year pg. 57 fit inside the window.Each of the 12" x 12" cardstock papers were scored at 2" from each edge.
I used a clear piece of plastic for the window.The tree tag cut from Very Merry Tags cartridge was cut approx. 3" I added clear embossing powder to the top green layer to give is some shine.Summer B-B-Que
Create a project and incorporating b-b-q summer food /cooking
I used three Cricut cartridges for my card,George and Basic Shapes for the lettering, and From my Kitchen for the grill on pg. 41 of the handbook, the spatula is on page44 and page 55 is the fork I used (I show how I made a two pronged fork below). Then Everyday Paper Dolls for the grass on page 77 (accessories 2).
I used the regular fork and cut off two of the prongs as shown below. For the handles, I cut each of the utensils out of brown cardstock, then cut off the utensil part.
I also added brown ink to the edges of the handles, the fork did not have a hole so I made one with a piercing tool then added red twine.
Come see the sizzling Fantabulous Cricut design team projects -HERE.
Create a project and incorporating b-b-q summer food /cooking
I used three Cricut cartridges for my card,George and Basic Shapes for the lettering, and From my Kitchen for the grill on pg. 41 of the handbook, the spatula is on page44 and page 55 is the fork I used (I show how I made a two pronged fork below). Then Everyday Paper Dolls for the grass on page 77 (accessories 2).
I used the regular fork and cut off two of the prongs as shown below. For the handles, I cut each of the utensils out of brown cardstock, then cut off the utensil part.
I also added brown ink to the edges of the handles, the fork did not have a hole so I made one with a piercing tool then added red twine.
Come see the sizzling Fantabulous Cricut design team projects -HERE. My outdoor activity would be bird watching :)
I used the Serenade Cricut cartridge to create my bird bath scenery.
Come see the other "Outdoor Activity" projects that the design team has created, and come join our challenge -HERE I made this card about a month ago but had not posted it yet because of my "technical" difficulties lol
It's good to be back, should be done with the craft room this weekend. Fully loaded for next week. Hope you all have a wonderful weekend =D
Hugs,
Giselle
I used Cricut Wild Card for card and envelope, Cricut Sampler for other cuts (same cuts from New Arrival)
The round tag is from Cricut Sampler also.
The stamp was embossed and die cut with the Cuttlebug small folders included with it.
Vintage Valentine - Make your own Paper Lace Die-Cut!
Peachy Keen Sketch Challenge # 43
I used the Heritage and Sweethearts Cartridges, but any cartridge with a heart and any lacy background (lacy labels) would work great! I also used Glossy Accents to give the heart and sentiments a little shiny dimension.
I used Vanilla Bean Crinkle Ribbon for this card. Scroll down for a video showing how I made the ribbon border!
Scroll down to watch a video showing how I made this heart with my Gypsy (super easy)!
The first video shows how I used my gypsy to create this layered heart:
The second video shows how I made the ribbon border:
Measurements for the heart: (These will make more sense after watching the video)
Background frame (Heritage) rotated - 3.20 x 2.68
Heart scalloped shadow (Sweethearts) - 2.81 x 2.68
Heart (Sweethearts) - 3.87 x 2.68
Heart Frame (Sweethearts) - Outer heart: 3.87 x 2.68
Inner heart: 3.50 x 2.39
Be sure to subscribe to my blog via email - at the top right of my blog - updates of new posts will be emailed to you!!
Wednesday, January 26, 2011
More fun with Country Life!
Hey everyone - I am loving this Country Life cartridge! There are soooo many fun cuts!
This card is 5 1/2 x 5 1/2 and all of the cuts came from the Country Life cartridge:
Pig and Chicken - 3 1/2 inches
Barn and layers - 3 1/2 inches
I hand cut the sun.
I hand cut the sun.
The stamped sentiment came from My Pink Stamper.
All of the patterned paper is Crate Paper. The black is the only paper that isn't patterned. I love the soft, subtle colors on the back side of brighter patterned card stock!
The blue background paper is 5 1/2 by 3 1/2 inches and the green background paper is cut at 5 1/2 by 2 inches.
I used glossy accents on all of the black pieces and dimensional squares to lift the pig and chicken up a bit.
Have a great day!
You might also like:
Road Trip ... Fantabulous Cricut Challenge
Oh the amazing places we go and people we meet on our road trip journeys... I love to go... but then it's nice to get home to my own bed.
This weeks Fantabulous Cricut Challenge #25
Road Trip
Create a card or project incorporating a vacation or travel theme
My card celebrates "Places to go... and People to see"
I used Zoobaloo cartridge for the trees on page 72 of the handbook. Locker Talk was used for the fabulous car on page 37 of the handbook, I only used the car and shadow feature. I used a 3/4 " circle punch for the wheels then added a flower brad.
The road was made from a piece of black cardstock then I used a white gel pen for the lines. My printer was used for the saying "Places to go... People to see" tied on using ribbon and added a sunshine charm. I also use a tan ink all over my paper pieces.
Head over to Fantabulous Cricut to see what the design team has created for their "Road Trip" project. -HEREI used Doodlecharms cratridge for the apple and apple boarder, I created the card in Design Studio and have a cut file available at the end of this post.
The word "Thank you" was printed using my computer, the I used scissors to cut a tag shape, punched a hole and added twine to the tag.*****
Come follow my blog and leave a comment on this post and you will be eligible to win my little prize package that I'm offering.
I will announce my winner on Wednesday the 22nd.
Come follow my blog and leave a comment on this post and you will be eligible to win my little prize package that I'm offering.
I will announce my winner on Wednesday the 22nd.
*****
Now it's your turn!
Incorporate a button on your own "Button Up For School" project. Make sure to include a Cricut cut somewhere on your project!
Incorporate a button on your own "Button Up For School" project. Make sure to include a Cricut cut somewhere on your project!
Next stop... my wonderful friend "Penny's" blog at Light Whimsy. Go see what she has in store for you today... And when you're done, make sure to link up your project to FCCB's Fantabulous Cricut Crawl post to be entered into the contest!
Have fun Cricut crawling and being inspired!
Sweet Treats Cake -Fantabulous Cricut Challenge
October celebrates National Bake and Decorate month and Fantabulous Cricut is celebrating with a yummy challenge.
The challenge: create a project that has something to do with baking, or if you have the Cricut Cake use it to make something delicious.
I decorated a cake using the Sweet Treats cricut cartridge, so delicious.
I used design studio to get the right sizing that I wanted to cut for my card. The cake is approx. 3" tall and the cake stand is approx. 1 3/4" tall, cutting each twice, the first was glued directly on my card and the second was pop up off my card. The scallop layers were cut once, then using a white ink pad I lightly dragged it over the scallop edges.
I used tiny Prima flowers to decorate my cake.Go see the other yummy projects by the Fantabulous Cricut design team -HERE and join us for this weeks challenge.
Labels: wedding card, cake, flower, prima flowers
Candy Corn Cricut Gift Tag -FREE cut file
It's Challenge Me Monday at Fantabulous Cricut the challenge is called "Frighten Me... or Not". OK, so my project is not frightening at all and I rarely, if ever, make any of my Halloween projects scary, it's just not in my nature.
I'm sharing a super quick gift tag that is perfect to add to a quick little gift or treat bag.
It's a Candy Corn gift card.
I have a simple Design Studio cut file at the end of this post
For the mini card tag I scored in the center then folded.First layer (building from the tag base upward) is white with no slits, then next layer is orange, I cut off the top so the white would show. The top layer it is yellow and I cut at the bottom slit. I added brown ink to all the layers before adhering them to the tag.If you download this file please leave a comment on this post, it would mean a lot to me, Thank you!Candy Corn Gift Tag video -HERE
Snowman Card --using Cricut Cartridge Winter Woodlands
It's Challenge Me Monday at Fantabulous Cricut Challenge Blog, and this week it's a Color and Shape challenge.
color "green" and shape "circle"
Use the shape-CIRCLE and color-GREEN somewhere on your Cricut project.
Do you love snowmen... I love snowmen and that saying "Snowmen melt your heart" is true for me. I do hope we will get lots of snow this year, however, I heard that it may be a mild one here, so we'll just wait and see. But in the mean time I can create the cutest snowman here in my crafting space. This snow man is from Winter Woodlands cricut cartridge on page 46 of the booklet and cut at 6 1/2".
For my circle shape I added two green buttons to my cute snowman.
Use the shape-CIRCLE and color-GREEN somewhere on your Cricut project.
Do you love snowmen... I love snowmen and that saying "Snowmen melt your heart" is true for me. I do hope we will get lots of snow this year, however, I heard that it may be a mild one here, so we'll just wait and see. But in the mean time I can create the cutest snowman here in my crafting space. This snow man is from Winter Woodlands cricut cartridge on page 46 of the booklet and cut at 6 1/2".
For my circle shape I added two green buttons to my cute snowman.I popped up the snowman from the card to add dimension.Now you've got to see the clever and amazing projects that the FCCB design team has made, head over to Fantabulous Cricut -HERE.
Guest Designer for Everyday Cricut -Leaf Shape Card
I'm so excited that Joy from Everyday Cricut asked me back as a guest designer this week, I had a blast in June when I go to share a few Summer and Father's day projects, view those posts -HERE. This week I'll have a few Fall, Thanksgiving and then Christmas/Winter projects. I hope you'll join me all week long and gather some awesome inspiration for your crafting projects.I love Fall, it's a gorgeous time of year, I love to see the beautiful colored leaves on the trees, although most are now covering the ground ready to be raked into a huge pile and then jumped into by smiling faces, young and old. :)
My first inspirational project this week is a lovely leaf shaped fall card, I added a birthday sentiment, but it surely could be used for any type of greeting. I have a Design Studio cut file for this project at the end of this post.
For details about this project please visit Everyday Cricut -HERE.
Below is a photo of all that cuts that I used for my card, obviously they are different colors then the above photo, and that's because I'll will be making another card using different colors and this time I'll make a video of the step by step process and that will be coming soon, keep a watch out for it.I hope you liked the leaf card today and got inspired to create your next project.If you donwload this file, please leave me a comment on this post, it really makes my day great! Thank you. :)
Design Studio cut file -HERE
"Snowy Delights"
Create a project and incorporate snow or snowflakes.
I'm beginning the New Year with this thank you card. I used my Winter Woodland cricut cartridge, the branch is on page 38, the bird on page59 of the handbook.
I was so excited to get a gypsy for Christmas and used it to create my first card... woo hoo...
There is so much inspiration at Fantabulous Cricut Challenge Blog, go see more "Snowy Delights" projects and get inspired to create your own project. -HERE
ollipop lollipop... Oh lolli lollipop.... *POP*
Today's challenge at Fantabulous Cricut is: Sweet Shop, create a project using something sweet, like ice cream, cake, candy etc.
I created a yummy lollipop shape card, isn't is delicous? I love how it turned out. I use the Accent Essentials cricut cartridge and designed it using my new gypsy. I welded two circles together, added a patterned paper circle then the swirl.
Then added just the right amount of glitter on the swirl.
My favorite part... the packaging. I added a cello bag then curling ribbon to close it up. Then added a the "You're so SWEET" (oops I need to fix the 'You're' on the tag) glad I noticed before I mail this to my sweet friend.
You'll have to go check out Fantabulous Cricut to see the yummy design team "Sweet Shop" creations and be inspired to create your own project. -HERE
Today's challenge at Fantabulous Cricut is: Sweet Shop, create a project using something sweet, like ice cream, cake, candy etc.
I created a yummy lollipop shape card, isn't is delicous? I love how it turned out. I use the Accent Essentials cricut cartridge and designed it using my new gypsy. I welded two circles together, added a patterned paper circle then the swirl.
Then added just the right amount of glitter on the swirl.My favorite part... the packaging. I added a cello bag then curling ribbon to close it up. Then added a the "You're so SWEET" (oops I need to fix the 'You're' on the tag) glad I noticed before I mail this to my sweet friend.You'll have to go check out Fantabulous Cricut to see the yummy design team "Sweet Shop" creations and be inspired to create your own project. -HERE Pilgrims Give Thanks -using A Child's Year Cartridge
Happy Tuesday everyone!Thanksgiving is a time of thanks, a time to gather family and friends together and eat all day long... ok some where in there we take a nap.
Today I'm sharing a lovely Thanksgiving card that I designed in Design Studio, I've used three cartridges for this card, A Child's Year for the pilgrim people, George and Basic Shapes for the oval frames and the rectangle layers, then I used Doodletype for the words "Give Thanks"
I do have a cut file available on my blog.
I first traced the words using a gel pen, then cut out the letters. I purchased my gel pen holder from Amy Chomas -HERE. Remember, if you do not have a gel pen and holder, you can just omit the drawing part and cut out the letters, or use any cricut font cartridge that you have on hand.Below are the pieces that I cut out.In my cut file I have labeled each mats that will be used to create this card. The first titled "Give Thanks draw 1a" this page you draw the letters "Give Thanks", then carefully with out removing the mat from your Cicut you replace the drawing pen with the cutting blade. Then in design studio you click on the next mat titled "Give Thanks cut 1b" below I have shown in a white box the pieces that are cut. After cutting remove your mat then move on to the design studio mat that reads "Give Thanks cut 2a" cut those pieces out.
The cream colored cardstock under the ovals is what I used as my card base, I cut it using my paper trimmer at 5 1/2" x 8 1/2" I scored half way at 4 1/4".
I inked around the edges of the pilgrims before adhering to the brown shadow pilgrim image. Then used my scotch mounting tape to add them to the patten oval (I think this looks like wallpaper, prefect for the picture frame). The reason I cut out three ovals is I wanted my frame to be thick, each oval is just glued on top of each other.I added lots of dimension around the frame to give more of a 3D look.I'm so glad you visited to day. You can get the Pilgrim cut file on my blogRobin's Creative Cottage -robinscreativecottage.blogspot.com
Tea For Two -using Once Upon a Princess cartridge
I couldn't decide if I should do a Fall/Thanksgiving project or a Winter/Christmas project, so I decided to do neither and play with my Once Upon a Princess cartridge, after all, it's the give-a-way cartridge this week here on Everyday Cricut.I have to admit this is the first time I used this cartridge and I've had it for about a month now. This is such a fun cartridge and quite cutesy, but I wanted to create a project that wasn't cutesy just to show the versatility that you can get by using different colors of paper.
I love the way this card turned out, and I think it could work for several occasions, friendship, birthday etc. The weathered patterned paper is a very old pack of Stampin' Up! designer paper I've had it for several years.
The tag was printed from my computer then cut out by hand, then layered with tan cardstock and punched a hole then tied to the handle of the teapot using kite string.Below is a photo of the images that I cut and the page where each can be found in the Once Upon a Princess booklet.I didn't want to use the "crown" image for my layers of my teapot, so I cut two of the above image using the "shift" key on the keypad. On the white cardstock (pictured below) I cut a straight line to cut the top and bottom off the teapot, that way you would be able to see the green cardstock that was layered underneath.I inked all the edges of the images before gluing them together. You know how much I love to add dimension on my cards, so I used my scotch mounting tape and popped up the teapot, and the two teacups.Close up view of my sweet teacups.I hope you like today's card and can see that the Once Upon a Princess cartridge doesn't always have to be cutesy :)Thanks so much for visiting today.
Come visit my blog and see what else I've created... Robin's Creative Cottage
Remember to leave a comment for your chance to win the Once Upon A Princess cartridge!
"Love You" Birds Card
OK, so this is probably my favorite card I've made this year (ha, ha - only 6 days in...)! This A2 sized card (4-1/4" x 5-1/2") came together in a snap once I got my sizing figured out.
A tip for the newbies: Use the Fit to Length feature key on your Expression or Create to get just the right size you need on a project. I used that to determine what size to cut the label shape behind the birds.
Speaking of label shapes, can you believe this one came from the Twinkle Toes Lite cartridge? Be sure to look at your cartridges carefully - there are lots of labels and shapes on there that are parts of other images. This one was supposed to say "Tiny Dancer", if you cut all the layers.
I cut the label shape ("tinydncr") from Twinkle Toes at 3-1/4". Then, I ran it through the Cuttlebug using the Textile Texture embossing folder.
The love birds ("loveb") are from the Holiday Cakes cartridge and cut at 1-1/2". Remember that the Cake cartridges work in any of the machines and you can use the images to cut paper. Silver gems and glittered big brads are from Hobby Lobby.
I added a red button on my bow, then tied it with Martha Stewart baker's twine and added my sentiment from Papertrey Ink. Button and ribbon by Papertrey Ink.
A finishing touch on the inside and we're done! Paper was by Core'dinations and Basic Grey's Bittersweet line.
Week 4: Simple Card Monday with Disney!!
Hello, Everyone and thanks so much for joining us for Simple Card Monday.As you know this week is Disney week!! There is so much you can do with your Disney cartridges. Even though they may not seem Christmas'y' they totally can be!!
Take this week's simple card for example. I made it using the Pooh and Friends cart. Not a Christmas cartridge at all, but with a little creativity and my trusty Cricut voila a simple Christmas card is born!!
Here are the videos for the card. It was too long to be all in one so it is a two parter....sorry about that!
part 1:
part 2:
Here is the actual sketch for the week:
The 'gift' cut is on page 52 in your Pooh and Friends booklet. The shadow, icon, and icon/shift were cut at 2 1/4'.
All paper except for the cream card stock(which is CTMH) is Core'dinations from the Nostalgia super assortment. The ribbon is SU! 1 1/4' Old Olive striped grosgrain ribbon. The stamp set is Close to My Heart 'Holiday Jingle' and will be availiable September 1st. The embossing folder used is the 'Argyle' A2 embossing folder.
Check back in with us tomorrow for Home Decor Tuesday. Tammy will be posting something positively fabulous!! Also, make sure you are leaving comments on all of the posts. That way you can have an even better chance to with the Hannah Montana cartridge that we will be giving away on Sunday!
WEEK2: Simple Cards Monday
Here is the second installment of Simple Card Monday here on Christmas with the Cricut. This weeks card is made using the Christmas Cheer Cricut cartridge!
This cartridge was one of the first I ever bought. It has some super cute cuts on it and I think it is one that you will want to add to your Cricut cartridge library.
The cardstock is a mixture of Close to My Heart, SU!, and Bazzil. The stamp used is by Close to My Heart and is called 'Wonderful Season'.
Don't forget to check back with us tomorrow for Home Decor Tuesday! Also, make sure you are leaving comments so you can be one of the first people to own the New(but not yet for sale) Winter Woodland cartridge!!
Week 17: Simple Card Monday with Video and Winter Woodland!
This is Joy and today is everyone's favorite day, Simple Card Monday with Video!
I made today's card using the Winter Woodland Card feature key - so simple and quick! I cut out snowflake 4 with the card feature key at 5". Then, I used the Cricut to cut a circle out of a square to back the card - this required the "centerpoint" feature key and is shown in the video.
Next I ran the card through the Cuttlebug and glittered the card using a technique I learned from a Stampin Up! rep I know, Patti Dunham. Don't worry - I asked her if I could show the glittering technique and she was more than happy to share it with all of you! Thanks Patti! This is brilliant!
All the details are below in the video! You will love how easy this all comes together!
If you can't see the video, click HERE!
TWO BONUS DESIGNS FROM OUR FABULOUS GUEST DESIGNERS:
Isn't this elegant card just beautiful? Check out Jeannie's gorgeous SIMPLE CARD by clicking HERE
Monday, January 4, 2010
Simple Card Monday - Yummy Cupcake Card using Sweet Treats
Hi, it's Joy and today's card is simply delicious! Well, deliciously easy, especially after you view the video and see how to make a smaller shadow for your ice cream cone!
I chose to make the icecream2 cut from the Sweet Treats cartridge and cut it at 4 1/4". Then, because I did not like how large the shadowing is on the shadow feature key, I instead used the shift icecream2 with the card feature key set at 5" to get a shadow I liked better. The video will show the differences. All the layers and such for the ice cream cone itself were cut at 4 1/4" using Jillibean Soup paper. I love this paper! Very versatile and great patterns on both sides!
The card when closed measures 4" x 5 1/2", a little smaller than the standard A2 size but you can still use an A2 envelope. It was cut using the cupcake2 card feature key at 5 1/2" with hot pink Core'dinations cardstock.
Check out the video below for more information! Click HERE if you can't see it!
Simple Card Monday- You're a Sweetheart using Wedding Solutions
Happy Monday, everyone! This is Melanie and I have a simple card for you today using the Wedding solutions cartridge and Bo Bunny paper.The sentiment is from a Hero Arts Valentine set that I bought at Archivers.
Here is the video:
Thanks so much for stopping by today. Make sure to leave comments all week long, so you can be eligible to win the Wedding Solutions cartridge and the Bo Bunny embellishment bundle.
"What They Call You After You Get Married" Card
Hi, this is Joy with today's Simple Wedding Card. I made this card using SEI Juliette papers (my new favorite papers) and two Cricut cartridges - Sweethearts and Songbird. The card measures 5" x 5" and there is a matching envelope that can be cut out on the Sweethearts cartridge.
This "Mr. & Mrs." sentiment is from the Sweethearts cartridge, page 63, and was cut at 3 1/2" for both the base cut and the corresponding shadow cut. I just used white and black cardstock.
I always like to use the Cuttlebug folders wherever I can and the base cut of the "Mr. & Mrs." seemed a perfect choice. I ran the word art through the Cuttlebug using the Swiss Dots folder.
Ribbon and rhinestones are from Michaels.
Above is a close-up of the word art so you can see the dots. The frame was cut using the Songbird cartridge, page 63, using both the base and shadow features. I cut it at 4". Apparently, all the good cuts are on page 63 today...strange!
No card is complete without some finishing touches on the inside! So, I went ahead and stamped "Congratulations" on a piece of white cardstock, then layered it with the peach and the gray. I also put down a piece of peach cut at 4 3/4" x 4 1/4". Stamp was from Michaels.
I am sorry there is no video to go with this today....my throat is still not back to normal. But, I hope to have one up on Friday for Fancy Card Friday.
Labels: wedding card, songbird, sweethearts, cuttlebug
and this is Melanie and this is my card that I made with the doodlecharms cricut cartridge and doodlebug paper.
The base and base/shift was cut out at 3" and I layered that with another base/shift cut that was cut at 2 1/2".
The stamp set is from Hero Arts and the ribbon is Papertrey Ink. This is an easy throw together in a pinch kind of card. Not a lot of steps and not many layers.
Be sure and leave a comment and follow/subscribe to us for a chance to win either a Sentimentals or Serenade Cricut cartridge! The drawing for those cartridges will take place tomorrow so don't wait!
On to today's card.......This week's card is made using the *new* Just Because Cards cartridge. I seriously love this cartridge!! It is full of really great cuts. For example, how about this sweet little peach!?!
The peach is cut at 2 1/2".
The Paper, ink, sentiment, and ribbon are from Papertrey Ink. Here is the blog of the stamp designer herself http://dawnmcvey.typepad.com/these_are_a_few_of_my_fav/ You are definitely going to want to add her to your daily routine!
Here is the video:
Thank you so much for stopping by today!! Make sure you are leaving comments on all of the post this week for even more chances to win one of the MANY prizes we are giving away this week!!
Merci beaucoup to you..and you...and you--card made using Summer in paris mini cricut cartridge.
Hello, friends! This is Melanie and I hope you are having a great Monday! Today is Simple card Monday of coarse and I have something for you that I made with the Summer in Paris mini. Let me tell you it is my favorite mini so far!I cut the Arc de Triomphe at 3".
The card is A2 sized and the patterned paper is from Basic Grey's Capella line.
and here is the video!
Simple Shaped Card using Hello Kitty Greetings
Happy Monday! This is Donna and I'm so excited to be spending the week with you here at Everyday Cricut.
Those of you who are familiar with my work know I'm a big fan of shaped cards and Cricut Design Studio. I received DS for Mother's Day (from the kitties) only a week or two after receiving my Expression and I hate to admit I almost NEVER use my Cricut without it, even for regular cards.
In the spirit of simple card Monday, however, I decided to do a shaped card WITHOUT my beloved DS. Many of the new cartridges have a shaped card feature but I chose the Flower1 (page 47) from Hello Kitty Greetings because of the shadow effect of the layers which I love. Besides the adorable kitties, there are loads of sweet shapes on this cartridge so I think it's definitely worth a look if you don't already own it.
First I used the Card feature at 5 1/2" for the card base. Then, to hide the fold, I cut what I always call a first mat using the Blackout feature and glue it directly to the card base. Now when I cut my layers I will have a full shadow around the entire card.
The petals and stem are found on the Clothes and Clothes shift Layer feature (top row, 2nd key) and are also cut at 5 1/2. The flower center is found on the White and Fur Layer feature (top row 1st key) and that's it for the front. WooHoo!
When the card is this simple, I like to use bright coordinating prints and, although you certainly can glue the layers directly to the card base, I prefer to pop them with foam dimensionals. I was able to find black ones at my LSS (made by EK Success so they virtually disappear. The particular paper I chose for this card was just that, paper, not card stock so to get the strength I needed to pop the layers I cut them out of inexpensive smooth white card stock and glued the paper to those first.
To add a little texture to the flower center I ran it right side down through my Xyron and flocked it. I could have also run it through my Cuttlebug for texture instead. I think it's always the little extra unexpected touches that make a card special.
Because the designs on this cartridge are so simple and almost childlike, I didn't ink the edges but doodled instead. For a finishing touch I tied a bow around the stem.
Inside I always mat my cards. Besides the fact that the base is black, it adds strength to balance the front layers. However, there was no solid flower to use that would fit properly. Instead I just cut the layers again, but I was forced to use Design Studio to hide the selected contour of the cut out center. Oops, I guess I lied about not using DS. The other option would have been to cut another blackout mat in white and trim it at the fold but there wouldn't have been any black edging like I wanted. Sorry about that. This was unforeseen.
Although it's simple, I think the shape of this card would bring a smile to almost anyone's face and could be used for a number of different occasions. I encourage you to explore your cartridges for the fun shaped cards that are available to cut directly with your Cricut.
Criss Cross Card from Tie the Knot 2 Ways
Isn't it amazing how different cards can look when you change the paper? Here are two examples of a criss cross cards that are essentially the same, but the Monogram card has an elegant feel, while the Celebrate card feels like a party.
I've always thought criss cross cards were pretty, but I could never cut them right using measurements or templates I found on the net. While browsing Tie the Knot, I realized that there was a scalloped one (with holes or not) right on the cartridge, there for the cutting. Who knew? It is on page 72 of the manual and is called "invitation". To cut the scalloped one without the holes, use the invitation feature (second key from top right) and the shift, and go all the way down to the bottom row, second to last key and you've got it.
I used Design Studio to do this card and cut it at 6". At this size you would have to rotate the cut in order to have it fit on a 12x12" mat, so if you aren't using DS or your Gypsy, the largest you can cut it is 5" unless you pull out your 12x24" mat.
I love the elegance of cream and black and one of my favorite paper stacks is the 8.5 x 8.5 black and ivory Designer Paper by K&Co that I get at Michael's. It's double sided and the coordinating patterns are fabulous.
Instead of using one of the cards that come on the cartridge, I tweaked the rounded rectangel2 from George to fit and welded the shadow of the monogram to the top of it. Then I cut a slightly smaller mat and glued it to the card, cut another shadow and regular cut of the D and glued it on top. The welding adds strenght to the monogram, but you certainly could just attach the monogram on top without the weld if you want to make the card without DS. The triangle mats are skewed to fit in DS using George as well. An option would be to measure and use your paper cutter or just cut the card out of patterned paper, but I like the scallops being a solid color for contrast.
I embossed the regular cut of the monogram using Swiss Dots and added adhesive beads (one of my FAVE embellishments) for interest.
The band is purely decorative because the criss cross is glued shut like an envie and doesn't open. I just cut a 1 1/2" x about 10" strip of back and wrapped it around the card, trimmed it to fit and added a srp of another pattern and more beads. That looked a bit more elegant and understated to me than a bow or flower embellishment. Besides an invitation, I really think this card could be used for any occasion, including a keepsake menu card for a special dinner party.
The second card says "PARTY"! It's done in exactly the same way as the Monogram card but "Celebrate" comes from Straight From the Nest. The fun bandana paper is from an 8"x 8" Martha Stewart pad.
Here I thought doodling was a better choice for a more casual feel. If you choose to make a card like this without the welding, I suggest you glue the word further down on the card for strength.
To finish this one off, I added some gingham ribbon and a watermelon slice brad. Wouldn't it be a great invitation for a Memorial Day or Fourth of July barbeque? I also think it would even make a fun birthday card or any other reason one might celebrate. I hope you enjoyed this and it gives you the inspiration to take a closer look at your cartridges and explore the card options. See you tomorrow!
Oh, and BTW, if you would like to win a pad of that favorite ivory and black K&Co paper, click HERE and leave a comment on my blog. The winner will be announced Friday, along with the winner of the Cutting Cafe set.
Simple Sweet Card with Mini Monsters Cartridge and Bella Blvd. Paper
Hi, this is Joy and today's 4" x 9-1/4" card is from the new Mini Monsters Cricut cartridge. You wouldn't guess it to look at it since who knew there was this cute lollipop hidden on this cartridge? The colors on this are a true yellow and pink - I don't know why the computer distorted it so much.
All this week we will be featuring projects from the five new cartridges that Provocraft released this past Thursday - Mini Monsters, Toy Story, Cindy Loo, Wall Decor and More and Freshly Picked.
It's simple card Monday and so I've kept it very simple. I cut the lollipop on page 57 of the handbook at 7" and used all the layers but the shadow. This cartridge has thick shadows and when I tried it out on the card, I wasn't sure it worked.
I cut the "sweet" word art also on page 57 at 1-1/2", also without a shadow. A good way to fit your word art on the card is to use the "Fit to Length" button. In this case, I pressed "Fit to Length", then dialed in 3-1/2" and then hit the Phrase Feature key and the lollipop key. The machine then gave me the size of 1-1/2" as a height that would fit the length of 3-1/2" long.
Paper is from Bella Blvd. and Core'dinations cardstock.
I just added in a sheet of white cardstock for the inside. This card fits in a standard business envelope so no problem finding one of those, huh?
"Hello" Cricut Lite Cherry Limeade Card
A little change to the schedule - we're swapping projects and having a card today, layout tomorrow.
This is probably my favorite card of the 40-something plus I made! And it was so easy! I love this Cricut Lite Cherry Limeade cartridge! The font rocks and so does this flower image!
First off, I cut the flower (all layers) at 2" and instead of just one layer of flower, I cut three. I used the Bo Bunny double dot paper for the flower section and some of the leaves and Core'dinations for the other leaf sections. I ran these layers through the Cuttlebug using the Swiss Dots folder, after inking the edges. I had also inked the edges of the green leave parts and then layered the whole thing together and threaded a large black brad through the center.
My card is a regular A2 size (4-1/4" x 5-1/2"). I cut the "hello" letters with the regular and shadow features at 1-1/2" and it cut like a dream. I am so loving this font! I mounted the word onto a background cut that went over the striped green ribbon from Stampin Up!
Surprise from Craft-E-Corner and Good Luck Card!
Guess what? We're all lucky today, as you're about to find out!
But, first, let's take a look at today's simple Good Luck card from the new Cricut Lite cartridge, Celebrate with Flourish! OK, I just have to say that this is probably my favorite cartridge from the new release of Cricut Lites! It's just so versatile!
My card is a standard A2 card (4-1/4" x 5-1/2" when folded) and I extended the shamrocks out, figuring I could use a little bit larger envelope to accommodate them. Sometimes, you just got to go outside the boundary lines, know what I mean? Or maybe since I live in Texas, I don't want to be fenced in...
I cut these shamrocks at 4-1/2". Remember, with shadowed images, you always cut your shadow FIRST, making sure it is the size you want. Then, add in your base cuts. Sometimes, the shadows can be quite a bit larger than you might expect so this is very important.
The paper used on this card is from Core'dinations, Bo Bunny (dotted paper) and October Afternoon. Stamp from Papertrey Ink - their mixed mega messages set may be the last sentiment set you ever need to buy again - incredible for card makers! Lace cut is from the Martha Stewart Lace edge punch.
A Little Birdie Told Me Cricut Imagine Card with Videos!
WOW! This was one of the easiest cards I have ever made! I used the new Cricut Imagine Machine and cut out the bird, branch, frame with scallopy edges and blue background at 4". It took about 3 minutes! Card ends up sized at 4-1/4" x 6".
I added some pen marks on the bird and branch. The stitching on the frame printed out on the image. Then I popdotted the bird. I also inked edges throughout.
I added the rest of the sentiment to the inside:
Stamp sentiment is from Darcie's Stamps and cardstock is from Core'dinations. Ribbon and button from Papertrey Ink.
Ewe and Me - We're Meant to Be! Simple Card Monday
This 5-1/2" x 5-1/2" card was so fun to make! I had seen this ewe on the Cricut Country Life cartridge and thought she was just too cute! I knew using some off white glitter paper vy DCWV would help her get her bling on....ok, that was silly, but hopefully, funny...
I thought it would be fun to make this a stand-up card. The "ewe and me" stamp is by Waltzingmouse Stamps and the "I love you" stamp is from Papertrey Ink. Paper is by October Afternoon and Coredinations.
I cut the ewe at 3", all layers, and pop dotted her onto the front. I love the curly-Q cuts on the ewe! The ribbon and button are from Stampin Up!.
Here's what the inside looks like if you opened the card traditionally. This card is going to be for my husband, the love of my life...it's good to make a card for the hubby once in awhile!
Hi, everyone! I thought it might be fun to revisit the Preserves Cricut cartridge, as I just got the Preserves Cricut companion folders. I decided to use them in an unusual way, which you will see below.
Also, today, I thought it would be fun (and maybe daring) to cut my focal image small (pear3 cut at 1-1/2"). This A2 sized card (4-1/4" x 5-1/2") required a smaller image. Lately I've been making larger cards but I thought I should go back to the standard sizing.
My scalloped and regular circles were actually punched out. Paper is by October Afternoon, Coredinations and JillyBean Soup. Ribbon by Stampin Up! and sentiment by Papertrey Ink. In fact, that "thank you" was stamped on the edge of an EK Success punch that I turned 90 degrees and cut down.
The little leaf sprig is from the Martha Stewart branch punch.
Here you can the see the inside and below you can see how the Cuttlebug folder embossing actually shows up on the inside of the card, for a different twist on things. I love these Preserves Cuttlebug Companion folders!
Below you can see the card - I pop dotted the focal image to give it more presence on the card. I also used the Swiss Dots folder to cuttlebug the background that the pear sits on. Most everything is better Cuttlebugged!
Tune in tomorrow for another oldie, but goodie, Cricut cartridge project!
Celebrate Football Treat Bags, Tags and a Card! with Cricut Wrap It Up!
It's football season and I thought this card, tag and bag set from the new Cricut Wrap It Up! cartridge would be just perfect for that football fan in your house. My husband is a huge Notre Dame fan and so every Saturday he devotedly watches the game with the Notre Dame club while I am silently praying they will win so the weekend isn't ruined. Needless to say, if you know anything about college football, you know the last few years at our house have been difficult...
Moving on to the project - this card was cut at 4". I cut the card twice and then cut off the front layer so I could run it through the Cuttlebug using the Tiny Bubbles folder. I had to run it through twice. This folder is so convenient for adding texture to images like whales, various animals and now this football. I love the pebbly surface! The white edges were so stark that I ran them through the Cuttlebug also using the Distressed Stripes folder (another winner) and then I used some chalk ink to rough it up a little. The football was looking too stark...
This football box was a snap to put together! I cut it at fit to page using a 12x12 sheet of Core'dinations cardstock. Check out the photos below:
You could put a little bag of nuts inside this box as a quick snack - or maybe M & Ms.... yummo!
Finally, the tag is just two layers. Since I wanted the football to have white stripes, I backed just that section with a scrap of white paper and then used my scissors to trim around the football before I added the yellow layer. A bit of Stampin Up! ribbon in brown and cream seemed to be the perfect match!
So, let's get started!
My first card is a standard A2 size (4-1/4" x 5-1/2"). What I did first is print and cut a rectangular section of the background patterned paper.
Then, I cut the three trees at 3" and 3-1/2", four times each. I wanted to layer the trees with pop dots to give them some dimension. You can see above how it adds a lot to the card. The frame is from Spellbinders. I also Cuttlebugged the white front section using the Swiss Dots folder (an essential)!
I added a stamped sentiment from Papertrey Ink and three more trees to the inside.
I used HP photo paper to print out the background patterned paper and the trees. I set the print settings on "glossy" and had NO TROUBLE at all. No smearing, no nothing. Not only that, the colors were so nice and vibrant when using the photo paper. I got a 150 sheets at Sams Club.
Verve Thanks by LodiChick - Cards and Paper Crafts at Splitcoaststampers
http://www.spli
http://www.spli
|
| Photo Details | |||
| Poster: LodiChick | |||
| Date: Monday, January 17, 2011 GMT Views: 240 Favorited: 16 | |||
| Additional Info | |||
| Keywords: Verve | |||
| Stamps: Verve-Kind Words | |||
| Paper: peach parfait, black, vanilla | |||
| Ink: peach parfait, old olive, black | |||
| Accessories: Embossing folder (Cuttlebug Preserves 4 pack), MFT Open Scallop border die, Verve tag die | |||
| |
I made some cards with this cart using some computer generated sayings too. I have 5 cards...
strawberry- "so berry nice"
watermelon- "thanks a melon"
orange- "orange you sweet"
pear- "we make quite a pear"
apple- "you are the apple of my eye"
strawberry- "so berry nice"
watermelon- "thanks a melon"
orange- "orange you sweet"
pear- "we make quite a pear"
apple- "you are the apple of my eye"
You might also like:
Okay so now to my first ever crafting of the new year.........
I took my first trip out into town briefly today and stopped in at YTOC to pick out papers for the first class of the year coming up on 19th January. The theme is Valentine's Day and I had in mind to make a set of stacking boxes just perfect for filling with yummy sweet treats. I knew I wanted to make 'pillow' boxes in graduating sizes so the class is called 'pillow talk' - kinda cute huh? Well I thought so.
After several colour selections I finally settled on the pink, white and black combo and chose a couple of Jilli Bean dotty papers and 3 colours of Bo Bunny polka dot cardstocks for the actual boxes.
After making the boxes I stacked them on top of one another and tied them together with black ribbon. Then I decided to create a pretty decoration for the top using the Jilli Bean papers, glitter and nestabilities heart dies. The smallest of these boxes is 3" x 5" and the largest measures 6" x 7" so there's plenty of room for goodies.
This should be a fun, relaxed class to start the year, nothing too complicated so I hope there's enough demand and the class runs. I'm really looking forward to it already.
So many thanks! Peachy Keen "Let's Face it Friday" Challenge
Good afternoon!!! I am really excited about this card - because I was able to accomplish two things that I wanted to accomplish - enter the Peachy Keen "Let's Face it Friday" Challenge, and use my Simply Charmed cartridge for the first time (the cartridge I am giving away on Monday morning SEE HERE FOR MORE INFO!)
Besides using Simply Charmed and Peachy Keen faces (Dolly Dumplins face assortment), I also used a sentiment from one of my Unity Stamp sets. Added some ribbon a bit of doodling on the leaves, and an edge along the bottom from one of my Martha Stewart branch punches. I think it came out really fun - and I LOVE the colors on this one! Thanks for looking - and feel free to join in on the fun HERE! There is a great prize as well!
Birthday Wishes!
I just noticed before this post that I am up to 100 followers!!! Thanks to each and every one of you!!! Still can't believe it...
Anyway, I love how this card came out! I had some scraps of 3 colors of paper that I loved together and had set aside until I could think of something to make with them - when it hit me! Three scoops of ice cream! So I broke out my Sweet Treats cartridge, added some Peachy Keen faces (used the Everyday Character Face Parts and MORE), some inking, doodling, ribbon, buttons, and a stamped sentiment from my stash. Also went a little crazy with the pop-dotting, as the shadow is raised from the background, AND the ice cream cone is raised from the shadow! The second picture shows that a little better...
As always, thanks for looking, and have a GREAT day!!!
Made this for the challenge at My Pink Stampers Blog Hop! For some reason this just popped into my head! (Almost forgot that I also wanted to enter it in the Scrappy Moms Terrific Tuesday Challenge! The challenge was to use Birthday Bash - which I did!)
All cuts, including the shaped card, are from Birthday Bash. Added a Peachy Keen Face, a Prima flower with a stick on pearl for the center, and then pop-dotted the bird from the background. The sentiment is from My Pink Stampers Tweety Hoo Puns stamp set. Also added some pink pearls to the corners, and some doodlin', as well as LOTS of inking on everything!
Sweet baby
I love how this card came out! My only regret is that I made it HUGE - 6x6, since I had just gotten some envelopes that size. However...I didn't take into account the fact that it should have been slightly smaller to allow it to fit INTO the envelope until I was all finished! So...it will just have to either have no envelope, or just slip in one of the clear sleeves (which it does fit in fortunately!)
I started off with the umbrella from New Arrival, and added a Peachy Keen face from the Princess face assortment. The background shape came from Lacey Labels, and cut a circle out of the center and ran it through the Cuttlebug. Added some stick on pearls, LOTS of faux stitching, a bit of inking to the umbrella, some ribbon, and a stamped sentiment from my stash. Oh yeah...also pop-dotted the umbrella and the sentiment from the background.
Thanks for looking - and have a great day!
Snow much fun - Circle Challenge Card
So...I wasn't really in love with this card, but once it was finished, it wasn't too bad. I was trying to meet the requirements of the challenge on the Cricut Circle blog for the weekly challenge - to use metal, white paint, and a snowflake cut. There had to be a minimum of 2 cricut cuts to qualify.
So the metal is the four brads on the corners to loop the ribbon through. For the white paint I used perfect pearls (it's white, and it's paint!) and sponged it over the background that I had run through my Cuttlebug. For the snowflake and Cricut cuts, I used Winter Woodland and cut out 3 different snowflakes, several times and in a couple different sizes. I stacked them up with pop-dots in the middle, stamped a sentiment from my Pink by Design stamps in the center of one of them, and then sprayed them with Glimmer mist before I attached them to the card. Now if we could just get some snow here where we live...
Baby boy card or invite
Good morning! My best friend came over the other day to make baby shower invitations for her sister-in-law. Since she only needed to make 12, we decided they could be a little more elaborate than we would normally do for a large number. NOTE TO SELF: 12 invitations can still be a lot!!! Anyway, I think they came out really cute anyway! The first one is what we originally came up with, and then changed our mind a little, so the second one is what we actually ended up going with for the invitations. I'm saving the first one for a baby card though anyway!
The train came from New Arrival, and the banner cut on the first one is from Give a Hoot - resized on my Gypsy. The stamp on the first one is from a Pink by Design stamp set, the second one is from something in my stash...not sure what it was from. We added some ribbon for the tracks, LOTS of inking and some doodling.
Hang in there! Peachy Keen Sketch Challenge
I had so much fun with this one! This is for a sketch challenge over at Peachy Keen Stamps (see HERE for more info). I wanted to do something other than flowers or balloons for the 3 items on the circle - so I suddenly pictured kites with cute Peachy faces! Couldn't wait to make it!
I found the kites on Create a Critter cartridge, and added the Peachy keen faces from Basic Paper Doll Face Assortment. Those were pop-dotted from the background, both of which were cut from Preserves, and inked. The top layer was run through the Cuttlebug. I pop-dotted that whole thing from the background, added some bakers twine, and buttons, as well as a sentiment from my Pink by Design stamp set.
Suddenly, I'm not in the mood for snow, I'm in the mood for summer!
Forever Young Birthday Card
This card is one of my favorites. It is so simple and so cute. I'm also loving the color scheme.
I made this card for my aunt, today is her Birthday. Feliz Cumpleanos Tia <3
I did some stitching all around the card and the inside of the card.
The zebra, flower and purse are all from Create a Critter. I added pearls and some white gel pen faux stitching. I bought the stamp at Joann's on those new clear stamps sections for $2 or less. It is made by Studio 112 (K&Company). The paper stack is Sweet Stack by DCWV.
I embossed my handmade info on silver on the back. I'm loving the embossing, it resembles a seal :)
Hope you guys like it.
Glad you passed by. Hugs,
Giselle
June 13, 2010
Congrats on your Engagement!!
Yesterday night I got great news, well some friends of ours got engaged!! They were going to have a get-together today (... long story lol ). After my final exam today, I ran home and started crafting. My first pick was Sweethearts.
The card and envelope from page 80, were cut at 5 1/4 in. (Max. size for envelope on a 12x12)
The image and shadow were cut at 3 1/2 in.
***Don't forget to ink your edges =D
As you can see, the shimmery look of the Medalion (shift, page 78) was achieved by spraying a mix of perfect pearls, faded jeans refill inker and water.
Spray all over your image and let it dry (or use your heat tool to speed it up)
Add pearl accents and ribbon. Add some pop-dots to your image to give it dimension.
Tie your ribbon of choice & stamp your sentiment.
......... a closer look......... oh...ahhh... shimmery lol
Thank you so much for visiting & congrats to the newly engaged =D
Good night.
Giselle
shellys card blog
http://cardsbys
http://cardsbys
Wednesday, June 23, 2010
cricut cardz challenges
happy wednesday! this week over at CCC mary has chosen the theme of wedding. any cartridge any color.
be sure to go to the blog and give the rest of the dt a lil blog luv :)
for my card i used beyond birthdays cartridge for the hearts. i also used my cuttlebug and swiss dots folder colorbox fluid chalk and memorybox pearls. paper is dcwv luxury stack.hope ya like this one :) thank you so much for stopping on by i truly am grateful for you :) have a wonderful rest of day :) XXXshelly
Labels: wedding card, heart
shellys card blog
http://cardsbys
http://cardsbys
paper cutz challenges
happy TGIF! this week our theme at PCC is circles,squares or stars. make sure you pop on over to the pcc blog and see what shape the rest of the dt is in :) i chose circles.
i used my cricut and george cartridge for them, the elephant is a sizzix die cut which i attached a hero arts pearl heart . i added some kaiserkraft pearls and some buttons and of course used colorbox fluid chalk. paper is daisy d's. thanks so much for checking out my blog today :)XXXshelly
shellys card blog
http://cardsbys
http://cardsbys
Monday, June 28, 2010
BittenByTheBug2
happy monday :) this week over at BBTB2 our cut is the genie lamp from the Paper Dolls cartridge. be sure to pop on over to blog and see what magical projects the rest of the DT has whipped up for us :) ALSO theres a blog hop going on. sorry im not part of it this month as im taking care of some personal stuff still.
so, for my card i used paper dolls cart for the genie lamp and the castle. i actually meant to use the word wishes in my setiment instead of dreams, but once i realized what i did ..well i wasnt going to redo it ;) . other than the cuts i just added a couple of rhinestones and inked this up with colorbox fluid chalk. thats it very very easy.thanks for stopping by have a super rest of day :) XXXshelly
shellys card blog
http://cardsbys
http://cardsbys
craftycreationschallenges
happy wednesday :) this week at CCC claire is our host and sponsor and she has chosen cake or ice cream theme. yummo! i want both! she offered up one of her super digis to use, but i opted to use my cricut and from my kitchen (cake and stand) and hello kitty (strawberry) cartridges. the sentimentis from the hip hip hooray set from creative visions clear stamps. paper is dcwv. be sure to go see what the rest of the dt has designed to tempt ya :) thank you so much for stopping by your comments are always appreciated. have a fun rest of day :) xxxshelly
Okieladybug's Scrap N' More: Birthday
http://okielady
http://okielady
THE SU REPLICA TAG SET WORKS!
I couldn't resist! I just couldn't! I just had to try the tag set. I had gotten the Stampin Up Tag Set at the stamp garage sale a few weeks back and haven't really played with it because I wanted to get the smaller tag punch. I thought I should make a card to see if the .cut file I made worked, especially since I already posted the file for download. IT DID IT DID!! *okie says beaming with pride*
Since I don't have the small tag punch I couldn't compare but I did with the large tag punch I have and I got it within a hair of being exact!
The birthday stamp was part of the set I got. I did have some problems lining up the stamp, but I used one of the better ones for the card. The flowers are prima and the brad in the middle is one I got from Eyelet Outlet. The butterfly punch is Martha Stewart *okie wonders if Martha even knows she offers this punch*. I have no idea what the paper is as it was some more scrap I had. I did use some mica for the large tag and the bottom layer of the butterfly, but you can't really see it. I really like this card! You can click on the picture for a closer look.
the Stampin Up Tag Set at the stamp garage sale a few weeks back and haven't really played with it because I wanted to get the smaller tag punch. I thought I should make a card to see if the .cut file I made worked, especially since I already posted the file for download. IT DID IT DID!! *okie says beaming with pride*Since I don't have the small tag punch I couldn't compare but I did with the large tag punch I have and I got it within a hair of being exact!
The birthday stamp was part of the set I got. I did have some problems lining up the stamp, but I used one of the better ones for the card. The flowers are prima and the brad in the middle is one I got from Eyelet Outlet. The butterfly punch is Martha Stewart *okie wonders if Martha even knows she offers this punch*. I have no idea what the paper is as it was some more scrap I had. I did use some mica for the large tag and the bottom layer of the butterfly, but you can't really see it. I really like this card! You can click on the picture for a closer look.
Okieladybug's Scrap N' More: Birthday
http://okielady
http://okielady
This next one is for Valentines day I guess. I am not sure really. I have 6 of these too. My daughter said "uh....I like that, I need about 10" I told her "well I have 6" LOL. I used TBBM for the heart on this one and I did use George to cut the pieces for the ban at the bottom and the little ban across the heart.
I guess I better get looking for another card map and post another challenge for cards tomorrow! I also have to post my next LO challenge on the MB tomorrow also!
I am not sure really. I have 6 of these too. My daughter said "uh....I like that, I need about 10" I told her "well I have 6" LOL. I used TBBM for the heart on this one and I did use George to cut the pieces for the ban at the bottom and the little ban across the heart.I guess I better get looking for another card map and post another challenge for cards tomorrow! I also have to post my next LO challenge on the MB tomorrow also!
Okieladybug's Scrap N' More: Birthday
http://okielady
http://okielady
Here are my cards I made. This one is CELEBRATE FLOWER.
I used the Stamped cartridge for it so you will need that cart to cut the pieces for the card. The file is set to cut 6 at a time. No sense in just making just one is my motto!!Okieladybug's Scrap N' More: Birthday
http://okielady
http://okielady
Happy Birthday...a man card
I think this card would make a good card for a man for a birthday. I used some paper and 5.5 x 5.5 card blanks that my friend Carmen P. sent me. It was really hard not to add bling since I love bling!! I used rectangle nesties to put the sentiment on. I even decorated the inside which is something I don't usually do very often. The black cardstock on the inside is just some cheap stuff I got at Wal-Mart. This was a simple card really. I did use the argyle cuttlebug folder on the argyle strip and inked the edges...yes I am addicted to inking!!
Okieladybug's Scrap N' More: Birthday
http://okielady
http://okielady
Karen's Cupcake
My friend Karen has a birthday coming up. Her card won't get there by her birthday but the good news is that she won't get to the destination before the card does anyway! LOL
I used Home Decor for the cupcake and the swirl. I used glossy dimensions on the cherry to give it some shine. The icing is Bazzil bling, the swirl is mica cardstock. The mat paper is from Imaginisce, I think So Happy pack. I used Stampendous bling stickers on the swirl also. The paper for the cupcake is some that my friend Linda gave me. I pop dotted the icing for some dimension.
I am so lovin this cupcake!!
Oh yeah you can click on the picture if you want to see a closer loo
I used Home Decor for
the cupcake and the swirl. I used glossy dimensions on the cherry to give it some shine. The icing is Bazzil bling, the swirl is mica cardstock. The mat paper is from Imaginisce, I think So Happy pack. I used Stampendous bling stickers on the swirl also. The paper for the cupcake is some that my friend Linda gave me. I pop dotted the icing for some dimension.I am so lovin this cupcake!!
Oh yeah you can click on the picture if you want to see a closer loo
Okieladybug's Scrap N' More: Birthday
http://okielady
http://okielady
Cherry card
I have been looking for cherry paper and while this still isn't what I would really like I decided to use it. I couldn't think of a sentiment to use on the card and after some wonderful suggestions I decided to be lazy and use a stamp I had, which is the "Another Yummy Birthday".
Pattern paper is Cosmo Cricket and Bo Bunny
Card stock is Stampin Up Chocolate Chip and Old Olive, the yellow I am not sure what company it is.
Glossy Dimensions on the cherry
Cherry is from Home Decor
Scallop border is from Plantin Schoolbook
Sentiment stamp is Inque Boutique
Punches used are the Stampin Up Spiral and Key tag
Here is a close up view of the card showing the dimension a bit better.
Okieladybug's Scrap N' More: Birthday
http://okielady
http://okielady
Berry Sweet Birthday Wishes
I love that saying and have seen it in several magazines and also on the Cricut message board and I decided to use it. I made a cut file for the Berry Sweet Birthday Wishes card since I had to make the strawberry from scratch.
I used Plantin School book for the strawberry and the mats. I used All Mixed Up for the sentiment. I had gotten a K & Company paper pack that had all kinds of berries in it and I knew it would be great for some kinda berry card. It is set to cut 6 at a time, but you will have to cut the strawberries and leaves twice since I was too lazy to keep copy and pasting the parts for them.
I used the D'vine Swirls Cuttlebug folder on the strawberry and Swiss Dots on the white. I also used the Stampin Up scallop border punch on the white mat.
I used All Mixed Up for the saying.
Here is the frontalong with the saying inside. I used a stamp from an Inkadinkado cupcake set I had for the inside sentiment. I used Stampin Up Riding Hood Red ink.
Here is a close up of the berry andsaying. You can see the detail better. I used diamond Stickles on the swirls and the words. The little round embellies are Robin's Nest embellies adhered with super glue *okie again hears the gasps* OH GET OVER IT! IT WORKS!! *okie cracks up laughin*.
This shows the dimensions better.
love that saying and have seen it in several magazines and also on the Cricut message board and I decided to use it. I made a cut file for the Berry Sweet Birthday Wishes card since I had to make the strawberry from scratch.I used Plantin School book for the strawberry and the mats. I used All Mixed Up for the sentiment. I had gotten a K & Company paper pack that had all kinds of berries in it and I knew it would be great for some kinda berry card. It is set to cut 6 at a time, but you will have to cut the strawberries and leaves twice since I was too lazy to keep copy and pasting the parts for them.
I used the D'vine Swirls Cuttlebug folder on the strawberry and Swiss Dots on the white. I also used the Stampin Up scallop border punch on the white mat.
I used All Mixed Up for the saying.
Here is the front
along with the saying inside. I used a stamp from an Inkadinkado cupcake set I had for the inside sentiment. I used Stampin Up Riding Hood Red ink.Here is a close up of the berry and
saying. You can see the detail better. I used diamond Stickles on the swirls and the words. The little round embellies are Robin's Nest embellies adhered with super glue *okie again hears the gasps* OH GET OVER IT! IT WORKS!! *okie cracks up laughin*.This shows the dimensions
better. Cuttlebug Birthday
CROSS MY HEART PAPERCRAFTS by GISELLE VARELA: Cricut Campout
http://crossmyh
http://crossmyh
Birthday Card!
I was really happy with this card, I wanted a distress look appropriate for a guy who loves fishing =) I used Wild Card for the envelope and the card, CampOut Solutions for the fish and lots of distressing ink. By the way, the hook is real =)
Happy Birthday Jairo!
No comments:
Post a Comment