
Cute Owl - Handmade Birthday Gretting Card
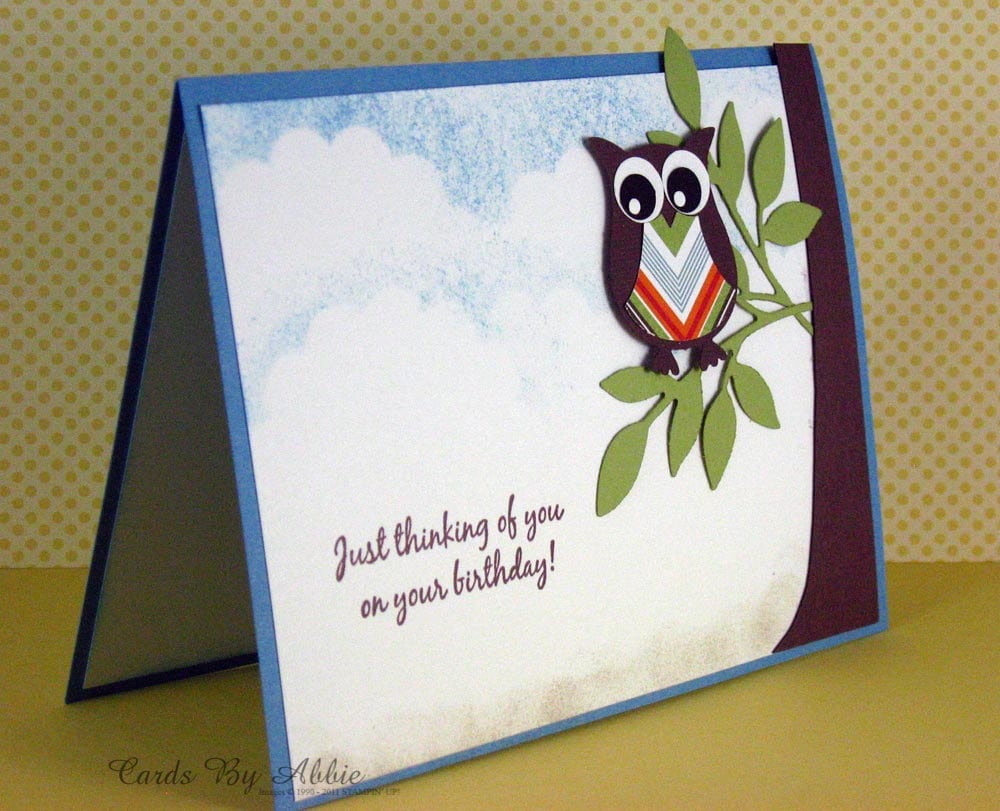

Labels: birthday card, owl, tree, leaf
 Thanks For Your Kindess Card
Labels: thank you card, flower, cuttlebug
These two Christmas cards are made using the same principal. A circle card, a circle stamp, circle layers and a bird with a branch. The second card consists for the most part of the remaining parts of the first card, which makes it much smaller. TFL.
Deze twee kerstkaarten zijn gemaakt volgens hetzelfde principe. Een cikelkaart, een cirkelstempel, cirkellagen met een vogel met tak. De tweede kaart bestaat grotendeels uit overgebleven delen van de eerste kaart, hij is dus ook veel kleiner. BVHK.


Deze twee kerstkaarten zijn gemaakt volgens hetzelfde principe. Een cikelkaart, een cirkelstempel, cirkellagen met een vogel met tak. De tweede kaart bestaat grotendeels uit overgebleven delen van de eerste kaart, hij is dus ook veel kleiner. BVHK.


Labels: christmas card, bird, circle card, scallop circle

Labels: christmas card, deer, scallop circle

Labels: gift bag, rosette, cupcake
Scallop Joy Card
Here's a unique shaped card: finished size is 4-1/2" x 4-1/2". The Scallop square is a SU Exclusive Die. I wanted to keep the scallops at the top of the card - see below details on "how" to do this card. The letters do hang over the frame of the card a bit but I think it is OK.
Close-up of card front:

Card Inside:

Another view of Card inside:

To make this project:
(2) Scallop Squares in Chocolate Chip
(1) 3-3/4" x 3-3/4" Old Olive CS
(1) 3-1/3" x 3-1/2" Merry Moments Designer Series Paper
(1) Punched Jumbo Snowflake in Chocolate Chip
(1) 3-3/4" x 3-1/2" Very Vanilla for card inside
(1) "J" and "Y" from the Serif Essentials Die in Real Red
(1) "&" from the Serif Essentials Die using Merry Moments Designer Series Paper
(1) "cheer" from SU Exclusive Join in the Cheery Sizzlits Decorative Strip Die in Real Red

To keep the scallop at the top of the card, cut CS, plan the core line 3/8" from the top of the scallop. Cut the CS a min of 1/4" beyond the top of the scallop. Mark where the top of the CS should be placed on the die.

Here you can see the scored CS positioned below the arrows:

In addition, to maintain the scallop at the top, it is best to add the sticky tape above the score line NOW before the card is cut. Then place the 2nd piece of CS on top and run through Big Shot.

Now remove the sticky tape backing and adhere top and bottom CS.

Use 3/16" Corner Rounder punch for all 4 corner of Old Olive and Merry Moments Designer Series Paper as well as inside Very Vanilla CS.

Adhere dimensionals behind the Old Olive CS. Add 1/4: Old Olive Grosgrain Ribbon and finish with single knot in card front.

Add dimensionals to the Die cut letters and punched Jumbo Snowflake as shown below:

Adhere letters to card front, Adhere "&" and "cheer to inside card and project is finished!
Supplies:
- Stamps: none
- CS: Chocolate Chip, Old Olive, Real Red, Very Vanilla, Merry Moments Designer Series Paper
- Ink: none
- Accys: SU Exclusive Big Shot Bigz Clear Scallop Square Die, SU Exclusive Join in the Cheer Sizzlits Decorative Strip Die, Big Shot Serif Essentials Die, Jumbo Snowflake Punch, 3/16" Corner Rounder Punch, 1/4" Old Olive Grosgrain Ribbon, Sticky Tape, Dimensionals, 2 way Glue Pen
Labels: joy card, christmas card, snowflake, scallop edge

Supplies:
Card Sketch: Mojo Monday # 205
Designer Cardstock: Basic Grey.
Ribbon and Button: Doodlebug Designs.
Punch: Fiskars and Martha Stewart.
Cuttlebug: To cut with Nestabilities Lacey Circless and Circles.
Twine: The Twinery.
Other: ATG, stitching, pop dots and glue gun.
You might also like:
Labels: birthday card, cupcake, bakers twine
Birthday Clown
Designed by Jeannie Phillips - Southside, AL
Click on any picture to enlarge.

I am excited about this card...it's one I am using Monday for my card class... it was inspired by Kim Romig's clown card which was inspired by my elf card....thank you for inspiring me Kim!... I hope that you like it...and I hope that my class likes it!!
CRICUT & GYPSY
Some of your cuts need to be on a separate page but I put them all together so your could see them in one picture... see screen shot in the last picture.
Pooh & Friends
Hair... they are clouds... cut @ w 1.89 x h 1.58..the second one is duplicated and flipped sideways...on the Cricut I would cute these @ 11/2 inches.
Stamping
Happy Birthday cut @ h 1.71 inches...both the shadow and the regular cut... on the Cricut I would cut this @ 1 3/4 inches.
Paper Doll Dress Up
Hats cut @ h 4.05... the width will be right if you set the height...I welded a hat to each of the heads...on the Cricut I would cut these at 1 1/2 inches.
Celebrations
Balloons cut @ h 4.02 ... 2 regular cut balloons and 1 shadow cut balloon which I welded to the card square ...on the Cricut I would cut these @ 4 1/4 inches.
George
Rectangle is a square cut @ w 3.50 x h 4.75 on real dial size... using the Cricut I would cut this with a paper trimmer.
Ovals for the faces cut @ w 2.48 x h 4.05 ...on the Cricut I would cut these at 4 inches.
Ears are hearts cut @ w1.21 x h 0.95 welded to one of the ovals... I put these on the back ovals so the ears would appear behind the face... on the Cricut I would cut these at 1 inch.
Ovals for eyes cut @ w.0.51 x h 0.69...on the Cricut I would cut these at 3/4 an inch or 1/2 inch.
Circles cut @ w 0.41 x h 0.38...ob the Cricut I would cut these at 1/4 an inch.
Circles for nose cut @ w 0.62 x h 0.58.I cut two of these pop dotted the top one...on the Cricut I would cut these at 1/2 inches.
Circle for center of bow..which is popped from the bow cut @ 0.56 x h 0.53...on the Cricut I would cut this at 1/2 inch.
Mickey and Friends
Bow which is for Minnie's hair cut @ w1.38 x h 1.60 ... on the Cricut I would cut this at 1 1/2 inches.


Labels: clown, balloons, birthday
Swirls & Curls Verses
My card today was a nice surprise from Heather ....thanks Heather....I love it!!!!
She used the Swirls & Curls Verses stamp set along with the Strength & Hope stamp set ....both can be found in the Summer Mini Catalog.
She also used one of my favorite colors Pear Pizzazz and doesn't it go beautifully with the Elegant Eggplant?
Here's a list of some of the supplies she used:
- Swirls & Curls Verses Hostess stamp set - Wood #123015 - Clear #123017
- Strength & Hope Stamp set - Wood #118100 - Clear #123660
- Elegant Eggplant card stock #105126 & ink #105210
- Pear Pizzazz card stock #119795 & ink #119784
- Sponges #101610
- Rhinestones #119246
Labels: butterfly card, hello, scallop edge
Labels: celebrate, birthday card, balloon
Inching by to Say Hi!
Hi! I hope you having a wonderful Saturday!
Today's card was super simple and fast.

It measures 4 1/4" x 3". I used kraft card stock for the base of the card and DCWV colored card stock for the rest. The cut is from the Live Simply cart and it was cut at 2 1/2". The yellow piece on the front measures 3/4" x 3" and was stamped with this stamp. I used my white Signo pen to make the stitch marks around the edge of the card.


The inside pieces measures 3 3/4" x 2 1/2". The flower was cut from the same cut,
but at 3/4".
I hope you are having a wonderful day!
Happy Scrap'n!
Labels: worm, flower
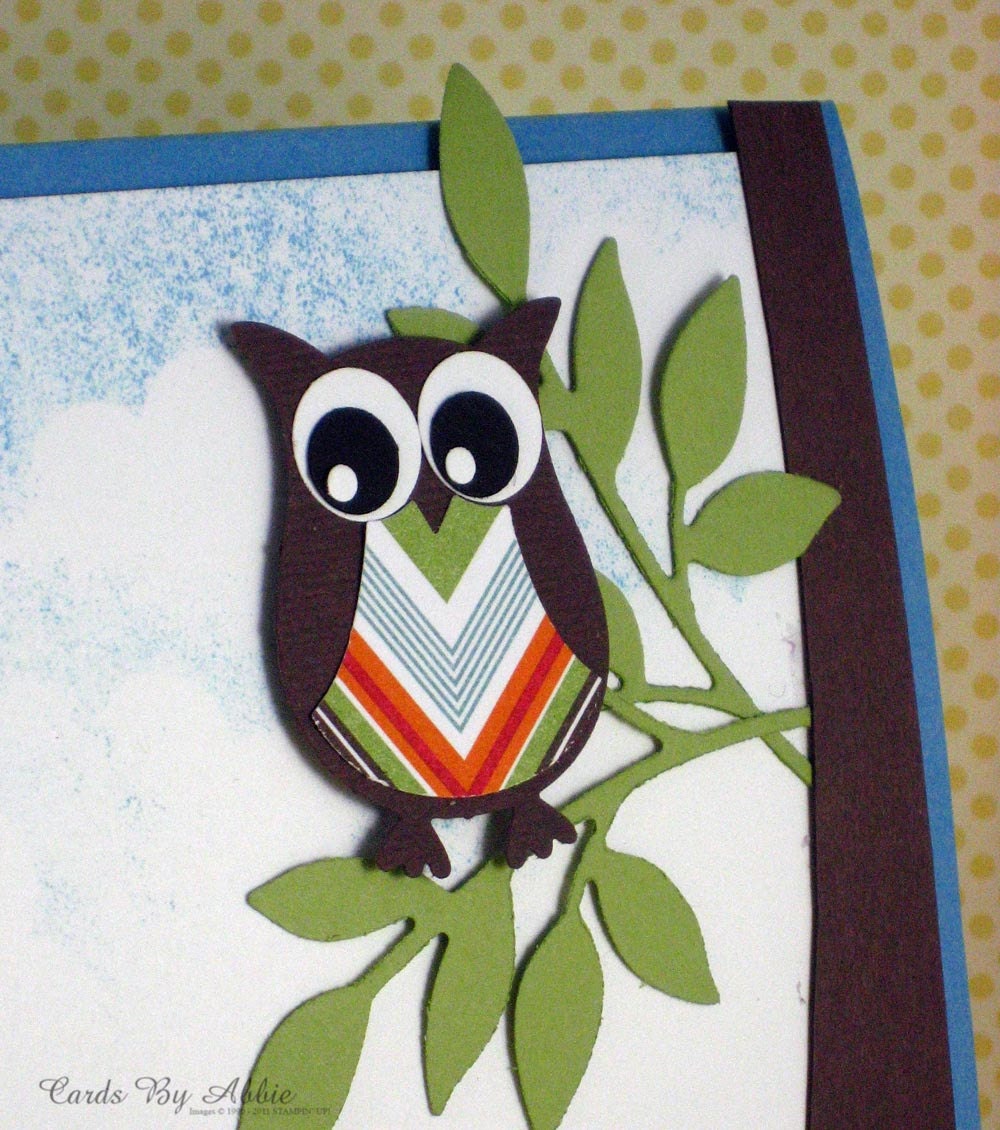
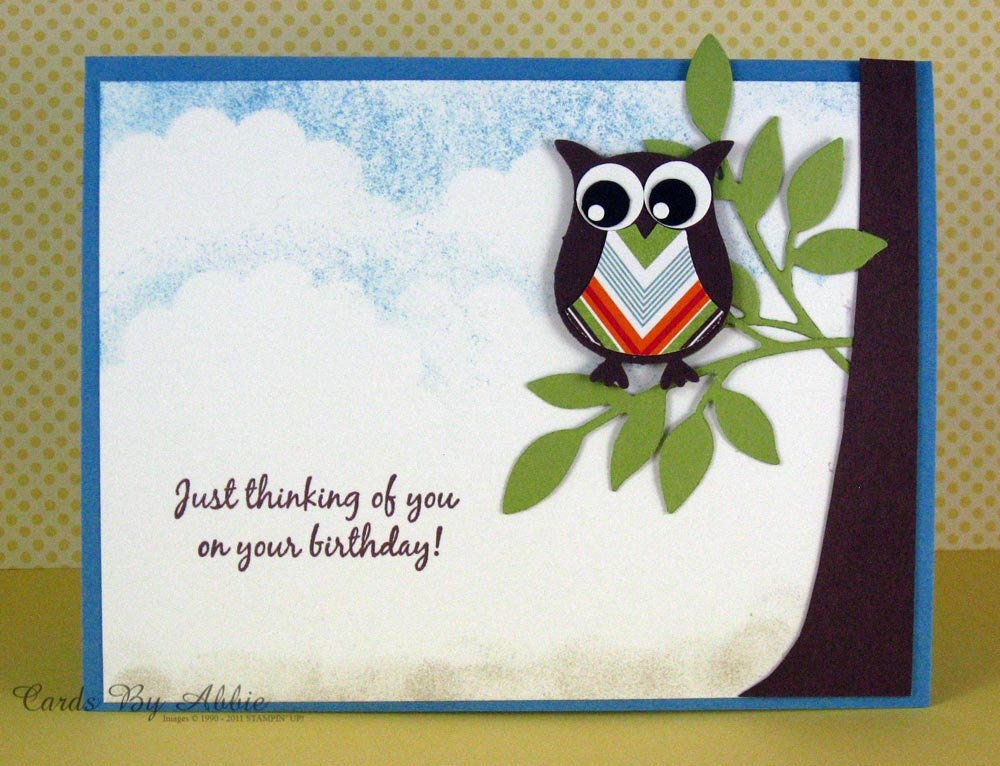
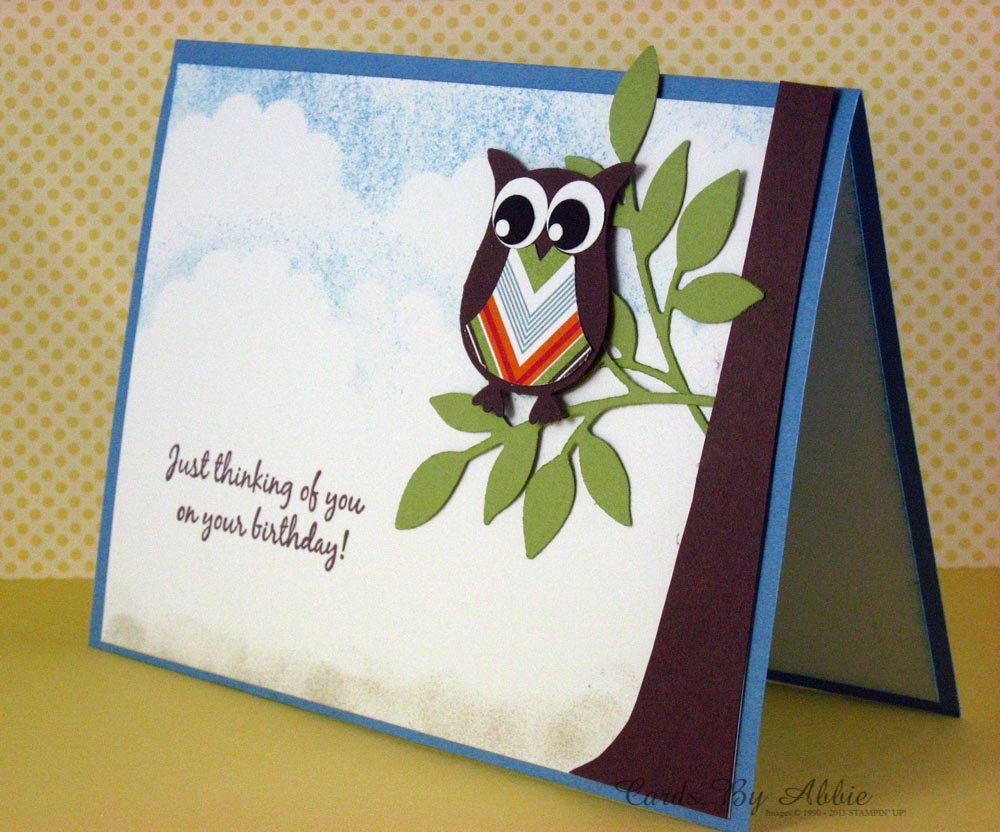
This weeks Cricut Cardz Challenge was to create a Get Well card using any cartridge(s) and green, blue, black, and white only. I haven't spent much time using my Hoot and Hollar cart so I thought I would break that one out and make the card with that. I also used the "center point" button on my Cricut for the 1st time! :)


The card measures 4 1/4" x 5 1/2". The pattern paper is from the DCWV Retro stack and the solid card stock is also DCWV. The ribbon is 5/8" stitched grosgrain ribbon from Michael's. The owl was cut from the Hoot and Hollar Cart at 3". The sentiment was printed on my printer and then I used the "center point" feature on my Cricut to cut the blurb around my sentiment. The blurb was cut from Create a Critter, it was cut at 2".


The inside sentiment pieces measure 3 3/4" x 5" and 3 1/4" x 4 1/2". The flower was also cut from the Hoot and Hollar cart at 1 1/4".
Labels: get well card, owl, hoot & hollar, create a critter
This card was my design team submission for this weeks Cricut Cardz Challenge.
This weeks challenge was to create a card with any cartridges and theme you would like, using only orange, yellow, blue, black, and white.

The card measures 5 1/2" x 4 1/4". The background paper is from Papertrey Ink and was embossed with the D'vine swirl folder. The solid color card stock is DCWV. The butterfly was cut from the Live Simply cart at 3 3/4". The 7/8" polka dot grosgrain ribbon is from Michael's. The sentiment stamp is from here.


The inside sentiment pieces measure 3 3/4 x 5, 3 1/4 x 4 1/2, and 2 3/4 x 4. The flower was cut from the live simply cart at 1 1/2" (I cut off the leaves).
Labels: butterfly card, flower, cuttlebug
Here is another card that I made with the Rock Princess cart. I love the way it turned out.

The card measures 5 1/2" x 4 1/4". I used kraft card stock from here. The colored card stock is DCWV. The strawberry was cut at 4", it's on page 48 of the Rock Princess cart.
I used a white Signo Ball Pen for the stitch lines.


The inside sentiment piece measure 5" x 3 3/4". The green piece measures 3 3/4" x 1 1/4". The boarder punch is from Fiskars. The flower was cut at 4".
Labels: flower, strawberry, rock princess
Her Birthday was last week and I wanted to make her a card.
A friend of mine let me borrow her Cindy Lou cart and the owl cut on the cart,
reminded me of my most favorite of all her owls.

The card measures 4 1/4" x 5 1/2". The owl was cut at 4". The papers are from the DCWV Linen Closet designer and solid card stock stacks. The ribbon was purchased at the floral supply warehouse and the stamp is from here. The boarder punch was purchased at Michael's, it is a Martha Stewart punch.


I hope you have a wonderful weekend!
I am planning on some serious scrappy time with my bestie!

Happy Birthday Joy!
I hope that you had a wonderful day!
(Your banner and card are in the mail.)
Labels: birthday card, strawberry, bakers twine
I made this card several months ago for one of the design teams that I am on, but sadly... it was never used. So I decided to post it for today's card.


This card measures 4 1/4 x 5 1/2. I used the DCWV Citrus designer paper and card stock stacks. The Dino was cut from the B is for Boy Cricut Lite cart at 3 1/2". I used the Fiskars treading water boarder punch. The ribbon is from Doodle Bug designs and the stamp is from the Lots of Pun stamp set.


The paper on the inside of the card measures 3 3/4 x 5, 3 1/4 x 4 1/2 (the bottom of this pieces was punched with the treading water punch), 2 1/2 x 4.
Labels: dino card
Cricut Cardz Challenge #39
This weeks Challenge on the Cricut Cardz Challenge Blog was to create a card for
going back to school. The inspiration for my cards came from here and here. I decided to go a step further and make a gift box set for my sister-in-law. I made her 12 cards, envelopes, and the box to keep them in.

She is pretty traditional so I decided to go with an apple on the front of each card. The apple was cut from the Give a Hoot cart, it was cut at 3". The paper's I used and the twine are from Michael's.

The wording was printed on my printer, this video explains how to do it. The apples on the cards were cut at 2". I cut 5"x 3 3/4" pieces of cream card stock and adhered them to the inside of each card, so that it would be easy for her to write a note.
Hope on over, play along with us, and check out/congratulate all the new design team members!
Labels: teacher appreciation, apple
September 28, 2010
Boo... too you!
Happy Wednesday!
Today's card, is for this weeks challenge over at the Cricut Cards Challenge blog. This weeks challenge was to make a S or Z fold card for Halloween, using any carts and colors that you would like.
This is my card...

I used paper from the K and Company paper stack, Spook*Tacular and 5/8" grosgrain ribbon from Michael's. I designed the card in Make-the-Cut and then cut the ghost from the Everyday Paper Dolls cart, he was cut at 3 3/4". The face on the ghost is from the Monster Mash Face Assortment from Peachy Keen Stamps.


I hope you have a "Bootiful" day!
Labels: halloween, ghost, everyday paperdolls
December 17, 2010
Flaunt it Friday Challenge #3
Happy Friday!
Can you believe that Christmas is only a week away!?! I am sooo not ready. I still have so much to do. Hopefully, this weekend I will be able to get caught up on some things.
Anyway.. on to today's Flaunt it Friday Challenge. This weeks challenge is to use the cup and lemon from page 48 on the Simply Charmed Cricut cart. Please use both of the images. If you do not have this cart, no worries, you can still enter the challenge, just make sure you use a similar cut.
This is my card...

The lemons were cut at 1" out of the same paper as the background. I inked around each one and glued them down, trying to give the effect of the paper being embossed. The cup was cut at 3".

The twine is from the Twinery. The sentiment is from this Pink by Design stamp set. I used this punch to make the tag.

The PKS face stamp is from the Cheery-O face assortment.
Labels: just because card, peachy keen, lemon aide, simply charmed

Sympathy Card
Ingredients:Earthy Serenity Power Palette Kit
Cardstock: Cement
Custom Cutting System and Circle and Oval Patterns
12-Inch Straight Trimmer
Scissors
Tape Runner
Font used: Brush Script MT
How to Create:
Cut cement cardstock to 8 /12" x 5 1/2". Fold in half to create card.
Using a word processing program, print sentiment onto light patterned paper. Cut to 4 1/4" x 5 1/2" and place on the front of the card.
Using the 12-Inch Straight Trimmer, cut out a 1 1/2" x 5 1/2" strip of green patterned paper. Distress edges with scissors and then adhere to the left side of the card as shown.
Next cut a strip of orange patterned paper to 1 1/2" x 4 1/2" and distress top edge with scissors.
Adhere that to the bottom of the card as shown.
Using the Custom Cutting System with Circle and Oval Patterns, create the flower. Distress the edges of the flower with scissors and adhere as shown.
Adhere swirl stickers to the card.
Finished Size:
4 1/4" x 5 1/2"
Project Designed by:
Jen Martakis, Creative Memories Design Team
Labels: sympathy card, just because card, flower

15 of 21
Party Hat - Tissue-paper scraps burst with color and texture at the top and bottom of this hat. Attach the party hat on a circle background and stitch around the edge for added interest. Finish the card with a message handwritten on strips of white paper.
Labels: birthday card, celebrate, party hat

14 of 21
Butterfly Style - This card gets a dose of springtime with stamped, embellished butterflies. Stamp the image with paint and then sprinkle on glitter before it dries. To add movement to the card, create a fluttering path with a paper piecer.
Labels: birthday card, butterfly card

13 of 21
Sweet Daisies - A sparkly chipboard flower is the perfect addition to this birthday card. The shimmer adds just a touch of shine and doesn't come off on the rest of the card. The red paper border adds a pop of color and picks up the accent color in the patterned paper.
Labels: birthday card, flower

10 of 21
Cute Owl Card Labels: birthday card, owl

16 of 23
Zigzag Birthday Card - Use a sewing machine and colorful teal and green papers for the background of this eye-popping card. Large letter cutouts or stickers in upper and lowercase make the card even more playful.
Labels: birthday card, masculine card

15 of 23
Happy Birthday Coin Card Labels: birthday card, envelope pocket

13 of 23
Confetti Birthday Card Labels: birthday card, confetti
- view all thumbnails

12 of 23
Happy Birthday Leaf Card - Create an elegant look by adding botanical stem punches to the center of a mod card. Use warm colors to emphasize the natural look. Editor's Tip: Use an assembly line to make a few versions of this card in different colors so you'll always have one on hand.
Labels: birthday card, leaf, circle, masucline card

Labels: birthday card, masucline card
Good Cheer Paper Bag Gift Keeper


I’d say that this paper lunch bag never looked so good!
I love the ‘rustic’ colors in the ‘Deck the Halls’ designer series paper and have used them in the color scheme of this easy ‘paper bag’ gift bag.
I have included a short photo step-by-step of how this bag was made (click images for larger view):


- Cut the paper down to 5 3/4 inches high. Line the back of the paper bag with a 5 inch by 8 inch piece of Artichoke cardstock, scored at 6 inches
- Line the front of the bag with a 6 x 5 inch piece of Artichoke cardstock
- Adhere a 4 3/4 x 5 3/4 piece of designer paper to the front artichoke panel and punch half a jumbo circle
- Adhere a 5 3/4 and 2 1/4 piece of designer paper to the top panel and wind a 20 inch piece of hemp around the top and tie a knot
- Adhere the central image as shown. Use Sticky Strip to adhere it, since it will take some abuse (opening and closing). If you want the bag to stay shut, you can use Velcro dots.
- Stamp the image on both Vanilla and on Crumb Cake.
- Trim the Crumb Cake image around the holly (leaving at least 1/8th inch).
- On the Vanilla image, color and cut out Santa and the reindeer. Ahere Santa to the Crumb Cake image right over the other Santa, adhere the reindeer with Dimensionals.
- Extra step: I stamped an additional Santa on Vanilla and cut out only the head (down to and including the mustache) and adhere it with Dimensionals.

 Enjoy the gift bag idea!
Labels: gift bag, christmas
Going Batty for Halloween
 The Sizzix Spiderweb embossing folder is one of the cooler embossing folders this season!
I embossed the web on vellum cardstock paper overlayed on black… and it looks properly ‘spooky’!
The bats are the new ‘Bitty Bats’ Jumbo punch with little white ‘eyes’ added. The overall effect is cool for a very quick little Halloween card.
Below is the recipe, enjoy!
Set(s): Dark & Dreary, House of Haunts
Accessories:
8 ½ x 5 ½ River Rock cardstock
5 ¼ x 4 Basic Black cardstock
1 x 4 inch Basic Black (for punching bats)
5 x 3 ¾ Vellum cardstock
1 x 3 ¾ River Rock strip of cardstock
Old Olive inch, sponge dauber, Dimensionals
Black StazOn™
4 inch Trim Lace ‘Raven’ ½ inch ribbon #120988
Bitty Bat Jumbo Punch #119279
Spiderweb embossing folder #120889
Sizzix Big Shot, Multi-purpose platform, clear cutting pads
Labels: cuttlebug, halloween, bat, spider web
Word Play Stamp Set

 This was a fairly simple card to make. And the large oval from the Sizzix ‘Ovals’ die is perfect for all of the exceptional greetings in the ‘Word Play’ stamp set.
I filtched this layout from a swap I got from Karen Duke. I didn’t have any of the sets that she used, but I loved the oval on layers with the ribbon. The ‘Word Play’ greetings were perfect for the center of the large oval and with the greeting options of the set, this layout could be used for any reason!
And aren’t the butterflies to die for?! The Sizzix Embosslits Die ‘Beautiful Wings’ embosses and cuts 6 butterflies at once… and is a Stampin’ Up! exclusive Embosslit (#118138).
 Stampin' Up!'s Word Play Set
Set(s): Word Play #120308 (wood); #120651 (clear)
Accessories and measurements:
8 ½ x 5 ½ Pear Pizzaz cardstock
4 x 5 ¼ Basic Black
3 ¾ x 5 Whisper White
2 x 2 ½ Pear Pizzaz cardstock
3 x 4 Whisper White cardstock (for die cutting)
Black StazOn ink
Black satin ribbon
Basic Rhinestones #119246
Sizzix Bigz Die ‘Ovals #114525
Beautiful Wings Embosslits Die #118138
Sizzix Embossing Folder Elegant Bouquet #115964
Sizzix Big Shot & standard cutting pads
Labels: cuttlebug, butterfly card

Labels: just because card, flower, scallop circle, circle, bakers twine
Now for a fun little dimensional tag that would be the perfect finishing touch for birthday gifts!
I stacked several layers of vintage book print (from an old book) and die-cut them with the Sweet As Can Be die all at once. I then stitched down the center of the stack with my sewing machine.
After the stitching was completed, I just fanned all of the layers to create a 3D scoop. Such a fun look!
Labels: birtday card, birthday box, ice cream cone
Jessica Witty left me wanting more with her Friendship Jar Summer Fillers project that is dedicated to all things beachy. She die-cut a jar from clear cardstock and stitched it in place to create a shaker-box of sorts complete with real sand and the new seashell image from the stamp set. Pairing it up with the map paper from the Road Trip paper pad was just a perfect finishing touch to bring everything together. I also love the twine mixed with the twill tape, wrapped around the top of the card. This girl's a genius!
Labels: bakers twine, jar, just because card
Handstamped Stitched Baby Girl Congratulations Card

Like this item?
Add it to your favorites to revisit it later.Handstamped Stitched Baby Girl Congratulations Card

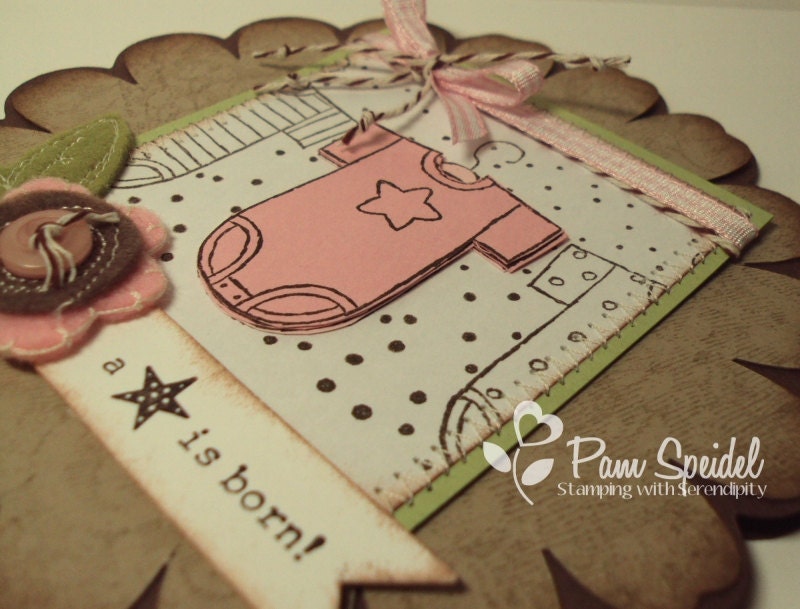
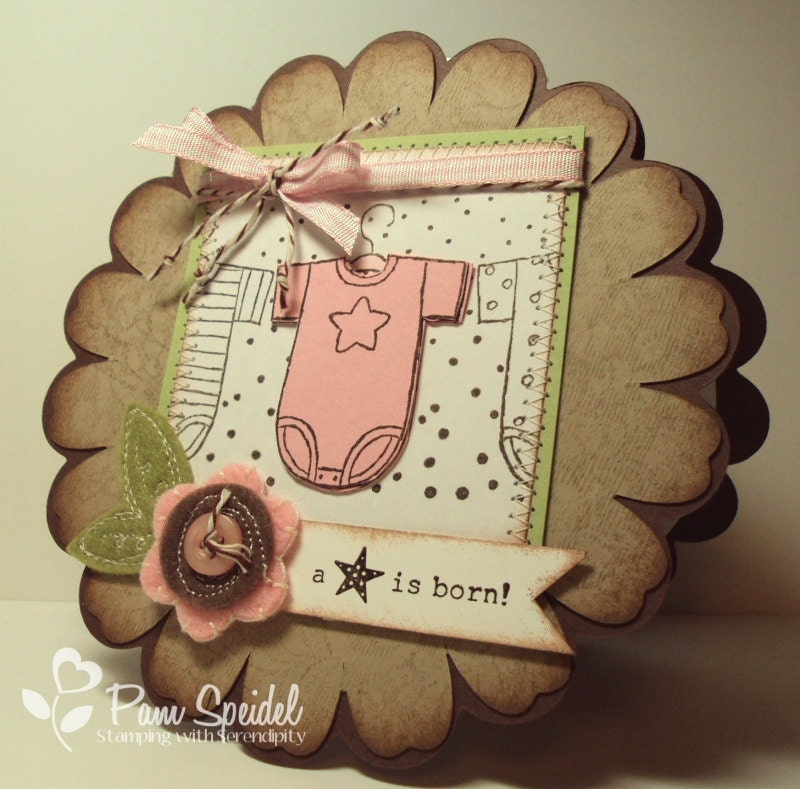
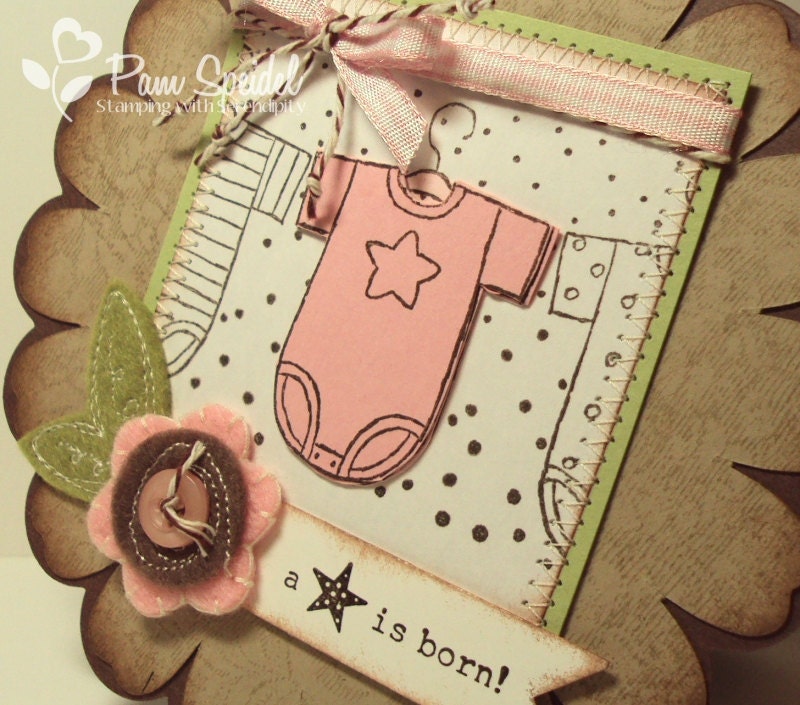
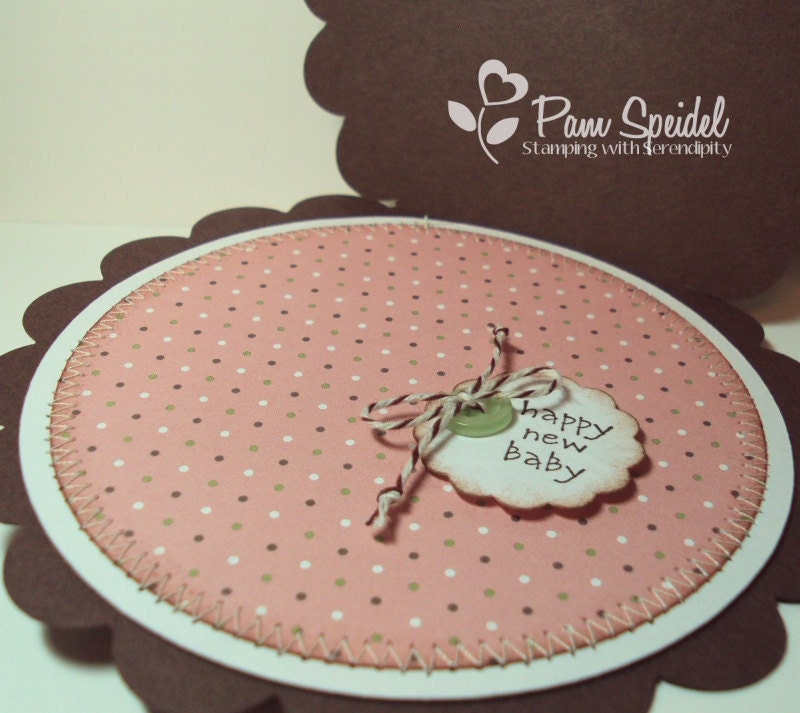
The sentiment on the front says "a STAR is born". The inside of the card is finished to coordinate with the front and has a cute little tag attached with button a twine that reads "happy new baby".
Labels: baby card, scallop circle, new arrival

Labels: gift card holder

Labels: square tag

Labels: cherry blossom
Monday, July 4, 2011
The end of a long weekend!!!
Happy 4th Everyone….I hope you all had a WONDERFUL weekend!!!! Mine was PERFECT for me….I spent it in my ARTHaven and had A LOT of fun creating!!!!! Just thought I would share with you most of what I was working on……..if some might be interested in seeing….and there’s a few new files thrown in……")
")
")
")
")
")
")
")

Labels: gift bag, flower
Easy Gift Card Holder

I'll be the first to say I'm not thrilled with how this particular one turned out, but that's okay, right? Just focus on the idea of it. lol
Here's all you need to do:
6×4" pc patterned paper
Score it on the long side at 1.5" & 4.25"
Apply sticky strip on bottom center, and all down one side flap.
Punch a circle for notch in the top.
Decorate as desired!
See how easy? It could totally work for birthdays, too! Just change up the DSP! :)
Labels: gift card holder, scallop circle, birthday card, wedding card, bridal shower, baby shower
gChristmas Treats, Part VI
Are ya still with me? ;0)Six days of gift ideas for you...dare I go six more? lol
Today's project is another gift card holder, since it's a pretty popular gift nowadays.
Day 6
Unisex Gift Card Holder

This was one of the FREE make & takes at my recent Annual Open House at the end of October.
To be honest...it seems a little blah. Boring. Makes me feel the need to explain myself. ;0)
I chose the colors I did to make it work for either gender, for any occasion. They had the stamp options available to make it what they wanted. Male, Female, Christmas, Birthday...you name it! :) It IS double-sided DSP...and there are some GREAT designs in the pack with more, ahem...color. Go ahead, go take a look in the catalog...it's called Thoroughly Modern, and it's one of my faves. :)
Would you like to see the inside? Of course!! :)

Instructions:
4 1/4" x 7" cardstock (Soft Suede)
4 1/8" x 2 1/4" pc. designer paper (Thoroughly Modern)
4 1/8" x 1 1/4" pc. designer paper (Thoroughly Modern)
-Score the cardstock on the long side at 2.5 and 5.5"-Fold bottom flap upward.
-Adhere DSP to topside and bottom flap.
-Stamp desired decor/greeting & attach.
-Attach bottom flap to card base at upper corners with gold brads.
That's about it!
Well....you may want to slip a gift card in the newly formed pocket, or your recipient might be a smidgen confused. ;-)
Labels: gift card holder, scallop circle, birthday card, wedding card, bridal shower, baby shower
Printable all-in-one card and envelope


Butterfly invitation template
 Let's call this stationery week at How About Orange. Friends inexplicably keep marrying and having babies, so here are some shower invitations I made with a pal last week.
The mom-to-be registered for purple butterfly things, so I had to hold off on the orange cheetah-themed shower that could have been awesome. I think this one might be more tasteful. I made the design in Adobe Illustrator, then cut the cards out with the Silhouette machine. The party information is printed on an interior sheet. It's stapled inside the card along the spine to form a mini booklet. Chartreuse envelopes fromPapersource plus these stamps finished it off.
 You can download the butterfly template as a PDF file, a zipped Studio filefor Silhouette users, or a zipped SVG file for Cricut users. And folks without a digital cutter will have to make do with an X-acto knife. Eek, that's a little bit daunting.
Labels: butterfly card, 3x3 card
Baby, Baby!
An old Amy Grant song just popped into my head as I wrote that title, lol. Anyone out there remember that one? Man, that seems like ages ago....Today is another baby card post. Sadly...not the invite. Yet. ;-)
Some more super-quick, super-easy 3x3 gift cards.
(yes, they'll be at the Market tomorrow, too!)

I realized after I took the pic, that it didn't show up well. Looks like I need to re-ink my ink pads! :)
This is another stamp from the set "Baby Bundle" I borrowed from my friend.
You can click on the pic to try to see the words (and little hearts underneath), but I'll also tell you what it says... "bottles and bibs, booties and more - that's what a baby shower is for!"
The scallop circle is a new XL punch from Stampin' Up - yay! :) Of course, they've got dimensionals behind them to make them 'pop'. :)
Well, what do you think?
The Small Print (All Stampin' Up)
Stamps: Baby Bundle
Cardstock: Whisper White, Bashful Blue, Pale Plum, Pretty in Pink, Certainly Celery
Ink: Bashful Blue, Pale Plum, Pretty in Pink, Certainly Celery
Accessories: 2 3/8" XL Scallop Circle punch, 1 3/4" XL Circle punch, Dimensionals
Labels: 3x3 card, baby card, scallop circle
Owl Appreciate You!
Pun intended, yet again. ;-)(remember yesterday's post?)
I'm back with another lil' project using the 2Step Owl Punch! :)
Dontcha just love it when you God blesses you with a friendship out of something that's so random? This little gift is for that friend of mine who miraculously started out as a Stampin' Up customer of mine. She's such a sweetheart, and I'm so thankful for her friendship! :)
Well, without further adieu...

Oh, and a little gift card too. Not a big deal...just a quick lil' card to match...

I'll admit that I like my new eyes better (yesterday's card), but I made this gift before I figured out a different way to make them...these are ok too (it's using all the pieces that come on the punch). It's nice to have different ways of doing things, right? :)
I used a new DSP from the catalog, called Greenhouse Gala...love it! :)
Well, what do you think?
The Small Print (All Stampin' Up)
Cardstock/Paper: Chocolate Chip, Whisper White, Garden Green, Wild Wasabi, Crumb Cake, Cherry Cobbler, Greenhouse Gala DSP
Accessories: SU ribbons (Kraft & Chocolate Chip taffeta, Wasabi stitched), XL 2step Owl Punch, Lg Circle punch, Scallop Circle Punch
Other: RSVP pen, Mini Spiral Notebook
Labels: owl, appreciate, gift card holder, 3x3 card, spiral notebook
Owl Love You Forever, Part 2
Yes, I suppose I could've been a little more creative in my naming of this post, but really...it makes sense. I made another card, just like the one on Monday's post (see here)...only changing one thing.Would you like to take a look? OK. :)

They're sittin' on a little woodgrain this time! :)
Literally. :) I stamped our BG stamp "Woodgrain" in Crumb Cake ink on Crumb Cake cardstock. Then, I sponged a bit with Crumb Cake, and Close To Cocoa (retired).
I can't decide which one I like best. What do YOU think?
The Small Print (All Stampin' Up)
Cardstock/Paper: Whisper White, Chocolate Chip, Cherry Cobbler, Basic Black, More Mustard, Garden Green, Crumb Cake, Afternoon Tea DSP
Ink: Crumb Cake
Accessories: 2way glue pen, Unibal Signo gel pen, XL 2step O
Owl Love You Forever
Pun intended. ;-)I'm so excited to unveil the sweet lil' lovebird card I made for my bro and his wife for their 6th Wedding Anniversary!

How did I make those adorable owls? With a PUNCH!!! Seriously...a new Stampin' Up punch! It's one that I saw and thought...Yes. Yup. Need that one. :) I've finally played around with it (I have more projects to share soon), and I was right...it's so fun!
I used a lot of green b/c it's her fave color. :) The leaves are from another great punch, the 2step Bird Punch. What I love about the owl punch is that it comes with the little heart, even! I used that heart to make the beak, AND the bow by the female owl's ear (is it called that?)
You're wondering about the DSP, aren't you? Well, I'm sorry to say, it's a retired one...called "Afternoon Tea." I'm trying to give up my DSP hoarding habits. ;-)
Labels: owl, just because card, masculine card
JUST ADD TEXTURE! :)

A simple guy card. Now I'll admit...it was a bit difficult to make the texture on this one, because of the "cardstock" I used. I used the big shot texturx plate in combination with....can you guess what?
ETA: The answer is in THIS POST (click on it).
Well, what do you think?
The Small Print (All Stampin' Up)
Stamps: Happy Everything
Ink: Basic Black
Cardstock: Basic Black, Whisper White
Accessories: Star punches, Black brad, Dimensionals, Sizzix Texturz Plate, Big Shot
Here's a card I made earlier this summer:

A simple guy card. Now I'll admit...it was a bit difficult to make the texture on this one, because of the "cardstock" I used. I used the big shot texturx plate in combination with....can you guess what?
ETA: The answer is in THIS POST (click on it).
Well, what do you think?
The Small Print (All Stampin' Up)
Stamps: Happy Everything
Ink: Basic Black
Cardstock: Basic Black, Whisper White
Accessories: Star punches, Black brad, Dimensionals, Sizzix Texturz Plate, Big Shot
Labels: masculine card, birthday card, cuttlebug, stars, foil
Wanna see?
Here's the card I made for my parents' anniversary:

A nice, CAS card. Wanted the flowers to be the true focalpoint, so I didn't add a whole lot extra. The white base is embossed with polka dots, added a few leaves (sizzlit), a sentiment (Teeny Tiny Wishes), and I was done! Now, if only it really took that little time to make, lol. Well, now that I've made the flowers, I think it'll go faster in the future. ;-)
Labels: ribbon flower, cuttlebug, just because card, anniversary, wedding card, bridal shower
Elegant Wedding Shower
****REMEMBER YOU STILL HAVE A CHANCE TO WIN! Go to this post HERE to comment for a chance to win the blog candy by 5pm PST - TODAY!****This weekend, I attended a wedding shower of a good friend of mine. I'm so happy for her to have found "the guy" to spend the rest of her life with! I was honored to be invited, and blessed by the sweet gals who put on the shower, and everyone else, too! :)
Made an elegant (yet, pretty simple) card for her:

I apologize, the tag is hard to read. If you click on the pic you should be able to see it better. It says "happy I do day". I embossed it with white EP on white cardstock. Since the rest of the card was so elegant, white, and pretty, I just couldn't bring myself to ruin it all by adding color to the tag. ;-b
I used Stampin' Up's Elegant Lines embossing folder, then applied our new adhesive pearls here and there (there's even itty bitty ones that you can hardly see on there, but they are there!) Used our white satin ribbon (lucious!) at top, then added my tag.
Well, what do you think?
The Small Print (All Stampin' Up)
Stamps: Word Play
Cardstock: Whisper White
Ink: Versamark
Accessories: White EP, Heat tool, 1 3/4" circle punch, White satin ribbon, Elegant Lines embossing folder, Pearls
Technique: Dry embossing, Heat embossing
Labels: embossing, cuttlebug, wedding card, bridal shower
Snowflakes...and Bling!
Here's a card I recently made with some new product...and yes, I realize it's a Christmas card. ;-)

NEW (Holiday Mini): Northern Flurry Embossing folder, Extra Lg. Decorative Label punch
NEW (Idea Book & Catalog): Adhesive Rhinestones, Marina Mist cardstock
"How To" on the Ribbon = I layered our 5/8" white satin with some homemade Marina Mist taffeta, then tied them together with white taffeta. Make sense? ;-)
"How To" on the Punch = I stamped the sentiment on Whisper White, then punched it out. Punched another label out with Marina Mist cardstock, cut it in half, and mounted it behind the white layer.
"How To" on the Snowflakes = I embossed the Bashful Blue cardstock with the Big Shot, then applied white craft ink to each snowflake with a sponge dauber.
Well, what do you think?
The Small Print (All Stampin' Up)
Stamps: Christmas Greetings
Ink: Classic Marina Mist, Craft Whisper White
Cardstock: Whisper White, Marina Mist, Bashful Blue
Accessories: Big Shot, Northern Flurry EF, Rhinestone jewels, 5/8" white satin, White taffeta, Sponge dauber, Dimensionals
Techniques: Dry embossing
Labels: cuttlebug, snowflake, just because card

For some customers of mine. I
Labels: treat bag, thank you, just because card
Lovely, Lovely, Lovely
So, I had a friend threaten me with bodily harm if I didn't post to my blog soon. Just kiddin'...kinda, lol. ;-) Glad to know people out there care whether I post or not! :)
I have a little secret, and it explains where I've been.
I've been working on a project...for a blog I'm going to be featured on!!! Yup - so excited!! Stay tuned for more info on that! Anyways, that took a ton of my time, and I was in uber-creative mode and could think beyond nothing but this secret project.
But now I'm back! :) Here's what I made up today...
featuring our stamp set "Lovely As A Tree"

It was so refreshing to create for fun, again! :) Look for these cards to appear on my Etsy site, soon!
Want a close up of each LOVELY? ;-)
#1 - Lovely Landscape Trees

#2 - Lovely Tall Tree

#3 - Lovely Maple Tree

I used an old (retired) Stampin' Up Designer Paper called "Juntos" - it was from our Spanish Catalog and I fell in love with it the moment I laid my eyes on it! The colors I used here are so rich...Chocolate Chip, Always Artichoke, and Very Vanilla. Each main image is up on dimensionals (of course!). :)
Well, what do you think? Do you have a favorite?
The Small Print (All Stampin' Up)
Stamps: Lovely As A Tree
Ink: Chocolate Chip, Always Artichoke
Cardstock: Chocolate Chip, Always Artichoke, Very Vanilla
Paper: Juntos DSP
Accessories: Chocolate Chip Taffeta ribbon, Dimensionals, SU markers
Labels: masculine card, trees
Day #1 - Teabag Holder

Here's an inside view:

FYI: My plan was to make a video, but I'm not having much luck with those right now. ;-)
Ready to get started?
OK!
Step 1: 6"x6" pc. cardstock (bashful blue)
Step 2: Score at 3", turn and score at 3" again.

Step 3: Cut at an angle from RH corner up to middle, and LH corner up to middle.

It should then look like this:

Step 4: Fold on creases.

Step 5: Lay out flat again and stamp front & back portions, and flaps.
Step 6: Adhere sticky strip to each side, as close to the edge as possible.
Step 7: Fold upward onto sticky strip, and you've got your pockets!
VOILA!

Here's an inside view:

FYI: My plan was to make a video, but I'm not having much luck with those right now. ;-)
Ready to get started?
OK!
Step 1: 6"x6" pc. cardstock (bashful blue)
Step 2: Score at 3", turn and score at 3" again.

Step 3: Cut at an angle from RH corner up to middle, and LH corner up to middle.

It should then look like this:

Step 4: Fold on creases.

Step 5: Lay out flat again and stamp front & back portions, and flaps.

Step 6: Adhere sticky strip to each side, as close to the edge as possible.

Step 7: Fold upward onto sticky strip, and you've got your pockets!
Step 8: Decorate front, add a little matching note on the inside!

If instead of making them, you'd still rather purchase a set of these from me, let me know - I'll set up something for you in my Etsy shop! :) I'll make up the holders, you put in the treat -- no tea-lovers that you know of? Mmm...how about a Ghiradelli Chocolate - perfect! :)
Labels: tea bag, 3x3 card, snowflake

and I need to finish getting these Visiting Teaching Messages ready for everyone to make at Relief Society on
LOVE....HEARTS...hmmm...oh! I just thought of another challenge I could use! Thursday's "Ways To Use It" challenge was to use silver!
After gazing at a few of my 'heart' stamp sets and drinking some creamerized coffee, the idea came to me. A clean and simple (my fave kind!) card using hearts and silver.

 Do you have ANY idea how difficult it is to capture embossed silver on cards?? Ugh. I won't tell you how many different angles I took the pic from. ;-)

After gazing at a few of my 'heart' stamp sets and drinking some creamerized coffee, the idea came to me. A clean and simple (my fave kind!) card using hearts and silver.


Here's a closeup of the embossing:

I may just keep this card setting up to remind me of my resolutions:
Keep your life clean & simple, and remember to foster the relationships, Crystal. :)
Wellllll.....what do you think? Do you have any resolutions you'd like to share?
The Small Print (All Stampin Up)
Stamps: Love You Much
Cardstock: Whisper White
Ink: Encore Silver
Accessories: Silver EP, Heat tool, Paper snips, Dimensionals
Labels: embossing, heart, love
Like this item?
Add it to your favorites to revisit it later.Boy Airplane Card
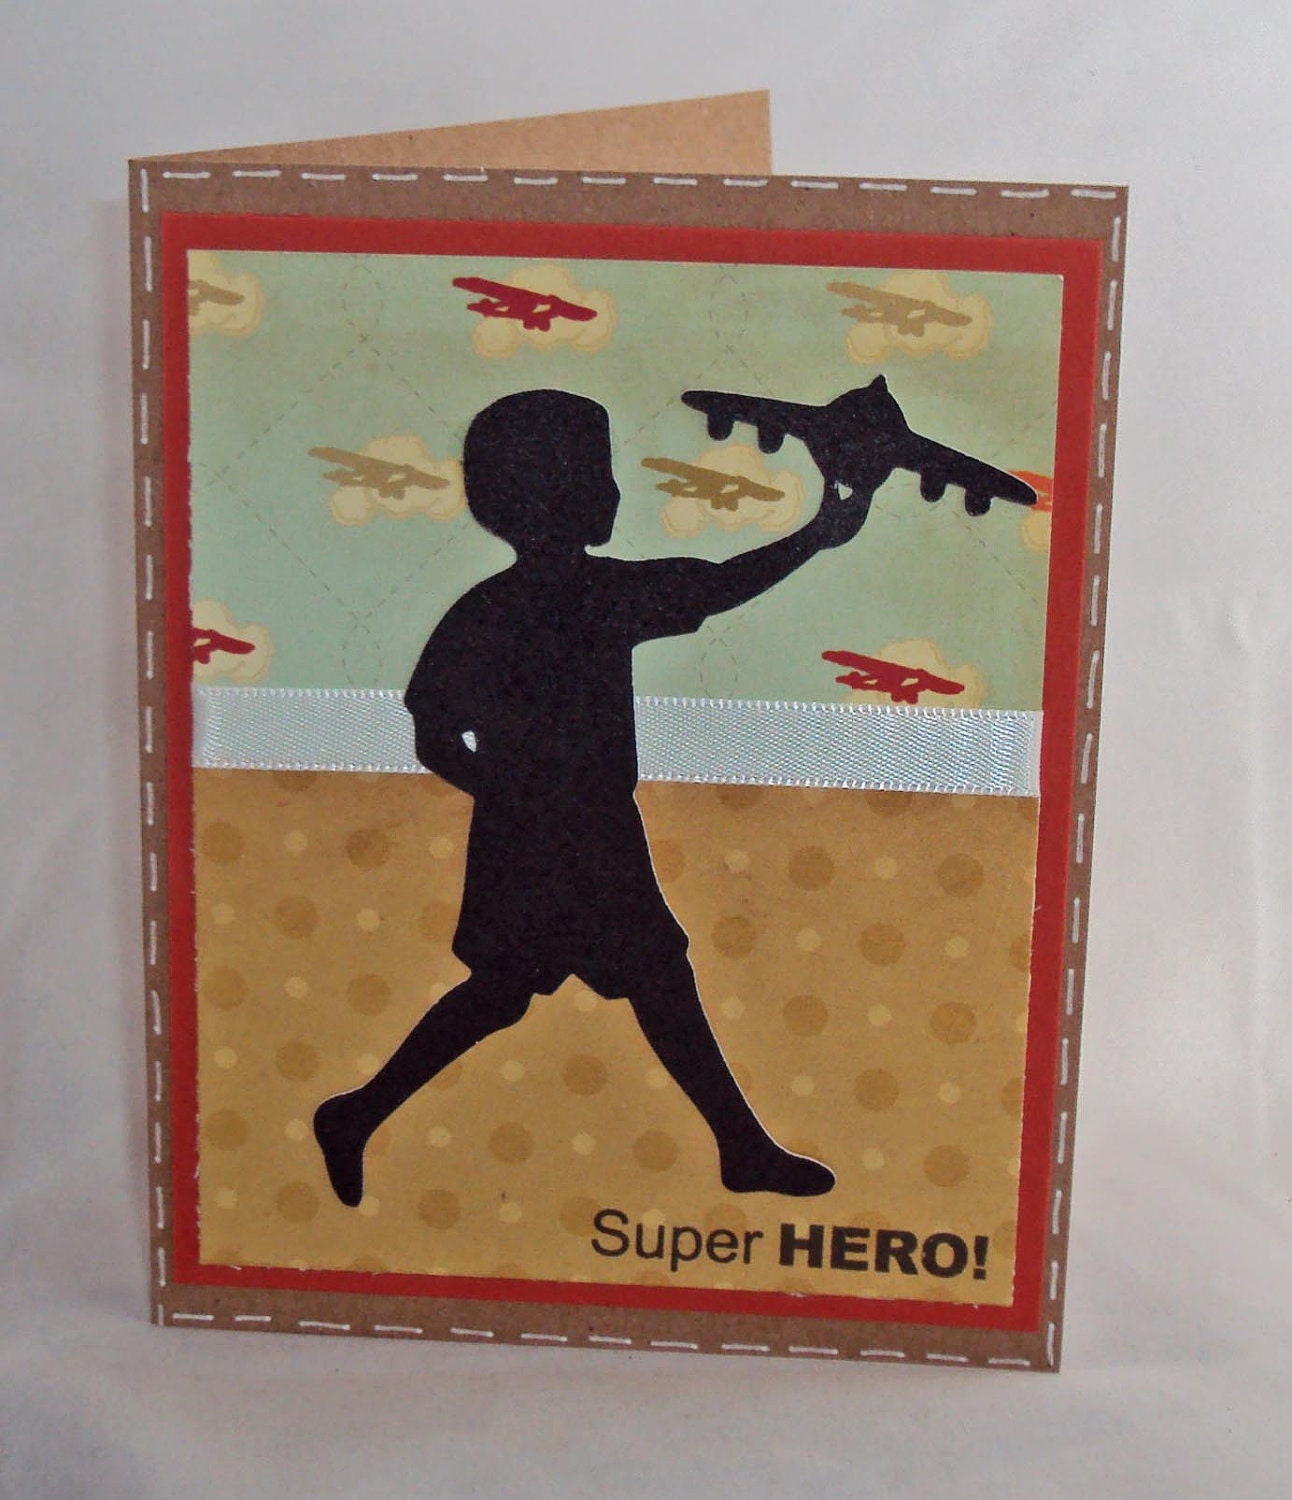
Labels: masucline card, boy, plane
Sunflower Thanks Card
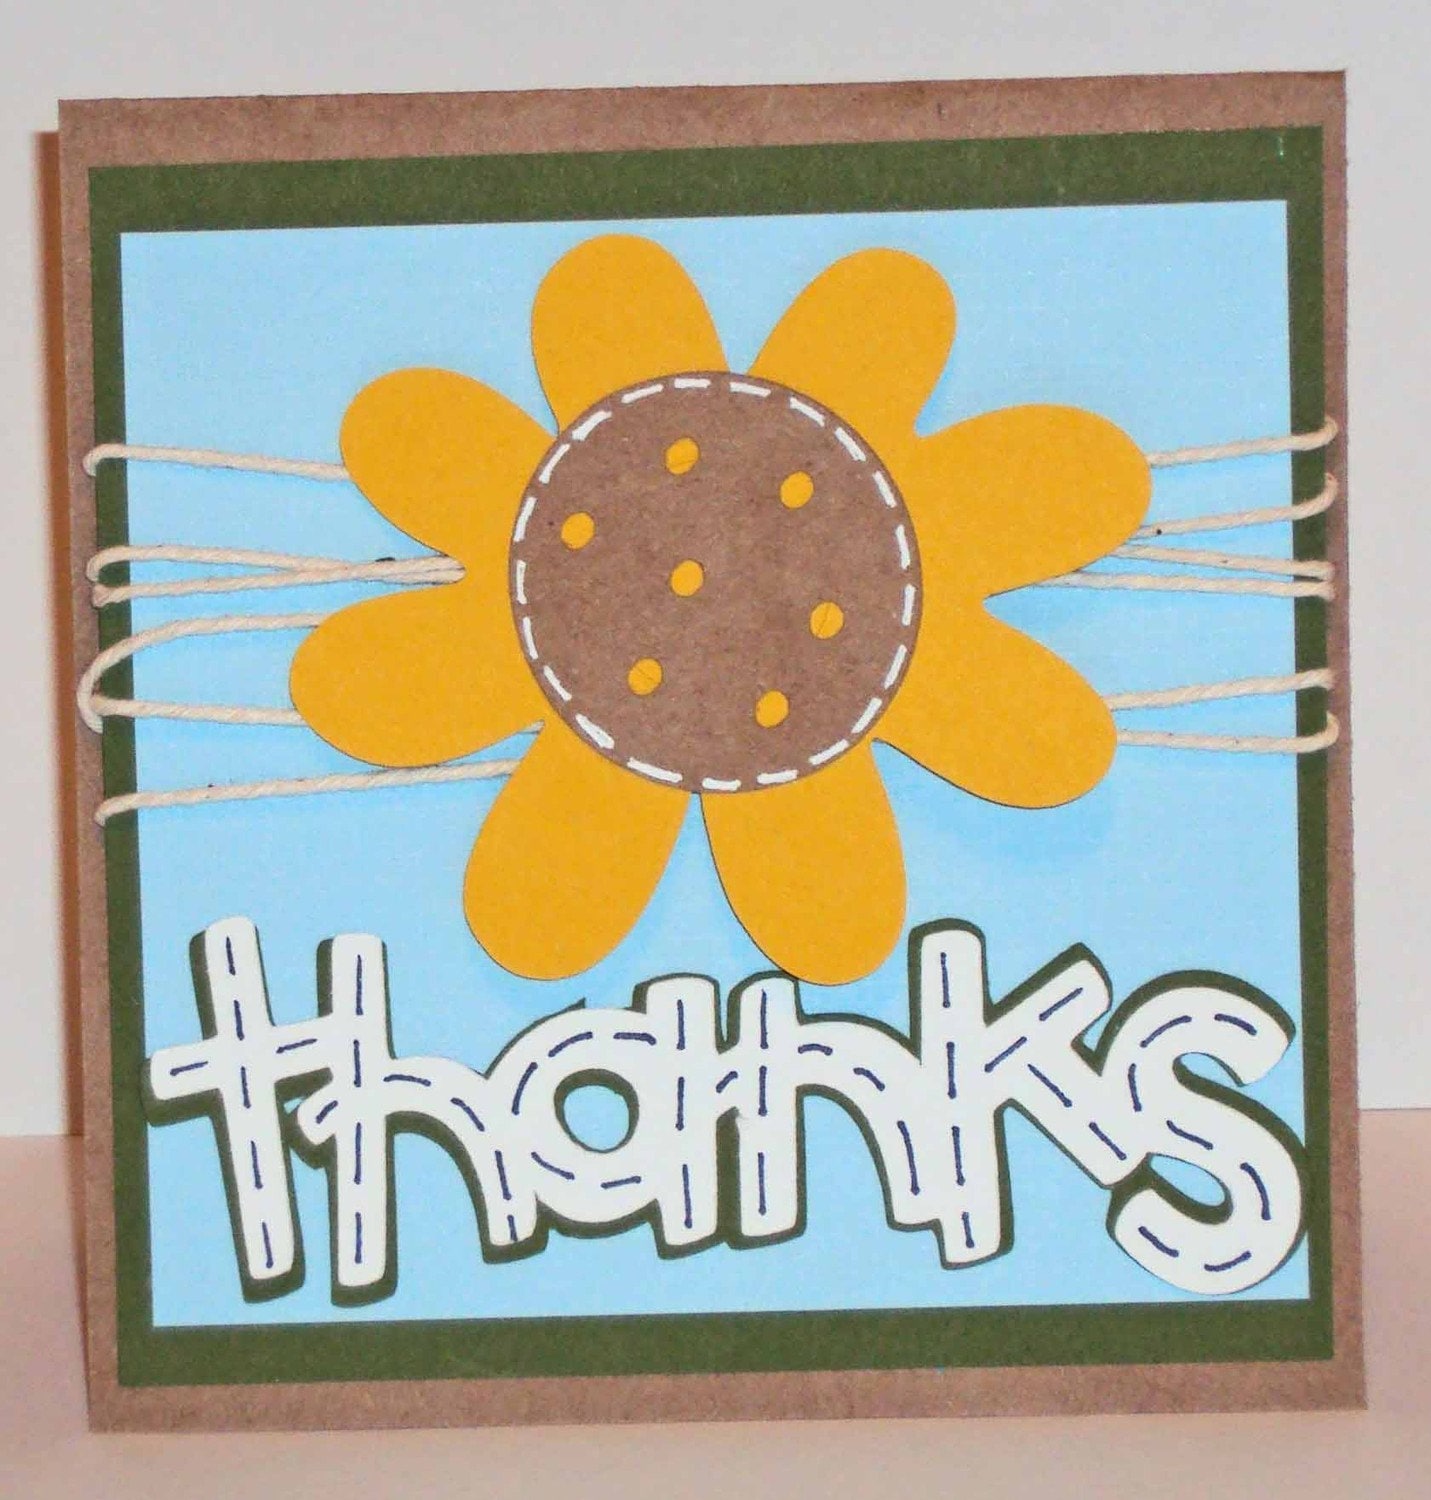
What an adorable thank you card to give someone:)
I love love love this adorable sunflower on the card. It is so stinkin cute and simple.
This card measure 6 inches and was handcut and does not include an envelope.
I have made this card with the highest quailty of cardstock.
I do custom orders, convo me.
Thanks for stopping by;)
I love love love this adorable sunflower on the card. It is so stinkin cute and simple.
This card measure 6 inches and was handcut and does not include an envelope.
I have made this card with the highest quailty of cardstock.
I do custom orders, convo me.
Thanks for stopping by;)
Labels: flower card, thank you card, bakers twine
Valentine Treat
Helloooo! (do I hear an echo?)
Wouldn't be surprised! lol
Sorry it's taken me a bit to get back on here - you know how that goes, dontcha? Life is busy right now, and I just haven't had time to stamp/create.
I'm here today to show ya somethin', though! YAY!
I think it's been 1-2 years since I've made this little treat holder, but I thought it would be fun to make it Valentine themed this time around. :)

It stands just over 3.5" tall.
Well, what do you think?
The Small Print
Cardstock: Real Red, Whisper White
Paper: Sending Love DSP (last year's)
Accessories: Scallop circle punch, 1 3/8" circle punch, Heart to Heart punch, Real Red taffeta ribbon, Crop-A-Dile, Sticky strip
Labels: valentines, heart, scallop circle, treat box
Valentine Ideas - Day 2
Okay, so you'll definitely get yourI've included THREE projects!!
FYI: I didn't think about making this a series until today, but yesterday's post could definitely be part of the series, so we'll just pretend it is, even though it's not titled that way, lol! :)
Boy, I tell ya what...it felt SO good to create today! I've got some things I'm really excited to show you today, so I'll just dig right in! :)
Boy, I tell ya what...it felt SO good to create today! I've got some things I'm really excited to show you today, so I'll just dig right in! :)
Day 1

A 3x3 card, candy packet, and valentine slider.
Want to see some closeup and more details? OK! :)
First, the 3x3 card:
First, the 3x3 card:

Here, I used the set "Filled with Love," carefully coloring the images with my Real Red & Old Olive ink pads. This is actually a single stamp (heart with stem), that I've stamped 3 times. Created my own "love" tag with a random SU stamp to complete the tied linen thread.
Now, the candy treat:

For this idea, I folded a piece of Real Red cardstock over one of our cello bags filled with cinnamon disks. The sentiment is from the same set ("Filled With Love"), stamped in white craft ink. The hearts are from the set "I {Heart} Hearts." With the flourish one, I inked it in red, stamped off once, then inked the edges again and stamped onto whisper white cardstock - just gives it a little variance instead of a solid image. The other heart is inked & stamped full strength onto white cardstock as well.
Finally, the Valentine Slider:

And an open view (pulled out):

Our Real Red cardstock cut, scored, and stamped with "Confetti" in white craft ink. The layers behind the sentiment (from "Filled With Love") are Pretty in Pink, and Pink Pirouette. The heart circle in the middle of the "O" is punched with our 3/4" punch, a pink brad in the center, and up on a dimensional. The "you" is handwritten. The ribbon is Pretty in Pink taffeta. It took me awhile to figure out the dimensions/scoring based on an old example from my stash...hopefully I've got it figured out now, lol! Would you like to see a tutorial on my blog? Let me know! :)
Well, what do you think? Would LOVE to hear from you! :)
Well, what do you think? Would LOVE to hear from you! :)
Be sure to stop by tomorrow, too!
Labels: 3x3 card, valentines card, slider card, heart, love
Day 3

Want more info?
OK! :)
4pc. Hershey's Nugget pkg:
4 nuggets tucked into our small cello bag, folded over,wrapped the red satin ribbon around and up, tying off with our hemp twine. The image is a heart stamped from the set "Filled With Love", then punched with our wide heart punch, and up on dimensionals.
Peppermint Patty Sandwich:

Lots of punches used here! :) I stamped the image from "Filled With Love," punched out with our 1 1/4" circle punch, layered with a Pretty in Pink 1 3/8" punch, and Real Red scallop punch. Attach to peppermint patty with sticky strip, attach another red scallop to the bottom side, making a "sandwich." There are actually a few images from this set that would work in the center! :)
Well, what do you think?
Be sure to come back tomorrow for more ideas! :)
T

Want more info?
OK! :)
4pc. Hershey's Nugget pkg:

4 nuggets tucked into our small cello bag, folded over,wrapped the red satin ribbon around and up, tying off with our hemp twine. The image is a heart stamped from the set "Filled With Love", then punched with our wide heart punch, and up on dimensionals.
Peppermint Patty Sandwich:

Lots of punches used here! :) I stamped the image from "Filled With Love," punched out with our 1 1/4" circle punch, layered with a Pretty in Pink 1 3/8" punch, and Real Red scallop punch. Attach to peppermint patty with sticky strip, attach another red scallop to the bottom side, making a "sandwich." There are actually a few images from this set that would work in the center! :)
Well, what do you think?
Be sure to come back tomorrow for more ideas! :)
T
Labels: valentines card, scallop circle, candy
Valentine Ideas - Day 4
Hello, and welcome to Day 4 in my series of Valentine Ideas!
Be sure to check out the past days, too! :)
Today's project is pretty much the same as one from last year, but I felt that I should share the idea again, just decorated differently! I have more readers than last year at this time, so maybe some of you haven't seen it! :)
Someone asked me for the dimensions awhile back, but I was so sad to tell her that I couldn't find the original! Seriously, couldn't find it - STILL can't. :( However, I found another one decorated for a birthday, so I was able to at least take the outside dimensions & scoring from that.
Ready? OK

Here's a few more views:


Want to know what I did?
Okay, I'll tell ya - it's real simple! :)
3.25" x 8.5" pc. cardstock
Score at 1" and 5"
Fold on score lines.
Staple candy under bottom flap.
Decorate with ribbon to cover staple.
Decorate as desired, and slip top flap into botttom - voila! :)
FYI: Real Red, Chocolate Chip, and Whisper White cardstock. The whisper White cardstock is embossed with our elegant lines embossing folder. I originally stamped the heart from "Filled With Love" onto the red cardstock & punched it out...but thought it looked too busy against the embossing, so I turned it over, and was much happier. :)
That's IT!!
Labels: match book, valentines card, heart

What I love about this (other than the colors, etc) was that you could change the layout so many different ways, but still keep the same elements!
The DSP is called Elegant Soiree, the ribbon is Crumb Cake seam binding ribbon. The cupcake colors are Soft Suede and Baja Breeze. The cherry on top is a stamp colored with SU markers, stamped, then punched out. After attaching the cherry to the frosting with a glue dot, I had the ladies add some dazzling diamonds to it for a little extra somethin'. :)
I had the ladies choose between Soft Suede and Crumb Cake for the scallop circle behind main image.
Labels: birthday card, cupcake, scallop circle
 I love the sof
 Labels: thinking of you, cuttlebug, just be
Can't say I've ever written this on my list, though:

Ha ha ha ha! As a chocoholic, I'm sure I'd love to be able to cross that off my list each day, lol! ;-)
Here's the inside...

It's one of the sets that I *had* to have when I saw it in the Occasions Mini. Called...get this...Eat Chocolate. LOL! :) Wouldn't you love to make this little gift for that chocolate-lover you know? I'm thinking I'll be keeping an eye open for Ghiradelli chocolates to go on sale for that very reason! ;-)
Did you know you can purchase this set through me? Yup, sure can. It'll even be delivered to you! Go ahead, click on the Stampin' Up logo at the top RH of sidebar, and it'll lead you to my SU page. And remember, it's Sale-A-Bration time, which means for every $50 you spend, you can get something for FREE! :)
The Small Print: Eat Chocolate, Early Espresso, Cherry Cobbler, Very Vanilla
Labels: chocolate, match book
Today I'll be showing you the card I made for my sister-in-law.
She's such a sweetheart, a gem of a gal and I'm so glad she married my brother (over 6 years ago). It was her birthday this weekend and I was determined to make her card using her favorite color, green. :)
The thing I hadn't done before was this:


She's such a sweetheart, a gem of a gal and I'm so glad she married my brother (over 6 years ago). It was her birthday this weekend and I was determined to make her card using her favorite color, green. :)
It came together nicely, and I had fun doing something I hadn't done before.
No, silly...not that. If you've been to my blog, you know I've made a card before. ;-)

I'm actually not sure exactly what to call it, since I've heard it a few different ways. lol
Tissue flower? Puffy flower? Fluffy flower?
I like tissue flower. Sounds a little less made-up. lol!
Ready to see the whole card?

To make the tissue flower, I layered the tissue (for giftwrapping) several layers thick, punched out with my scallop circle punch. Scrunched it up, then poked a brad through to hold it all together. I then attached a faux button (NEW Sweet Buttons Embosslit - Occasions Mini) on top of the brad with glue dot! Fluff up the flower, and you're good to go! :)
That's about all! Easy-peasy...don't know why I waited so long to try! I'll definitely be doing more of these!! :)
Labels: birthday card, flower

I still think I'll return to my previous assessment that not spending too much time on kiddo cards is a good thing, lol. I can only hope inspiration doesn't strike again! lol
Well, what do you think?
Labels: butterfly card, cuttlebug

Labels: cuttlebug, heart, love

http://crystalscraftingandrambling.blogspot.com
Labels: masculine card, star, celebrate
Oh, and I love that I was able to use some of my new stuff! ;-)

http://crystalscraftingandrambling.blogspot.com
Well, most of it new to me, anyways.
The BG stamp is Stampin' Up's "Woodgrain", the bird is from Stampin' Up's "Friends 24-7".
The 5/8" satin ribbon IS new...it's in the Occasions Mini catalog. Have you checked it out yet? Oh my....it's WONDERFUL!! So many fun things in there! Go ahead, go to the RH sidebar & click on the pic! :)
Anyways....here's a bit of what I did:
- I lightly colored the main image with my watercolor crayons and aquapainter...didn't want too much color to overwhelm the project. Popped the main image up on dimensionals.
- I sponged the edges, into the BG, and around the main image with Close to Cocoa ink, added a punched out piece of "Thoroughly Modern" DSP behind the clear button, tying the linen thread for the finish!
Labels: masculine card, bird
Here's what I came up with:
...a Praying for You card (with a masculine touch)

http://crystalscraftingandrambling.blogspot.com
The Small Print (All Stampin' Up)
Stamps: Thoughts and Prayers
Paper/Cardstock: To The Nines DSP, Soft Suede, Very Vanilla
Ink: Soft Suede
...a Praying for You card (with a masculine touch)

http://crystalscraftingandrambling.blogspot.com
The Small Print (All Stampin' Up)
Stamps: Thoughts and Prayers
Paper/Cardstock: To The Nines DSP, Soft Suede, Very Vanilla
Ink: Soft Suede
Labels: masculine card, tree
Well, here's today's card:

http://crystalscraftingandrambling.blogspot.com
Sorry about the ribbon...it IS artichoke, the right color, but it shows up funny.
Labels: masculine card, tree

Labels: butterfly card, congratulation card
Texture Fades Embossing Folders By Becky Olsen
Embossing folders have been around for a while, and while I thought that they were cool, I had not jumped into the pool of users because none of the designs really fit my design aesthetic. That all changed for me when I found out that Tim Holtz had designed a product for Sizzix called Texture Fades. These embossing folders are right up my alley, and now of course my collection is growing faster than I can find places to store them!For this project, I designed it to have more of a masculine feel, although it could be given to anyone it is so beautiful! I started with the Regal folder and ran it through my Sizzix with Neenah Solar white card stock.
After removing the embossed paper from the folder I applied Faded Jeans Distress ink to the high points by lightly rubbing and tapping the ink pad across the top. Be careful with this part of the process, if you press too firmly you will end up with ink in the negative space.
Because I wanted more depth and dimension in the project, I applied Antique Linen and Tea Dye Distress inks with my favorite applicator tool, a nice chunk of Cut N' Dry Foam over the entire surface, making sure to vary the amount of ink and colors as I worked.
To embellish I tied some navy silk ribbon around garden twine that I had looped around my hand a few times. The sentiment is from a Hero Arts set called "Thoughtful" and I used Black Archival ink to stamp it onto a Maya Road Kraft Mini Tag. A Tim Holtz Trinket Pin is the perfect finishing detail to attach the sentiment to the bow.
Now for the best part! Not only do I love this card and would love to receive it, but my husband gushed over it too and it was unsolicited! He loved how it was stylish, but a little retro and beautiful without being foofy. Yay!
Labels: cuttlebug, masculine card, thank you card
 click image to enlarge | supplies used in this project: |
Labels: thank you card, flower
So here in NY we are buried in snow, and it is sooo cold outside! Since Christmas day we have been hit with two big snow storms, and more is expected tonight. My daughter is loving it all, and she went sleigh riding for the first time last week. She did not like it much, but really enjoyed throwing snowballs at our Lab, and making Snow Angels. With all this snow I had to make a wintry card


Pink By Design Christmas Wishes: Sentiment-Baby It's Cold Outside (it is zero here today)
Peachy Keen Stamps: Princess Face Assortment PK-640
CuttleBug Embossing Folder: Snow Flakes
Sizzix Tim Holtz Alterations Embossing Folder: Swirls Set
Cardstock: Kraft, and some scraps
Stampin' Ink and Chalk
Color Box Chalk
Prisma Colored Pencils
Pearls, Souffle Pens, Glossy Accents
Labels: snow, peachy keen, cuttlebug, winter frolic
A Warm, A Happy Hello by Sony ChristophStamps: Happy Hello (Verve)Paper: Girl Friday Collection (Cosmo Cricket), Paprika Double Dot (BoBunny), Gypsy Henna (BoBunny), Bitty Box Basics (PTI), Cherry Hill (October Afternoon), Ducks in a Row (October Afternoon), Kraft Ink: Frayed Burlap (Ranger Distress Ink), Soft Suede (SU), Versamark Accessories: Rubber band, Paperclip, Clear and Kaleidoscope embossing powder (Stampendous), Heat Gun, Stickles Glitter, Top Note Die (SU), Big Shot, Pop-Up Dots, Kraft Thread, Sewing Machine, Sponges | Date: 08/13/2010 Full size: 428x516 |
Happy Hello
Labels: hello, top note
June 03, 2008
Pun Fun Enchilada
Enchilada Part I: The note cards begin with a 3 x 3 card base (see note below in red for size update) of Whisper White card stock. I then stamped three of the Pun Fun characters on Blue Bayou using Versamark and heat embossing with White Embossing powder. TIP: Line images like the Pun Fun set are bundles of watercoloring fun . . . however, they look fantastic on their own, too. Crisp and clean. Each card received a little jazz with Blue Bayou Double Stitched Ribbon.
Enchilada Part II: I next used Stampin' Up!'s Spring Break Designer Series paper in a floral pattern to create envelopes from scratch. For the first five minutes, the only scratch was to my head trying to understand these directions but then something finally kicked in. TIP: I always give any new template a try with scratch paper first so I don't ruin the pretty stuff. This ended up quite empowering since the same formula with slightly changed square measurements means I can easily make square envelopes for many sizes . . . even my little 4 x 4's that I can't find envelopes for. TIP: Be sure to adjust your starting square according to your note card size . . . it's final dimensions should be 1/4" larger than the note card. Update 6/5/08: In order for the note cards and envelopes to work with the template below, you will need to make the note cards 2 7/8" square and the envelopes 3" square.
Enchilada Part III: OK, this polka dot pattern was the number one reason Spring Break Designer Series paper first grabbed my attention. It's delicious. TIP: I cut the designer paper to 8.5 x 11 and ran it through my printer using this template, (printing it on the opposite side of the polka dot pattern). Grabbing some paper snips, I clipped it out, made a few folds on the printed template and ended up with a box. Some more Blue Bayou Double Stitched Ribbon "wraps" things up for a charming mini gift set.
Hugs and Pretties . . . Mary
Stamp Set: Stampin' Up! Pun Fun
Paper: Spring Break Designer Series, Whisper White
Ink: Versamark
Cool Tools: Corner Rounder Punch, Heat Tool
The Perfect Touch: Blue Bayou Double Stitched Ribbon, White Embossing Powder
Labels: 3x3 card, 3" card box
MACM –

Morning, all! :)
First this week’s card, I’m still on the birthday card kick. I ended up using Hero Art’s Birthday Sayings stamp set and cut apart the stamp with the three repeating “Happy Birthday” lines. I know some of you are cringing because I took some scissors to the stamp (gasp!), but hey! It makes what I want to do easier and I can always mount them together on the block again if I want to. :)
Anyhow, I also used more of the Modern Homemaker 8×8 paper pad from October Afternoon. I think I love their 8×8 pads because they always include a couple useful polka dot patterns. Seriously, I love dots. Could find a use for them on every card if I wanted to.
NOTE: I cleaned my craft room yesterday. Yay! I’ll be having a blog sale starting in the next couple days. I’ve grouped things into a few different packages and they’ll be priced differently depending on what they are. Watch for details in the next day or so. Things will sell on a first come first serve bases and there aren’t many packages, so if you’re interested in product left over from the Holiday Card Series, Valentines supplies, or various collection packs, stay tuned. Yes, these can ship internationally. But be aware, the paper is heavy and you’ll be paying quite a bit for shipping. :)
So, back to today’s card. Enjoy!
Patterned Paper: Modern Homemaker (October Afternoon)
Stamp Set: Birthday Sayings (Hero Arts)
Ink: Ruby Red, So Saffron, Baja Breeze, and Crumb Cake (Stampin’ Up!)
Edge Punch: Scallop Sentiment (Fiskars)
Corner Punch: Corner Chomper (We R Memory Keepers)
Miscellaneous: Embroidery thread
Watch video below | Watch at YouTube
Morning, all! :)
First this week’s card, I’m still on the birthday card kick. I ended up using Hero Art’s Birthday Sayings stamp set and cut apart the stamp with the three repeating “Happy Birthday” lines. I know some of you are cringing because I took some scissors to the stamp (gasp!), but hey! It makes what I want to do easier and I can always mount them together on the block again if I want to. :)
Anyhow, I also used more of the Modern Homemaker 8×8 paper pad from October Afternoon. I think I love their 8×8 pads because they always include a couple useful polka dot patterns. Seriously, I love dots. Could find a use for them on every card if I wanted to.
NOTE: I cleaned my craft room yesterday. Yay! I’ll be having a blog sale starting in the next couple days. I’ve grouped things into a few different packages and they’ll be priced differently depending on what they are. Watch for details in the next day or so. Things will sell on a first come first serve bases and there aren’t many packages, so if you’re interested in product left over from the Holiday Card Series, Valentines supplies, or various collection packs, stay tuned. Yes, these can ship internationally. But be aware, the paper is heavy and you’ll be paying quite a bit for shipping. :)
So, back to today’s card. Enjoy!
Supplies
Solid Card Stock: Ruby Red and Kraft (Stampin’ Up!); Vintage Cream (Papertrey Ink)Patterned Paper: Modern Homemaker (October Afternoon)
Stamp Set: Birthday Sayings (Hero Arts)
Ink: Ruby Red, So Saffron, Baja Breeze, and Crumb Cake (Stampin’ Up!)
Edge Punch: Scallop Sentiment (Fiskars)
Corner Punch: Corner Chomper (We R Memory Keepers)
Miscellaneous: Embroidery thread
Watch video below | Watch at YouTube
Labels: birthday card, present, bakers twine, scallop edge

When I was cruising around ShopKo the other day, I saw a display of metallic water bottles that were navy, green, aqua and teal and filed it away as a fun color combo to try. Here I pulled out Night of Navy, Pear Pizzazz, Not Quite Navy and Baja Breeze and used my new Tim Holtz Tattered Banners
 No time for chitchat today, so much to do! I hope you have a fabulous day! Thanks so much for stopping by!
Enabler's List:
Stamps: Father Figure, Dad's Day (Verve Stamps)
Paper: Night of Navy, Pear Pizzazz, Not Quite Navy, Baja Breeze, Early Espresso (SU!), Cream
Ink: Not Quite Navy, Pear Pizazz (SU!), Vintage Photo (Ranger Distress)
Accessories: Lime Divine Twine (TCP), Wide Oval Punch (SU!), Crop-a-dile, paper distresser, Tattered Banners die (Tim Holtz)
Labels: fathers day card, masculine card, bakers twine
#1 Dad Gift by Jen TaplerStamps: Dad's Day, World's Best (Verve)Paper: Kraft, Whisper White CS (SU); North Shore DP (Scenic Route) Ink: Riding Hood Red (SU) Accessories: Fry Box die (Sizzix); Ribbon, buttons, scallop border punch (SU); hemp twine; | Date: 05/22/2009 Full size: 525x347 |
Labels: masculine card, fathers day card, fry box, 3x3 card, treat box, bakers twine
Hi friends! It's Monday again and that means it's time for another Mojo Monday sketch. This week's sketch is fairly simple, with room for embellishment, but clean enough for either a masculine or feminine style. I used the sketch and the Dad's Day and Happy Phrases sets to make this Father's Day card for my father-in-law.

As I moved things around in my studio to make room for the new blinds to get installed, I came across this Good Day Sunshine Boy paper from My Mind's Eye and thought it would be perfect for a masculine card. The aqua paper is the same print as the polka dot star, I just ran it through the Cuttlebug with the SU! lattice embossing folder and sponged the edges with Vintage Photo ink. The oval frame from Dad's Day is hand trimmed and I punched out the inner section with the SU! wide oval punch and popped up. The sentiment from Happy Phrases is stamped onto a Charming Banner Die and I embellished with some really cool nailheads from Pizzazz Aplenty.
Not a lot of chitchat from me today. Mark is patiently waiting on me to finish up, so I've got to run. I hope you have a fantabulous start to your week! Thanks so much for stopping by!
Enabler's List:
Stamps: Dad's Day, Happy Phrases (Verve Stamps)
Paper: Good Day Sunshine - Boy (MME), Early Espresso (SU!), Cream
Ink: Early Espresso, Cherry Cobbler (SU!), Vintage Photo (Ranger Distress
Accessories: Charming Banner Die (A Cut Above by Verve), Silver Checked Nailheads (Pizzazz Aplenty), Small Star punch, Wide Oval punch, Circle Punches, Lattice embossing folder (SU!)

As I moved things around in my studio to make room for the new blinds to get installed, I came across this Good Day Sunshine Boy paper from My Mind's Eye and thought it would be perfect for a masculine card. The aqua paper is the same print as the polka dot star, I just ran it through the Cuttlebug with the SU! lattice embossing folder and sponged the edges with Vintage Photo ink. The oval frame from Dad's Day is hand trimmed and I punched out the inner section with the SU! wide oval punch and popped up. The sentiment from Happy Phrases is stamped onto a Charming Banner Die and I embellished with some really cool nailheads from Pizzazz Aplenty.
Not a lot of chitchat from me today. Mark is patiently waiting on me to finish up, so I've got to run. I hope you have a fantabulous start to your week! Thanks so much for stopping by!
Enabler's List:
Stamps: Dad's Day, Happy Phrases (Verve Stamps)
Paper: Good Day Sunshine - Boy
Ink: Early Espresso, Cherry Cobbler (SU!), Vintage Photo (Ranger Distress
Accessories: Charming Banner Die (A Cut Above by Verve), Silver Checked Nailheads (Pizzazz Aplenty), Small Star punch, Wide Oval punch, Circle Punches, Lattice embossing folder (SU!)
Labels: masculine card, cuttlebug, star
A quick little Easter Carrot!

Here's my version:
Use the largest heart nestie and a scalloped circle to fit the top, cut off one part of the heart like this.

I would run these through a cuttlebug folder to emboss at this point, but didn't for these pics.

Glue in the green scallop. You could cut it in half if you want. That is what we did with the SU! one. I added a little red glue tape along the edge to hole it shut.

Labels: carrot treat box, cuttlebug
Vintage Folded Heart
Here's another elegant card perfect to give to a friend to let them know you are thinking about them. It features the new Love Letter Designer Series Paper, the new Petal Card Extra-Large Double Punch, and a new Hostess Level 1 Set. We made this card at my recent Stampin' Club Class too. Enjoy!Labels: valentine card, heart
Gettin' My Green On!
I got my GREEN on
this weekend!!!
Thought I would show off my
little treats that I made for
my co-workers!
I love these and had a lot of fun making them:)
ENJOY!


The sentiment is from Emma's
I Believe in Leprechauns stamp set!
Labels: clover, treat box, st. pattricks day, valentines
Scrappy Mom's Terrific Tuesday Challenge and winner!
Hey everyone! We are on our 2nd challenge over at the Scrappy Mom's Stamps Terrific Tuesday Challenge ((every other Tuesday))..we are having so much fun checking out everyone's projects! I hope you all can join in this week!

So the Cricut cartridge we are using this time around is Sweethearts. This is one of my all time favs, it has some really cute images on it and it goes perfect with the newest set of Scrappy Mom's stamps 'Love Notes'! I love the way this came out, I think it's my favorite card so far this year!

I added Stardust Stickles on the big heart and the one the kitty is holding..I even gave the kitty some glitter eyeshadow! lol..but it's kinda hard to tell.

Make sure you pop over to the Scrappy Mom's blog to check out what the rest of the DT made, you won't be dissappointed!
Labels: valentines card, create a critter, cat, peachy keen, love
Love at first sight Blog Hop
FOR THE LOVE IS IN THE AIR BLOG HOP PLEASE CLICK HERE.
Hello everyone! Welcome to the Love at First Sight blog hop! Today we are helping my big sissy Sandra celebrate when her and her hubby first met 8 years ago. I was so excited when she thought of this idea to celebrate that special time. It was a fun time for her...and I have to admit I wasn't sure where that relationship was going at first, but the two of them are made for eachother! ;)
Ok..so onto the hop! Please start HERE, if you came from Amanda's blog then you are in the right spot!
We were to create a project to give to someone we love..so I thought I would whip something up for my sweet ol' hubby! I altered a candy jar ((he has a BIG sweet tooth so I know he will love this! )).


Isn't this cute! I love the way it turned out! I kinda wanna keep it for myself! lol..
So here's a few details:
I bought the candy jar at Wally world for 3 bucks..I used the Create a Critter cricut cartridge for the 'Nuts about you' and the squirrel, Gypsy Wandering for the scallop circles ((I've been addicted to scallop circles all week!)) and the adorable face is from the Peachy Keen-Wided Eyed and Bushy Tailed assortment and I get my twine from Scrappy Mom's.
LOVE it!
So since this is a blog hop...who wants blog candy!!??? :)

For your chance to win the PK-758 Wide and Bushy Tailed 1-1/8" set please leave me ONE comment on THIS post! Thanks!
Labels: squirrel, treat box, peachy keen, create a critter
Spring Fever Card!
Hello crafty friends. It has been a long week. I have been sick with a sinus infection and had no energy to craft. Today is the first day that I am feeling a little better. The first thing I did this morning was head into my craft room and got to work on a card. All of the snow here in NY has finally melted, the sun is shining bright, and the birds are chirping away. Yes, spring is in the air and no one gets spring fever worse than me! Here is my first spring card of the year:)
Cardstock: Kraft, Stampin' Up & Bazzil
Create A Critter: Grass (welded together), Tulips, and Snail
Simply Charmed: Tree
Doodle Charms: Sun
Peachy Keen Stamps: Simple Sallies Face Assortment (snail) PK-531 and Happy Lashes Assortment (sun) PK-460
Sentiment: "It's a Spring Thing" Pink By Design Simply Everything
Twine: HoneyDew from The Twinery
Tim Holtz Alterations: Swirls Set embossing folder
Color box fluid chalk, stickles, glossy accents, white jelly roll pen
Labels: peachy keen, shape card, snail, bakers twine, create a critter, simply charmed, doodlecharms, cuttl
Take Shape
Good morning crafty friends. I hope everyone is having a great week. I can't believe how fast this month is flying by. Before we know it the kiddo's will be out of school. Now for our challenge...this is Whimsical Wednesday Challenge #6. This week our challenge was to make a shape card. I had a lot of fun with this one. Here is what I created:
 As soon as I saw this jar from Kate's ABC's, it reminded me of when me and my sister were kids and we would catch butterflies, fireflies, and dragonflies and put them in a jar. Did any of you do that when you were little girls or boys:)? I used my Gypsy to weld two of the jars (each 5 inches) together at the top. If you don't have a gypsy you can still make a shape card. Many cartridges have shape cards on them already. You could also cut two of the same shape and then attach them together using a brad or even some ribbon. I cut the grass and bugs (layers for the jar) twice and pop-dotted them to add dimension. All of the cuts are distressed with Close To Coco ink from Stampin' Up. The top of the jar was glittered with German Glass Glitter from Custom Crops. This is the best glitter I have ever used, LOVE it. I tied some hemp cord around the top of the jar, and then tied a Tim Holtz Adage Ticket and a little dragon fly charm, to the hemp cord using Honey Dew Twine from the Twinery. After I finished assembling the card I layered a piece of Grafix Clear Craft Plastic that was cut using the cricut, to the top of the card. It cuts great on the cricut and it really gives a shiny effect and makes it look like a glass jar. Thank you GiGi for telling me about this stuff. It is hard to see the plastic in the above picture so I tried to get a side view:
 A little better I guess. I used double sided sticky tape to attach it because it is practically invisible so you can't see it:)


Labels: shape card, butterfly, kates abcs
Wednesday’s Card: Owl Friend
Jul 21 2010 Published by Darlene DeVries under Card-Making Videos


I can’t believe I ever doubted getting this owl punch. It is now my favorite tool and my top pick for the new catalog!! It is so easy to put together, and when you adhere it to the card using dimensionals, it’s adorable!! I also used the new 2 1/2 inch scallop circle punch, which is perfect around the 1 3/4 inch circle punch. AND, I used the new scallop ribbon punch. All of these new punches are awesome.
I show my husband all my cards. His usual response is “fine”, “nice”, or “mm hmm”. When he saw this card, he said, “cute.” But then when I opened it he smiled and said, “Oh, I like that!”. The owl inside is a bit of a surprise when you open it. I get so excited when I get a good response from him – then I know the card is one of my better ones.
With the new Stampin’ Up! color renovation, I decided to purchase an assortment of each color family. As of right now, I am loving Wild Wasabi and Regal Rose (which by the way is not even a new color – I have rediscovered it!). I also love Riding Hood Red. If you are planning on attending my Open House tomorrow, I will have all the colors for you to see! I even got the new markers so you can try them out. Please RSVP if you haven’t already.
This video is one of my longer ones – sorry about that. I think I was just working a little slower than usual!
Enjoy!
Is the video blocked in your country due to music rights? You can see an audio-swapped version here.
Supplies:
- Stampin’ Up! Cardstock: Crumb Cake, Wild Wasabi, Whisper White, Basic Black, Chocolate Chip, and More Mustard
- Stampin’ Up! Welcome Neighbor 6×6 Pad
- Stampin’ Up! Two-Step Owl Punch
- Stampin’ Up! Woodgrain Stamp
- Stampin’ Up! Owl Together Now Stamp Set
- Hero Arts Trees, Birds, and Messages Stamp Set
- Stampin’ Up! Inks: Chocolate Chip, Wild Wasabi, Crumb Cake
- Stampin’ Up! Punches: 1 3/4 inch Circle, 2 3/8 inch Scallop Circle, Dotted Scallop Ribbon
- Stampin’ Up! Dimensionals
- White Embroidery Thread
- Colorbox Dark Brown Chalk Ink
Labels: owls, friend card, just because card, birthday, digital stamp
Wednesday’s Card: Tri-fold Shutter Owl Party!
Mar 16 2011 Published by Darlene DeVries under Card-Making Videos
")
")
")
")
Hi All!
I saw my first tri-fold shutter card a few weeks ago at Alesia’s house (she is my Stampin’ Up! upline). I thought it was so cool! Well, I went home and searched the web for this fantastic and creative idea. I found out that I have been out to lunch on this one… this concept has been out for a long time and there are tons of examples out there. I found this blog entry (from 2 years ago!) with the measurements and decided to go with it. Creating the base card was actually quite easy. Getting the card all decorated with a theme was what took me so long!
This month is my sister’s birthday, so if anyone deserves a card like this, it’s her. Do you seriously want to know the real amount of time it took me to make this card? Let’s just say that this is the longest video I have ever posted. This card took longer than the pop-ups. I think part of the reason is because I decided to make the first one on video, so I had no practice and no plan. I’m really happy with the way it turned out though – I wanted it to be very festive and colorful. I think she’ll like it!
I decided to create a montage of Norah Jones songs to span the video – I always get a lot of good feedback when I use her songs. Her voice is incredible!
Enjoy and have a great week!
Supplies:
- Stampin’ Up! Two Step Owl Punch
- Stampin’ Up! Party Hearty Stamp Set
- Stampin’ Up! I {Heart} Hearts Stamp Set
- Stampin’ Up! A Slice of Life Stamp Set
- Stampin’ Up! Rough Type Alphabet Stamp Set
- Stampin’ Up! Woodgrain Background Stamp
- Stampin’ Up! Inks: Daffodil Delight, Old Olive, Pacific Point, Melon Mambo, Chocolate Chip
- Stampin’ Up! Ice Cream Parlor Designer Series Paper
- Stampin’ Up! Inks: Chocolate Chip, Pumpkin Pie, Pacific Point
- Versamark Ink
- Stampin’ Up! clear and white embossing powders
- Stampin’ Up! Hemp Twine
- Stampin’ Up! Heart to Heart Punch
- Stampin’ Up! Full Heart Punch
- Stampin’ Up! Acrylic Blocks
- Yellow Embroidery Thread
- Stampin’ Up! Smooch Pearlized Accent Ink, Illuminate Top Coat
- Stickles
Labels: birthday card, tri fold card, owls, digital stamp
Thrifty Thursday--Distress for Less
Today I'm going to share a tip that I use to try and save money in my paper crafting addiction. I try not to buy specialized items that are only for one purpose, but I love the looks of some of the products and tools so I try to balance getting the look without spending the money. I'm going to share a Thrifty tip with you and I hope that you'll do the same! I love to make my dollar stretch so please share your money saving tips here too.
I love the look of distressing, but I don't want to buy more specialized products for one technique...My solution? Use what I have in unique ways. I have MANY pairs of scissors, and they each get used for something else: I have one pair for ribbon, one for paper, one for adhesive, and one for paper distressing. The one I use for paper distressing is a fairly small pair, the whole scissors is about 6 inches long and the blades are about 3 inches long. I open the scissors completely and hold the paper tight in my left hand while I scrape the scissors along the paper with my right hand. This gives a wonderfully distressed look. Rather than buying expensive distressing inks, I usually use brown chalk. The key to chalk is to seal it so that it doesn't smear and wipe off. I use a VERY LIGHT layer of hair spray to set the chalks. Here is a sample of both techniques on a card I made quite a few months ago.


Labels: masculine card, thrifty techniques, cuttlebug
A2 Gift Box and Cards
Today's tutorial is a stationery box made from one sheet of 8 1/2 x 11" cardstock. Follow these steps to make a great gift for someone special, shower door prizes, or to just organize your cards.
 Here is a box I've made to house some masculine birthday cards. Each box will hold 6 standard A2 cards and envelopes.
 Here is a picture of the box open and the cards that I have inside.
 Start by gathering your supplies for the box.
 - paper cutter with scoring blade
- scissors
- bone folder
- sticky tape
- corner rounder (optional)
Step 1:

- Place your piece of cardstock on the cutter with the 8 1/2" side along the bottom and score at 1", 1 3/4", and 7 3/4"
- Turn the sheet so that the 11" side is now at the bottom and score at 3/4", 5 1/4", 6" and 10 1/2"

Step 2:
Fold each score line with your bone folder
Fold each score line with your bone folder

Step 3:
Now your cardstock should look like this. the brown sections in the photo listed A, B and C are sections that you will completely cut off
Step 4:
You will but two tabs on the opposite site from where you removed letters A and C (see photo below)

 Step 5:
Now apply sticky strip to the small tabs you just cut as well as the two larger tabs labeled below as 3 and 4
The photo below shows the sticky strip placement on the tabs labeled 1, 2, 3 and 4
 photo below shows the sticky strip placement on the tabs labeled 1, 2, 3 and 4
Step 6:
Using the corner punch, round the edges of the tab to the left of the label "4" (See photo below)


Step 7:
remove the protective layer from your sticky tape and start forming your box. Once the two small tabs are secured, tuck the corner rounded edge inside so that it assists in squaring your box prior to adhering tabs 3 and 4

Here is your completed box!
You can see my opening the box (the rounded tab slides inside the box to close it)


Here are the cards tucked neatly inside.

Another look at the box and the cards.
The color scheme I used was Chocolate Chip, Old Olive, Whisper White and some cards used Soft Suede.
I completed a vertical and horizontal card for each set of stamps that I used.
Labels: stationary box, masculine card
used the embossing folder sponged with white craft ink to replicate the pattern and colors in the bedding.


I used Close to Cocoa for the base, a piece of Kraft (Crumb Cake) for the embossed piece which measures 4 x 5 1/4", Then I used the stamp set Elements of Style from Stampin Up! for the image and the sentiment on Kraft colored cardstock. I ran the flowers through my Cuttlebug with the circle Nestabilities and then used the circle scallop Nestabilities with Chocolate Chip as the layer behind the image. I used the small oval scallop punch (also from Stampin Up!) with Chocolate Chip for layering the sentiment. For the final touch, I added a piece of sheer polka dot ribbon underneath the sentiment. I'm pleased with the end result.


Thanks for stopping by, and happy stamping!
Labels: just because card, cuttlebug, masculine card, wedding card
So many different and beautiful cards you have shared...thanks you share it with us.Gift Card envelopes.
ReplyDelete