
free bag gift card holder tutorial, paper crafting instructions, downloads
http://scrapboo
http://scrapboo
Bag and Gift Card Tutorial
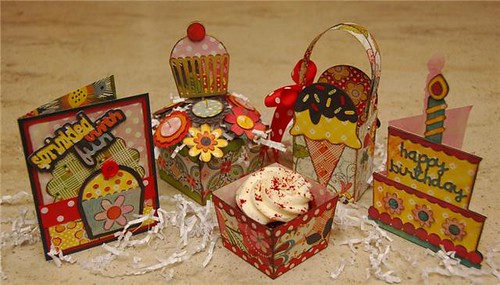
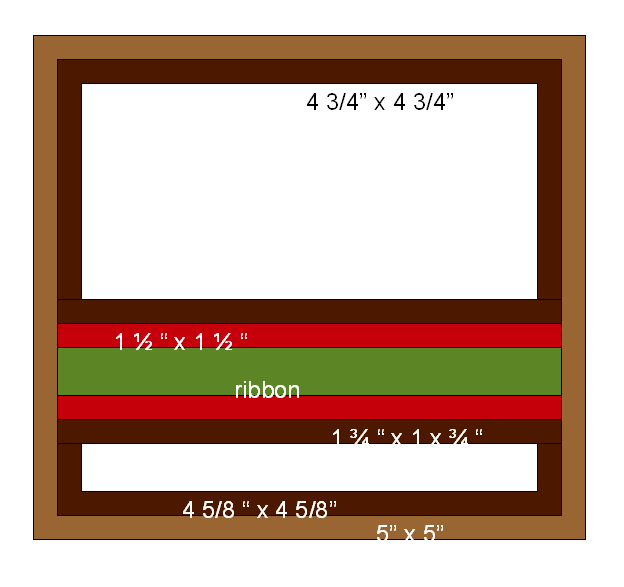
Box Instructions When done properly your piece should look like the photo below. Step #1: Taking your 3” x 12” piece of paper, score at 4”, 6” and 8”. Crease all your folds with a bone folder. Create a pocket in the center and adhere the outer edges. Cut the middle fold. This is where the gift card will slide in and hold in place. |


Labels: gift card holder, treat box, movie, score pal, birthday card, christmas
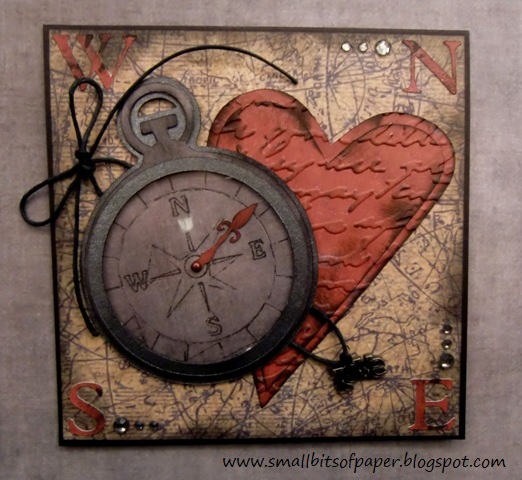
Compass Valentine
This week at Fantabulous Cricut, we are challenging you to make use of your neglected cartridges. I have a few cartridges that are still in their original packaging and (as I've mentioned before) one of my goals this year is to use what I've got. However, for this challenge, I opted to go with My World - a cartridge that has been opened but used only once and is not yet on my sidebar's labels list. Papers are designer cardstock from a set I got at Costco, a piece from Michaels' open stock, and metallic silver cardstock.
I made this card for my husband. I used My World to cut the compass. I cut the shadow and two cuts of the main image using the blackout feature. Then, on another layer, I hid the contours for the outer cuts and used a gel pen holder in my Cricut to draw the face of the compass. I was a bit disappointed, and had to do this five times - still with rather unsatisfactory results as most contours were not being drawn. I tried a number of different methods and finally ended up hand-drawing a good portion of the compass' face. However, with all the inking on the card, I decided that the uneven lines added to the charm of the overall look.
I also cut a circle silhouette from George and Basic Shapes using the same metallic cardstock which I had used for the shadow. I cut a full circle out of transparency too. These were positioned over the top layer of the compass to give it the look of a glass cover. I adhered these with small little pop dots. The needle of the compass was cut from Gypsy Wanderings and I used markers and ink to colour a tiny brad to match. I am so pleased with how the compass turned out!
I cut the heart and its shadow from a single piece of designer cardstock using George and Basic shapes and inked the edges to give some separation. After adhering the heart to its shadow, I ran it through the Cuttlebug using the script embossing folder. I did a bit more inking over the embossed script as well.
I also cut N, E, S, and W to use in the corners of the card and cut them from the same designer cardstock I had used for the compass needle and heart. These were cut from Plantin' Schoolbook and were inked. Initially, I had the N in the top left corner but then remembered my days of orienteering back at summer camp and realized that the needle of a compass always points north! As the needle is pointing to the heart, I quickly changed things to make sure everything was just right.
 I added a little heart charm tied to black hemp and positioned it behind the compass. A few silver gems were also added to finish off the card.
For the inside of the card, I created the sentiment in Microsoft Word. I did a bit of inking on the paper and finished things off by added some photo corners punched with an EK Success punch.
 Head over to Fantabulous Cricut and show us what you can do with those dusty cartridges! I would love to see what you can create!
 |
| (Sorry for the bit of glare. The compass was SO difficult to photograph.) |
I also cut a circle silhouette from George and Basic Shapes using the same metallic cardstock which I had used for the shadow. I cut a full circle out of transparency too. These were positioned over the top layer of the compass to give it the look of a glass cover. I adhered these with small little pop dots. The needle of the compass was cut from Gypsy Wanderings and I used markers and ink to colour a tiny brad to match. I am so pleased with how the compass turned out!
I cut the heart and its shadow from a single piece of designer cardstock using George and Basic shapes and inked the edges to give some separation. After adhering the heart to its shadow, I ran it through the Cuttlebug using the script embossing folder. I did a bit more inking over the embossed script as well.
I also cut N, E, S, and W to use in the corners of the card and cut them from the same designer cardstock I had used for the compass needle and heart. These were cut from Plantin' Schoolbook and were inked. Initially, I had the N in the top left corner but then remembered my days of orienteering back at summer camp and realized that the needle of a compass always points north! As the needle is pointing to the heart, I quickly changed things to make sure everything was just right.

For the inside of the card, I created the sentiment in Microsoft Word. I did a bit of inking on the paper and finished things off by added some photo corners punched with an EK Success punch.

Labels: valentines, compass, heart, my world, george and basic shapes, plantin schoolbook, gypsy wonderings
Mini Gift Bag

Small Pieces of Scrap booking Paper or Card
+
Japanese Masking Tape and Twine
=
Sweet Gift Bag

Here is a template showing the dimensions I used. You will need a piece of scrap booking paper that measures 8 1/2 x 4 1/2 inches. Cut to size (refer to template below) and fold along dotted lines. The twine/string was cut at 4 inches. I used 1/4 inch width double sided tape to join the sides and base.


I love cute stationery supplies and made some apple inspired pegs while Sarah was baking. I covered some wooden pegs (clothes pins) with Japanese Masking tape, and then added a sweet apple die cut (using the Preserves Cricut cartridge).


The larger peg had a piece of adhesive magnet added to the back so that it can stick to the magnetic board in the craft room. The pegs would also look sweet on gift bags.


The larger peg had a piece of adhesive magnet added to the back so that it can stick to the magnetic board in the craft room. The pegs would also look sweet on gift bags.

You might also like:
Labels: apple, preserves
Christmas Pillow Box - Easter Seasonal Cartridge - Provo Craft Community
http://communit
http://communit
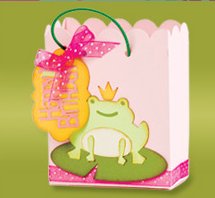
I have made a series of pillow boxes to put at everyone's place setting for Christmas dinner. I don't have the Design Studio software, so just covered up the bunny cutout with a strip of festive red/white polka dot paper. I used Very Merry Tags for some of the Christmas embellishments. I am going to fill them with cellophane bags filled with holiday coloured M & M's.   | ||
| Back to top | ||
Labels: christmas, favor box

Labels: birds, friend card, nestebirds
nestedbirds.jpg (JPEG Image, 535x433 pixels)
http://www.mygr
http://www.mygr

Labels: nestebirds, birds, anniversary
0929+Melissa.jpg (JPEG Image, 479x325 pixels)
http://www.mygr
http://www.mygr

Labels: nestebirds
St Patricks Day Cupcake Wrapper Freebie - Freebies - St Patricks Day Cupcake Wrapper Freebie - MY
http://www.mygr
http://www.mygr

Labels: cupcake wrapper, st. pattricks day, clover
Crafting with Katie: Ladybug Birthday Tag
http://www.craf
http://www.craf
Ladybug Birthday Tag

My niece Sarah is turning 7 tomorrow, and I wanted to make a tag to match the wrapping paper on her gift. I cut a tag from Sweet Treats at 5" and added a 2 1/2" ladybug (real size) from Just Because Cards. The white at the top of the tag is a layer, but I added another layer at the bottom that I edged with the Martha Stewart Ribbon Loop Punch.

Labels: tag, lady bug, sweet treats, just because cards
Crafting with Katie: A Quick Thank You
http://www.craf
http://www.craf
A Quick Thank You

You can never have too many thank you notes in your stash! For my design post for Creative Critterz Imaginations this week, I made a simple thank you note with my Imagine. The patterns and colors are all from the Lori's Garden cartridge. My flower was cut at 3.5" from Forever Young and run through several different Cuttlebug folders. For the patterned rectangles, I used a rectangle from Designer's Calendar, estimating the size I would need, and then just cut them down a bit to fit my card. The larger pink pattern is cut at 4" x 5 1/4", and the text pattern is cut at 3 1/4" x 5".
If you're sure an Imagine owner, be sure to join in our first Creative Critterz Imaginations challenge this week. Anything goes, and we're giving away an Imagine Blast Off cartridge!
Recipe:
8 1/2" x 5 1/2" Papertrey Ink Kraft Cardstock, scored at 4 1/4"
Bazzill White Cardstock for Imagine Cuts
Cuttlebug Swiss Dots, Polka Dots, & Seeing Spots Embossing Folder
Papertrey Ink "Asian Fusion" Stamp Set, True Black Ink, & Melon Berry Swiss Dot Satin Ribbon
ColorBox Cat's Eye Chalk Ink
Labels: flower, cuttlebug, forever young, designer's calendar, thank you card
A Spring Birthday Card

Welcome to my post for Craft Junkie Too's Crafty Designers! Today we are sharing spring projects. My mom's birthday is tomorrow, so I thought it would be fun to make her a card with some bright, springy colors. When I saw this newsprint background stamp from Papertrey Ink, I had to have it, since the date on it is her birthday! Well, maybe not the year, LOL!

My flowers were created with button and flower dies, and they are popped up on foam squares. The Papertrey Ink dies work great with the Cuttlebug! I added one more flower to the inside of my card, along with a sentiment.

Labels: flower card, cuttlebug, birthday card
RUTHIE

The “Cute as a Bug” stamp comes from Joy’s Lots of Pun stamp set.
I used the Wild Card cart for the card shape and inlay circles. The card was cut at 8″ x 4.18″ and the striped inlay circle was cut at 3 1/4″, both were cut using my Gypsy. The worm and flowers were cut from the April Showers Cricut cart.
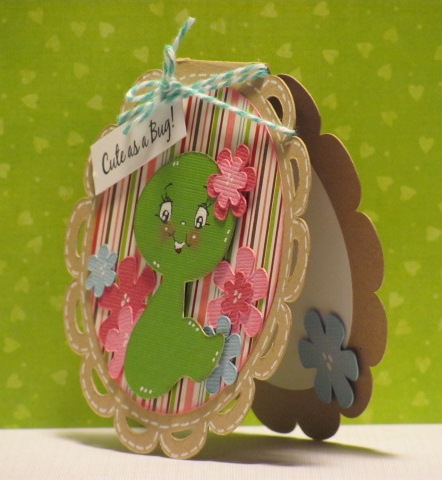
The worm was cut at 2 1/2″ and the flowers were cut at 1″, 3/4″, and 1/2″. The papers are DCWV and Bo Bunny. The twine is from The Twinery and the worms face is from Peachy Keen Stamp’s new stamps set PK-450 Wide Eyed Kids Face Assortment.

You can visit Ruthie at her blog: http://www.septemberninth.blogspot.com
KYLE
Labels: wild card, bakers twine, peachy keen, april showers, worm, flowers, scallop circle, shape card
Houses Built of Cards: Bakers Twine
http://housesbu
http://housesbu
Had cherries on my brain lately! I know, kind of random - maybe I'm just wishing for summer!
But I had this the red polka dot background (from Lacey Labels) cut out recently for another card, and didn't use it. It just looked SOOO perfect for a cherry card! So I stamped the cherry from the August 2010 Kit of the Month in black, red, and green, cut out the cherry in red and the leaves in green, and pop-dotted them on the black one. Added a sentiment from the June 2009 Kit of the Month, some Baker's Twine, and some doodles.

Labels: cherries, lacey labels, bakers twine
Houses Built of Cards: Bakers Twine
http://housesbu
http://housesbu
So...all the cuts are from Nate's ABC's...one of my all time FAVORITE cartridges!!! (I can't wait to get Kate's ABC's!!!) I welded the letters on my Gypsy using the font on Nate's ABC's, and covered them with Glossy Accents. The snail and the dog have some dots on them, and then I pop-dotted them from the background. Added some corners cut from my Fiskars corner punch, with a bit of Glossy Accents on them as well, and finished by using zip dry glue to attach some Baker's Twine around the edges.


Labels: boy, nates abcs, dog, snail, bakers twine
Houses Built of Cards: Peachy Keen Sketch Challenge - Cherish today
http://housesbu
http://housesbu
done!
Used Birthday Bash for all the cuts, and some of the new release Peachy Faces (LOVE THEM!). Ran the circle background through the Cuttlebug, added some Baker's Twine, a sentiment from Pink by Design, and lots of faux stitching. Finished off with a sweet pink bow along the side. Thanks for looking - have to be short and sweet...gonna go watch a movie with my hubby!

Labels: peachy keen, mouse, birthday bash, cuttlebug, bakers twine
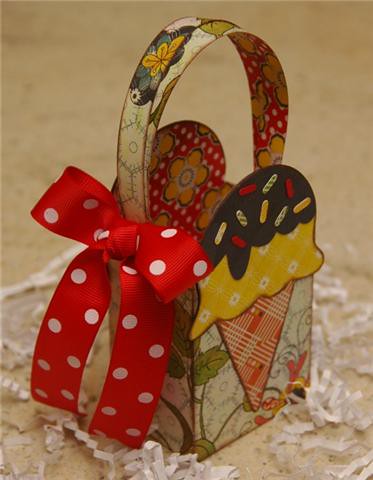

Labels: treat box, ice cream cone, birthday card


Labels: rocket, car, cake, teapot, ladybug, lamb, thank you, birthday card, just because cards
DIY Spa Birthday Party Invitations~
It's a big birthday for the Princess this year. She's turning 8! To celebrate we decided to throw a Spa party. We're going to have a whole gaggle of little girls over to be pampered...facial masks, painted nails, the works!Of course, every great party starts with a great invitation. And since I was making the invitations anyway...the blogger in me decided to photograph the process so that I can give you all a tutorial on how to make cute Spa Birthday party invitations. You know, just in case you should ever be throwing a Spa party. ;-)

These invitations were adapted from some I found on Martha Stewart.com... because I believe in giving
credit where credit is due.
First up: The Supplies
 You will need:
 colored cardstock - now, I just happened upon some cute oval notecards at Target that I knew would make my life easier for this project. They were just the right size, in the right colors, and they included envelopes. So I bought two packages.
stick glue - my glue of choice when doing paper crafting.
scallop edge scissors
regular scissors
ribbon
ribbon
Next: The Process:
1. The first thing I did was cut out a template. I should probably have done this using printer paper or something. But because I trust too much in my mad skills, I just started cutting one of the notecards. Then I ended up having to fold it in half to get it even, so I couldn't use it. Luckily, I had more cards than I needed, but HELLO?

2. Then I traced the template onto the other cards. You will trace as many as the number of invitations you are going to make. (makes sense, right?)

3. Cut out all the pieces you just traced. Since you probably wont be using notecards like I did, you will also want to cut rectangular pieces of cardstock in a coordinating color that are big enough to glue the cut pieces on and still have a border around the edge.
4. Now cut lengths of ribbon. I cut them long enough so that they could actually tie around a person's head. Of course you can cut them shorter if you so choose...just make sure that they are long enough to fit across the width of your sleepmask and still have ribbon dangling on both sides.

5. Using the stick glue, cover the back of your cut pieces entirely, then put a stripe of glue across the approximate center of your rectangle (remember I'm using the oval notecards...that's why there's no rectangle pictured). Lay the ribbon across the stripe of glue and then place the cut piece over the top.

6. Now using your scallop edge scissors, cut the rectangular piece to the same shape as the cut piece leaving approximately 1/4 inch showing.

7. Tie a card with the party details onto one of the strings.

8. Stuff your finished invitation into a cute envelope for delivery.
There you have it. Easy peasy Spa-themed invites. Enjoy!
Labels: shape card, spa, scallop edge, template
CROSS MY HEART PAPERCRAFTS by GISELLE VARELA
http://crossmyh
http://crossmyh
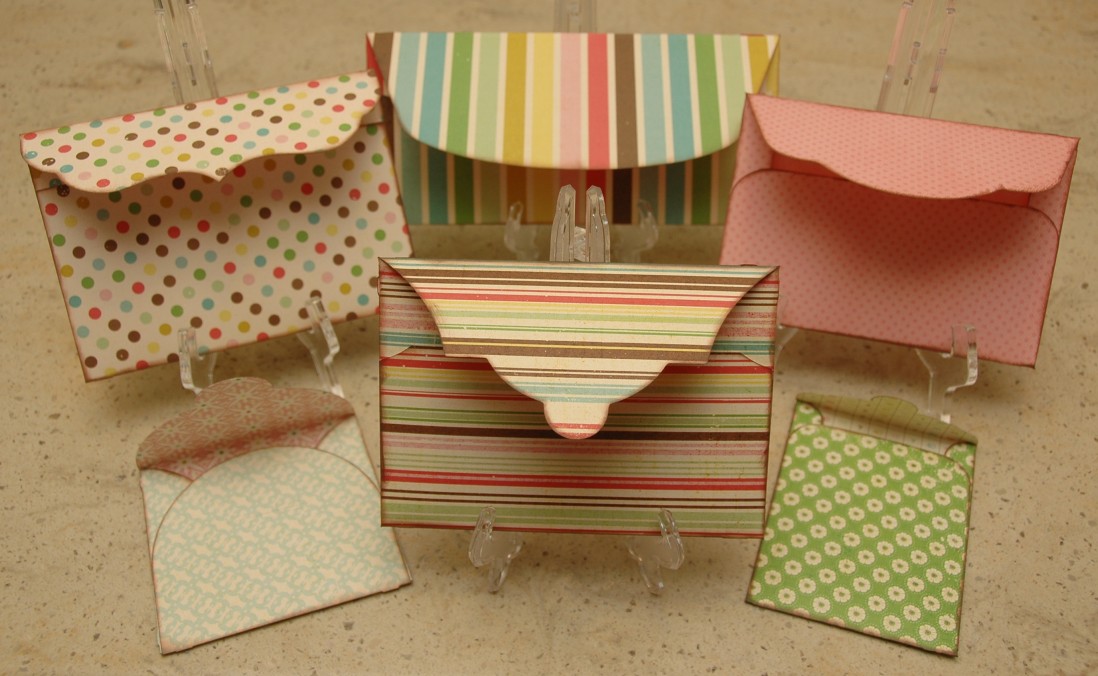
Hello everyone! Welcome to the Love At First Sight Blog Hop hosted by Sandra 365 Days Of Cricut. If you are here from STEPHANIE than you are in the right spot. If you just arrived here and would like to start from the beginning please go to Sandra 365 Days Of Cricut. For this blog hop Sandra is celebrating her anniversary of when she met her hubby 8 years ago "It was Love At Fist Sight", also her 7th wedding anniversary, and of course Valentine's Day! She has asked us all to make a Love-Themed Gift for someone that we love. For my project I made a stationery set :) ***OPPS.. I FORGOT TO MENTION I MADE THIS FOR MY MOM :)


I loved how this project turned out, it is very time consuming though. I learned to make this project HERE. The tutorial is awesome.
I used the Imagine More Cards and Better Together to decorate my note cards, a2 size cards and tags.
 |
| Here you can see the mini notebook, the tiny envelope to keep stamps or notes and the mini pen :) |
 |
| 3x3 note cards, tags, and 4 1/4 x 5 1/2 cards with envelopes |
UNDATED ***** I added a few details to the cards*****
*****
I loved how this project turned out, it is very time consuming though. I learned to make this project HERE. The tutorial is awesome.
I used the Imagine More Cards and Better Together to decorate my note cards, a2 size cards and tags.
Labels: love, cupcake, gift box, birthday card, tags
CROSS MY HEART PAPERCRAFTS by GISELLE VARELA
http://crossmyh
http://crossmyh


This image is from a sample print out I received on the mail, it is from the original Imagine Enjoy the Seasons cart ( I wish I had it <3 ). I hand cut the imagine to the best of my abilities and inked the edges.

This little gal was cut at 3 inches from page 32 on Create a Critter. The "nut" (also from the same page was cut at 1.5 inches).


The "nut" inside the card was cut at 3 inches.

Hope you are having a fabulous Wednesday!! It's the middle of the week, the weekend is almost here :) yay!!!
Hope you enjoyed my card. Thanks for visiting! Hugs.
Labels: squirrel, create a critter, birthday card
Here's my card:


I embossed the sentiment using MS white embossing powder.

Hope you enjoyed my card :)
Labels: snail, white embossing powder, birthday bash, birhtday card
Friday, August 21, 2009
WEEK 4: Fancy Card Friday with Mickey & Friends!


Hi, this is Joy and I am making this week's Fancy Card! Well, it wouldn't be Disney week if Mickey Mouse didn't make an appearance! I thought he would look so cute driving to the North Pole! I have loved this car from the MICKEY AND FRIENDS cartridge and have been dying to use it on a card! After some testing, I decided to create the card at 5" x 7" to make a nice large car and Mickey! There are lots of layers and pieces in the Mickey cut and the car cut that are tiny so the enlarged size helps!

The first thing I did was to cut the Mickey (mickey2) from the MICKEY AND FRIENDS cartridge at 3". I started with a black foundation layer, then added the face, gloves and eyes, and then pants. I didn't bother with making the shoes because they would not be seen, since Mickey was driving! Mickey's Santa hat is actually from the POOH AND FRIENDS cartridge and it is cut at 3/4" using red and white glitter paper.
Here's some good tips when cutting Mickey:
1) Work from large pieces to small. So, add the face before you add the white pieces for the eyes. These white pieces are TINY and you will need tweezers. A couple ways to stick them down include running them through the Xyron OR using a Zig 2-way glue pen. I actually used both methods, depending on the size of the item.
2) Always do a test cut with scrap paper to make sure the sizing is right. Do this before you cut with your real paper - you'll be much happier that way!
To make the car, I used MICKEY AND FRIENDS again and cut it at 3 1/2". I cut the shadow and foundation layer in black and then layered the pieces onto the car. I used silver paper for the front grill and tire parts (paper from Target). Then, I used new Bo Bunny paper in a dotted white on red for the body of the car. I thought it was fun! The seat and tires were cut in black and the lights were cut with white glitter paper. The convertible top was cut with white as was the center of the car's grill. I layered some of the black pieces on black and it does make a difference and gives it dimension.

When I was done with the car and Mickey, I went ahead and cut a slit into the edge of the car door with an exacto knife so I could slide a small portion of Mickey into the car - giving the illusion that he is driving! I cut the Mickey down so I could fit him through the slit.


To make the snow, I used glitter paper from a small glitter stack I got from Hobby Lobby and then ran that through the Cuttlebug using the swirl folder. Then, I tore the paper at an angle and overlapped them to fit the background paper (new Bo Bunny). I had seen this snow technique on another blog (can't remember which but I will look and give credit when I find it!). I thought it was amazing!
I cut the sign post from the MICKEY and FRIENDS cartridge out at 3 1/2" in both striped paper and black paper (cut as a shadow). At first, I used the striped paper but then I didn't like that look and thought it was too busy. I would have liked a candy cane striped paper but I couldn't find one so I went instead with a red glitter paper. I cut the arrows out at 3 1/2" and then stamped with some very small alphabet stamps from Michaels to make the "Orlando" and "N.Pole" words.

Finally, I pop dotted the car onto the blue snowflake background paper (new Bo Bunny paper cut at 4 3/4" x 6 3/4") and then mounted that whole thing onto a piece of new red Bo Bunny paper cut at 5" x 7" and then mounted the whole thing on a 5" x 7" card. I stamped the little "merry Christmas" on the inside.
Labels: mickey, snow, car, christmas, Mickey and friends, cuttlebug
Welcome to Fancy Card Friday!! Today, I have two cards using Designer's Calendar and Christmas Cheer.
The first card is made using the new and FANTASTIC Designer's Calendar. I have to say I love this cartridge. It has so many possibilities, including things you can use to make Christmas Cards!

This card was something I had sketched a few weeks back when I got this cartridge. It was something I was determined to try.
The '25' is cut at 2 1/2 " and 'December' is cut at 1 1/4".

The circle and scalloped circle were cut using the mini monograms cartridge. The scallop was cut at 4" and the corresponding circle was cut at 4 1/2".
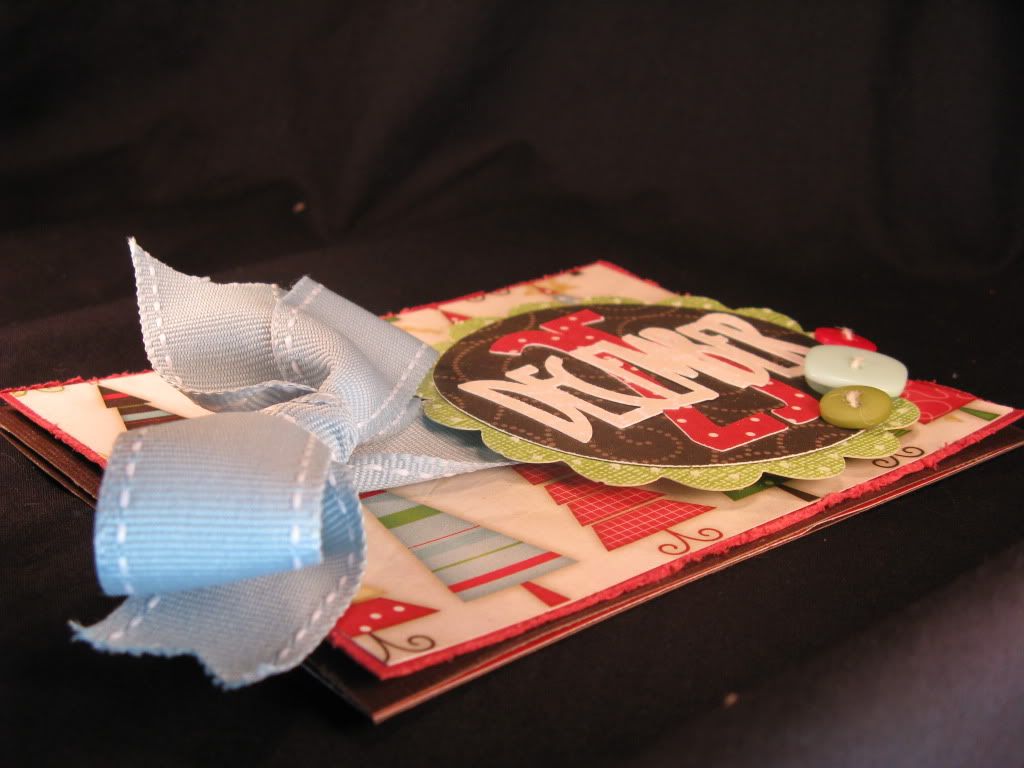
The patterned paper used was Bo Bunny 'Tis the Season'. All cardstock used is Core'dinations. The red paper layer has been roughed up using a distressing tool. That way, I could bring out its beautiful core! The cuttlebug Swiss Dots folder was used on the scalloped circle and was distressed.
Here is the sketch:
The second card I made using the Christmas Cheer cartridge.
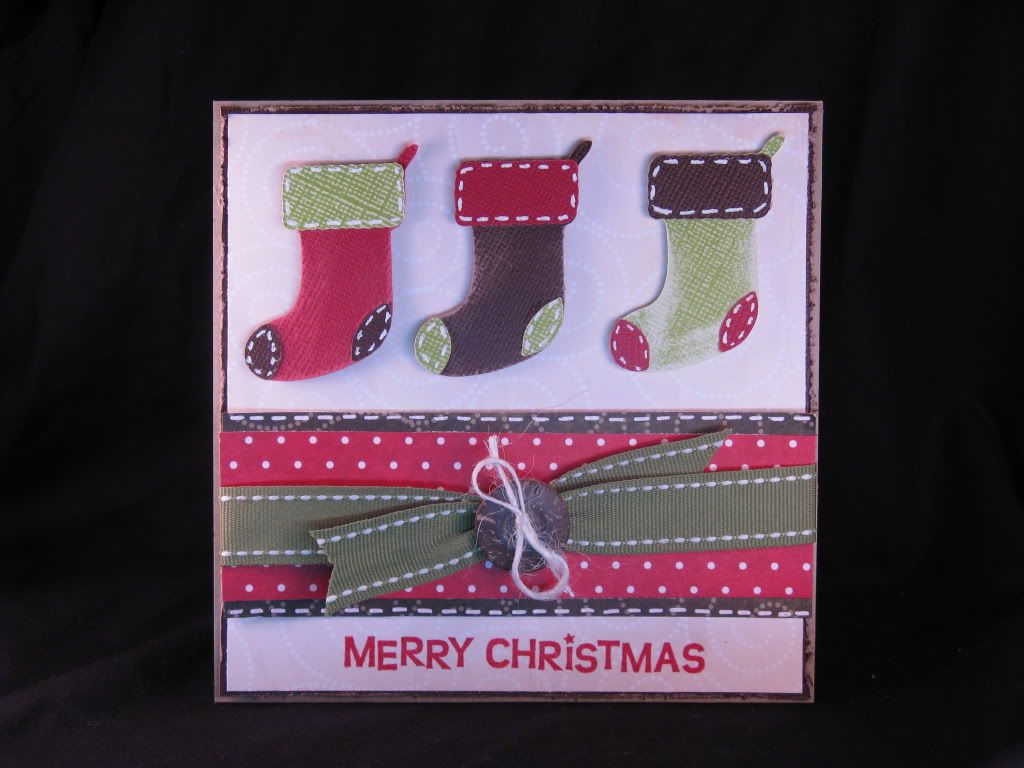
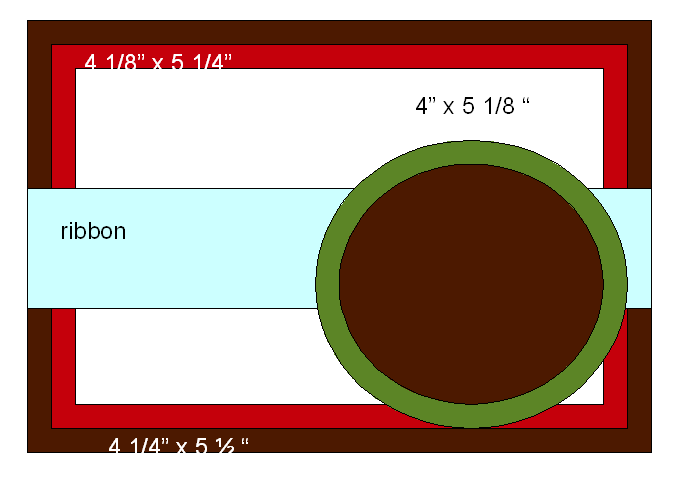
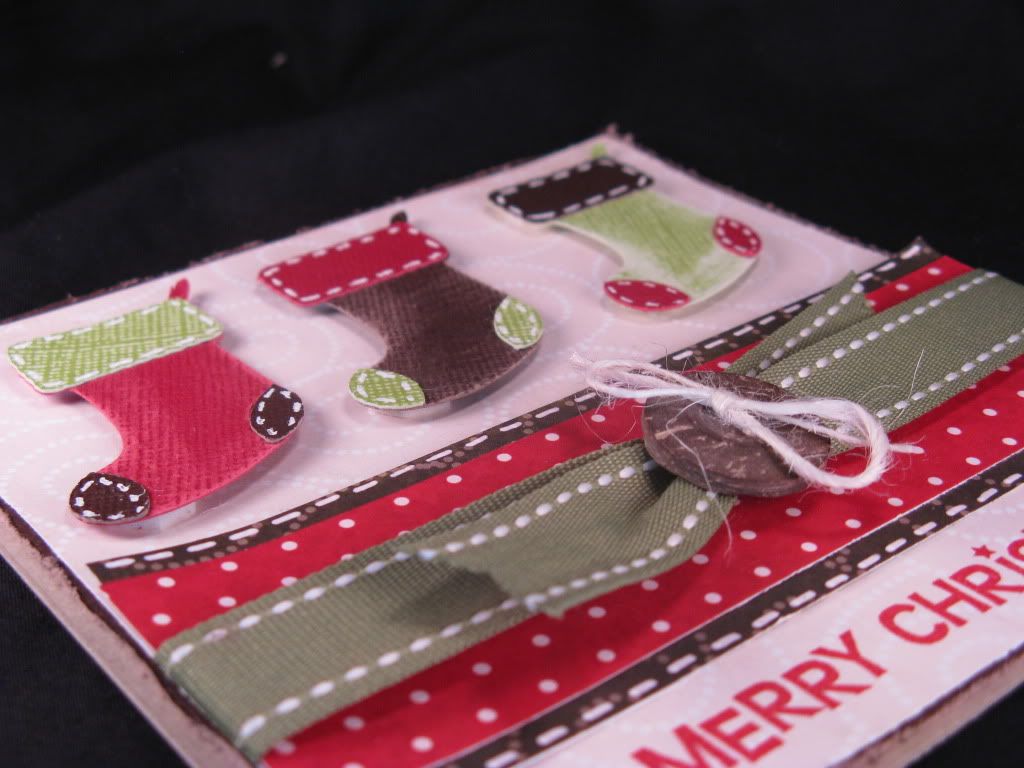
The stockings were cut at 2 1/4".
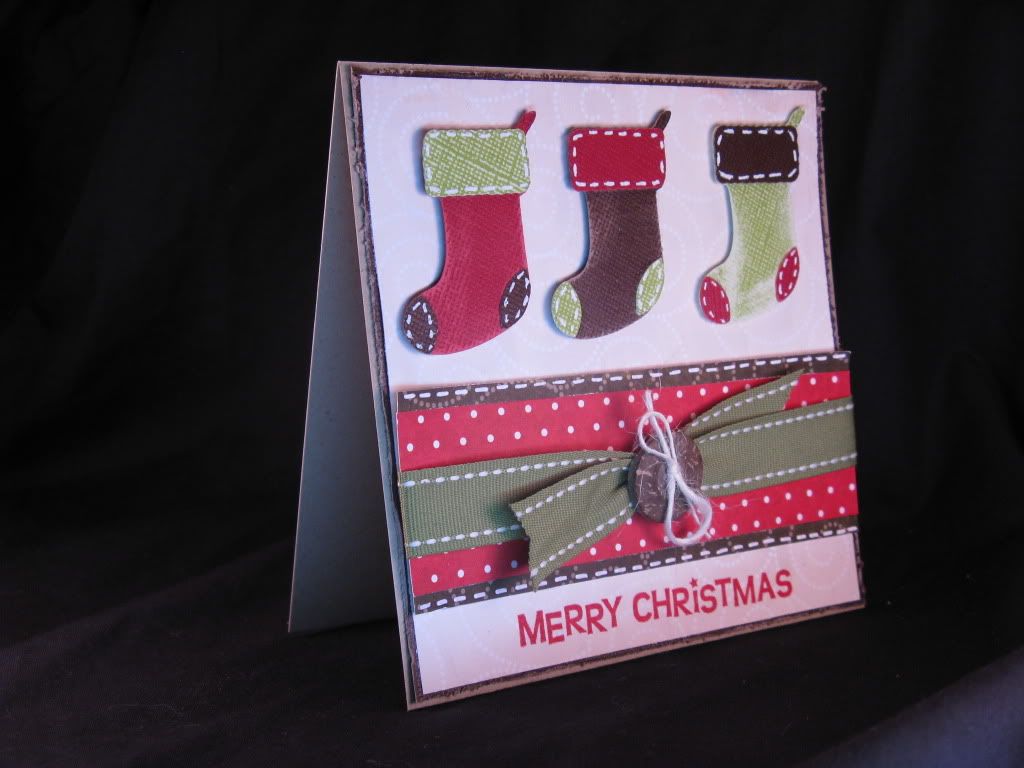
The patterend paper used is ...you guessed it, 'Tis the Season' by Bo Bunny. The ribbon and button are from Papertrey Ink. The stamp sentiment is from the 'Holiday Trinkets' stamp set from Close to My Heart.
Here is the sketch....
Thanks so much for stopping by today!! Make sure you leave a comment so you have an even better chance of winning the Designer's Calendar cartridge.
Labels: christmas card, heart, christmas cheer, cuttlebug, mini monogram, scallop edge, circle, stockings, designer's calendar


Labels: birthday card, flower, frog
I had 3 different challenges on my list that I wanted to get to, and due to busy schedule at the moment, I was able to combine them all into ONE!!! It was a challenge, and took a bit of a stretch to accomplish it - but I really like the results.
The first challenge was the Cricut Circle weekly challenge, which had to include at least 3 cuts from the Cricut, but they all had to be from the cartridges that came with your Cricut or Gypsy. So, the flower border and sentiment both came from Gypsy Wanderings, as well as the two rounded corner rectangles. The butterfly was built out of 2 hearts, an oval, some circles, and some little squiggles all welded and shaped on my Gypsy, and all from Plantin Schoolbook - a cartridge I don't use nearly as often as I should.
The next challenge was the Peachy Keen sketch challenge with a twist - the twist was to use a monochromatic color scheme. I have been struggling with that one since I saw it - cause that one is HARD for me!
The third and final challenge was a Love Bug challenge at Double Click Connections. And for that, obviously, the butterfly!
I also ran the bottom rectangle through the Cuttlebug, added some bling, a bit of black inking, some doodling and faux stitching, and pop dotted the butterfly, flower border, and sentiment. Almost forgot - also used a Peachy Keen face for the butterfly, and added a little bow with some Baker's Twine!!!


Labels: birthday card, peechy keen, plantin schoolbook, butterfly, cuttlebug
Good friends are like stars...
I am so happy with how this card came out! It was really simple, and just used my Unity Stamps from the January Kit of the Month. Only added some baker's twine for the bow, some stick on pearls, a little faux stitching, and pop-dotted the stars after stamping them and cutting them out. I think what I love the best is how the colors mesh together so perfect! Anyway, thanks for looking!

Labels: stars, birthday card, bakers twine
So...I cut the card base from Wild Card (a sadly neglected cartridge as of late!), cut the center from Preserves and used the Cuttlebug on it, and cut the word "love" from Home Decor with some Glossy Accents over it. The black hearts I hand cut after stamping in white with one of my grab bag Unity Stamps. I pop-dotted 2 of those when I stuck them down (the second picture shows that a little better). Added a bunch of faux stitching, some Baker's Twine, a couple of tiny Prima flowers, and some stick on pearls.


Labels: shape card, scallop edge, heart, musical notes, wild card, bakers twine, preserves, home decor, cuttlebug, glossy accents, valentines card
February 15, 2011
Quick and Easy Gift Bags!
Today's post shows how quick and easy you can make gift bags for your family and friends using regular bags from Michaels (or even repurposing bags!) and your Cricut!
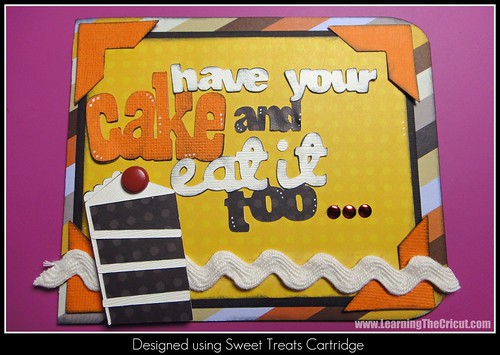
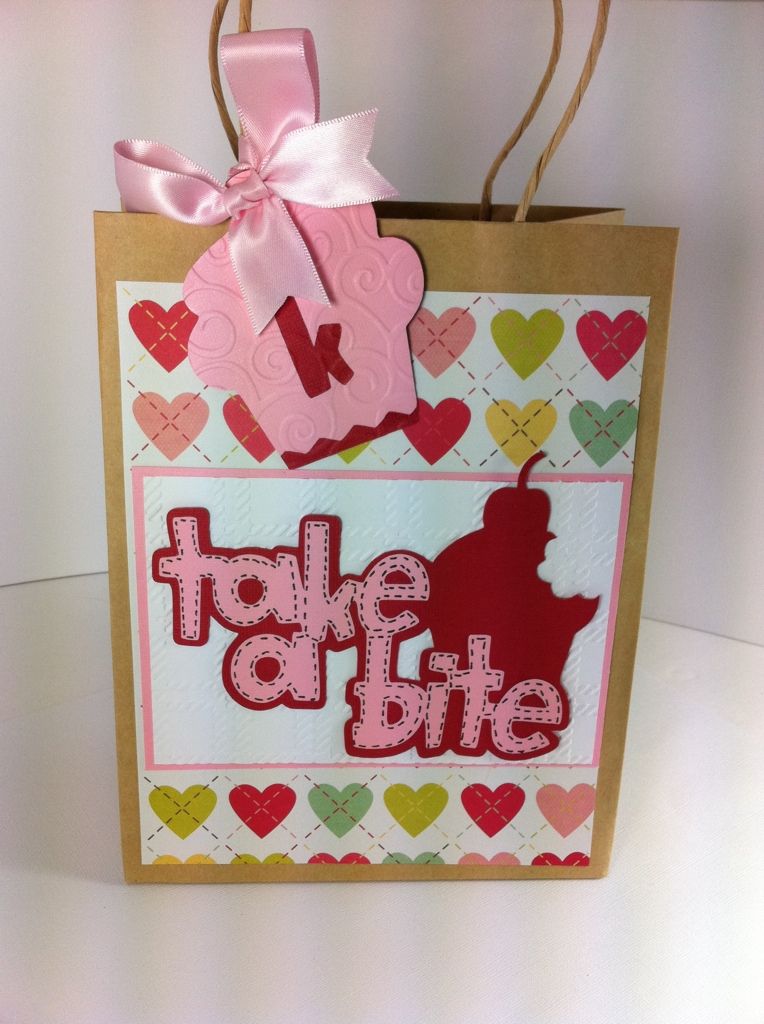
I made the bag above for my daughter for Valentine's Day and put some candy in it for her. She's now in middle school and the days of Valentine's parties are over....I can't believe it! I used paper from the WRMK (We R Memory Keepers) Valentine's stack and the Cupcake Cricut Lite cartridge (at Walmart online and in stores). I love this shaped word art!
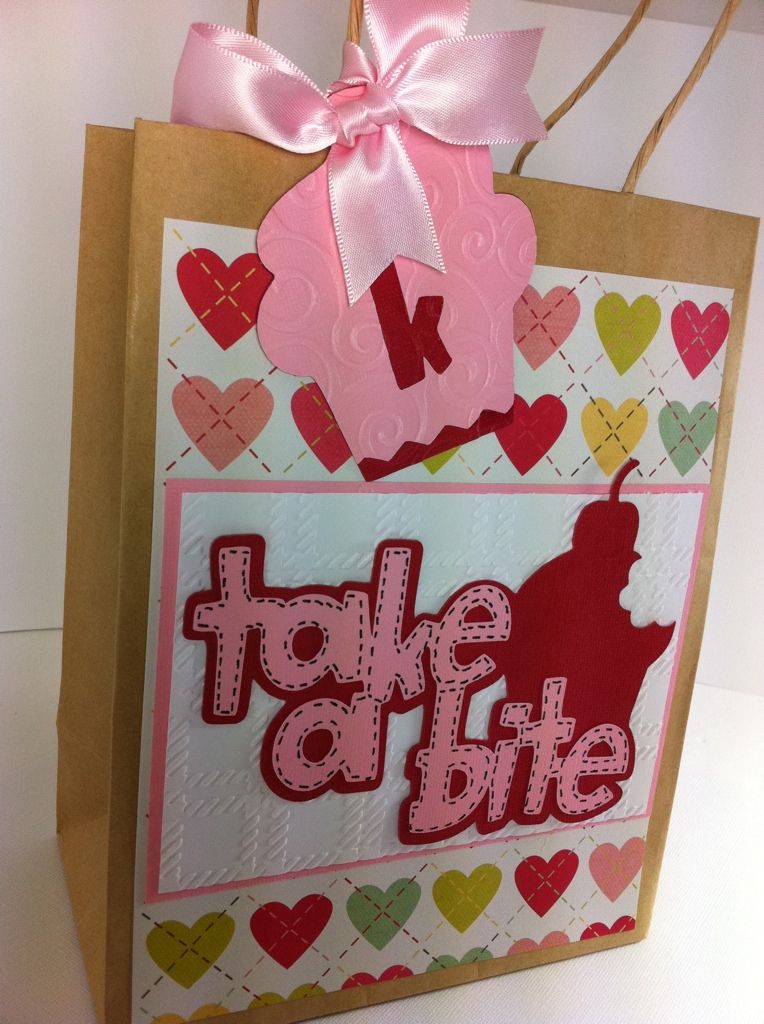
I cut the "take a bite" word art at 3-1/4", both layers and then used black pen to add some stitching. I cuttlebugged the background with the large plaid Cuttlebug folder and then layered it with pink. I used a bag from Michaels that measured 9" x 6" (approximately). Ribbon from Michaels.
The cupcake shaped "K" is from the Cupcake cartridge and is cut at 3-1/4". Then I embossed it using the Cuttlebug and the Divine Swirls folder.
I made this bag for my son using the Street Sign Solutions cartridge cut at 2-1/2". Heart was from Plantin Schoolbook at 2-1/2". Ribbon by Stampin Up! Same concept as above. I love how quickly this went together.
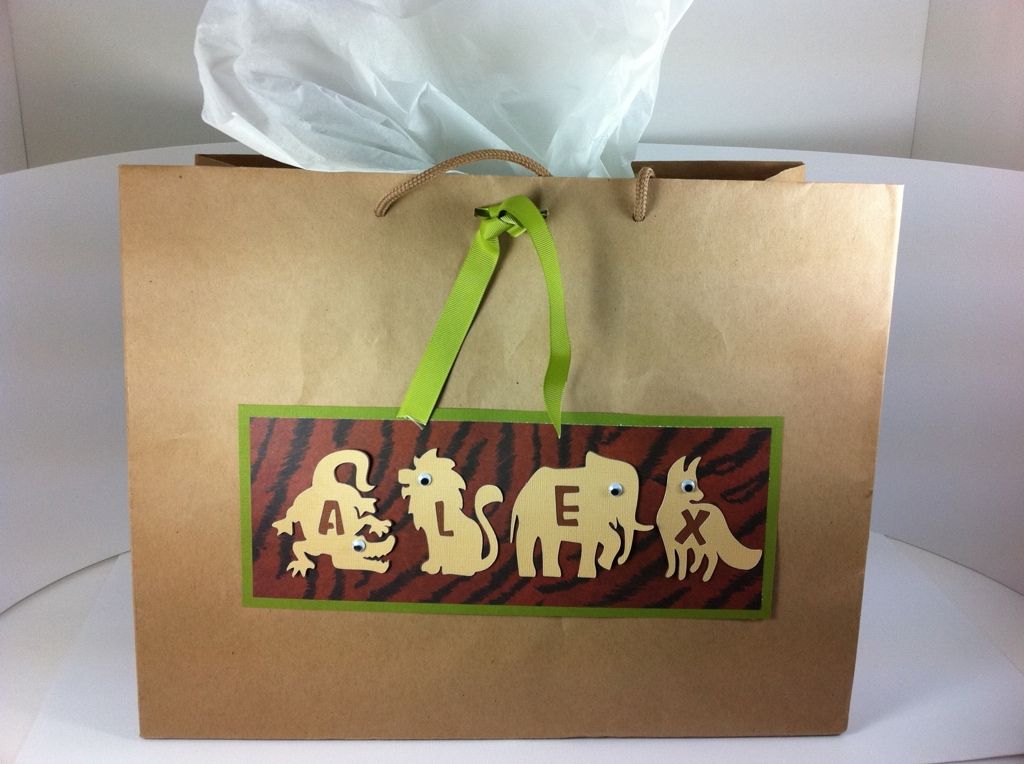
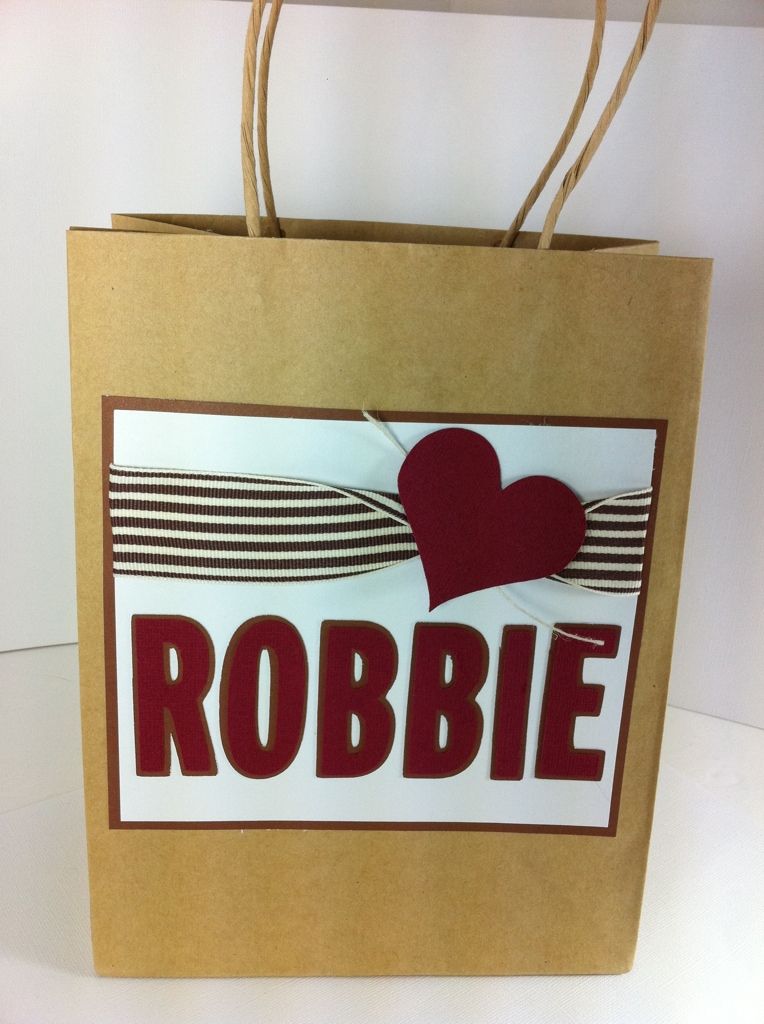
This last bag was a repurposed Coldwater Creek bag. I used Zoo Day and cut the animals at 2-1/4" using the child's name. Wiggle eyes felt like a fun addition.
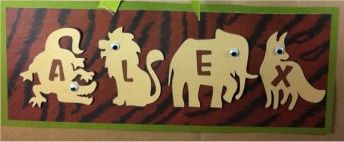
So, here are three quick ways to make fun gift
Labels: gift bags, zoo day, plantin schoolbook, cupcake, street sign solutions, cuttlebug, cupcake cartridge
Bee Happy Sentimentals Card!
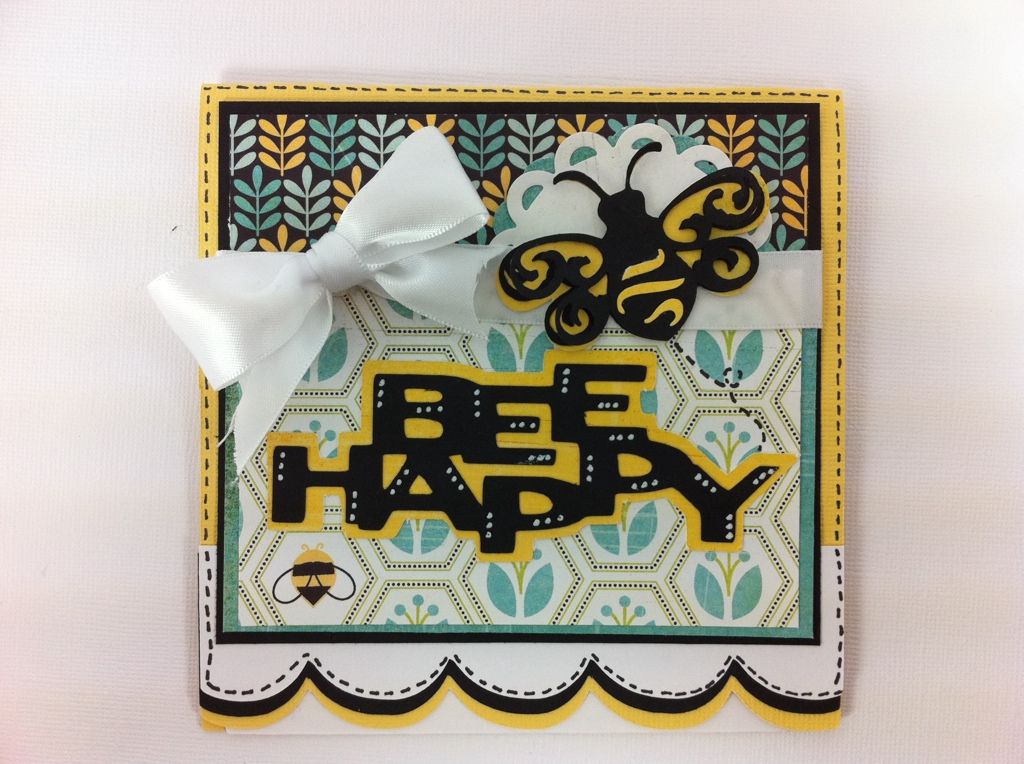
While making Friday's card using Sentimentals, I came across this bee and the word art, "bee happy" and thought it would make a fun card for today's simple card Monday. In fact, the more I studied the Sentimentals cartridge, the more little gems I found on it!
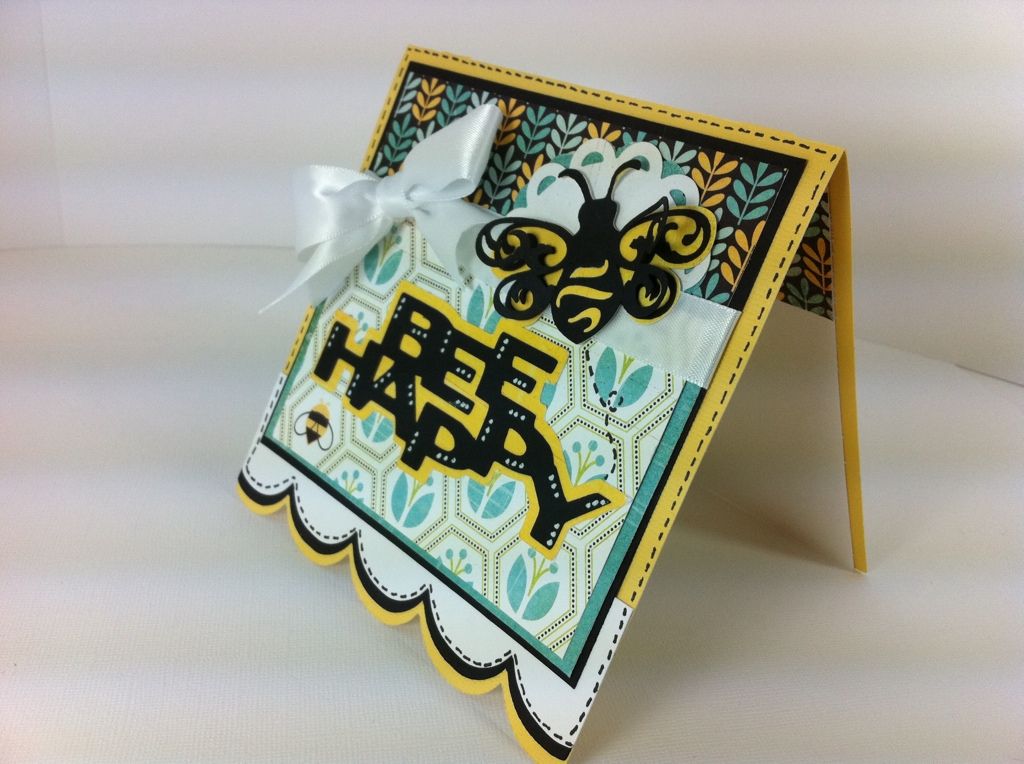
Today's square card was cut at 5" using the Card feature and the "label1" on page 68 of the Sentimentals cartridge handbook. I cut the card three times using yellow, white and black cardstock. Then, I trimmed down the white and black sections to make an additional scalloped border along the the yellow edge.
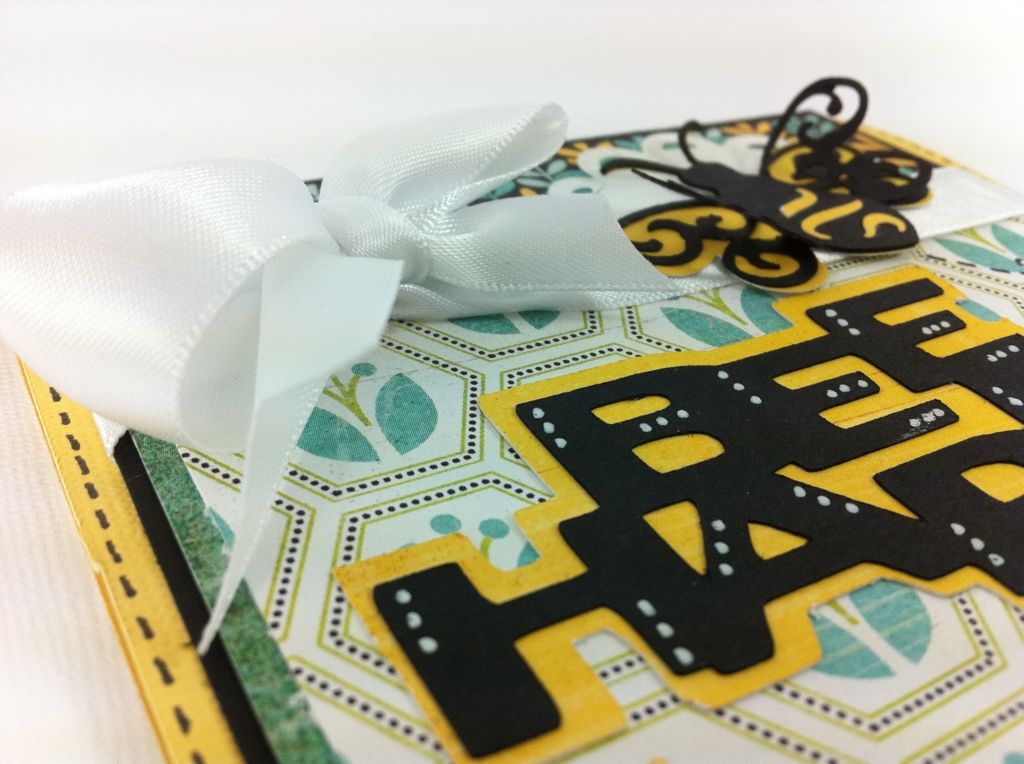
I cut the "bee happy" and the bee at 1-1/2", also from the Sentimentals cartridge. I cut the black wing layer twice. I glued down one layer and then created the second black wing layer by gluing on the yellow swirl parts and then just glued down the center section so I could fluff up the wings.
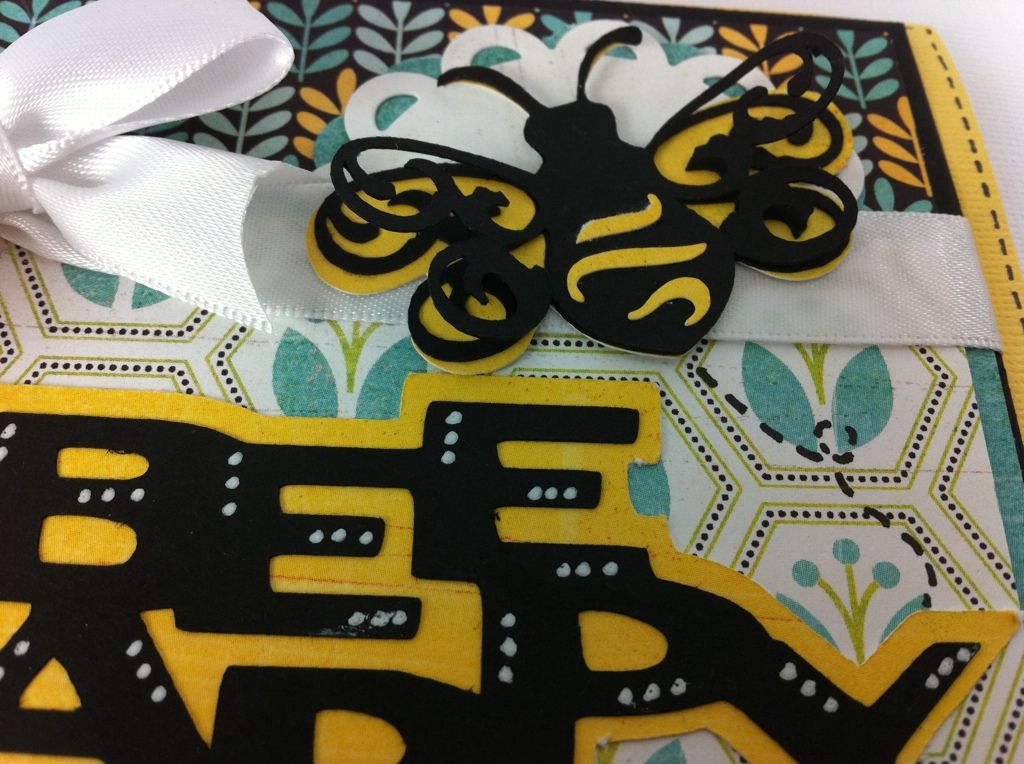
White pen dots adds interest to the "bee happy"- try not to smudge it like I did (grrr!). Scalloped white circle cut using Papertrey Ink dies run through the Cuttlebug.
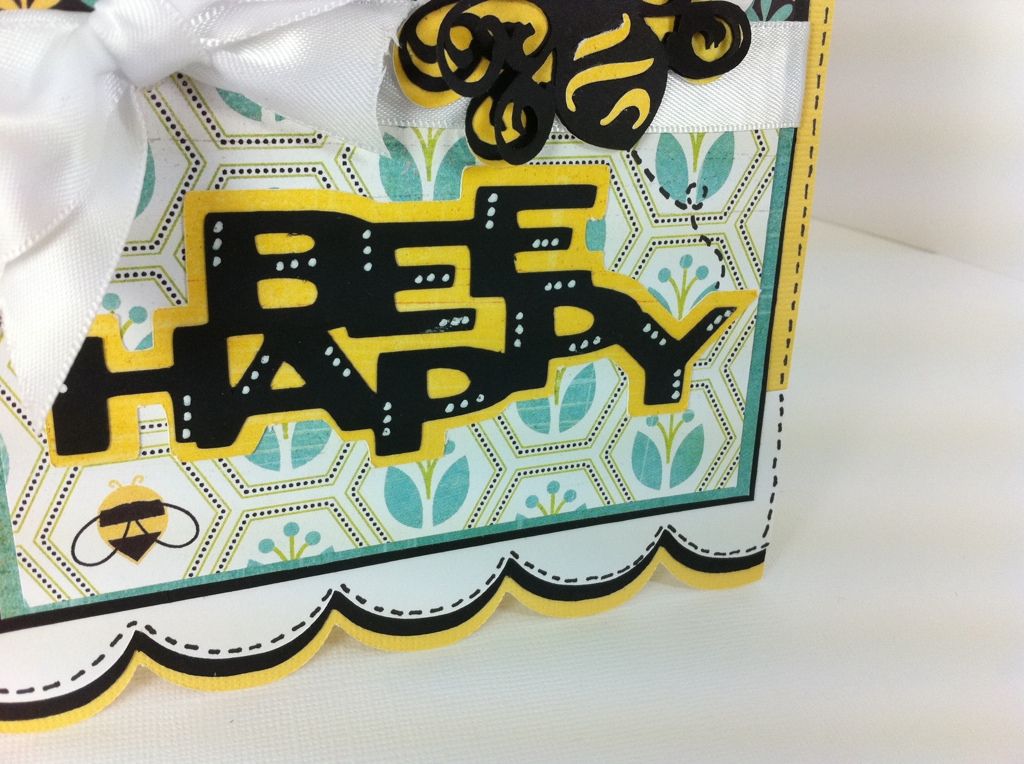
Using a black pen, I created faux stitching along the scalloped edges and the card edges. I also used some pen marks to make a trail from the bee.
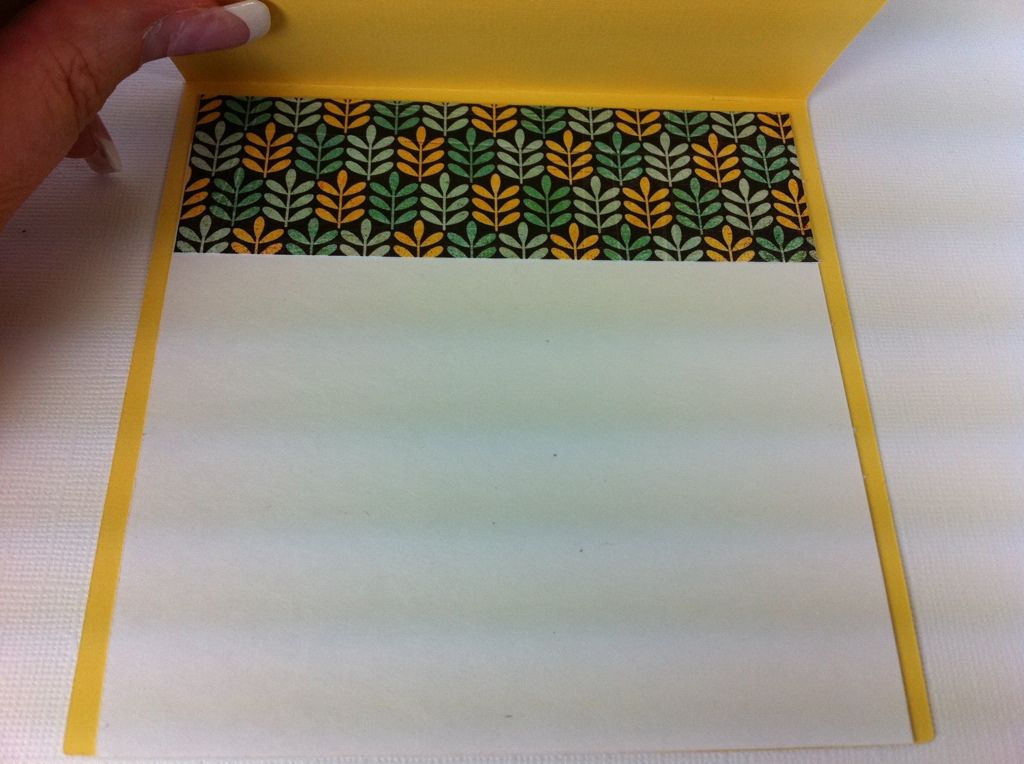
The inside is finished off using a bit of paper. I made the white section inside by cutting down the white card I used to create one of the scalloped border edges. I adhered it flush with the bottom. Paper is by Basic Grey (Urban Prairie line). Ribbon from Michaels.
Labels: bee, scallop edge, cuttlebug, sentimentals, be happy
The Moments Valentine Card
Well, another day, and another card to let my hubby know he is loved and appreciated. This is my card for day 3 of the week leading up to Valentines Day. This card kind of has a story behind it. I totally LOVE trees...and everywhere we go I am always noticing the trees along the way. I know...kind of weird! Anyway, this card is to thank him for his adventuresome spirit, and his love of the open road - we both LOVE taking road trips. These trips have taken us to the Redwoods in California, the Sugar Maples in Quebec, Canada, to the few (but really cool) trees in Oklahoma and Kansas, and hiking and camping under all the trees in our lovely area in the Northwest. I love how we have carved many of the memories of our life in this way.
Anyway, used the tree from Sweethearts, sentiment from Unity Stamps, Baker's Twine, some doodling - and lots of faux stitching. I am entering this in the Wacky Wednesday Challenge over at More Than Favors to make a Valentine's Card.
Thanks for looking - hope you are having a great day!!!
Thanks for looking - hope you are having a great day!!!

Labels: valentine card, bakers twine, trees, sweethearts, heart
Heard You Caught a BugFeel Better Soon by JustBeccuz on Etsy
http://www.etsy
http://www.etsy

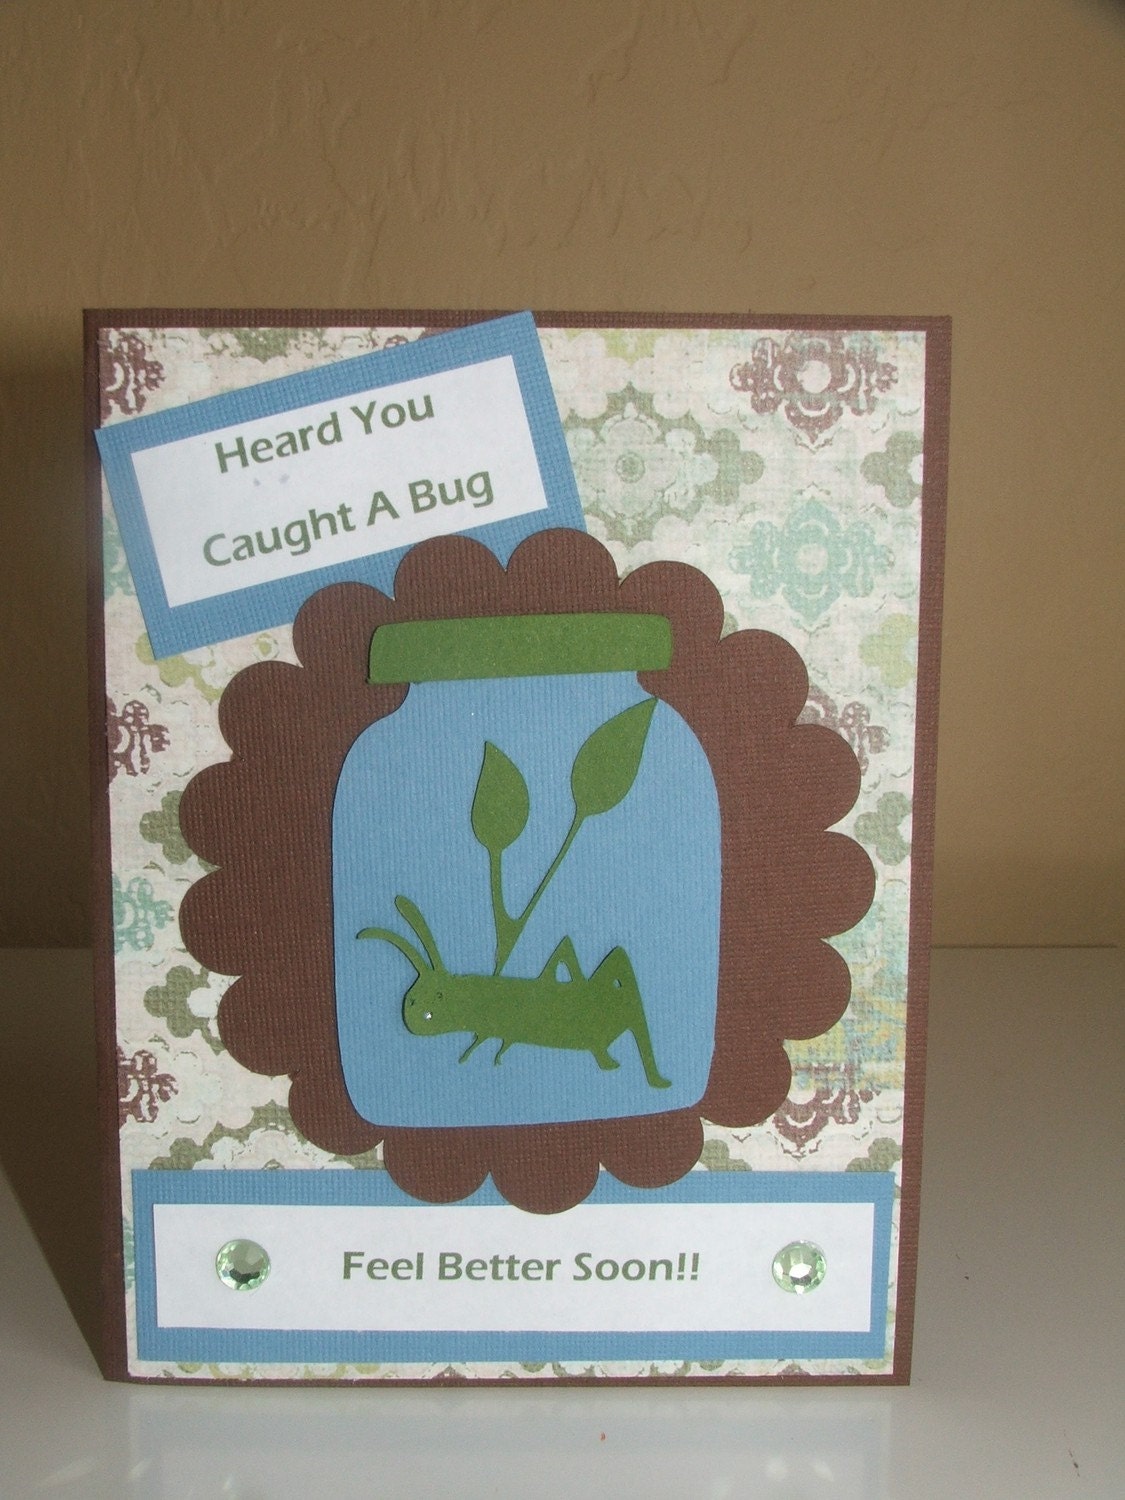
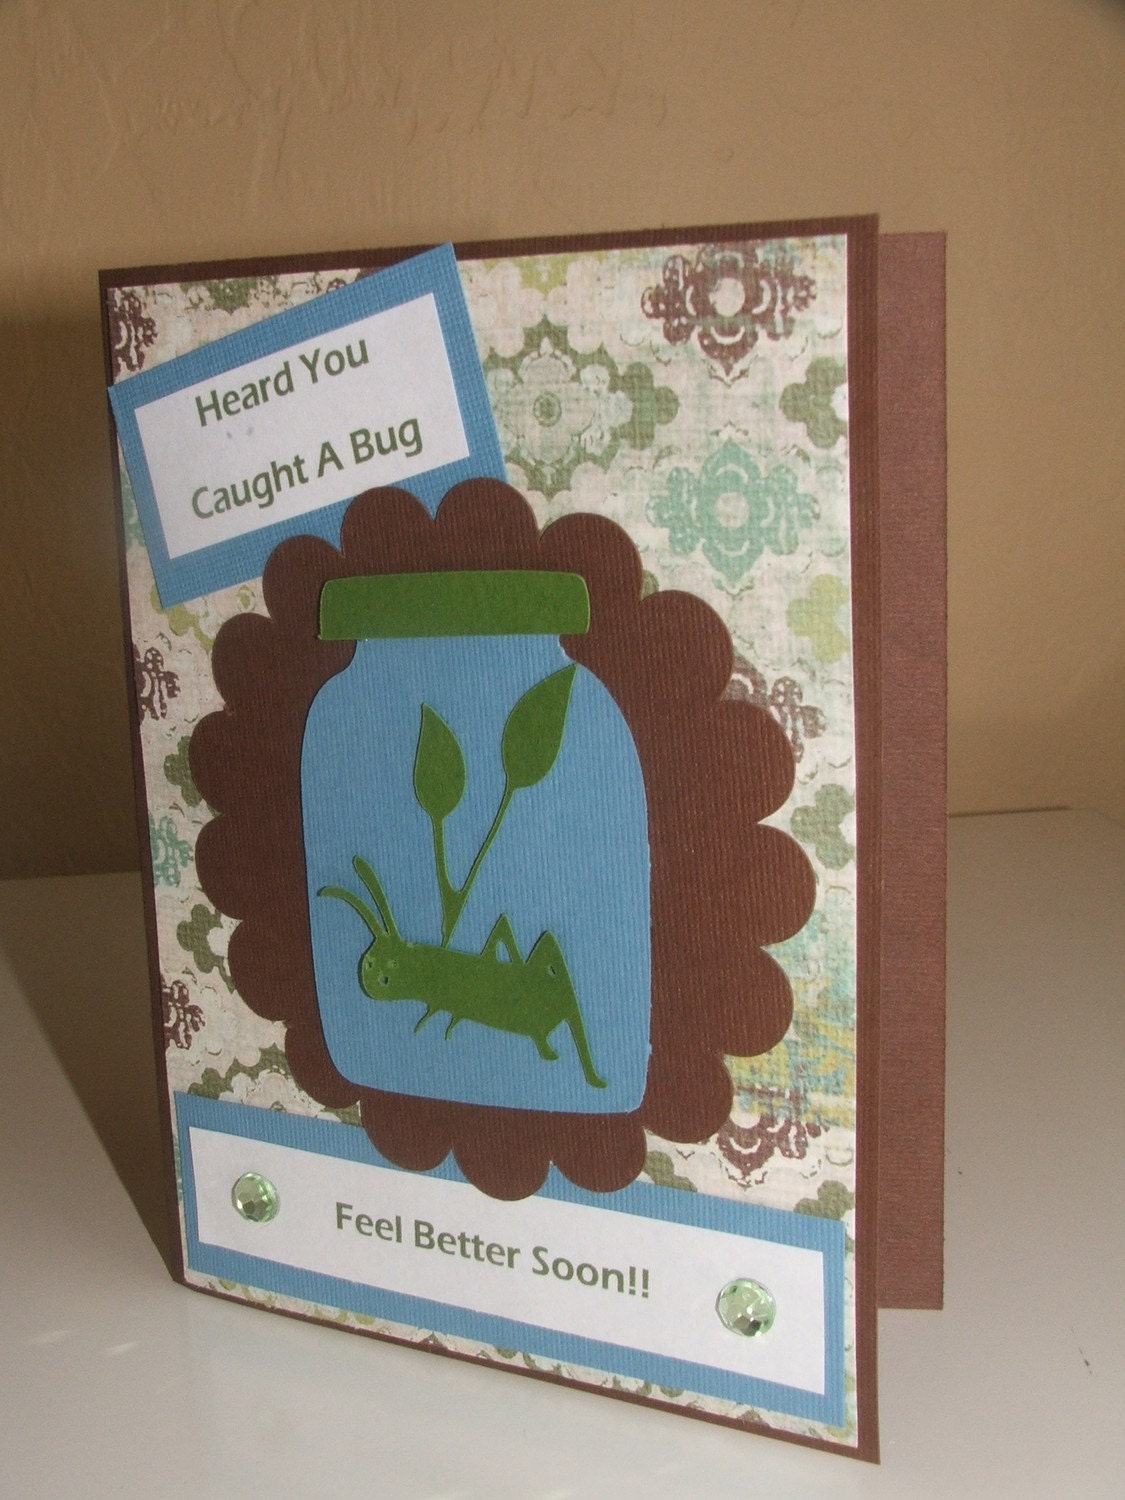
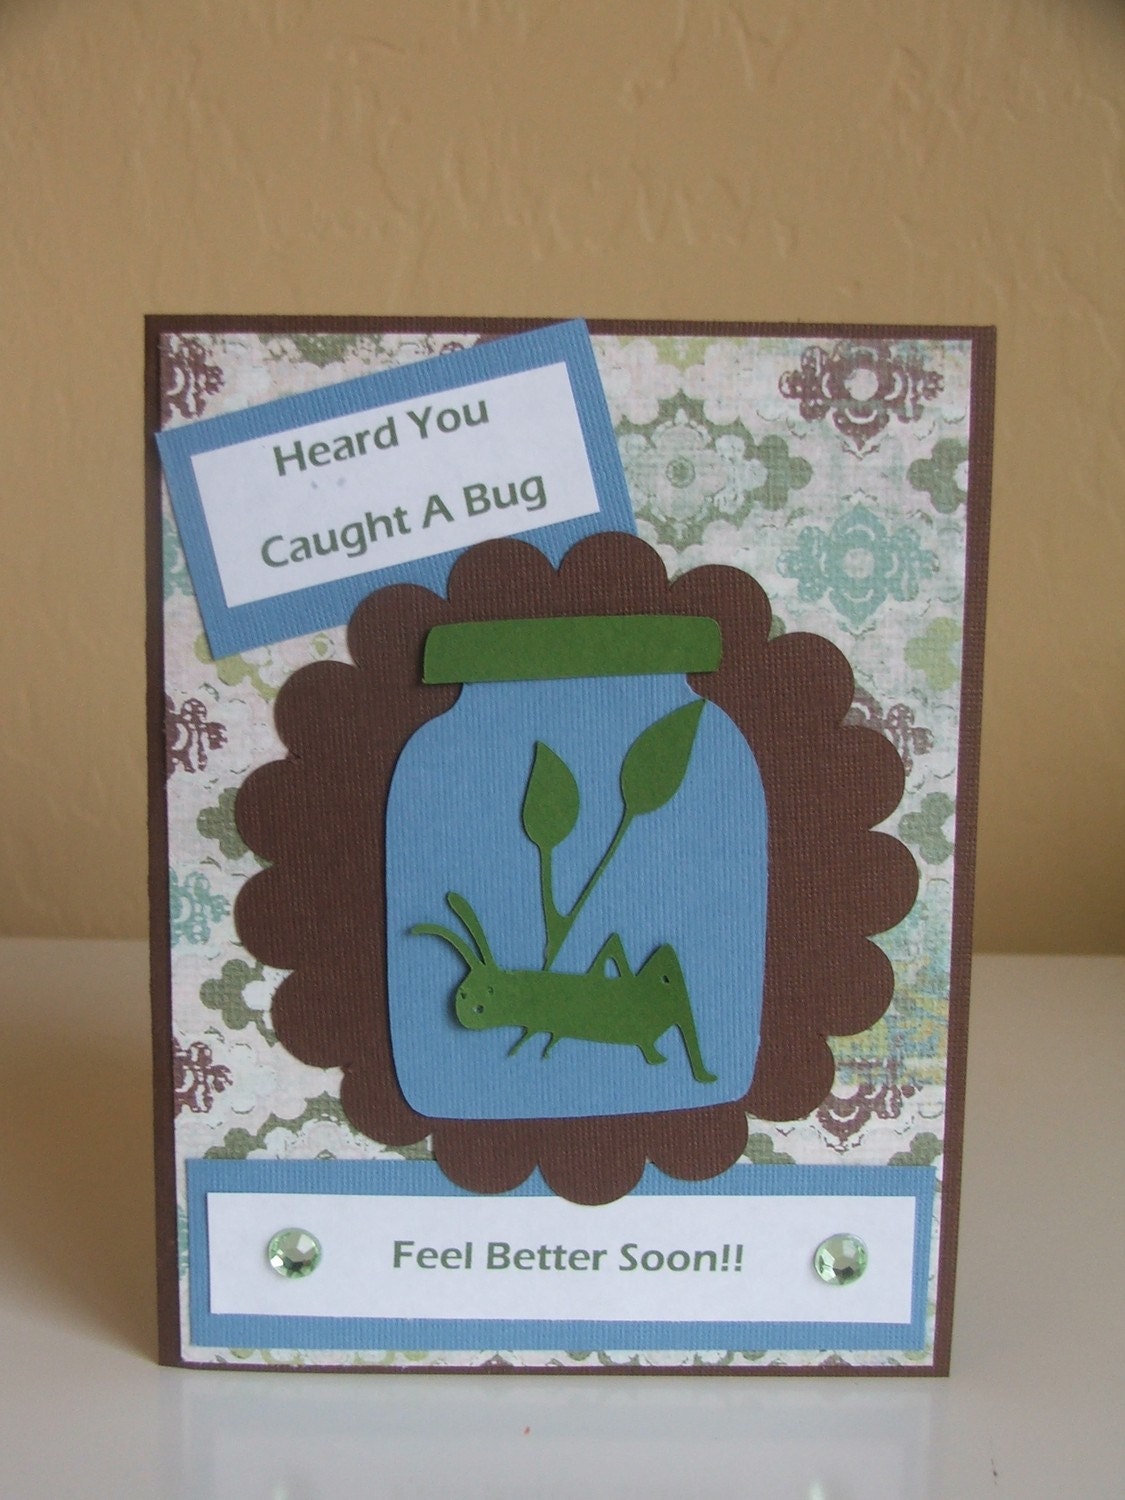
This adorable card is perfect for anyone that is feeling under the weather!
Labels: feel better soon card, grasshopper, scallop circle, just because cards
I'm Bananas 4 You - Sweethearts Love Card
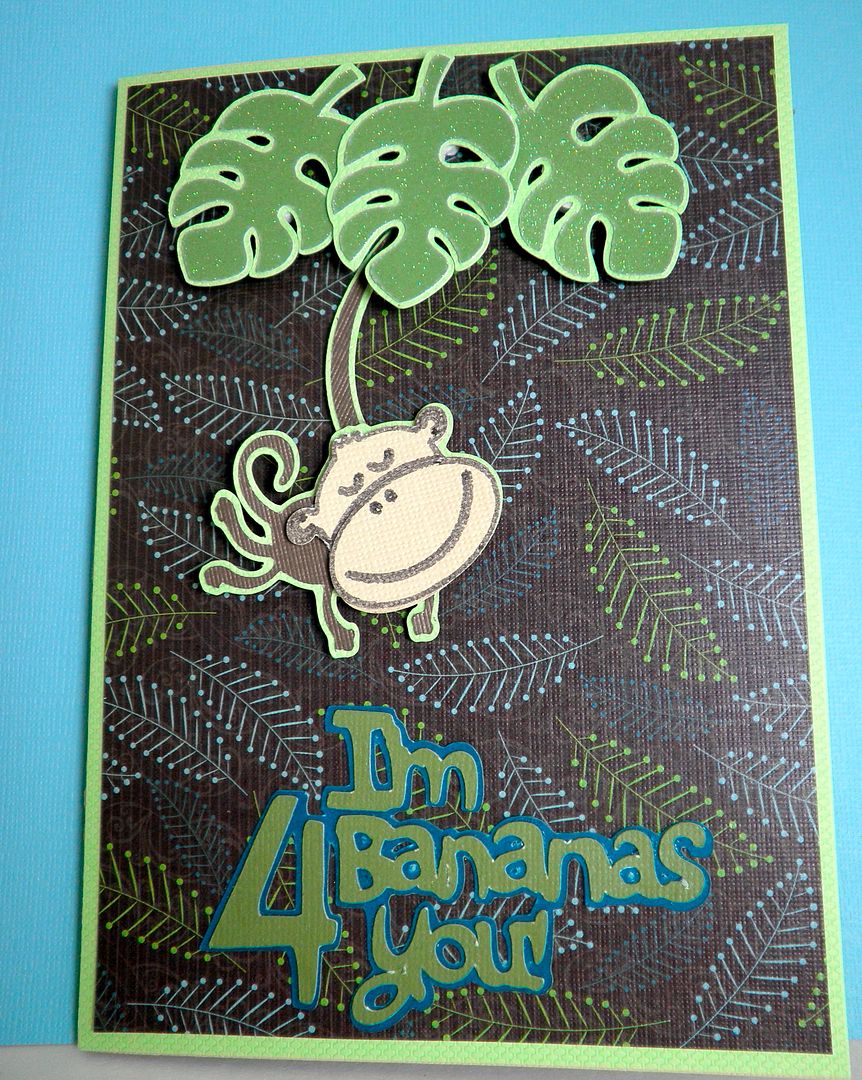
Hi, this is Joy and today's 5" x 7" card was made using the Sweethearts cartridge. I loved this cute monkey on page 43 and thought it would be fun to try to make a card that would allow him to swing on a vine from side to side.
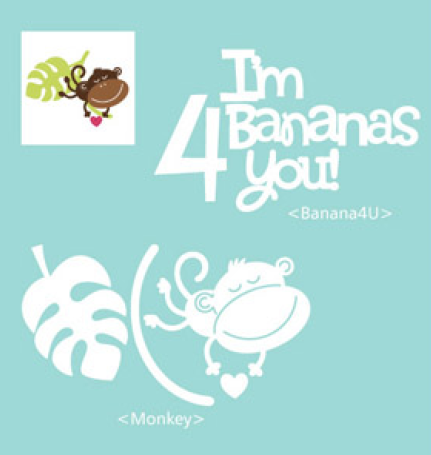
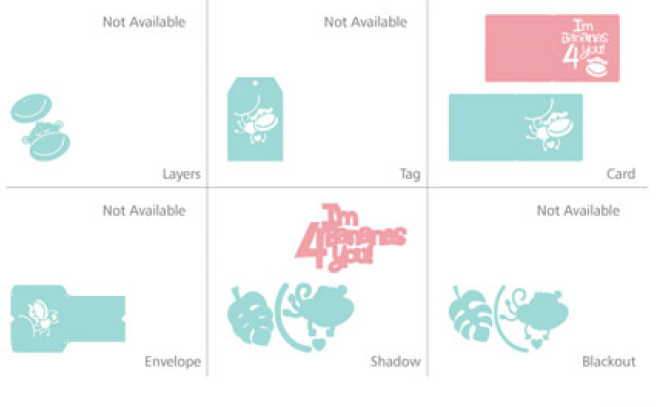
Two photos above from Provocraft cartridge handbook - can also be seen HERE.
Above, you can see some shots of the actual page in the handbook (courtesy Provocraft web site). Please reference that as you read the following. To start, I cut the base monkey at 2" multiple times, as the base cut comes with a leaf, vine and monkey, and I wanted to have 4 leaves to use on the card. Not only that I wanted the base of the monkey to be dark brown and the leaves to be green so that made a total of 5 cuts that had to be made. It's a shame they did this when there was room on the layers key to separate out the leaf and vine.
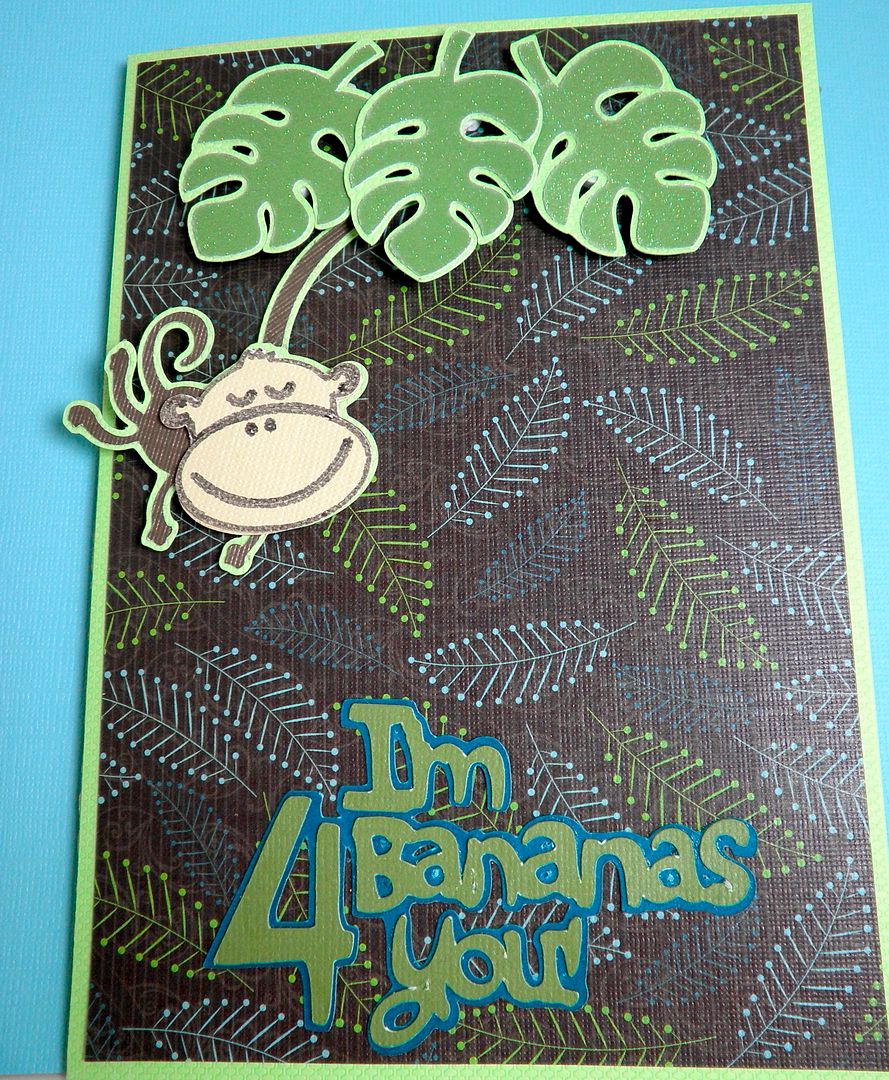
Next, to shadow the monkey, leaves and vines, required another 5 cuts using the shadow key, so that they previous cuts could all be shadowed. Not difficult, just a few more steps. I cut the "I'm Bananas 4 You" word art with a base and shadow at 2 1/2" for the bottom section of the card. I tried to keep it smaller so the monkey would have room to swing. Some of the word art cut was "fussy" and didn't have a lot of room for punching out holes.
The monkey face was first drawn on using the Cricut markers and the layers key for the monkey. After the face was drawn, I hit "load paper" to return the blade to its original position. Then I replaced the marker with the blade very carefully so it didn't accidentally draw on the finished piece. I adjusted my settings for cutting and then hit "repeat last" and cut. This made the monkey cut out exactly where I had drawn on it. I thought the face was so cute that the markers seemed to be the best way to capture that.
I left out the heart as it was too small for the monkey to actually hold and still swing.
Here is the monkey swinging in action:
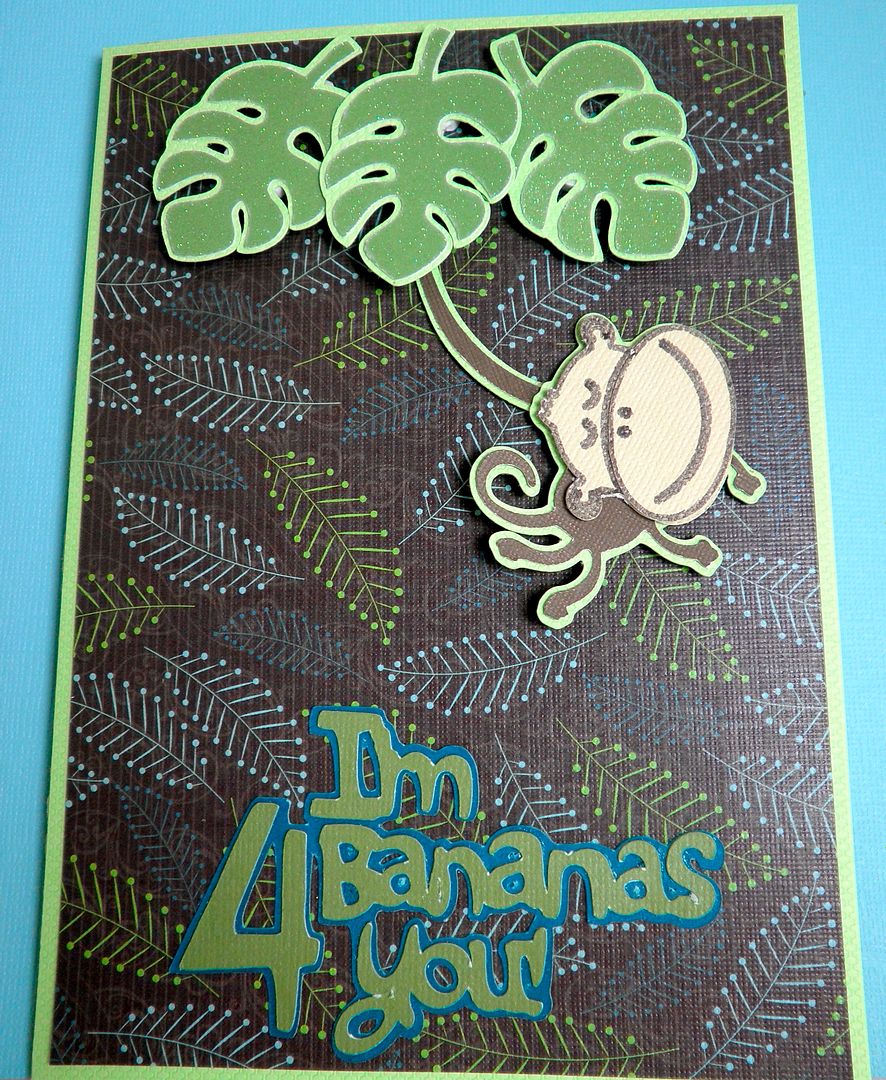
Here's how I made the monkey swing:
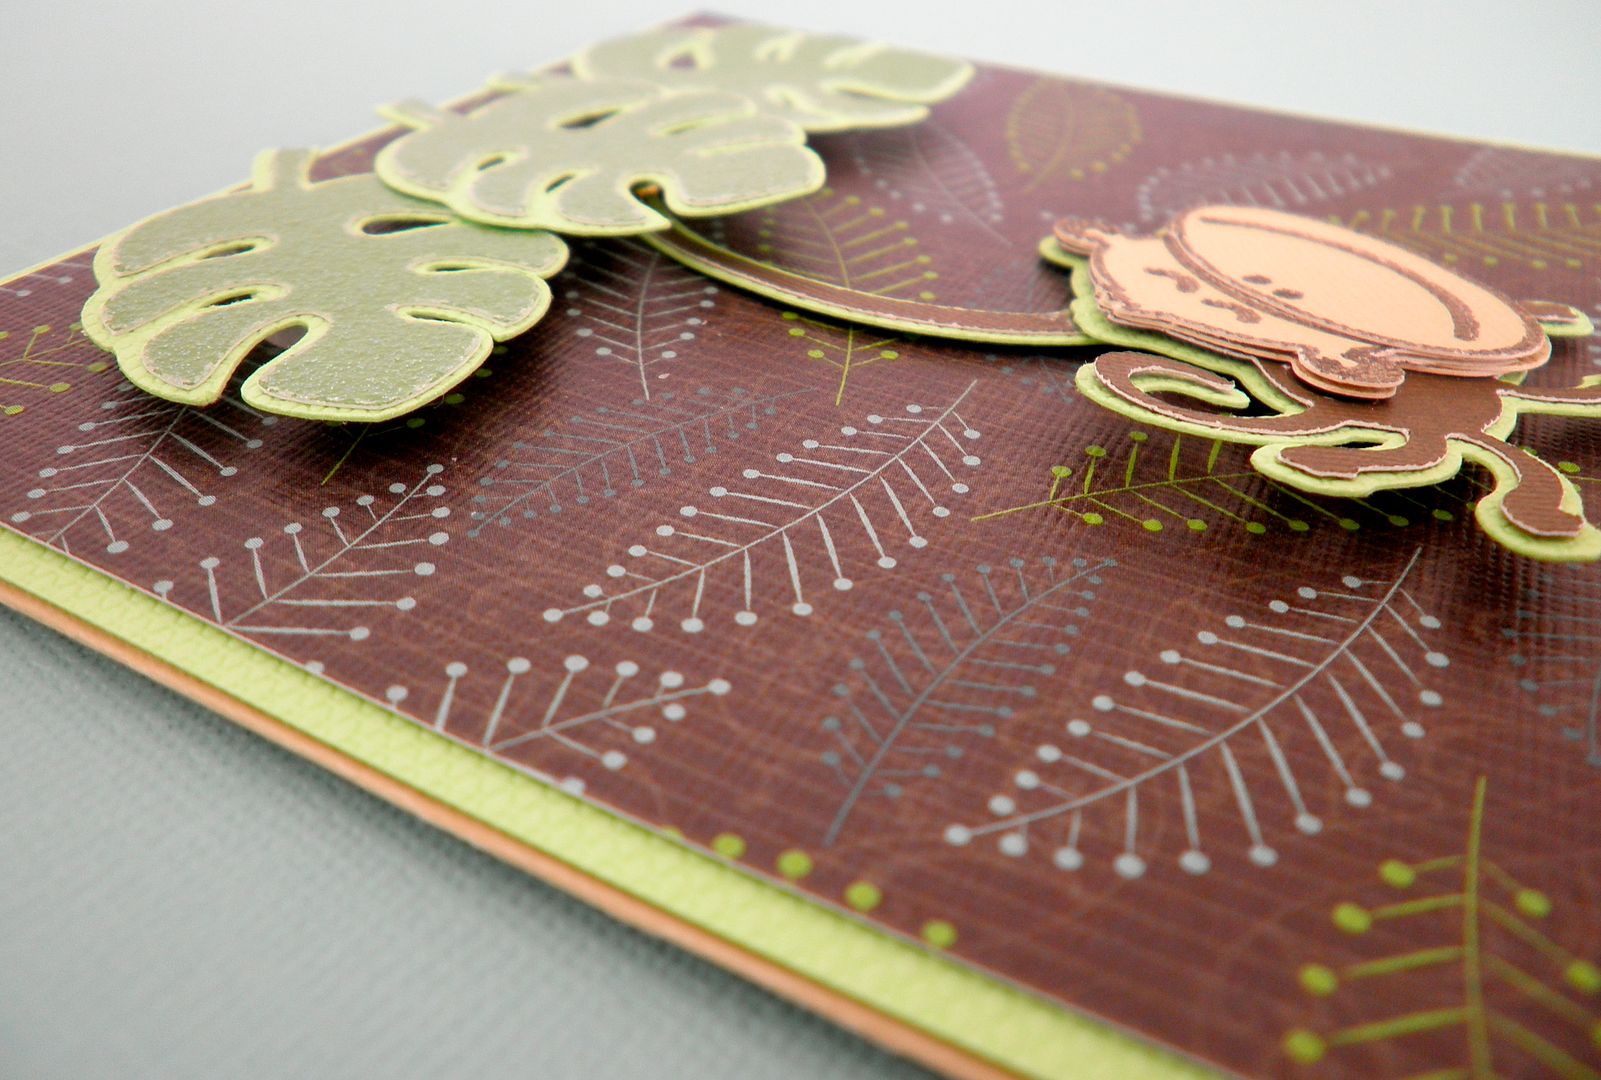
First, I layered the leaf paper (cut at 4.75" x 6.75") onto the bright green paper (cut at 5" x 7"). Next, I attached the vine to the back of the monkey. I attached a mini brad to the top of the vine and put that through a hole in the leaf paper. Then I mounted the leaf paper with swinging monkey onto the base of the beige card so that the brad prongs could not be seen. To cover the brad, I used pop dots on the back of the leaves to raise them up, thus hiding the brad and allowing the monkey to swing.
Inside of card:
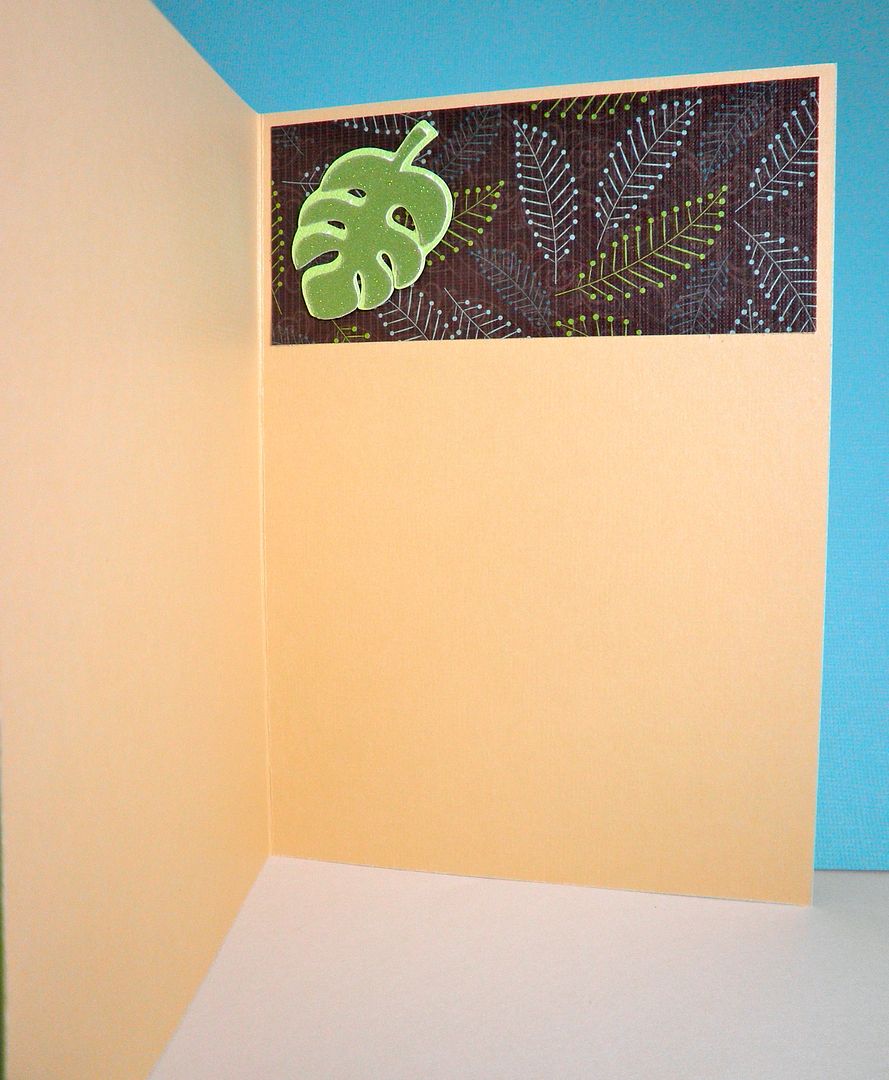
Paper was by Club Scrap, Core'dinations and DCWV (leaf and green glitter paper). Mini brad from Making Memories.
Labels: sweethearts, monkey, bananas for you
Go Green with the new Give a Hoot Cricut cartridge
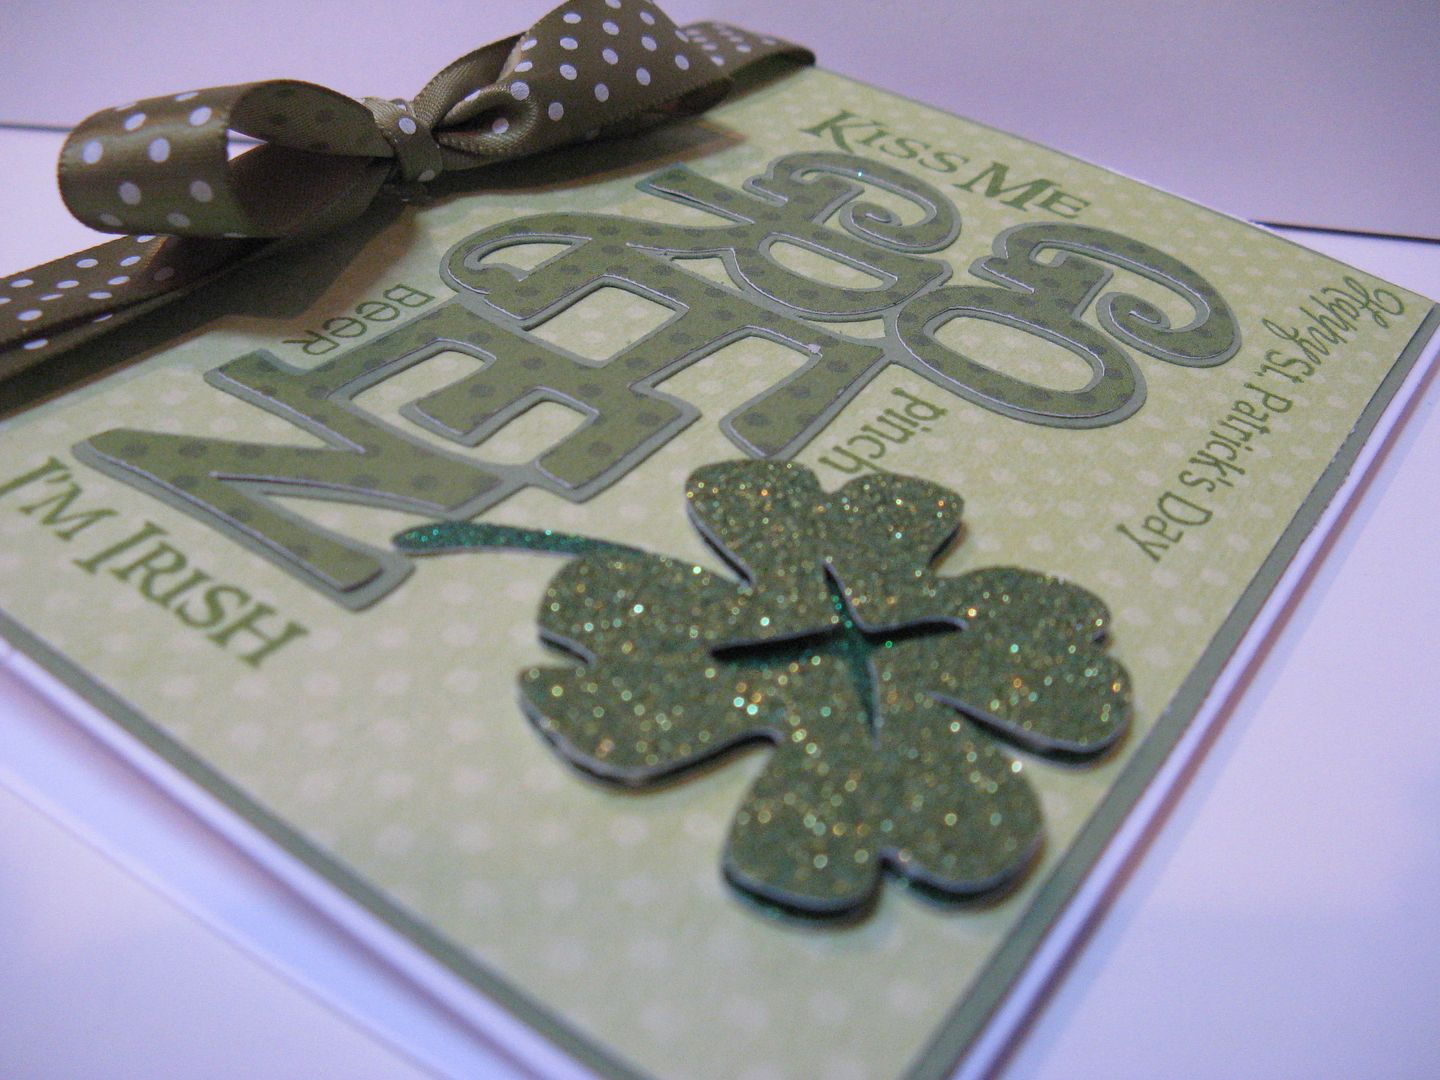
Hello, everyone! This is Melanie and I have a St. Patrick's card that I made with the new Give A Hoot cricut cartridge. Who would have thought this cartridge would have St. Patrick's Day stuff on it, but it totally does! In fact, it has one of the cutest shamrock cuts I have seen. I was so excited when I noticed it.This card is the standard A2 sized card. Then the green layers on top of the card are all cut at 1/4" smaller than the one that it is stacked on.
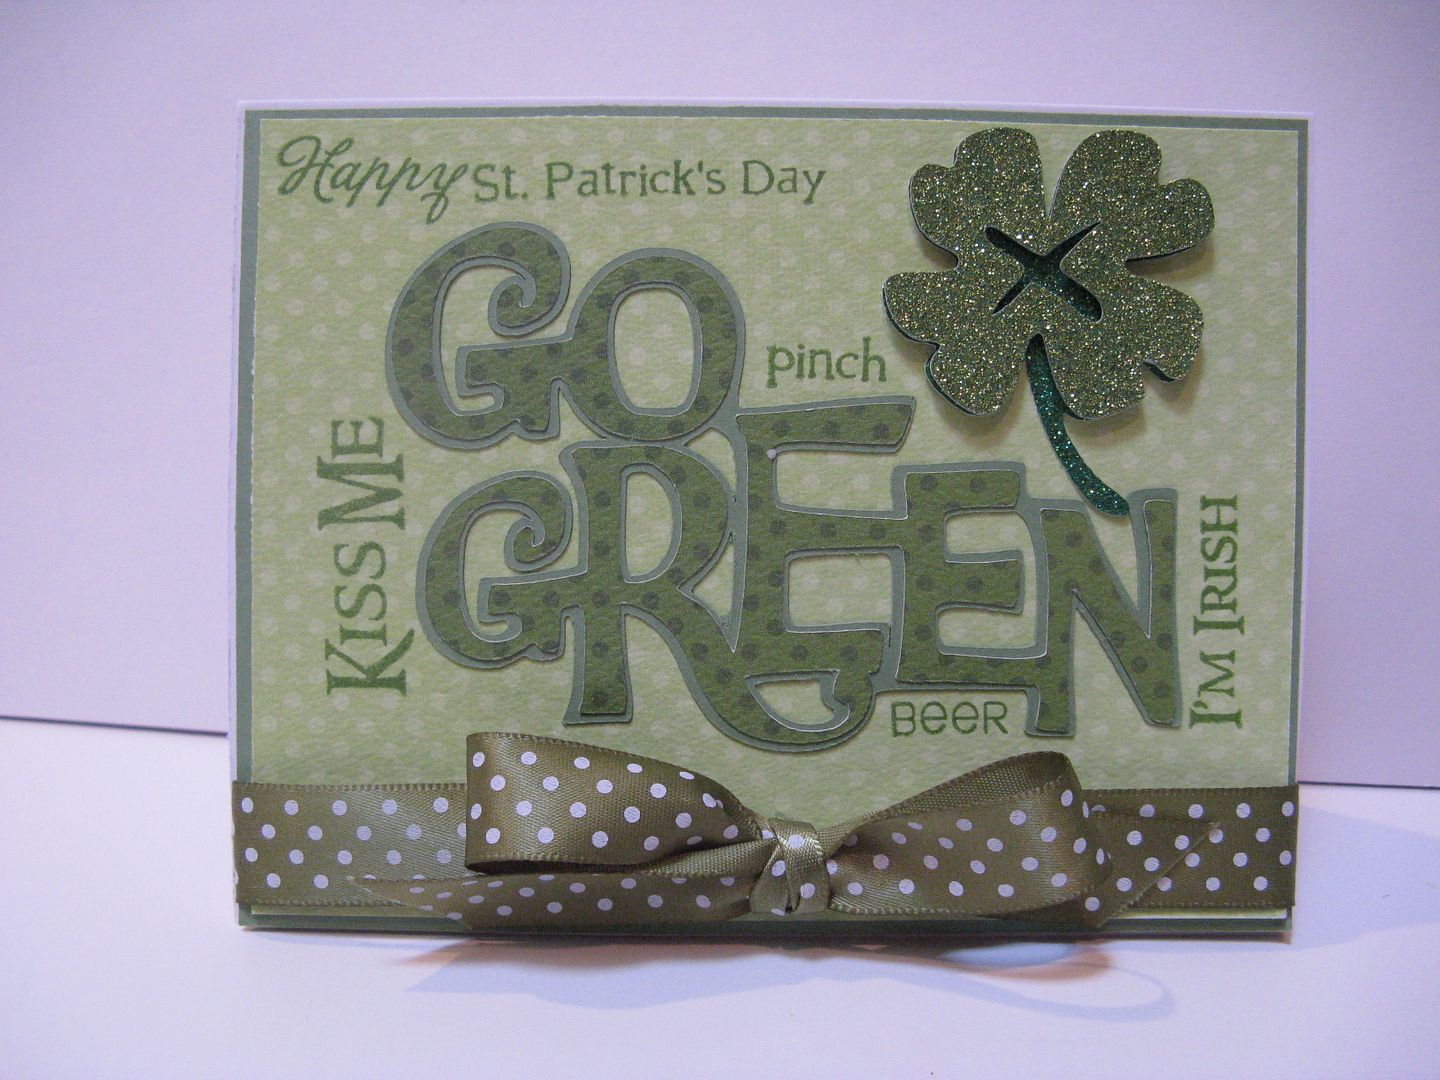
'Go Green' was base cut and shadow was cut out at 2 1/2.
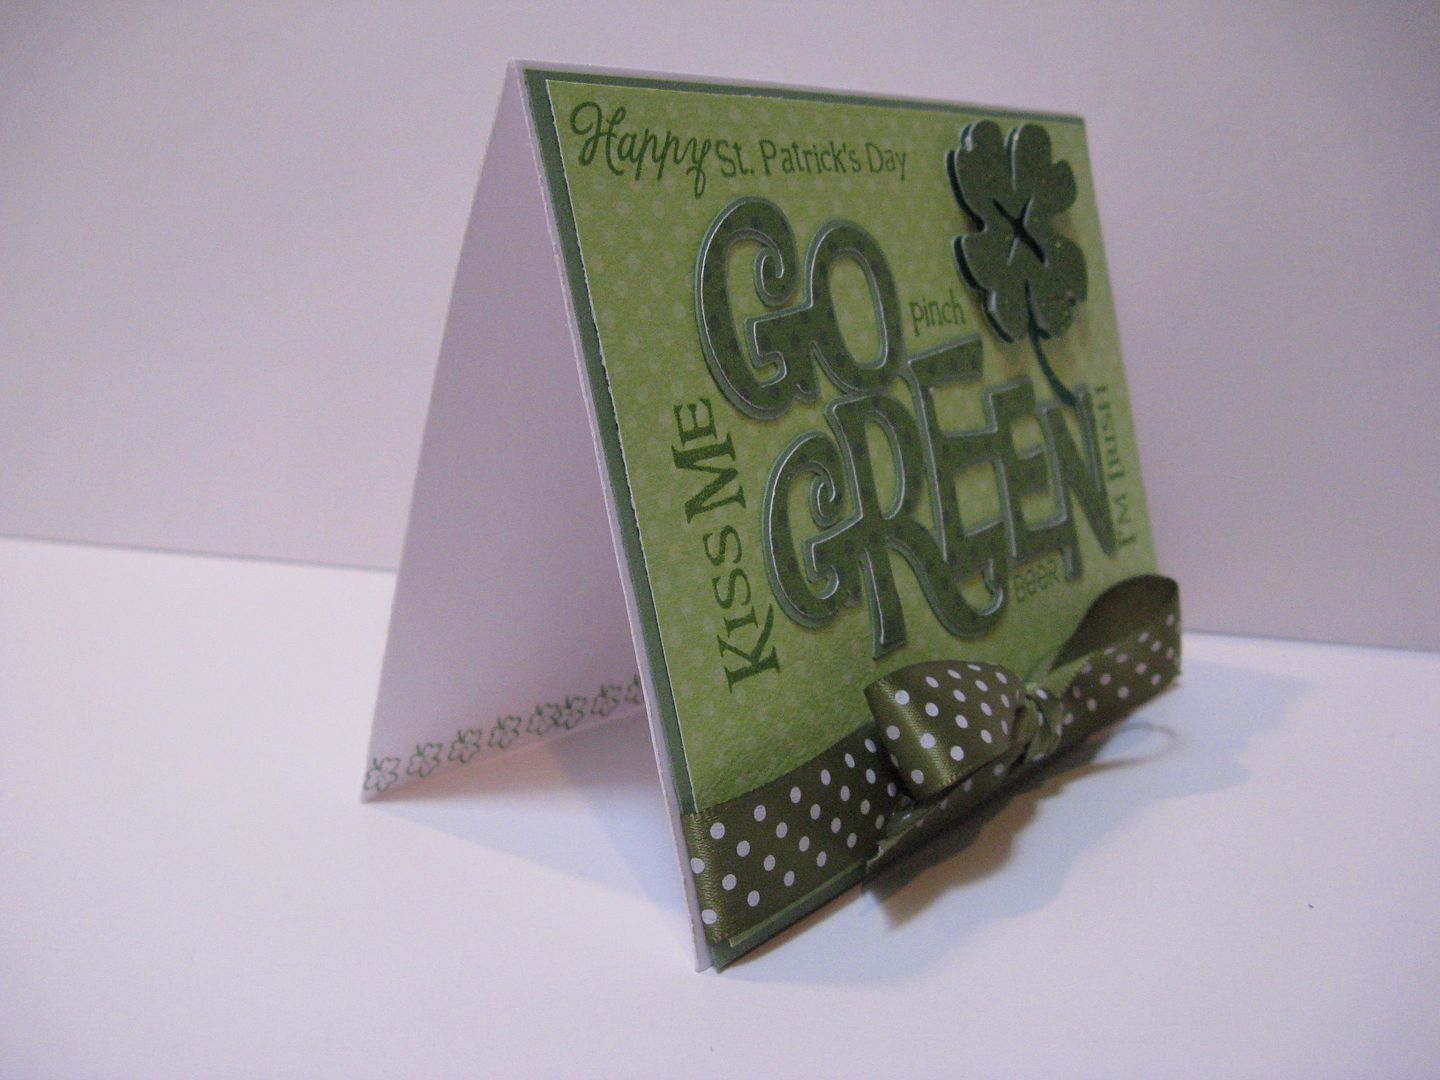
The 'shamrock' was cut out using glitter paper at 2" and flipped using the flip feature on my expression. Then using various St. Patrick's stamps from various companies I stamped the word art.
Thanks so much for tuning in this week! Make sure you are leaving comments on all posts this week, so you will have an even better chance to win this week's prize!
Have a wonderful weekend!!
Labels: give a hoot, shamrock, st. pattricks day
Anyway, on to the card....
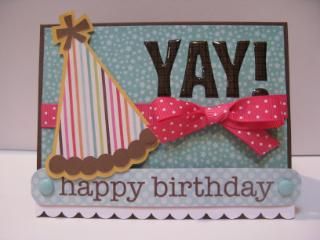

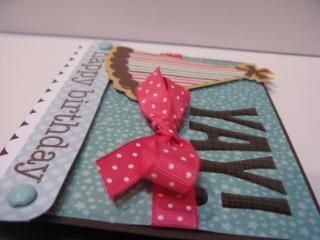
To make this card I used the SEI Happy Day paper line. This line is perfect for anything birthday!
I cut the hat at 3 1/2". The sentiment, brads, and epoxy stickers are also a part of the Happy Day line. The ribbon is from SU! I also used a border punch for the scalloped border across the bottom of the card.
Thanks so much for stopping by this week! If you have not stopped by Joy's or my blog then you should because we have lots of prizes to give away and a great sampling of things you can do with the 10 new cartridges that Provo Craft just released! Not to mention we are giving away the store with all the great prizes we are giving away! You have got to check it out!
Labels: birthday card, party hat, celebrations, scallop edge
You are So Doggone Good to us! Card and Video
EDIT: USTREAM WILL BE TOMORROW, THURSDAY NIGHT - IT WILL BE WORTH THE WAIT!!!
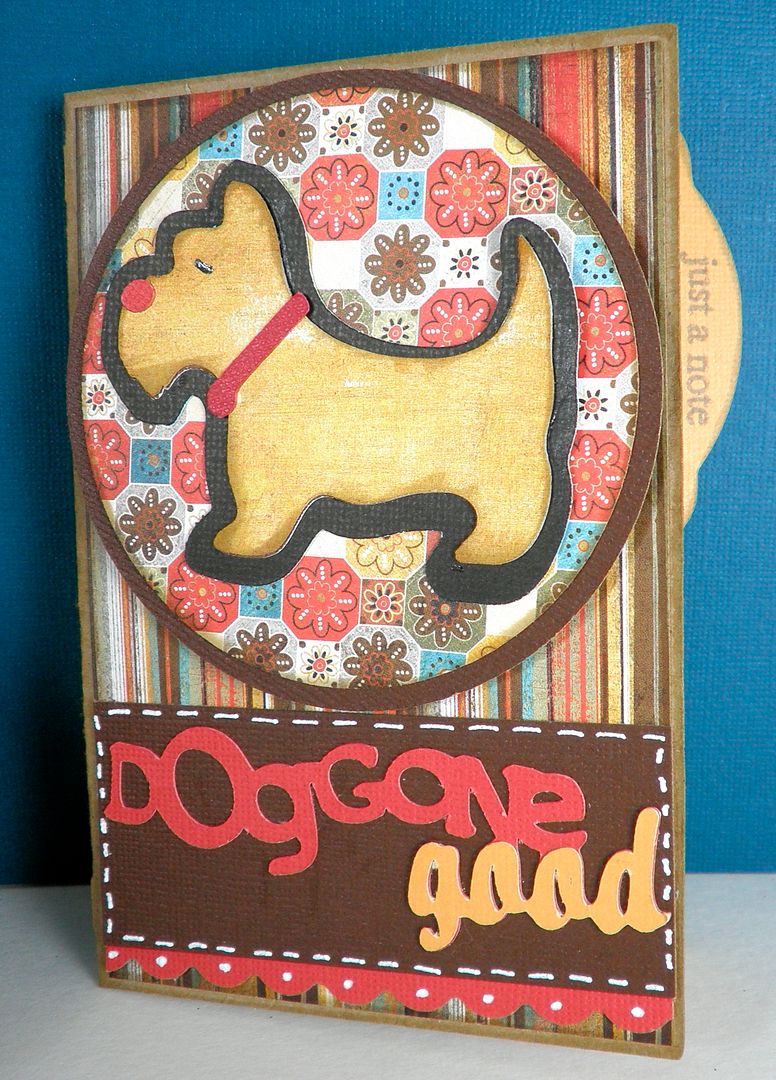
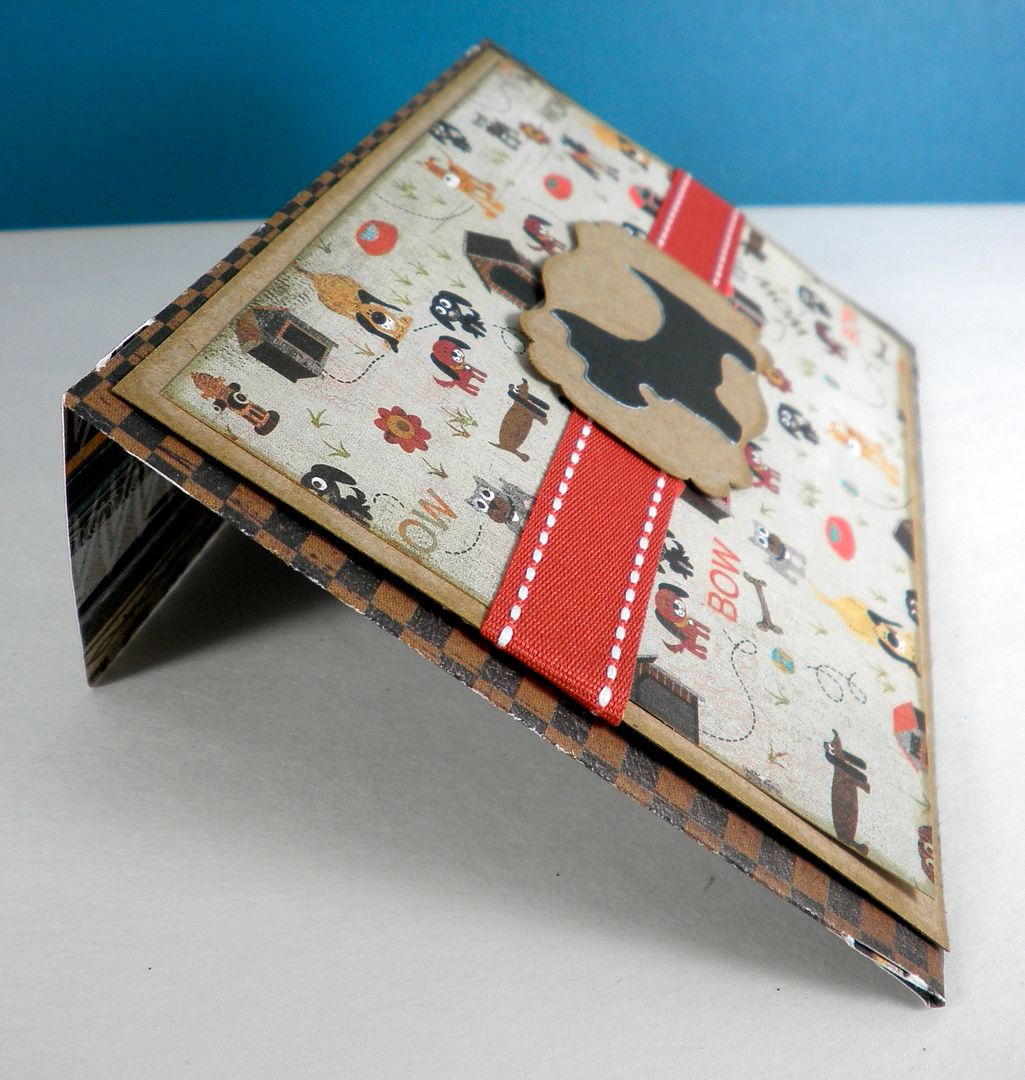
This is Joy and today's card and video is from the Just Because Cards Cricut cartridge! I just love this new paper line, Max and Whiskers from Basic Grey for all those pet layouts and cards. I thought it would be a perfect match with this "doggone good" card!
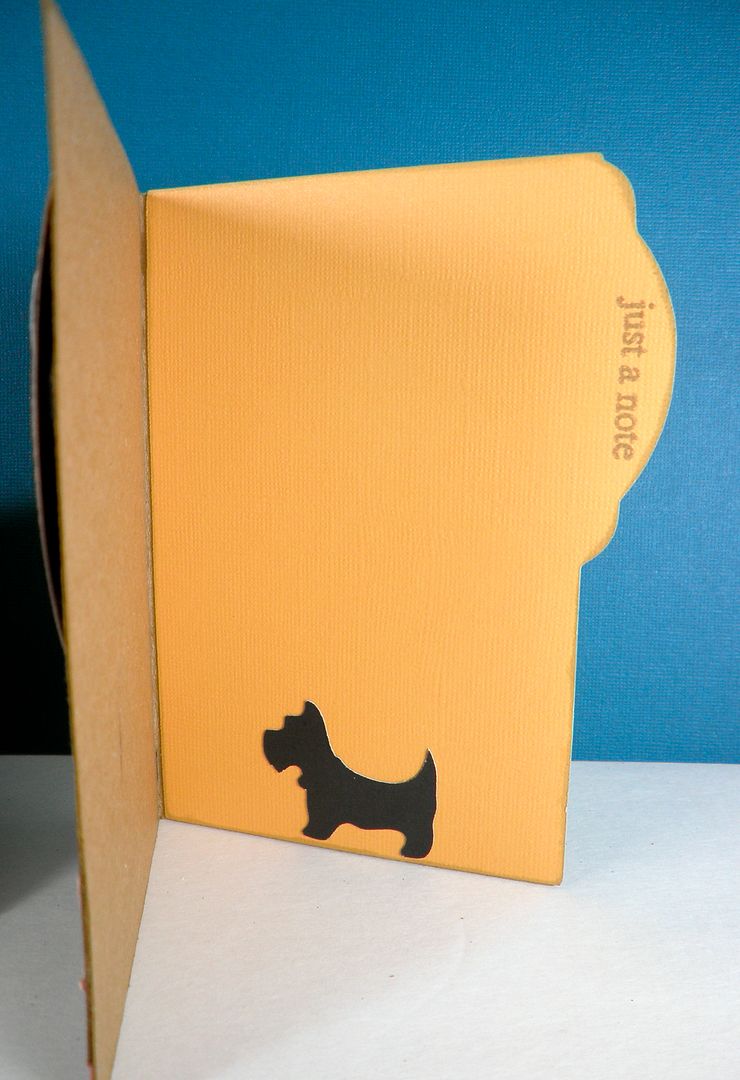
Here's some info on the cuts:
Card, dog (with layers and "Doggone Good" word art: cut at 5-1/2"
Circle cut at 3-1/4" and 3-1/2"
Envelope: Used card cut at 6" (don't cut at 5-1/2", it needs room for the tab)
Little inside dog cut using Sticker Feature key at 2"
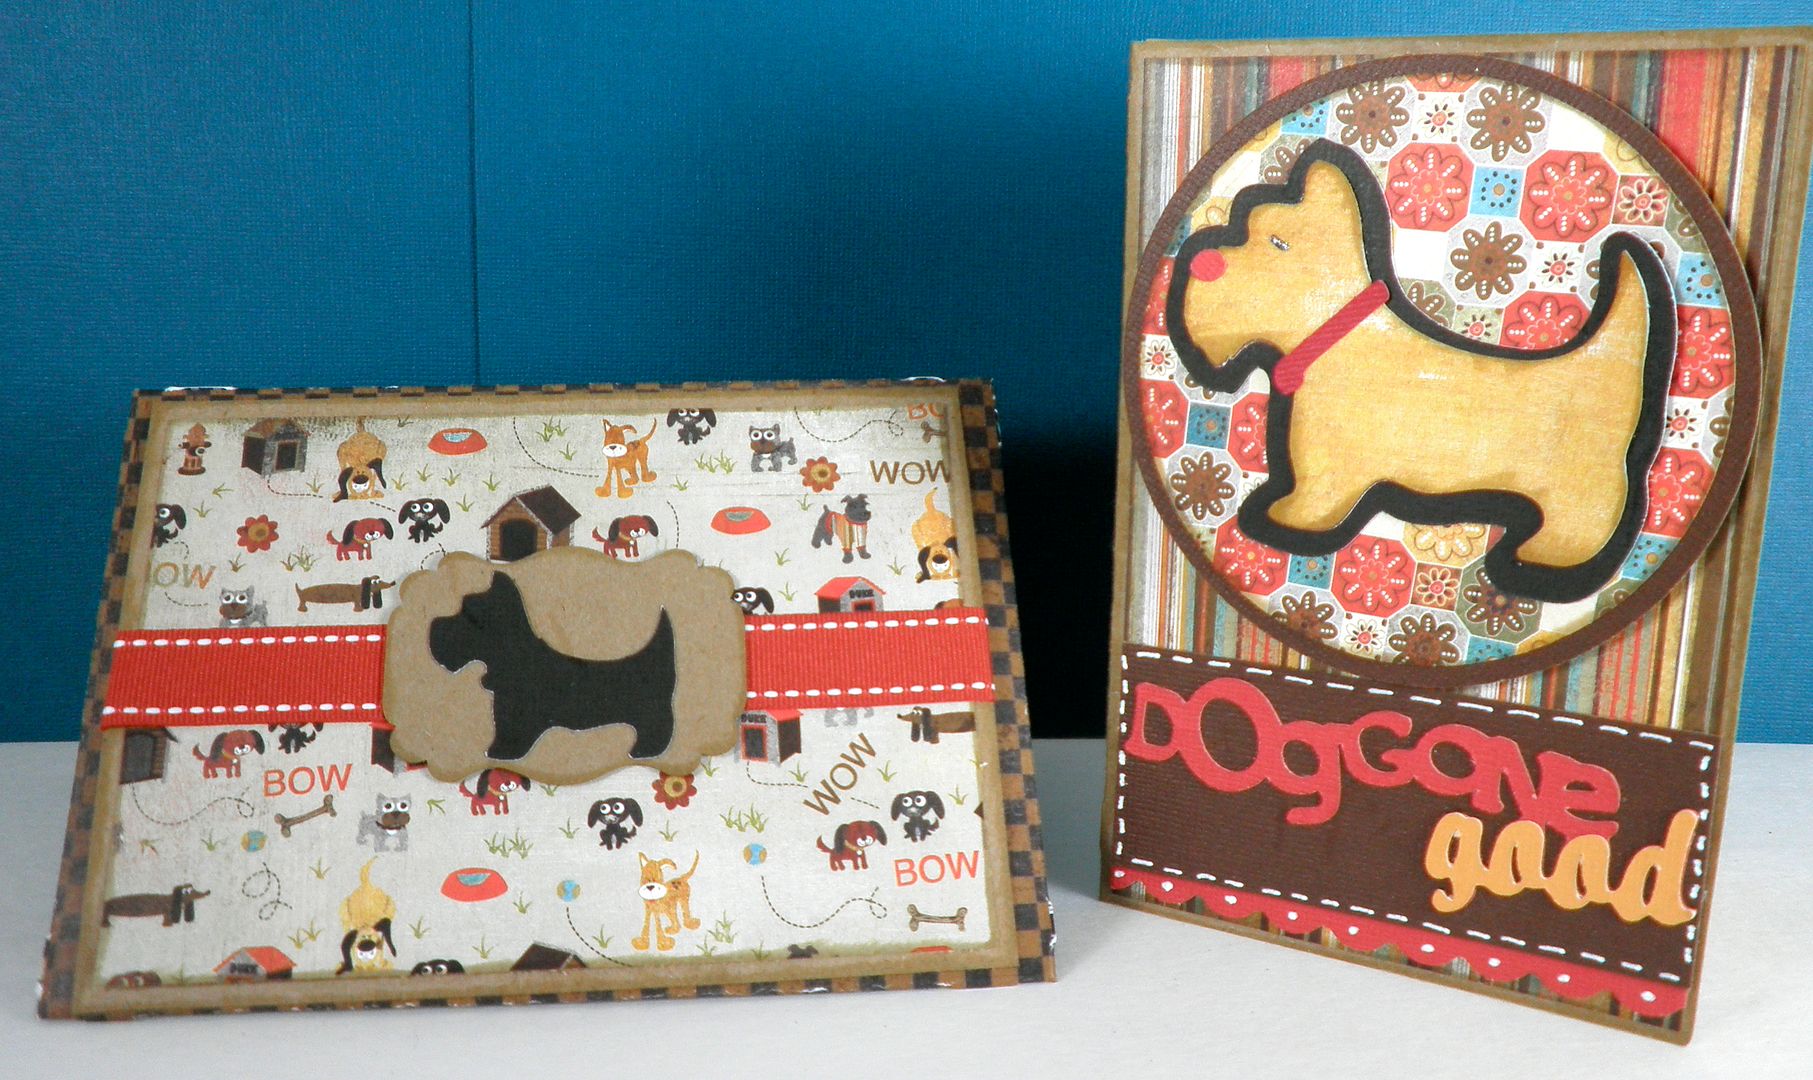
This is the envelope and card together. I decorated the envelope with another little dog and mounted him on a tag punched with a new EK Success punch. Ribbon is from Papertrey Ink. Max and Whiskers Paper from Basic Grey.
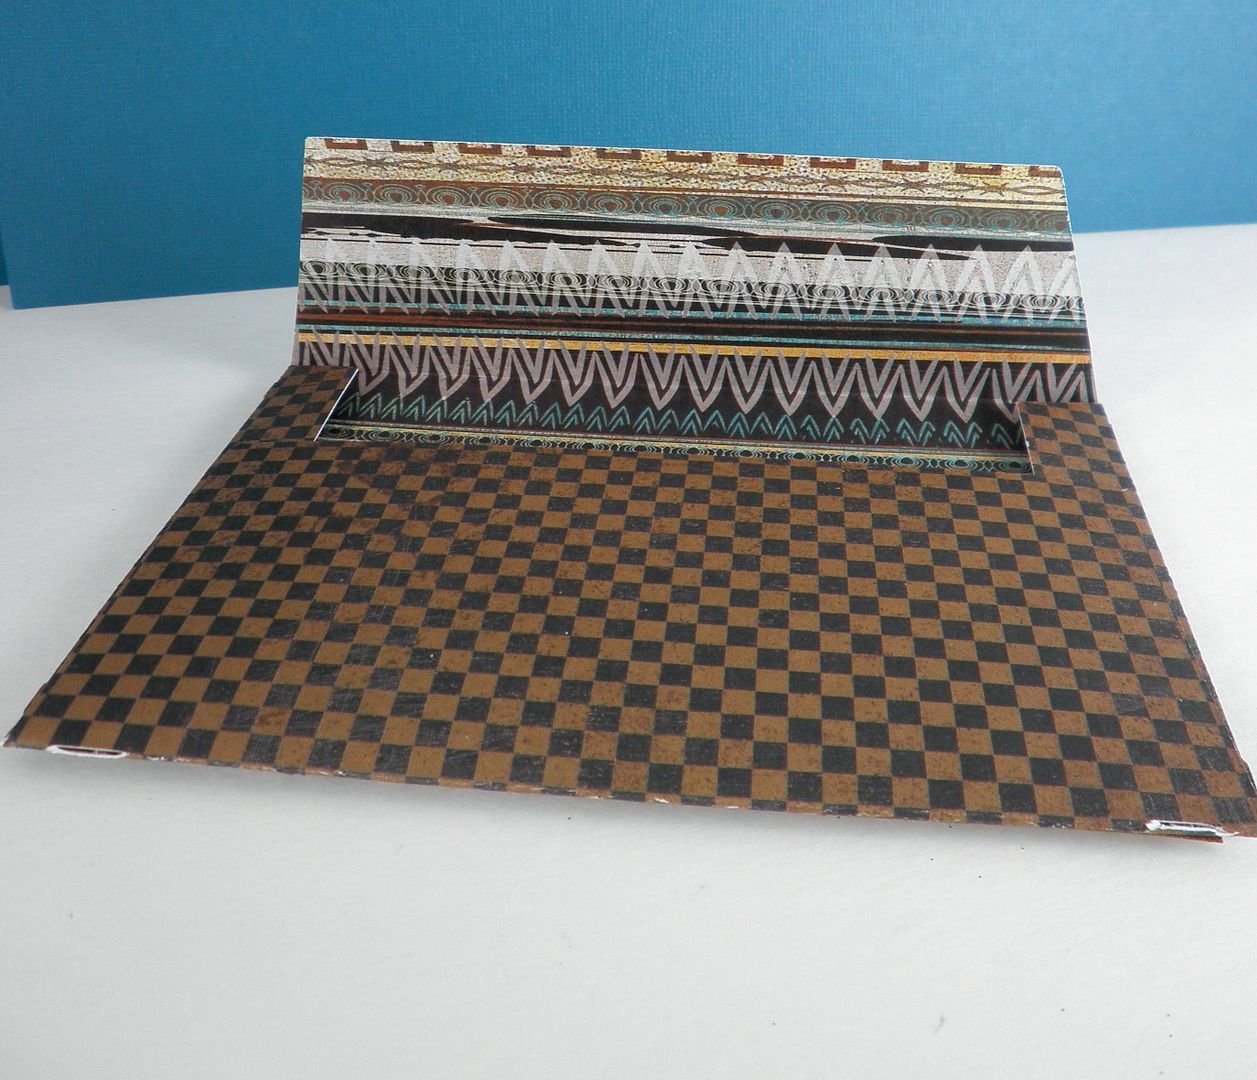
Envelope comes with score lines. If you don't like how they look, as they are large, you can remove them using the "hide selected contour" feature on the Design Studio Software. To pick an envelope for your card, check out this guide: Tips and Tricks for Just Because Cards cartridge.
Here's the video! If you can't see it, click HERE!
Join us TOMORROW at 8 pm central for our Ustream where we will give away a Cricut EXPRESSION machine and maybe some other goodies! There is still time to enter...head over the Cricut Expression post to see all the details.
Labels: dog, just because cards
Easy Paper Flowers
 First, stamp your image on white cardstock. You will need 8 images for each flower. This stamp is from Stampin’ Up!’s Vintage Labels set.
 Next, punch out your stamped images using a scallop circle punch. I love that Stampin’ Up!’s punches and stamps are made to fit.
 To give you flowers a bit of an aged/distressed look, use Distress Ink in Antique Linen and a foam blending tool. Carefully blend the ink onto the scallop circles to desired darkness.
 Spritz scallop circles with Perfect Pearls and water, giving the thick cardstock a pretty shimmer and more pliability. Wrinkle the flowers into a ball and let dry.
 Unfold the balls and pierce through center. Secure with a brad and mold into desired shape. Adhere to card.
 A TRUE FRIEND IS YOU FRIEND by Hannah Craner
Card is 5 ½ x 4 ¼”
Cardstock (Ocean Tides, Stampers Select White), ink (Ocean Tides, Orange Zest, Raspberry Fizz), twine: Papertrey Ink; Stamps (Vintage Labels), punch: Stampin’ Up!; Brads: Making Memories; Paper piercers: Making Memories and Scor-Pal (Scor-Bug); Distress ink (Antique Linen): Ranger
Create a card base from blue cardstock. Cut a 5 ½ x 2” block of white cardstock. Pierce a border on top and bottom of white block. Stamp sentiment on right side and antique with distress ink. Adhere to card base. Glue twine to card base to make stems. Tie bows around the twine for leaves and adhere Easy Paper Flowers to the top of stems.

Labels: paper flower, scallop circle, bakers twine
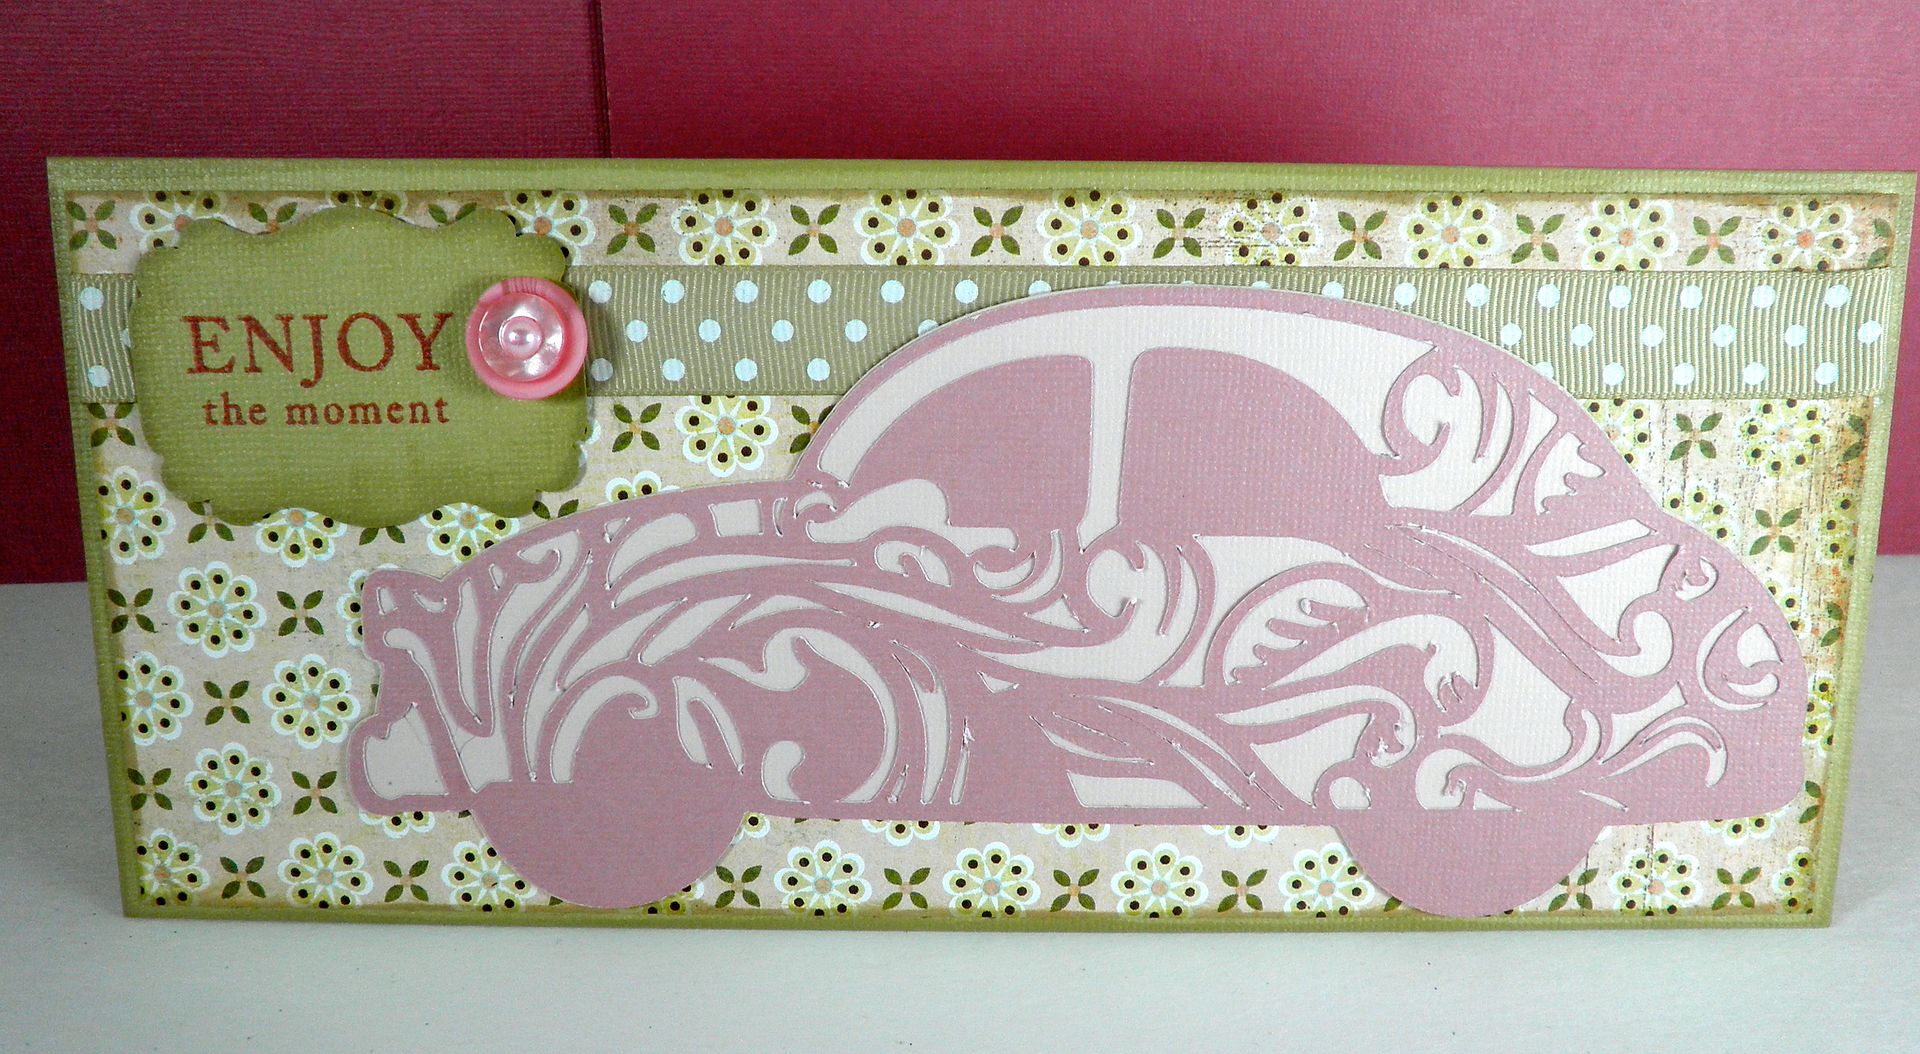
Hi, this is Joy and today's card was made using the Summer in Paris cartridge. I have been dying to cut this car out - I think it is so funky and fun!
This card was made by cutting out an 8" x 9-1/4" piece of Core'dinations cardstock and folding it along the 8" edge to form a 4" x 9-1/4" card. This will fit in a standard business sized envelope. I used paper from Basic Grey's new Cappella line - so gorgeous!
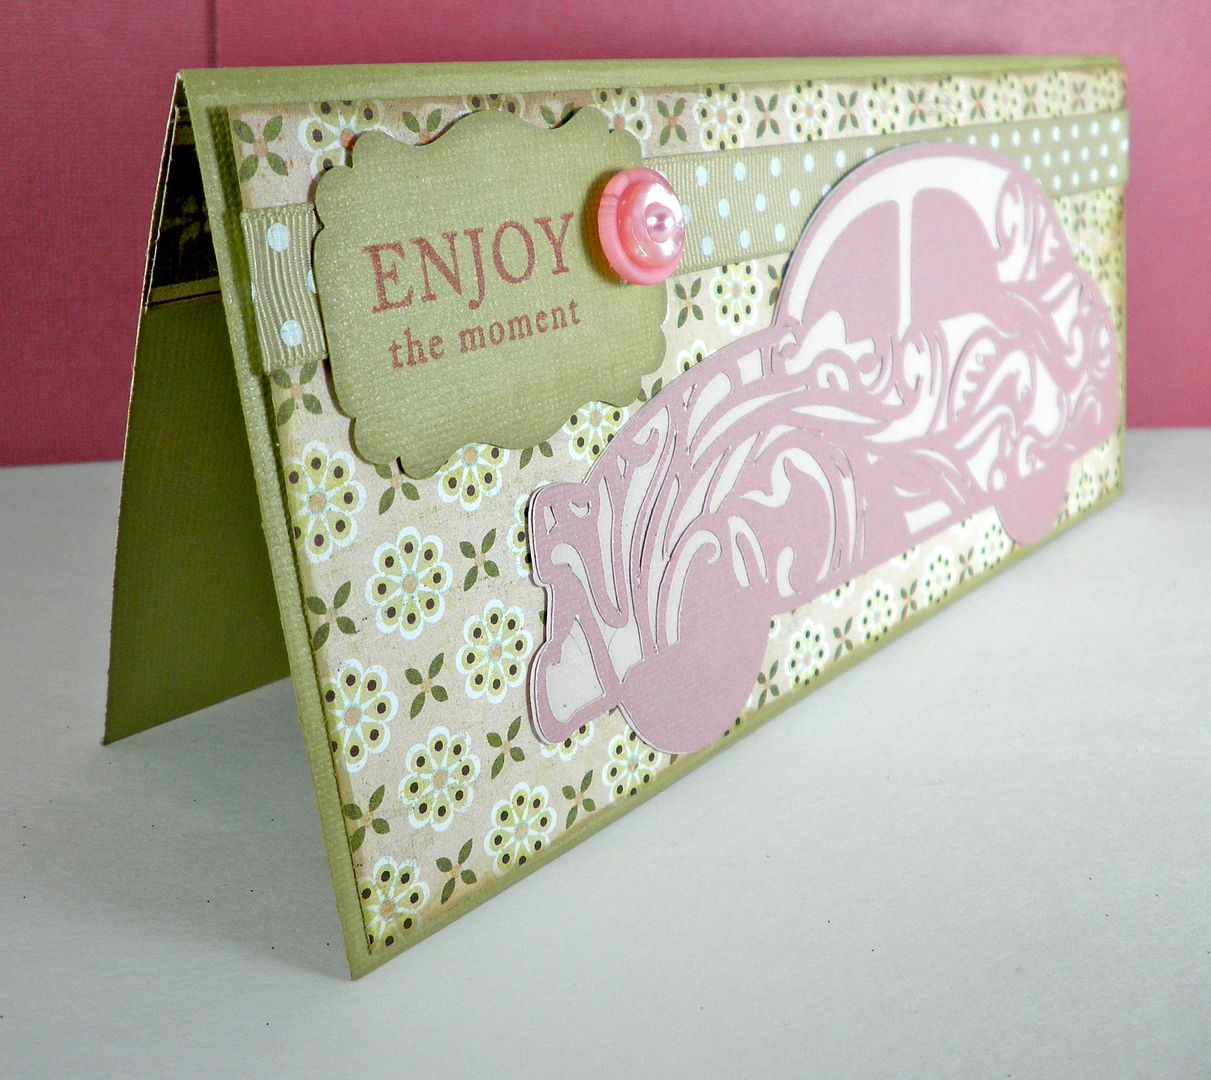
I cut this car at 3-1/2". I wouldn't cut him any smaller - those swirls need room to breathe!
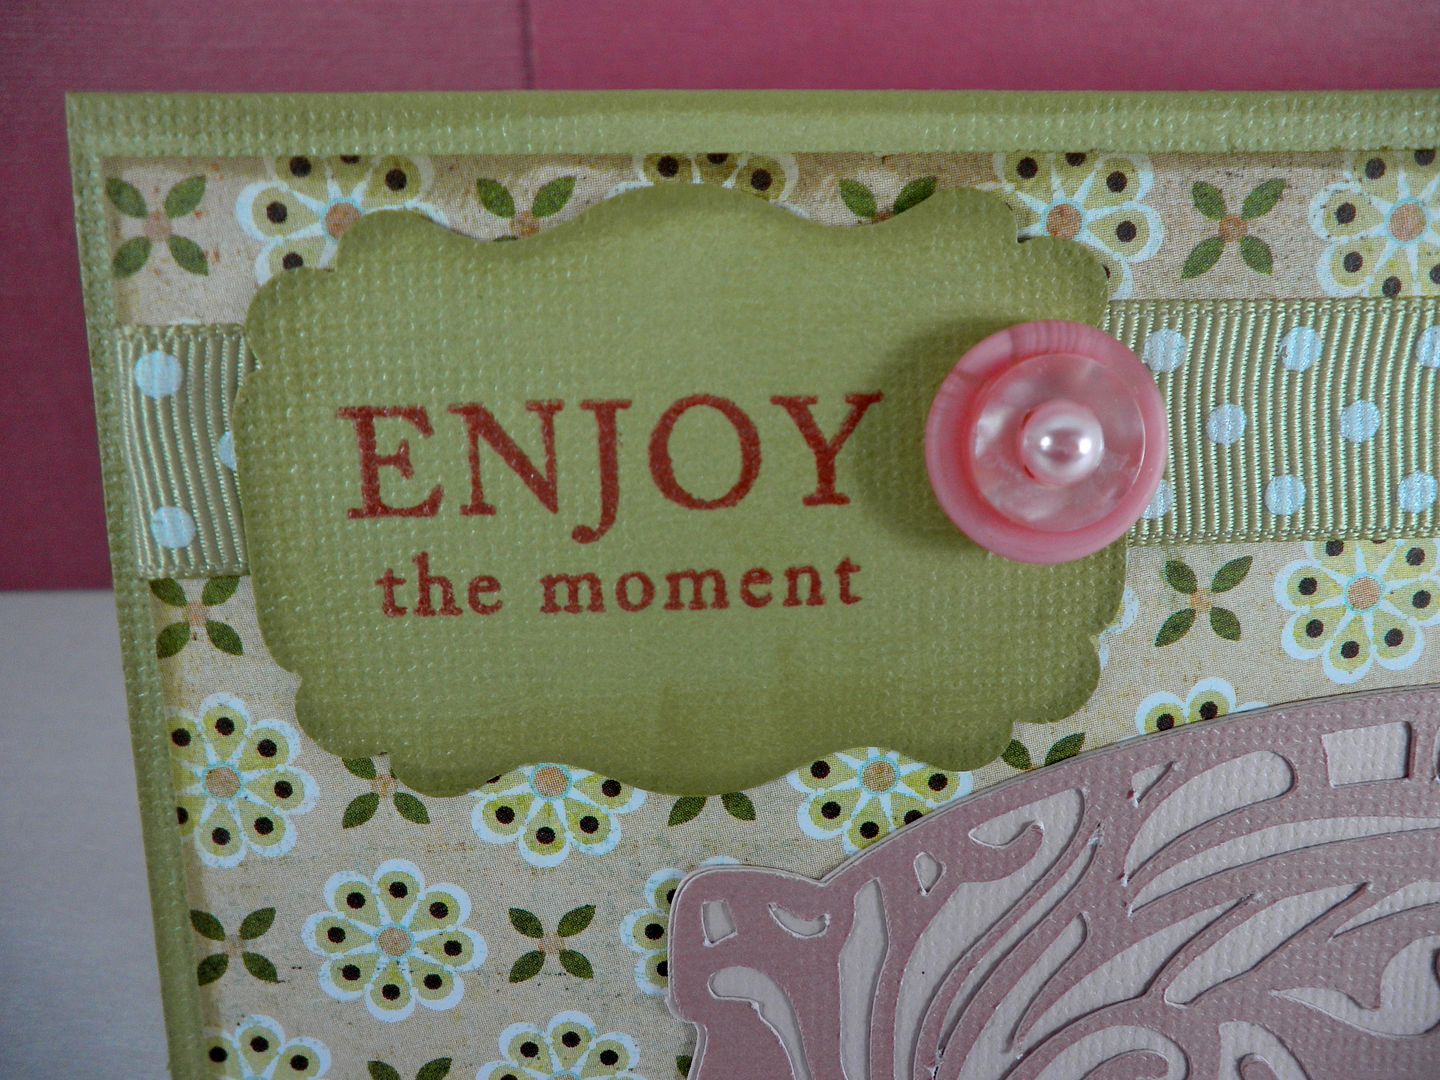
I used a top note type punch and inked the edges with Chai ink from Papertrey Ink. Sentiment also from Papertrey Ink. Button decoration is two buttons layered with a pop dot and then finished off with a decorative pearl. Ribbon is from the floor of my scraproom (i.e. I have no idea where it came from...).
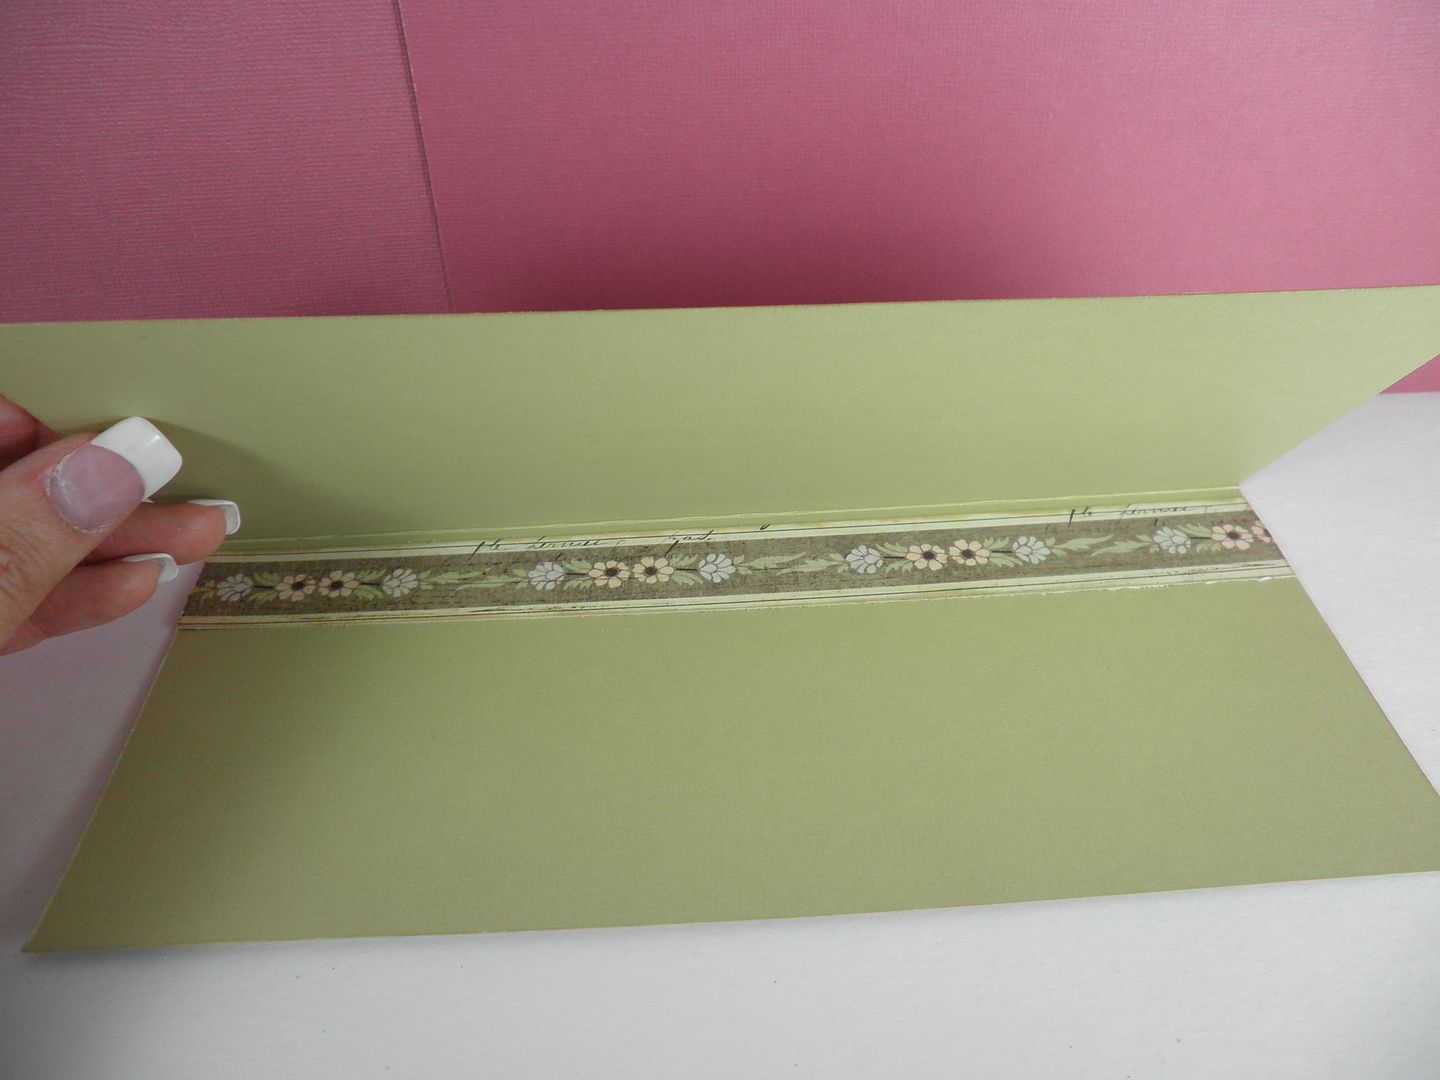
A strip of paper on the inside finishes this off.
Labels: car, summer in paris, masculine card
like the tutorial..but a lot of steps..a bit difficult to remember..anyway i might use when design Gift Card envelopes.
ReplyDelete